
Small Batch, All Grain Stove Top Brewing + Water Calculation Spreadsheet
Updated: February 12, 2025
I periodically brew small (1-3) gallon all grain batches of beer on my stove top. Some reasons I do that… 1. The weather – it’s too cold, too hot or too something else, 2. Time or 3. I want to test something. It’s a fun, simple, quick and economical way to brew all grain with minimal investment.
Limited Time DEAL (2/12/25 only) – 3 Gallon Fermonster for $23.99
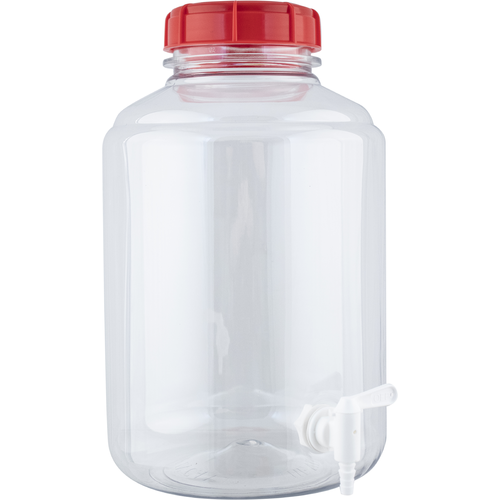
3 Gallon Ported FerMonster Large Mouth Fermenter from MoreBeer
More InfoFrom the product description, check product page for current description, price and availability:
The Fermonster is a brand new fermenter designed specifically for fermentation. MoreBeer! gave product feedback for over 2 years of development and we think they nailed the design. The large lid allows for easy filling and makes hop or oak additions a breeze. The smooth sides are fantastic for sanitization – no ribs or texture to collect yeast or bacteria. The punted bottom allows sediment to collect to the sides so that you can siphon liquid from the center. Because they are made from vigin PET plastic, they’re nearly unbreakable and a lot safer than similar glass carboys. Also notice the conical top which reduces surface area if you plan to store beer or wine long term.
- 4″ inner diameter wide mouth carboy – easy to clean!
- Food grade PET plastic construction is nearly impermeable to oxygen penetration
- No hard to clean dimples or ribs
- Punted bottom
- O-Ring and Lid with one hole is included (Fits #10 Stopper)
- Additional O-Rings and Lids available
- Weight: 1.5 lbs
- Temperature Limit: 140° F
- Height: 14.6 inches
- Diameter: 9 inches
- Completely taste and odor free
- Perfect for Beer, Wine, Cider, Mead, Kombucha or any other fermented beverage!
Limited Availability Deal of the Day: As of this posting, this on sale as as a MoreBeer Deal of the Day. Shipping is also free to addresses in the contiguous US with most $59 Orders. Availability: This is available today only, while supplies last. Quantities are limited. Check the MoreBeer’s Deal of the Day to check today’s offering.
Product Description – Here – Use coupon code BEERDEAL to get this discount.
FerMonster 3 Gallon Ported Carboy With Spigot FE260
1. A Bag.
That’s about it. You kind of just need a bag.
I started out with a paint straining bag from my local hardware store (similar to these). I have since graduated to a small sized Brew Bag – review. This process assumes you already have a reasonably sized kettle that you’ve used for extract brewing and a thermometer.
This article contains affiliate links. We may make a small percentage if you use our links to make a purchase. You won’t pay more and you’ll be supporting Homebrew Finds and more content like this. Thank you for your support!
What is All Grain Brewing? In a (very small) nutshell…
- Soaking malted grains at a set temp using a set amount of water. This triggers enzymes that convert complex carbohydrates to simple, fermentable sugars.
- Separating those grains from the sugary water, now called wort.
- Rinsing to retrieve some of the additional sugar that remains on and in the grains.
Small Batch Brew in a Bag (BIAB) Step By Step:
- Decide on a recipe and a batch size and gather your ingredients. Buy your grain pre-crushed if you don’t have a mill. More info on recipe sizing below.
- Heat the right amount of water to the correct temperature. How do you figure that out? Use the spreadsheet below.
- Put an appropriate fine mesh bag in your kettle. Make sure the bag is large enough to hold your grain.
- Put your crushed grain in the bag inside of the kettle. Mix everything well and take a temperature. The mash should settle out around your target temperature. If it’s a little low, add some direct heat and stir. If it’s a little high, add some ice and stir. Your temperature does not need to be exact.
- Put the lid on your kettle and wait, usually 60 minutes, depending on the recipe. Your grains are mashing. Because there is no insulation, I usually take a temperature measurement halfway through and add a bit of heat to bring it back up to the right temp. Again, always stir when you are adding heat.
- When the mash time is up, grab the bag and lift it out of your kettle. I give it a spin or two to close up the bag. Let it drip for several seconds. I also give it a few light squeezes. Have a large bowl nearby ready to receive your bag of spent grain. When you have the time, discard the grains and rinse out the bag. It’s ready for another use!
- Start boiling!
- I chill small batches in an ice bath in my kitchen sink. Always use extreme caution when dealing with hot and boiling liquids.
- When you’re done you have a single vessel to clean!
You will notice, there was no rinsing of grains. The technique that I’ve outlined, is a no sparge method. You’re just losing a little efficiency. No big deal in my book. If you want to make up for that, you can figure out your efficiency and adjust by adding a big more base grain or DME.
The Spreadsheet:
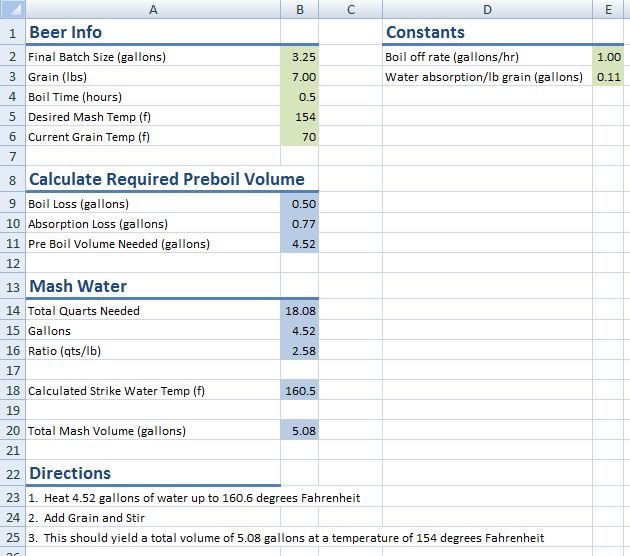
(Click the graphic to enlarge)
This is a simplified version of my regular brew day spreadsheet. Green cells are to fill in as necessary. Blue cells are calculated values. The directions section is calculated as well and puts all the numbers into narrative directions in plain English.
Need More?
My brew day spreadsheet helps you calculate water volumes and temps and helps you do simple tracking.
If you’re looking for a powerful, full featured solution for building recipes, brew day tracking and loads more, consider Brewfather.
- Hands on Review: Brewfather App – Recipe Formulation, Calculators & Brew Day Tools
- Brewfather offers a free full feature trial. After the trial period, you’ll still have access via a limited, non-expiring account
Plug in your numbers under “Beer Info” and go. You can adjust grain absorption rate and boil off rate, in the constants section, if you know your numbers or just leave the default values in place and adjust as you figure those out.
Microsoft Excel Version
Open Office Version
Google Docs Version (Thanks to Google+ friend Daniel for this!)
How do you get an appropriately sized recipe?
- Use a recipe software like BeerSmith or Brewfather to scale recipe volumes down.
- Divide a 5 gallon ingredient kit down to whatever size you need. Want to brew a 2.5 gallon batch, Divide your 5 gallon recipe in half. Want to brew a 1.25 gallon batch? Divide your 5 gallon recipe in quarters. If you’re physically doing this with a recipe kit, make sure the grain is mixed up thoroughly to evenly disperse specialty grains.
- I’m coming at this from a small batch perspective, but there’s nothing saying you couldn’t do this with a 5 or 10 gallon batch. You just need get the right sized kettle and bag.
Important Note:
However you end up with ingredients and a recipe, pay special note to the “Total Mash Volume” cell in the spreadsheet. After you plug in your numbers in the “Beer Info” section, this estimates the total volume of your mash. This should be less than the size of your kettle! Special thanks to the Green Bay Rackers. The Total Mash Volume calculation is an adaptation of the excellent “Can I mash it” online calculator.
Get a Bag!
Make sure to get the right size bag for your kettle. Always stir when applying heat.
- The Brew Bag – Review
- Search Amazon for “BIAB Grain Bag”
Get a Kettle
Get the right size kettle for your stove top and desired batch size.
- 5 Gallon Stainless Steel Kettle BE300 – from MoreBeer
- Search Amazon for “6 gallon stainless steel kettle”
- Anvil Kettle – 5.5 Gallon Size works perfectly with small brew bag
- Recent Kettle Finds
Get a Thermometer
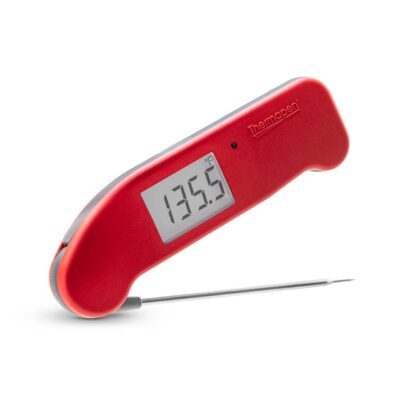 Thermapen ONE – Hands on Review
Also: Homebrew Thermometer Deals, Discounts and Coupons Resource Page – for recent deals and reviews
Highly Recommended – Large Whisk…
Related:
- The Brew Bag – Purpose Made BIAB Bag
- Homebrewing Spreadsheets – a collection of brewing spreadsheets to make your brew day easier
- All Grain Tips & Gear
More Homebrew Finds!
- Last 50 Finds!
- Top Deals – a curated list of the best deals
- Homebrew Reviews – one of the largest libraries of homebrew reviews in existence!
- Our Top Posts – tips, how-tos, resources posts and more
- Let’s be Friends!
Recent Deals!
10 Most Recent Homebrew Resource Posts & How-To’s!
More BIAB-Related!
- BIAB Brew Day Spreadsheet – easy water and temp calculations
- The Brew Bag – Purpose Made BIAB
- Get a Bag! Search Amazon for “BIAB Bag”
- Brew In a Bag: Brew fantastic craft beers at home using the All Grain brew in a bag method
- Small Batch, All Grain Stove Top Brewing Using BIAB
- Should You Buy a Homebrew Grain Mill?
- All Grain Tips & Gear
- BIAB: Brew in a Bag – Easy All Grain Homebrew! – Gear, Resources & Reviews
This post may contain affiliate links. We may make a commission when you use our links. This will never cost you extra. Thank you for supporting Homebrew Finds!
greatdealsThis is a Top Post! See: All Top Posts
Make sure the components you use are compatible and rated for your intended application. Contact manufacturer with questions about suitability or a specific application. Always read and follow manufacturer directions. tag:lnksfxd toppost:smallbatchbiab rs:8 tag:tpr





Great article, thank you! I’m not following how you end up with more liquid when you say you heat up 6.77 gal of water and end up with 7.33 gal of mash water. I understand how you come up with 6.77 gal, but am lost as to how you heat that volume up for the mash and then end up with more volume , when 6.77 is supposed to be your pre-boil?
Hi Mike! Are you talking about line 3 of the directions section? If so, that second figure accounts for total volume (estimated) including both water and grain.
I’m interested in how you cool off your wort after the boil and how long it takes usually with the smaller batch?
Thanks!
Hi Robert! Great question. An ice bath in the sink works pretty good. For a 2.5 gallon batch, I’d say you’d be looking at about 20 minutes to chill. I’ve also fermented small batches right in a 5 gallon keg. When I do that I put the keg in a bucket of ice. For some reason, cooling that way seems to take a little longer. Probably a surface area thing. Either way, I don’t have to run on the tubing and hoses for a wort chiller.
How “transferable” are the recipes? BeerSmith doesn’t convert from BIAB to a regular all grain setup. Are you mainly doing fermentation variations and not recipes variations?
The only real transferring you need to do is figure our your efficiency and make adjustments based on that. But, even that is true of any style of all grain brewing and only necessary if you’re concerned about hitting numbers right on. Stated another way… there is no change in recipe for BIAB vs batch or fly sparging.
Does the extra headspace in the primary / secondary carboy become an issue for smaller batches ? I typically use a 6 gallon for my primary and a 5 gallon for my secondary. Thanks
Thanks for posting the spreadsheet. I’m going to modify it a bit to suit my system. It’d be great to see your “regular brew day spreadsheet” as well.
Glad you find it useful. I supposed I could post my regular spreadsheet as well. Maybe I’ll clean it up a bit and do just that. Thanks!
Yah! I want it too. I’ve been using BrewTarget, but generally use kit recipes and would do well with something that just calculates strike temps, sparge, etc.
That’s great but what do you do about yeast? Are you saving from a prior batch?
Awesome writ-up.