
Checking for Draft System CO2 Leaks – Using The Pressure Gauge Method
For the most part, checking for keg liquid and CO2 leaks is pretty straightforward. Is beer leaking? Then you’ve got a liquid leak. Is there six inches of beer in your kegerator? That one’s really easy to spot. If beer is shooting out like a geyser, you’ve got a… fast leak. 🙂
For kegerator CO2 leaks, it’s a generally a little more work, but still pretty easy… spray everything with Star San solution (diluted of course) and look for bubbles.
Related: Step by Step: Finding and Fixing Keg CO2 Leaks
A Problem Spot…
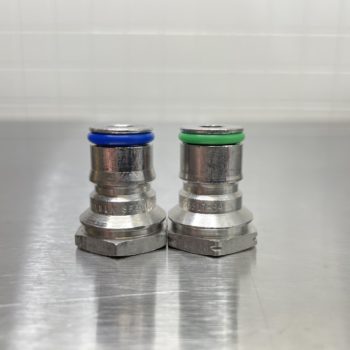 Color coded post o-rings. From our Keg Rebuild Post – Jump To: Replace O-Rings
There is one place on the CO2 side that the soak-everything-with-Star-San method doesn’t really work…. the keg’s gas post.
In my opinion the most difficult spot to check and the cause of many a lost CO2 tanks are… gas post o-rings.
Testing at this point using the “spray bottle method” (spray Star San everywhere and check for bubbles) is impossible or at the very least difficult and messy. Leaks will only surface here when a gas QD is actually engaged. The problem is, you can’t easily see that spot when a QD is on.
The problem stated more simply… You need a QD on to see if it’s leaking, but you can’t see it if a QD is on.
Be quick to replace gas side o-rings… I’m quick to replace gas post (and gas dip tube) o-rings. Beyond slow and no-carbing beers, a bad gas side o-ring can lead to empty tanks. That’s a waste of time and money and it’s frustrating.
These o-rings cost pennies each when you buy them in bulk. Liberally replacing these can save time, money and frustration.
- Keg Post O-Rings
- Keg Dip Tube O-Rings
- Full Lineup of Bulk Food Grade O-Rings
- Bulk Keg Orings and Keg Repair Part Numbers
The Pressure Gauge Method!
Enter what I call the “pressure gauge method”. The pressure gauge method can check the entire keg including gas QD connection and any connected tubing without soaking everything and the resulting clean up.
My process for that…
- Charge your keg with CO2 as usual. Use your usual serving pressure. Over-pressurizing can mask leaks that may otherwise show themselves.
- Remove the CO2 line and replace with a pressure gauge or Spunding Valve – with the adjustable PRV set to a very high pressure so that not gas escapes.
- After the pressure has stabilized. I mark the current pressure with a wax pencil, or you can just remember what it reads
- Wait for a couple hours to overnight to see if the gauge drops.
- If it drops quickly, there is a leak someplace in the system. Note: If your keg has beer in it that is uncarbonated the pressure will drop some overnight (it is equalizing and carbonating the beer). What you don’t want is a quick drop in pressure.
- This technique tests the entire keg including the gas post, o-ring, QD and any tubing that’s connected.
- In my experience, over long periods of time there will be some slow gauge movement. I don’t know if these are micro leaks or temperature related, but I’m not really concerned with that, I am looking for a relatively quick drop in pressure. Something that shows up within a couple hours.
This technique also has the advantage of saving Star San and saving some clean up that’s required when you soak gear in Star San.
Related: Why Won’t My Homebrew Carbonate? Fixing Beer Carbonation Problems
If the CO2 gauge method indicates a leak, you can start spraying with Star San to hunt it down. If you cannot find the leak, I would suggest changing your gas post o-ring to see if that’s the culprit. I’m quick to replace o-rings, especially on the gas side. I have lost a couple full tanks of CO2 to a bad gas post o-ring. These typically cost just pennies [See: Bulk Keg Orings and Keg Repair Part Numbers]. I would much rather be safe that sorry when it comes to the time, cost and inconvenience of replacing an empty CO2 tank. After you change the gas o-ring, re-check using the pressure gauge method.
This is one of the many uses of a Spunding Valve – See: Build a Spunding Valve
I’m not suggesting this as a replacement for the Star San spray method. Practically speaking, I use it as a complement to that to test an otherwise difficult to check spot. I use the spray method when I keg a beer and use the pressure gauge method periodically or if I otherwise suspect a problem.
Post O-Rings!
For the most part, what we’re checking with the “Pressure Gauge Method” are the keg’s gas o-rings.
I’m quick to replace these o-rings in general. Beyond slow and no-carbing beers, a bad gas o-ring can lead to empty tanks, which are… not fun. Grab Post O-Rings in Bulk to have on hand
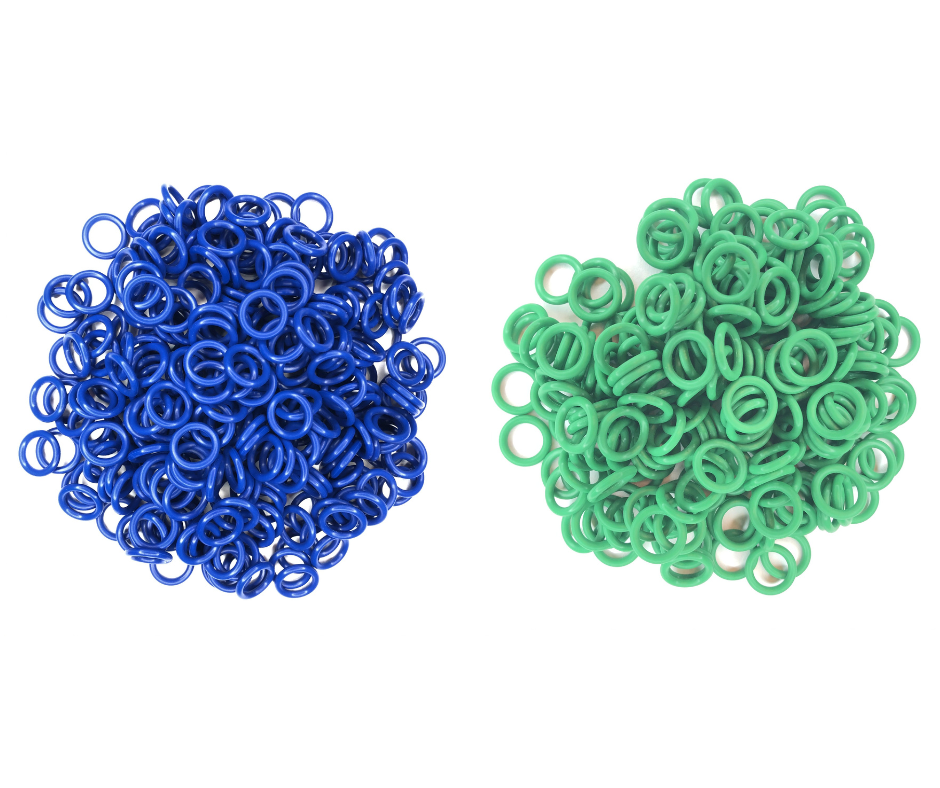
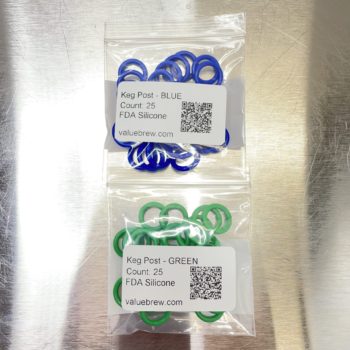 Valuebrew carries color coded post o-rings… “Green for Gas” and “Blue for Beer” they also carry pin lock post o-rings in bulk, Search “Post” at Valuebrew to see full lineup.
Related – Star San, Fixing Keg Leaks & More
- Build a Spunding Valve
- Star San Tips, Tricks and Guidelines – Using Star San In a Spray Bottle
- Step by Step: Finding and Fixing Keg CO2 Leaks
- Why Won’t My Homebrew Carbonate? Fixing Beer Carbonation Problems
- Search Amazon for Chemical Resistant Spray Bottle
- Kegerator Tips & Gear
- Bulk Keg Orings and Keg Repair Part Numbers
The Pressure Gauge Method… without a Pressure Gauge
Another option if you don’t have a spunding valve or other gauge (but do have a two gauge regulator) is to attach only one keg to your regulator and turn off the the CO2 tank. This allows you to use the low pressure gauge to monitor the keg. The benefit of this method is that you’re testing everything – line, manifold, QD, o-ring and keg.
Some downsides to this…
- You’re taking your other kegs offline
- It somewhat complicates things as you’re testing more than just the keg in question
- Most regulators… will not hold pressure long term. I’ve found that when pressure is not being applied from the high pressure side, regulators will slowly leak CO2. My guess is that this is by design. So, without a standalone pressure gauge, you can only check for moderately fast leaks using the low pressure side of your regulator.
Testing Single Kegs Using Digital Keg Pressure Tester:
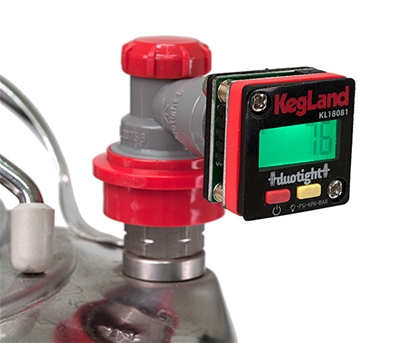
This combines a Kegland Ball Lock QD with a DuoTight 0-90 PSI Digital Pressure Gauge to for a digital keg pressure gauge. These have lots of uses, including checking for CO2 leaks and monitoring keg pressures.
This setup works even if – gasp! 🙂 – you aren’t using DuoTights as your draft fitting system.
Kegland’s DuoTight system along with their EVABarrier Tubing are amazing. Check out my extensive hands on review for a deep dive into the system.
This is a good option to check single kegs using the pressure gauge method.
Related: Hands on Review: Kegland DuoTight Fittings & EVABarrier Tubing!
Another Layer of Protection – Using a CO2 Monitor to Check for Kegerator CO2 Leaks
Thanks to HBF Reader Elliott for this tip! Let’s be friends! 8 Ways to Connect with HBF
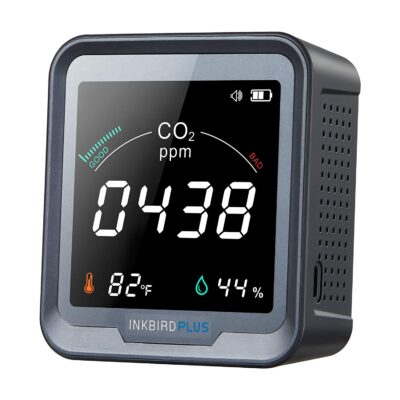
Pictured: INKBIRDPLUS Indoor CO2 Detector
Placing a CO2 Monitor with alarm inside of your kegerator can serve as another line of defense to protect against co2 leaks and loss. CO2 should not be building up in your kegerator. A CO2 monitor with alarm can alert you of this condition.
This is not a replacement for the steps outlined here, rather a another layer that could save you a trip to swap out a CO2 tank.
- Search Amazon for CO2 monitor with alarm
- Pictured: INKBIRDPLUS Indoor CO2 Detector, Air Quality Monitor, Tester for Carbon Dioxide, Temperature and Relative Humidity, Indoor CO2 Monitor with Alarm, for Grow Tents, Wine Cellars, Homes, Cars(PTH-9C)
Related: Check Your Regulator for Leaks!
Color Code Keg Post O-Rings for Easy Identification:
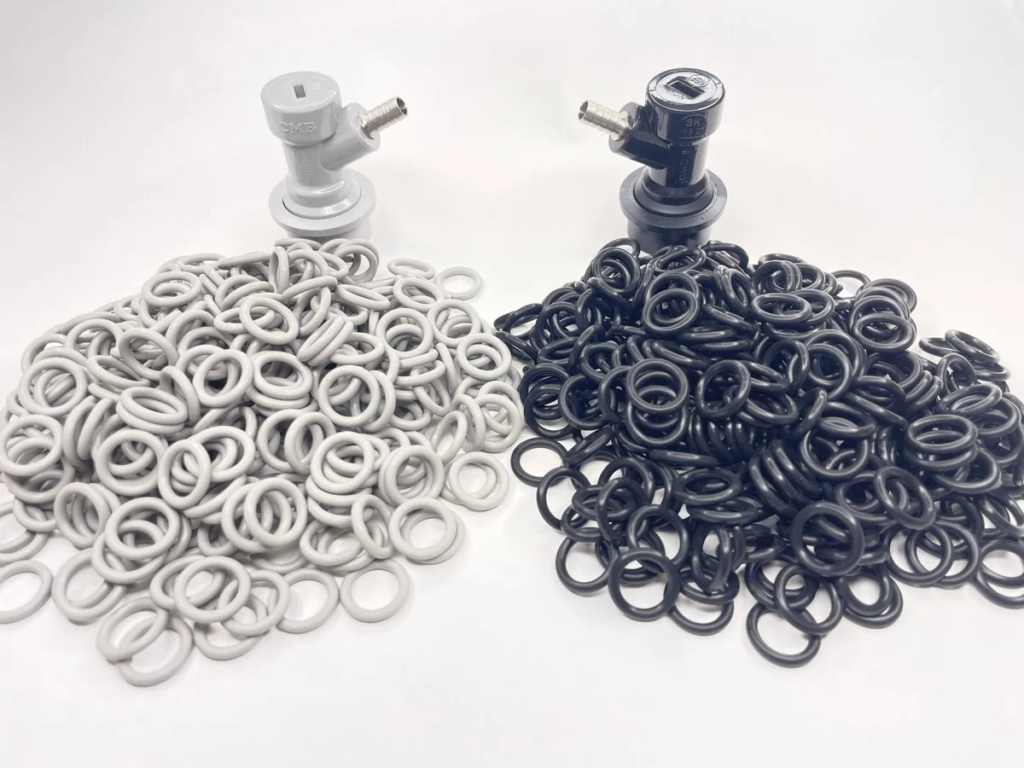
Valuebrew carries two color schemes to color keg posts. Doing this allows you to quickly identify keg posts. Gray and Black match standard keg QD colors. Blue and Green are meant to be remembered by “Blue for Beer” and “Green for Gas”. All options are made from FDA rated silicone. Since they work equally well on gas and liquid posts you can also mix and match to come up with your own color coding standard.
vbcolorcodeoringlargeClosely Related:
- How Often Should You Replace Keg O-Rings? – A Proposed Schedule for Keeping Kegs in Great Shape
- Rebuilding & Reconditioning Homebrew Kegs!
- Food Safe Replacement Keg O-Rings
- Keg Repair Part #s
- Tips and Gear for your Kegerator
- Recent Homebrew Keg Finds
- Top Draft and Kegerator Resources – Our draft top picks
- Keg Reviews
- Step by Step: Finding and Fixing Keg CO2 Leaks
- Draft and Kegerator Related Reviews
- Why Won’t My Homebrew Carbonate? Fixing Beer Carbonation Problems
- Star San Tips, Tricks and Guidelines
More CO2 Related:
- Check Your CO2 Regulator for Leaks!
- What’s the difference between Primary and Secondary CO2 Regulators?
- Get a Bigger CO2 Tank… Save Time and Money!
- Using a CO2 Detector in Your Kegerator
- The Most Difficult Spot to Check for CO2 Leaks
- Build a DuoTight CO2 Gas Manifold! – for Kegland EVABarrier Tubing
- Using a Keg as a CO2 Source for Portable Serving!
- Step by Step: Finding and Fixing Keg CO2 Leaks
- Kegging CO2 Use Estimations and Calculations
- Making a Utility CO2 Line Using Luer Lock Disconnects
Recent Keg Deals
kegdealsRebuild Your Kegs!
How Often Should You Replace O-Rings?
More Homebrew Finds!
- Last 50 Finds!
- Top Deals – a curated list of the best deals
- Homebrew Reviews – one of the largest libraries of homebrew reviews in existence!
- Our Top Posts – tips, how-tos, resources posts and more
- Let’s be Friends!
Recent Deals!
10 Most Recent Homebrew Resource Posts & How-To’s!
We are Homebrew Review HQ! Our 10 Most Recent Reviews
Also: Kegerator Tips & Gear | Keg Repair Part #s | Recent Keg Finds
Our Top Draft Resources!
Check our our Top Draft Related Resources- Commentary: Pin Lock Keg Pricing and Availability
- Check Your CO2 Regulator for Leaks!
- How to get a keg ready for first use? New Keg Cleaning and Prep
- Portable Draft Beer Serving Options!
- Pin Lock Keg Pricing and Availability
- The Most Difficult Spot to Check for CO2 Leaks
- Keg O-Ring Materials Selection! – EPDM, Silicone and Buna-N?
- Why Do I Have Bubbles in My Beer Line? Diagnosing and Fixing Kegerator Foam Problems
- Five Benefits of Using Corny Kegs As Fermenters
- Rebuilding & Reconditioning Homebrew Kegs!
- Food Safe Replacement Keg O-Rings in Bulk
- Hands on Review: Kegland DuoTight Fittings & EVABarrier Tubing!
- Why Won’t My Beer Carbonate? Fixing Draft Beer Carbonation Problems
- What Does a Flow Control Faucet Do?
- Upgrade Your Kegerator – 6 Improvements!
- Serve Homebrew on Any Kegerator & Convert Commercial Kegerator to Homebrew
- Tips and Gear for Growler Filling
- What’s the Difference Between Ball Lock Kegs and Pin Lock Kegs?
- Checking for Draft System CO2 Leaks – Using The Pressure Gauge Method
- Tip: Consider Oetiker Stepless Clamps for Kegerator Gas and Beer Lines
- Hands On Review: Inkbird ITC-308 Dual Stage Temperature Controller +WiFi Version
- Universal Poppets Tips and Tricks!
- Convert Your Mark II Keg & Carboy Washer to a Recirculating Draft Line Cleaning Pump!
- Step by Step: Finding and Fixing Keg CO2 Leaks
- Kegerator Temperature Probe Placement – To Immerse or Not To Immerse? – three tests to determine optimal pla…
- Kegerator Beer Line Temperatures & Reducing Foam with a Recirculating Fan
- Kegging CO2 Use Estimations and Calculations
- Balancing Your Kegerator Draft System
- Building a Simple Ball Lock Draft Line Flushing Setup
- Build a Recirculating Draft Line Cleaning Pump
- Home Brew Keg Roundup – New & Used, 5 and 2.5 Gallon & More!
- Damp Kegerator? Fix Kegerator Condensation
- Homebrew Temp Controller Roundup! – Kegerator and Fermentation – concepts, applications and models
- Bulk Keg Orings and Keg Parts Reference
This post may contain affiliate links. We may make a commission when you use our links. This will never cost you extra. Thank you for supporting Homebrew Finds!
greatdealsThis is a Top Post! See: All Top Posts
Make sure the components you use are compatible and rated for your intended application. Contact manufacturer with questions about suitability or a specific application. Always read and follow manufacturer directions. tag:lnksfxd toppost:co2leaks rp:tips6 tag:tpr




Hi, my keg has a leak on welding zone, bellow the rubber base, I can see bibles between rubber and steel line on keg’s bottom around rubber/metal union. So.. I don’t think rubber base could be taken off and weld, and you can’t put an arm and see what you are welding inside.. So¿is there any material to seal the leak?? Like epoxy or something? Preferentially food safe but if not it is good anyway because I’m giving an mom food/drink use. It seems the leak is not big because I can see a punch ofbubbles under water so.. ¿Any suggestions beside call the manufacturer who died or /and live in other continent? Thanks!
Hey Mariano! I don’t know of anything that would be food safe and hold pressure. Even welding could be problematic. My suggestion is to replace this keg. https://www.homebrewfinds.com/homebrew-keg-deals-roundup/
I have conflicting info on the regulator / valve test with set 12 low side then off to 0. The pressure always will drop on the valve to 0 to indicate the setting. This was told to me by the manufacturer. So is there a leak through the regulator or not?
Hey Gary! I think that’s by design. The lower pressure side doesn’t seem to hold pressure long term. So, the low pressure side of your regulator workaround is really only helpful for checking for moderately quick leaks. I suggest getting/building a spunding valve or building a simple assembly.