
Build a DuoTight CO2 Gas Manifold! – for Kegland EVABarrier Tubing
Updated: March 3, 2025
Kegland’s DuoTight Fittings are designed to work with their EVABarrier Tubing. They offer quick, reliable connections, easy implementation, a variety of fitting options and work with double wall EVABarrier tubing. These are push to connect and require no tubing clamps. Combine these features with their generally low price and this system and tubing are a game changer for kegerator/keezer owners and builders.
DuoTights are… awesome. Check out my extensive Hands on Review
As of this posting, the system has no native manifold option available. No need to fear, this post details three DuoTight manifold options that you can put together yourself.
Want to Learn More about DuoTights and EVABarrier Tubing?
duotightreviewBuy DuoTight
- DuoTight Push In Fittings & EVABarrier Double Wall Draft Tubing at MoreBeer
- Search MoreBeer for “DuoTight” – to find components and accessories that may not show up on category pages.
- Kegland DuoTight Fittings and Accessories at William’s Brewing
- Search William’s Brewing for “DuoTight” – to find components and accessories that may not show up on category pages.
- Search Amazon for “DuoTight” – offerings vary
- Search Amazon for “EVABarrier Tubing” – offerings vary
- DuoTight Compatible Locking Clips via Valuebrew
Build 1 – Convert a Flare Based Manifold to DuoTight
This article contains affiliate links. We may make a small percentage if you use our links to make a purchase. You won’t pay more and you’ll be supporting Homebrew Finds and more content like this. Thank you for your support!
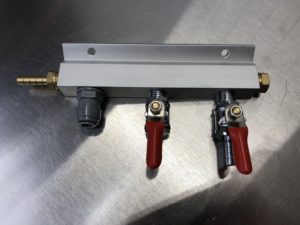
In my opinion, this is the easiest and cleanest option. It involves sourcing a 1/4″ flare based manifold and installing the proper fittings.
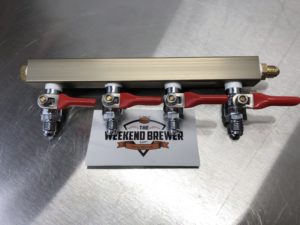 I chose this model via the Weekend Brewer. It features 1/4″ flare fittings throughout. That includes a flare fitting on the inlet port. That’s a bit unique as some models use a barb here, even if the trunks feature flare fittings. Note that this manifold is available in a number of size options. Choose the number of trunks you want, make sure to choose an all MFL model if you want to easily convert it to DuoTight. See: Sourcing an Easy to Convert Manifold section of this post for more manifold options.
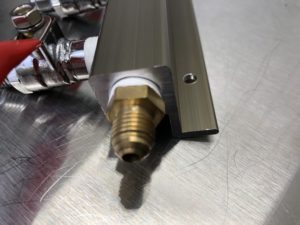 A look at the input flare fitting
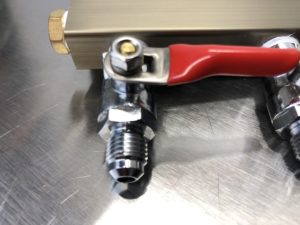 A close up of one of the trunk flare ball valves. These also feature and integrated check valve to keep gas flowing the right way.
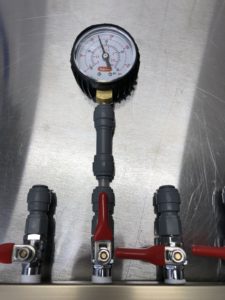 Pressure testing. This held pressure for days before I stopped the test. That’s a testament to both the manifold build quality and the DuoTight fittings. I have completed multiple pressure tests using DuoTight fittings and have found them to be very reliable. Another benefit of the DuoTight system is this economical pressure gauge (MoreBeer | William’s Brewing). This offers an easy way to double check regulators, check for leaks and more.
Digital Gauge Now Available:
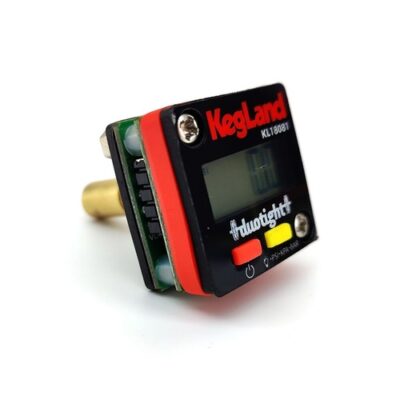
Since this how-to was written Kegland has introduced a digital gauge option. See my Hands on Review for more information.
via MoreBeer
- Digital Mini Pressure Gauge (0-90 psi) D1165 – upgrade for BlowTie & Inline Regulator – this is KL18388
- Digital Mini Pressure Gauge (0-90 psi) – 8 mm Duotight Compatible D1166 – standalone DuoTight compatible gauge – this is KL18081
via William’s Brewing
- Digital Illuminated Mini Regulator Gauge 0-90 PSI – upgrade for BlowTie & Inline Regulator – this is KL18388
- DuoTight 0-90 PSI Digital Pressure Gauge – standalone DuoTight compatible gauge – this is KL18081
- Also available as a combo pack with a Kegland Ball Lock QD – Digital Keg Pressure Tester
- Related: Kegland DuoTight Ball Lock QD Review
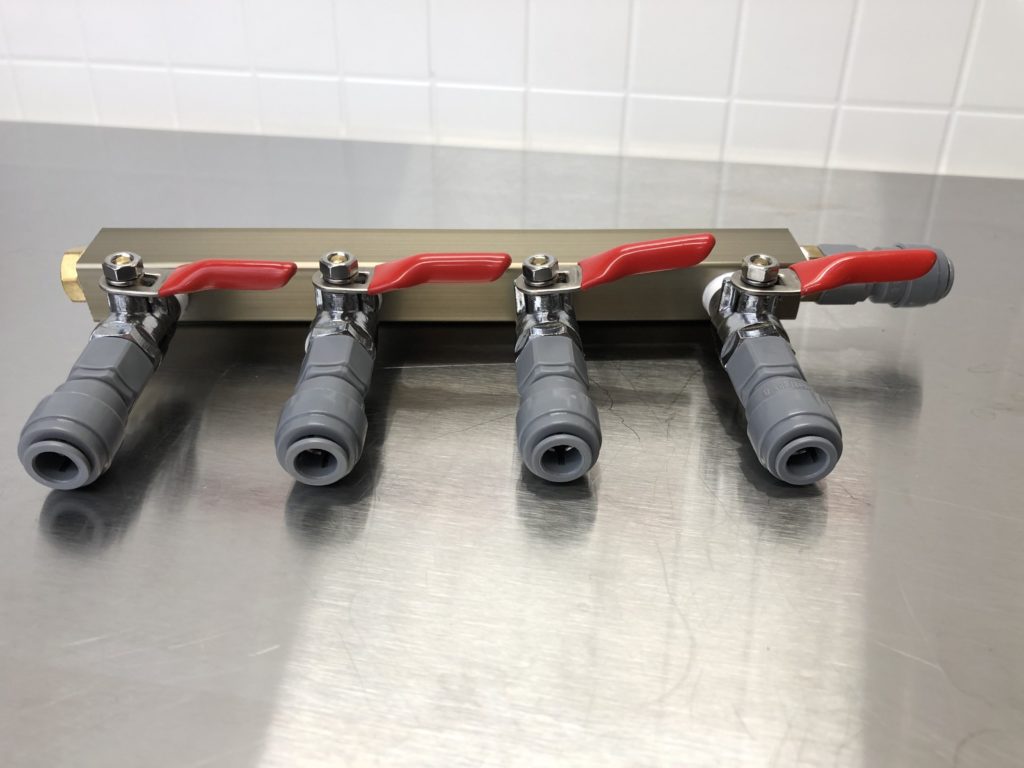
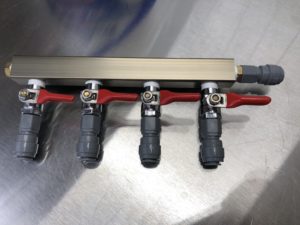 The newly converted DuoTight ready CO2 Manifold. This is simply a matter of putting a DuoTight Female Flare Fitting
 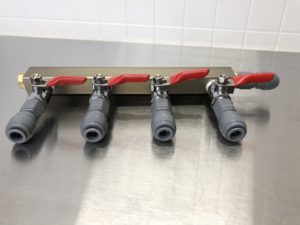 Front view of DuoTight Manifold
Getting the DuoTight Fittings:
For this style manifold you’ll want a female flare x DuoTight. Since DuoTights and EVABarrier are available in multiple sizes – the most common being 8mm (5/16″) and 9.5mm (3/8″) – be sure to choose the right size for your setup.
Sourcing an Easy to Convert Manifold
An easy to convert CO2 manifold features 1/4″ MFL connections for all inlet and outlet ports.
- Gas Distribution Parts at William’s Brewing – multiple flare options are available
- KOMOS® Aluminum Gas Manifold – 1/4 in. Flare
- The Weekend Brewer 4-way MFL CO2 Distributor Manifold with integrated check valves – available in a variety of sizes – make sure you choose an all MFL version if you want to easily convert to DuoTight – Note that this has been sold out for quite some time as of the most recent updates to this how-to
- Made To Order CO2 Distributor Air Manifold 2-20 outputs available – click on “Customize Now” to build yours – Note that this has been sold out for quite some time as of the most recent updates to this how-to
- 2 Way CO2 Manifold with Integrated Check Valves and MFL Fittings Bundle
- 2 Way Air Distributor Co2 Manifold – 1/4″ Threaded MFL Output, Shutoff with Check Valve
- 4-Way CO2 Air Distributor/Manifold with Integrated Check Valves and MFL Fittings | Perfect for Homebrew Draft Systems & Commercial Kegerators | Includes (4) 5/16 Inch Barbs/Stems & (4) Swivel Nuts
- Co2 Distribution Manifold – MFL (Threaded) Connections (3-way)
- CO2 Distribution Manifold – MFL (Threaded) Connections (2-way)
- More: Search Amazon for “1/4″ co2 manifold mfl” to shop around
Build 2 – Convert an existing 1/4″ NPT Manifold Body to DuoTight
 I have several gas manifolds. Every model that I have sports 1/4″ NPT threads. Pretty standard for kegerator manifolds, from what I’ve gathered. That means you can swap out the ball valves for 1/4″ NPT DuoTight Fittings. I tried this on two manifolds. The 1/4″ NPT threaded DuoTights feature o-rings. In my testing, I found that I could install these without teflon tape and had no problems with leaks. That may not be the case in all situations so you may have to use teflon tape to seal threads. If you’re wanting to go this route, make sure your manifold body has compatible 1/4″ NPT threads.
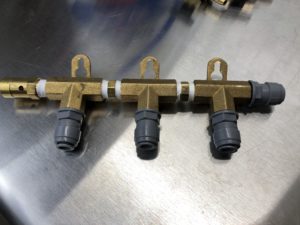 Here is MoreBeer’s expandable manifold system converted to DuoTight Fittings See: MoreBeer’s Complete Manifold Lineup of Manifolds – Hands on Review
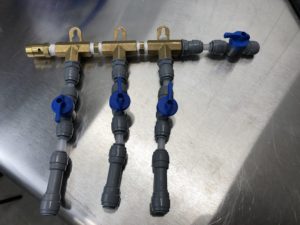 To really get full functionality, you need to add some more DuoTight Fittings. Each trunk needs a ball valve and check valve. The ball valve on the input side isn’t really needed. I have that there because I was pressure testing this setup.
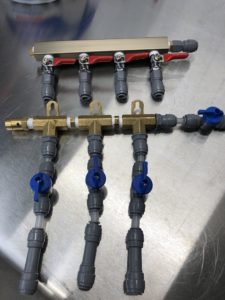 Here’s a comparison between the two builds. Although both work, the top version is a whole lot cleaner and more compact.
Pneumatic Manifold Blocks
Manifold Blocks are the basis of many of the assemblies that we end up using as gas manifolds. These can a way to save money.
New models show up regularly… shop around: Search Amazon for “pneumatic manifold block” to see what models are available.
Getting the DuoTight Fittings:
For this style manifold you’ll want a male flare x DuoTight. Since DuoTights and EVABarrier are available in multiple sizes – the most common being 8mm (5/16″) and 9.5mm (3/8″) – be sure to choose the right size for your setup.
You’ll also potentially want to add DuoTight check fittings & ball valves.
Build 3 – Tee it up – using DuoTight Tees and Fittings to Build a Manifold
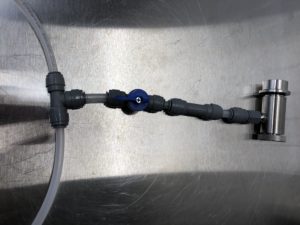 The left-most EVABarrier Tubing represents a feeder line that would start at your regulator and weave it’s way to each keg. From that feeder line, you would tee off for each keg you want to serve. From the tee you would have a DuoTight Ball Valve > DuoTight Check Valve > DuoTight 1/4″ Female Flare Fitting > Flare Based Quick Disconnect (ball lock or pin lock). This photo show’s Kegland’s flow control ball lock QD. This setup allows you to add as many kegs as you’d like, over time. While not as elegant as build 1, this will definitely do the job.
Remember: DuoTight Fittings are available in two sizes 8mm (5/16″) and 9.5mm (3/8″)
Build 4 – Control Each Keg Separately!
This build is an expansion of Build 3 but you’d also incorporate Kegland’s inline secondary with gauge. This would allow you to have control over pressure and carbonation settings for each and every keg!
- via MoreBeer
- via William’s Brewing
- via Amazon
Hands on Review: Kegland Inline Secondary Regulator and Upgrading Kegland Inline Secondary Regulator to Digital
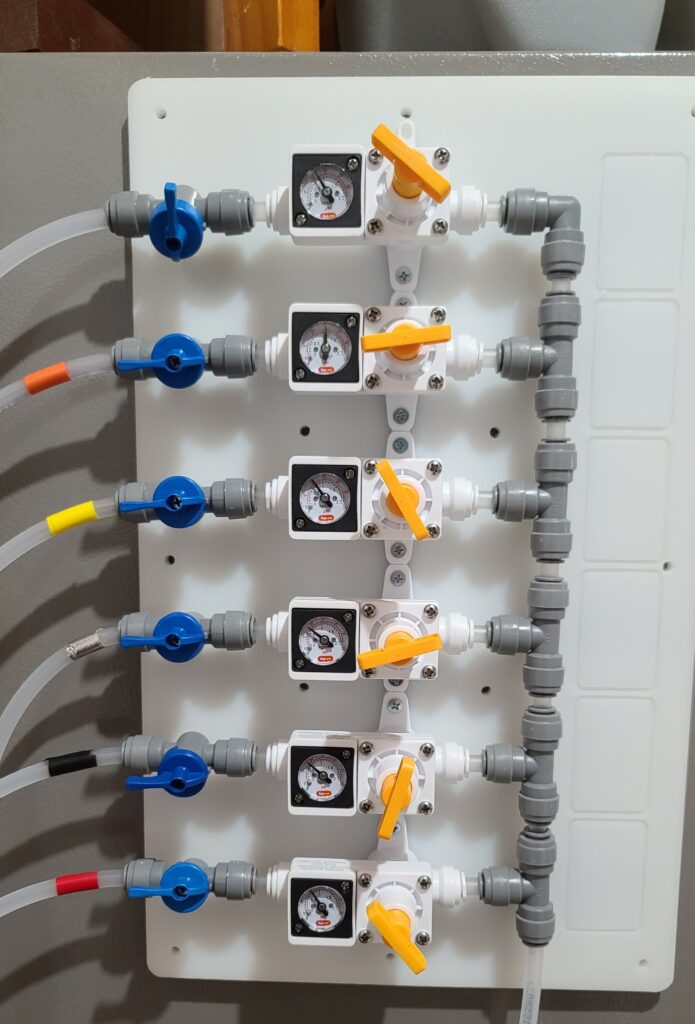 Thank you to /u/skaht on reddit for this photo
These allow you to neatly install compatible inline regulators for easy access and a neat setup.
- William’s Brewing: Polypropylene Gas Board for 4 Inline Regulators – for mounting inline secondary regulators
- William’s Brewing: Polypropylene Gas Board for 6 Inline Regulators – for mounting inline secondary regulators
- Mounting Boards at MoreBeer
Sourcing an Easy to Convert Manifold for Build 1
An easy to convert CO2 manifold features 1/4″ MFL connections for all inlet and outlet ports.
- Gas Distribution Parts at William’s Brewing – multiple flare options are available
- KOMOS® Aluminum Gas Manifold – 1/4 in. Flare
- The Weekend Brewer 4-way MFL CO2 Distributor Manifold with integrated check valves – available in a variety of sizes – make sure you choose an all MFL version if you want to easily convert to DuoTight – Note that this has been sold out for quite some time as of the most recent updates to this how-to
- Made To Order CO2 Distributor Air Manifold 2-20 outputs available – click on “Customize Now” to build yours – Note that this has been sold out for quite some time as of the most recent updates to this how-to
- 2 Way CO2 Manifold with Integrated Check Valves and MFL Fittings Bundle
- 2 Way Air Distributor Co2 Manifold – 1/4″ Threaded MFL Output, Shutoff with Check Valve
- 4-Way CO2 Air Distributor/Manifold with Integrated Check Valves and MFL Fittings | Perfect for Homebrew Draft Systems & Commercial Kegerators | Includes (4) 5/16 Inch Barbs/Stems & (4) Swivel Nuts
- Co2 Distribution Manifold – MFL (Threaded) Connections (3-way)
- CO2 Distribution Manifold – MFL (Threaded) Connections (2-way)
- More: Search Amazon for “1/4″ co2 manifold mfl” to shop around
Buy DuoTight
- DuoTight Push In Fittings & EVABarrier Double Wall Draft Tubing at MoreBeer
- Search MoreBeer for “DuoTight” – to find components and accessories that may not show up on category pages.
- Kegland DuoTight Fittings and Accessories at William’s Brewing
- Search William’s Brewing for “DuoTight” – to find components and accessories that may not show up on category pages.
- Search Amazon for “DuoTight” – offerings vary
- Search Amazon for “EVABarrier Tubing” – offerings vary
- DuoTight Compatible Locking Clips via Valuebrew
Related DuoTight Reviews on How-To’s!
DuoTight Reviews, Resource Posts & How-To’s!
DuoTights are so amazing – at least in my book 🙂 – that I have several reviews and related top posts
- Hands on Review: Kegland DuoTight Ball Lock QDs!
- Hands on Review: Nukatap Counter Pressure Bottle Filler!
- Troubleshooting and Fixing DuoTight Leaks
- Hands on Review: Kegland Inline Secondary Regulator!
- Building a Simple Ball Lock Draft Line Flushing Setup
- Hands on Review: Kegland DuoTight Rigid Joiners
- Hands on Review: Kegland BlowTie Spunding Valve!
- Using a Keg as a CO2 Source for Portable Serving!
- Hands on Review: Kegland Ball Lock Cleaning Kit and Party Pump
- Hands on Review: Kegland Digital Gauges!
- Hands on Review: Kegland DuoTight Fittings & EVABarrier Tubing!
- Five Benefits of Using Corny Kegs As Fermenters
I Recommend These for DuoTight Fittings!
duotightclipsDuoTight Ball Lock QDs!
My DuoTight Review!
duotightreviewMore CO2 Related:
- Check Your CO2 Regulator for Leaks!
- What’s the difference between Primary and Secondary CO2 Regulators?
- Get a Bigger CO2 Tank… Save Time and Money!
- Using a CO2 Detector in Your Kegerator
- The Most Difficult Spot to Check for CO2 Leaks
- Using a Keg as a CO2 Source for Portable Serving!
- Checking for Draft System CO2 Leaks – Using The Pressure Gauge Method
- Step by Step: Finding and Fixing Keg CO2 Leaks
- Kegging CO2 Use Estimations and Calculations
- Making a Utility CO2 Line Using Luer Lock Disconnects
Also: Kegerator Tips & Gear | Keg Repair Part #s | Recent Keg Finds
Our Top Draft Resources!
Check our our Top Draft Related Resources- Commentary: Pin Lock Keg Pricing and Availability
- Check Your CO2 Regulator for Leaks!
- How to get a keg ready for first use? New Keg Cleaning and Prep
- Portable Draft Beer Serving Options!
- Pin Lock Keg Pricing and Availability
- The Most Difficult Spot to Check for CO2 Leaks
- Keg O-Ring Materials Selection! – EPDM, Silicone and Buna-N?
- Why Do I Have Bubbles in My Beer Line? Diagnosing and Fixing Kegerator Foam Problems
- Five Benefits of Using Corny Kegs As Fermenters
- Rebuilding & Reconditioning Homebrew Kegs!
- Food Safe Replacement Keg O-Rings in Bulk
- Hands on Review: Kegland DuoTight Fittings & EVABarrier Tubing!
- Why Won’t My Beer Carbonate? Fixing Draft Beer Carbonation Problems
- What Does a Flow Control Faucet Do?
- Upgrade Your Kegerator – 6 Improvements!
- Serve Homebrew on Any Kegerator & Convert Commercial Kegerator to Homebrew
- Tips and Gear for Growler Filling
- What’s the Difference Between Ball Lock Kegs and Pin Lock Kegs?
- Checking for Draft System CO2 Leaks – Using The Pressure Gauge Method
- Tip: Consider Oetiker Stepless Clamps for Kegerator Gas and Beer Lines
- Hands On Review: Inkbird ITC-308 Dual Stage Temperature Controller +WiFi Version
- Universal Poppets Tips and Tricks!
- Convert Your Mark II Keg & Carboy Washer to a Recirculating Draft Line Cleaning Pump!
- Step by Step: Finding and Fixing Keg CO2 Leaks
- Kegerator Temperature Probe Placement – To Immerse or Not To Immerse? – three tests to determine optimal pla…
- Kegerator Beer Line Temperatures & Reducing Foam with a Recirculating Fan
- Kegging CO2 Use Estimations and Calculations
- Balancing Your Kegerator Draft System
- Building a Simple Ball Lock Draft Line Flushing Setup
- Build a Recirculating Draft Line Cleaning Pump
- Home Brew Keg Roundup – New & Used, 5 and 2.5 Gallon & More!
- Damp Kegerator? Fix Kegerator Condensation
- Homebrew Temp Controller Roundup! – Kegerator and Fermentation – concepts, applications and models
- Bulk Keg Orings and Keg Parts Reference
More Homebrew Finds!
- Last 50 Finds!
- Top Deals – a curated list of the best deals
- Homebrew Reviews – one of the largest libraries of homebrew reviews in existence!
- Our Top Posts – tips, how-tos, resources posts and more
- Let’s be Friends!
Recent Deals!
10 Most Recent Homebrew Resource Posts & How-To’s!
We are Homebrew Review HQ! Our 10 Most Recent Reviews
pinnedThis post may contain affiliate links. We may make a commission when you use our links. This will never cost you extra. Thank you for supporting Homebrew Finds!
greatdealsMake sure the components you use are compatible and rated for your intended application. Contact manufacturer with questions about suitability or a specific application. Always read and follow manufacturer directions. 7.27.19 tag:lnksfxd toppost:duotightmanifold rs:8 tag:tpr


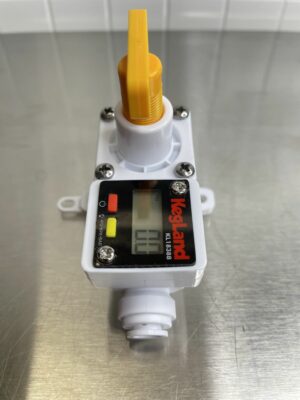



I skipped the manifold and instead used a duotight regulator for each line. They are mounted horizontally across the back of the collar.
Thanks for the write up on these. I want to get some here pretty soon to re-do my draft system. From my shopping it appears that there’s one you can screw into the bottom of your regulator or at least the bottom of the check valve right?
Hey David! Yep, usually you would use a flare to DuoTight. See how I converted mine in my review… https://www.homebrewfinds.com/hands-on-review-kegland-duotight-fittings-evabarrier-tubing/
One other question…
Do you use a wrench to tighten the duotight MFL adapters or just hand tighten?
Thanks,
Marc
I used a wrench. Don’t over-tighten, but I thought a wrench would be required to make sure and get a good seal.
Sorry if this is a stupid question…
Can you elaborate on how you use the Pressure Gauge to test for leaks in the system?
Say you set your regulator pressure @ 30 PSI…do you just check that the pressure gauge also reads the same? How would you know if it’s leaking? If it’s leaking and there is still gas in the tank, wouldn’t the pressure gauge still read the same until the tank runs dry? Think I’m missing the concept. Need a smarter person to explain 🙂
Whatever the gauge is reading, it should remain constant after it settles in. Otherwise, there’s a leak. In this case, I didn’t have this hooked to a tank, but if you were going to pressure test your draft system, you’d want to turn off the gas at the tank and then monitor for changes.