
Toasting your own Wood Chips by Matt Del Fiacco
Toasting your own Wood Chips
by Matt Del Fiacco
Like many new brewers, when I first started brewing I was eager to find interesting ingredients I could use, from Sriracha (bad idea) to vanilla beans (used 2 beans per gallon, terrible plan). Around this time, I tried my first bourbon-barrel stout, and feel in love with the wood characters of the beer. Wood-aged beer quickly became a passion, but the desire to experiment was still there. I noticed early on that at my local homebrew shop, all of my options were Oak of some kind, but what about Maple? What about Mesquite?
Barrel & Wood Sources:
- Oak Barrels at MoreBeer
- eBay Seller nopal_verde offers a wide variety of barrels. These come from Mexico but shipping is generally reasonable – the pictured barrel is from nopal_verde.
- Search “used whiskey barrels” on eBay – probably the best current source for used barrels
- Search “oak barrels” on Amazon
- Search “used whiskey barrels” on Amazon
- Search “homebrew oak chips” at Amazon
- Oak Aging at SoCal Brewing
- Oak Aging at William’s Brewing
- Oak Infusion Spirals via William’s Brewing. Multiple toast levels are available
- MoreBeer doesn’t generally offer used barrels. They have a good selection of new barrels, but they don’t seem to be big into used barrels. One really cool offering they do have that is related to used barrels is… MoreBeer has worked closely with Russian River on their Russian River Kits including Pliny and Blind Pig. These recipes aren’t clones in that they are directly from the brewery. So much so, that their Consecration kits actually have chunks of real Consecration Barrels included with them. From MoreBeer: “we actually include chunks of oak from actual Consecration barrels with each kit. Periodically we get a call from Vinnie that they are bottling Consecration and that we can come pick up some of the used barrels.” Because of this, these kits can have some availability problems. Really cool! Extract and All Grain – via MoreBeer
Tip: When looking at eBay and Amazon look for offerings that are specifically for aging beer and wine. Rain barrel and decorative options are also out there. In my opinion, you should disregard those as they may not be food safe or they may be beyond repair for use with beer or wine. If a barrel leaks too much = it’s now a decoration.
This article is about toasting your own wood so you can use it in your homebrew, no matter the source or the type. Not all wood is suitable for brewing (soft-woods, chemically treated wood, etc.), so be sure to do your research. For this article, let’s stick to commercially available smoking-wood, which is often untreated and is safe for use in cooking. In addition, this article is about chips primarily, simply because (as smoking chips) they are widely commercially available.
The point of this short article isn’t to be comprehensive or absolute, but to help you get started on dialing in your wood additions so you can adjust to your system and palate. I’m happy to hear any criticisms or ideas you may have!
Toasts of Wood
Before we go into the different types of woods, their toasts, and the flavors that can develop, we need to understand the varying toasts of wood and how toasting temperatures develop different characteristics.
Light toasts are typically toasted at a low temperature for a longer period of time. This breaks down tannins and hemicellulose, and facilitates the formation of vanillin, the chemical compound from lignin that is responsible for the vanilla flavors and aroma. Typically, smoky flavors are not present in light toasts, and wood flavors, along with vanilla, are prevalent.
Medium toasts are toasted at a moderate temperature for a long period of time, which avoids harshly charring the wood and focuses primarily on the breakdown of hemicellulose, resulting in the carmelization of sugars. This toast produces toasty, sweet, caramel, and maple flavors with hints of vanilla.
Check Out Our Resource On Sourcing Whiskey Barrels!
Heavy toasts are often the result of a two-step process. First, the wood is heated briefly at a high temperature, resulting in a strong surface toast that will impart smoky flavors. After that, there is often a medium toast for a slightly longer period of time which creates a deeper toast, penetrating the wood more fully and allowing for more complex flavors to develop. Some vanilla flavors may be present but the flavor and aroma are typically dominated by smoky, roasty, coffee like flavors balanced with notes similar to those present in a medium toast.
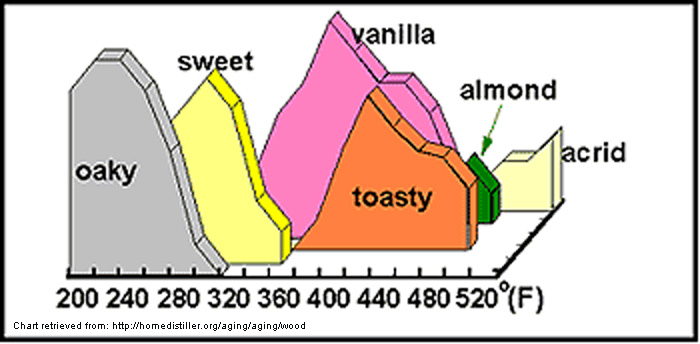
This diagram was created by World Cooperage as a visual way of explaining heat’s effects on wood, in this case American Oak, and the characteristics that develop at various temperatures. The actual temperatures for (and presence of) particular flavors will vary depending on the levels of cellulose, hemicellulose, tannins, and lignin in the wood, so this chart won’t be across the board correct. However, the chart is a good rule of thumb and illustrates the temperature’s influence on wood well.
More Homebrew Finds!
- Last 50 Finds on Homebrew Finds – Catch up quickly!
- Top Deals – a curated list of the best deals
- Homebrew Reviews – one of the largest libraries of homebrew reviews in existence!
- Our Top Posts – tips, how-tos, resources posts and more
- Let’s Be Friends! – connect with Homebrew Finds
Different Types of Wood
Now that we know what characteristics can develop at certain temperatures, let’s look at the different woods and the different characters between them. Personally, I only have experience with Oak, Cherry, and Hard Maple, but this article from the September/October 2012 issue of Zymurgy[1] contains an article noting the specific tastes of particular woods in a blonde ale, and their experiences are consistent with my own.
Cherry: Dried cherry, earthy, additional sweetness in finish, light vanilla, fried bread. Phenols muted, alcohol persists, slight tannic astringency.
Hickory: Light woodsy character, light hay-like aroma, slight honey-sweetness. Phenols not muted, slight tannic astringency, alcohol softened.
Hard Maple: Woody aroma, maple-syrup character lingers in finish, light nutmeg. Had a thinning effect on body, alcohol subdued.
Soft Maple: Caramel, yellow cake, light pear-like esters, maple sap (rather than syrup). Phenols and alcohol only lightly subdued, thinning effect on body.
Red Oak: Red berries, woodsy, peppery, resinous. An authoritative and dominating wood. Alcohol and phenols heavily subdued slight oil contribution to mouthfeel.
White Oak: Soft esters (orange, pear), chardonnay-like, light earthy and spicy (peppery). Moderate repression of alcohol and phenolics.
White Ash: Light dried fruit (plum, pear), breadiness, lingering wood sweetness on finish. Alcohol and phenols subdued, considerable creaminess and smoothness contributed to base beer.
Yellow Birch: Toasted marshmallow, caramel, wood aromatics strongly reminiscent of base wood varietal, aroma considerately more prominent than flavor. Not effective at subduing alcohol and phenols, moderately tannic.
Using this information as a guideline, combined with the chart above, we can determine what flavors we want and estimate what temperature to toast the wood at. For example, White Ash has a lingering wood-y sweetness. In Oak, that would mean that toasting around 300° Fahrenheit would be ideal for accentuating sweetness. It’s not perfect, but it is a great place to start. Experiment, take consistent notes, and dial in the temperatures and woods you like.
Toasting the Wood
Last year, the blog Homebrew Dad ran a short contest to give away some yeast cultivated from the famous Heady Topper. The contest was to submit a creative recipe that you would use the yeast in, and I had the idea for a Cherry Wood IPA. I didn’t end up winning the contest, but I did have a recipe that I was really excited about, and so I set out to brew it anyways. It turned out well, but I learned quite a bit along the way, and so I’m going to take another shot at it.
I bought Cherry smoking-wood chips from my local Walmart after calling the company and ensuring no chemicals were added to the wood. For this recipe, I wanted hints of vanilla while complimenting the naturally sweeter, earthy characteristics of the wood, and so using the chart above as a guideline I decided to toast at about 350° Fahrenheit. Since I’m using chips, the toasting process will be fairly quick and I set a timer for one hour, checking the chips every fifteen minutes
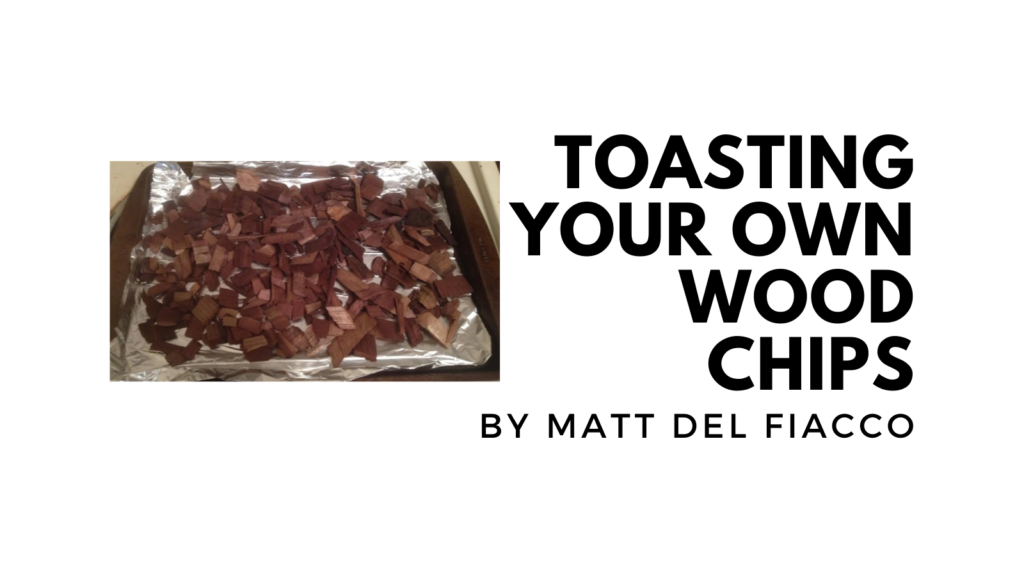
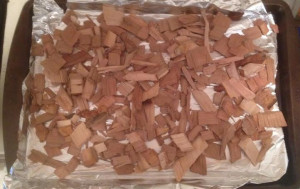
First, I preheated the oven to my desired temperature, then covered a cookie sheet in aluminum foil. I then spread five ounces of Cherry wood evenly across the sheet. Pre-toasted, the wood looked like this:
I put the wood on the middle rack of the oven and set my timer for an hour. Less than five minutes in, the kitchen has a great wood smell which, by the thirty minute mark, developed a characteristic I can only describe as “harsh”.
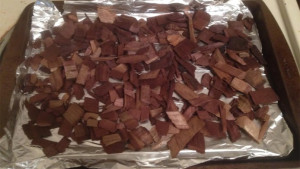
After the hour was up, I had five ounces of medium-toast Cherry woodchips, which looked like this:
So, the quick and dirty steps to toasting your own wood:
- Determine the type of wood and temperature you want.
- Pre-heat the oven to your desired temperature.
- Cover a cookie sheet in aluminum foil and then evenly spread your wood additions across the sheet.
- Put the wood in the oven on the middle rack.
- Set your timer for an hour, check on the wood every fifteen minutes or so.
- Take the wood out of the oven after an hour, toast longer if desired.
- Allow the wood to cool, and add it to your beer using your preferred method.
Preparing to add the Wood
How you add the wood to your homebrew is up to you. Personally, I prefer adding the wood straight to the beer after a ten minute boil. The boil will help fight off any chance of infection and will help reduce some of the tannic astringency that can come from the wood.
Wood chips tend to be a bit one-dimensional in flavor contributions, and due to a high surface-area to volume ratio they impart their flavors fairly quickly. For a five gallon batch, I typically recommend about half an ounce of chips for one week. This is obviously very dependent on the beer’s style, the wood, the toast, and the flavors you’re looking for. For my IPA, the half-ounce for a week was more than enough to impart a strong wood-flavor to the beer, a bit of vanilla, but none of the dried earthy characters I was hoping for.
Another popular method is the use of a tincture, soaking the chips in alcohol (usually vodka or bourbon) for a few weeks to extract the flavor, and then adding that liquid at bottling, tasting as you go. This is a useful method for chips, since the flavors they impart tend to be a bit one-dimensional anyways, adding just the liquid and tasting is a good way to add a layer of flavor and aroma to your brew. If you’re looking for complexity, I would recommend using cubes and adding them as a straight addition.
None of this information is beyond question, and like I said in the introduction to the article the purpose isn’t to be definitive or absolute, only to introduce you to the variety of woods that can be used and how you can treat them yourself. Experiment and dial in your methods to your palate and system. Feel free to comment here or email me with questions, comments, or criticism, and I would love to hear about your experiences using wood!
Happy homebrewing!
Matt
Barrel Related Books, Tools and Supplies:
- Logic BOX-1LB Barrel OxyFresh Barrel Cleaner and Refresher – 1 Pound Bag – via Amazon
- Barrel Airlock FE377 – via MoreBeer
- Wood, Whiskey and Wine: A History of Barrels affiliate link, note that multiple variations of this product may be available, as such a different version may appear at this link
- Wood & Beer: A Brewer’s Guide affiliate link, note that multiple variations of this product may be available, as such a different version may appear at this link
- American Sour Beers – affiliate link, note that multiple variations of this product may be available, as such a different version may appear at this link
- Stout (Classic Beer Styles) – affiliate link, note that multiple variations of this product may be available, as such a different version may appear at this link
- MoreWine!® Barrel Washer WE492 – via MoreBeer
- Stainless Steel Barrel Spigot – via MoreBeer
- Barrel Oxyfresh Barrel Cleaner – via MoreBeer
- Barrel Tools and Accessories at MoreBeer – sealing wax, stands, racking canes and lots more
Barrel & Wood Sources:
- Oak Barrels at MoreBeer
- eBay Seller nopal_verde offers a wide variety of barrels. These come from Mexico but shipping is generally reasonable – the pictured barrel is from nopal_verde.
- Search “used whiskey barrels” on eBay – probably the best current source for used barrels
- Search “oak barrels” on Amazon
- Search “used whiskey barrels” on Amazon
- Search “homebrew oak chips” at Amazon
- Oak Aging at SoCal Brewing
- Oak Aging at William’s Brewing
- Oak Infusion Spirals via William’s Brewing. Multiple toast levels are available
- MoreBeer doesn’t generally offer used barrels. They have a good selection of new barrels, but they don’t seem to be big into used barrels. One really cool offering they do have that is related to used barrels is… MoreBeer has worked closely with Russian River on their Russian River Kits including Pliny and Blind Pig. These recipes aren’t clones in that they are directly from the brewery. So much so, that their Consecration kits actually have chunks of real Consecration Barrels included with them. From MoreBeer: “we actually include chunks of oak from actual Consecration barrels with each kit. Periodically we get a call from Vinnie that they are bottling Consecration and that we can come pick up some of the used barrels.” Because of this, these kits can have some availability problems. Really cool! Extract and All Grain – via MoreBeer
Tip: When looking at eBay and Amazon look for offerings that are specifically for aging beer and wine. Rain barrel and decorative options are also out there. In my opinion, you should disregard those as they may not be food safe or they may be beyond repair for use with beer or wine. If a barrel leaks too much = it’s now a decoration.
Other Wood Options:
Barrels can be expensive, hard to find and require a lot of space. Here are some options for adding wood to your beer without a barrel
- Aroma Sciences Barrel Extracts – Aroma Science’s internationally-patented Evaporative Extraction™ technology naturally captures complex aromatics from wine and whiskey barrels to create aroma profiles that are perfect copies of the original barrel source. Use to balance and boost oak aroma in beer, wine, spirits, ciders, seltzers, and traditional, reduced proofed, and nonalcoholic ready-to-drink cocktails.
- Search “homebrew oak chips” at Amazon
- Oak Aging at SoCal Brewing
- Oak Aging at William’s Brewing
- Oak Infusion Spirals via William’s Brewing. Multiple toast levels are available
- MoreBeer doesn’t generally offer used barrels. They have a good selection of new barrels, but they don’t seem to be big into used barrels. One really cool offering they do have that is related to used barrels is… MoreBeer has worked closely with Russian River on their Russian River Kits including Pliny and Blind Pig. These recipes aren’t clones in that they are directly from the brewery. So much so, that their Consecration kits actually have chunks of real Consecration Barrels included with them. From MoreBeer: “we actually include chunks of oak from actual Consecration barrels with each kit. Periodically we get a call from Vinnie that they are bottling Consecration and that we can come pick up some of the used barrels.” Because of this, these kits can have some availability problems. Really cool! Extract and All Grain – via MoreBeer
Aroma Sciences Barrel Extracts
Aroma Science’s internationally-patented Evaporative Extraction™ technology naturally captures complex aromatics from wine and whiskey barrels to create aroma profiles that are perfect copies of the original barrel source. Use to balance and boost oak aroma in beer, wine, spirits, ciders, seltzers, and traditional, reduced proofed, and nonalcoholic ready-to-drink cocktails.
Choose from American Bourbon Barrel, French Brandy Barrel, American Oak Barrel, Caribbean Rum Barrel, Brazilian Cachaca Barrel and French Oak Barrel
Aroma Sciences Barrel Extracts
More Homebrew Finds!
- Last 50 Finds!
- Top Deals – a curated list of the best deals
- Homebrew Reviews – one of the largest libraries of homebrew reviews in existence!
- Our Top Posts – tips, how-tos, resources posts and more
- Let’s be Friends!
Recent Deals!
10 Most Recent Homebrew Resource Posts & How-To’s!
We are Homebrew Review HQ! Our 10 Most Recent Reviews
Matt is a homebrewer with a passion for community, high gravities, and wood-aged beers. Check him and his other work out at his blog To Brew a Beer!
[1] Batcheller, David. “Wood’s Wild Side”. Zymurgy. American Homebrewing Association. October, 2012. Print.pinned
This post may contain affiliate links. We may make a commission when you use our links. This will never cost you extra. Thank you for supporting Homebrew Finds!
greatdealsMake sure the components you use are compatible and rated for your intended application. Contact manufacturer with questions about suitability or a specific application. Always read and follow manufacturer directions.
Price, promotions and availability can change quickly. Check the product page for current price, description and availability.
This is a Top Post! See: All Top Posts – tag:lnksfxd top:toasting rs:8 tag:tpr









Great post! BTW, parchment paper (used for baking) could be an alternative to aluminum foil.
Hi Matt – any further updates, insights, learning?
My daughter and I are brewing beer for her upcoming wedding and plan to incorporate some toasted cherry chips. Any guidance you have would be much appreciated.
Great article. I found this while searching on how to toast my own chips because I use toasted chips in my home winemaking and would like to try different woods that the local suppliers do not carry.. I would also like to try toasting my own so I can experiment with my own other hobby with corn and grains.
I fell in love with a toasted oak kombucha at Urban Farm Fermentory in Portland Maine. I have been working to produce similar flavors with my own home brews. My beer snob friends love my version of kombucha with oak. I am working on a signature flavor with maple chips. Your article is a great reference for flavor notes and toasting temperatures. Thanks Matt for taking the time, effort and passion to share.
Matt, what exactly do you mean by half an oz per week? You said you add them during the boil, but the second part seems like you may be leaving them in through your primary fermentation. Can you explain? Great article btw…can’t wait to try an addition to my maple sap beer as soon as the taps start flowing.
G~
Great post. I look forward to trying some experiments.
Thanks Adam! When you finish the experiments, send me an email and let me know how they turn out! Always happy to hear about the experiments people are doing