
Hands on Review: Torpedo Keg Buoy Floating Dip Tube!
This review is by Homebrew Finds Contributor Brad Probert. Brad is an engineer, expert homebrewer and experienced reviewer. Grab a link to Brad’s website at the end of this review.
Torpedo Keg Buoy Floating Dip Tube
In the world of continuous improvement, you’ll find changes to things that you didn’t think needed improvement. If they’re good improvements, they’ll change how you use it. The floating dip tube was one of those unexpected changes to the simple homebrew keg. The keg has so few pieces to it, and has such a simple job. It’s surprising that they took something as boring as a metal tube and found something creative and new to do with it.
The dip tube is the passageway for the beer from inside the keg to outside. The standard dip tube is all about being in the right position at the end of the beer- at the bottom to get the last drop of beer out. The floating dip tube turns that upside down and instead of being at the bottom the whole time, sits at the top of the beer as the level continuously changes. The rigid steel tube is replaced by flexible silicone tubing with the open end attached to a stainless float ball. The float then sits on the top of the beer, and as the beer level goes down, the float of course goes with it, and the tubing allows you to pull beer whether the keg is at its fullest or at its lowest.
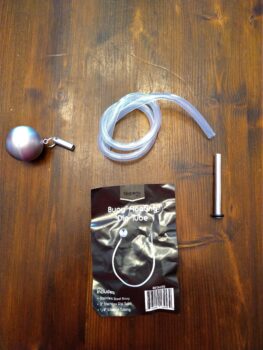
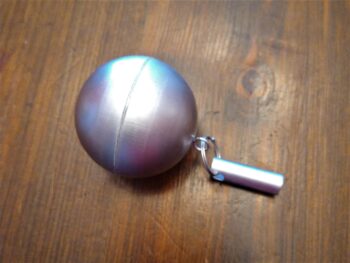
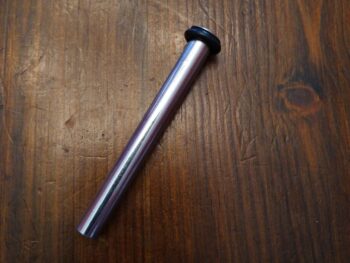
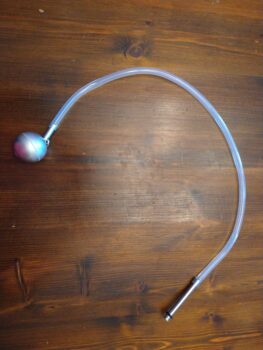
The Torpedo Keg Buoy Floating Dip Tube starts with a short 2” tube. This tube goes into the keg with the same interface as a regular dip tube with a flared end and an o-ring that gets compressed when you screw down the keg post. Once that’s installed, you attach the 23.5” long silicone tubing from inside the keg. Lastly, the float has a short 1” length of stainless tube attached to it with a ring. The silicone tubing then slides over this short stainless tube to complete the setup. With this configuration, it pulls beer from the top, while the precipitate sinks down below it to the bottom of the keg.
Check Prices, Models & Availability, Review Continues Below:
- Torpedo Keg Buoy ™ Floating Dip Tube KEG655
- Complete Torpedo Lineup – Kegs & Accessories
Hands on Trial
I had two trials in mind for the dip tube. The first was to use it in a regular serving keg, just swapping out the standard/fixed dip tube with the Torpedo Keg Buoy Floating Dip Tube. Everything went together fine. Pro tip: be sure to follow the well-known trick of soaking the ends of the silicone tubing in some hot water for a bit before slipping them on over the metal tubes.
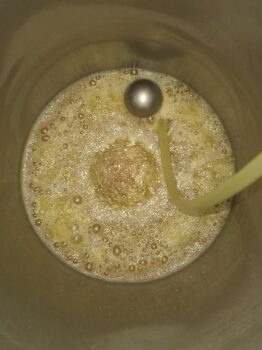 Rye IPA Hop Residual After Drank
I brewed a big batch of Rye IPA that had a lot of hops in the boil (just under 9.5 oz of pellets per 5-gallon batch), and good amount of dry hops (3 oz of pellets per 5-gallon batch). I brewed just over 10 gallons and then split it between 2 fermentors. After fermentation, the beer from the first fermentor went into a keg with a standard dip tube, and the second one went into a keg with the floating dip tube. To really test how well the float kept sediment out of the poured beer, I skipped my typical cold crash step and just went directly from fermentor to keg. I also skipped the inline Bouncer filter while transferring out of the fermentor, which is another typical process I use to minimize debris in my serving kegs. As a testament to how chunky this beer was, I had to stop multiple times while transferring, because the keg post would get clogged with hop debris.
Side by Side Clarity Results – Regular Dip Tube on Left Keg Buoy on Right
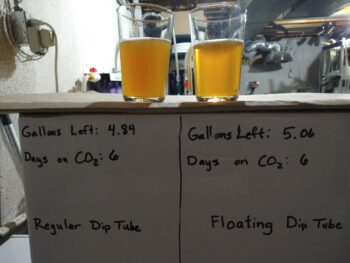 6 Days After Kegging
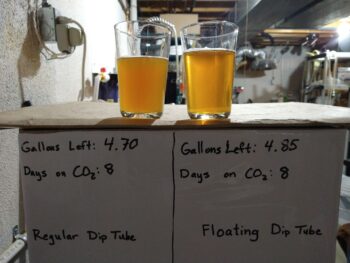 8 Days after Kegging
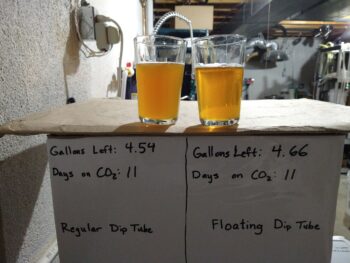 11 Days after Kegging
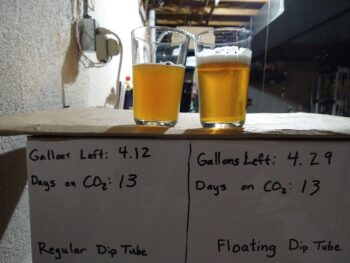 13 Days after Kegging
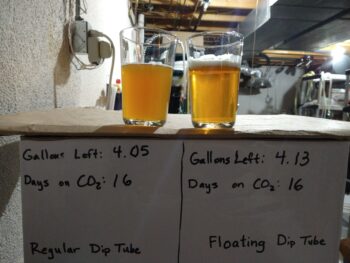 16 Days after Kegging
As the trial was underway, I poured beers from each keg and took pictures of beer clarity. I used my Plaato Keg Management System – Hands on Review – scales to keep track of how much beer was in each keg as well. The difference in beer clarity was striking. I believed the principle would work, but I had no idea how quickly I could get clear beer out of the keg with the floating dip tube. I don’t burst carb my kegs, I use the “set it and forget it” method. But when I saw how quickly the beer cleared with the floating tube, it seemed like something burst carbonators would like. You could have clear beer and carbonated beer within a few days. It even cleared so fast that by the time I poured the first sample at 6 days, it was already noticeably cleared. The keg with the regular dip tube had visible flecks of yellow-green hop debris I could see from the bottom of my glass. These bits were visible from the regular dip tube all the way through the first 1-1.5 gallons of beer. The floating dip tube didn’t have any visible debris until I was down to the last 1/2 gallon of the keg.
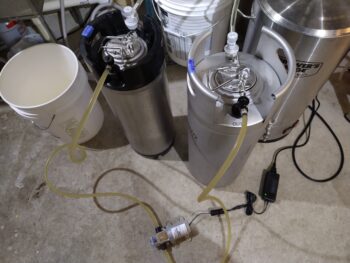 Closed Transfer When Used in Cold Crash Keg
The other trial I did with the floating dip tube was to use it in a keg specifically designated for cold crashing. I fermented the beer in my fermentor until my Tilt told me that fermentation was finished. I then transferred from fermentor into the keg that had been purged of oxygen. I stuck that keg into my keezer, and let it sit at 35F for 3 days before transferring to my serving keg. Since kegs have easy ways to purge them of oxygen and do closed transfers, it minimized oxidation risk like you might see with using a secondary. The pressure capability of kegs means no fancy balloon airlock needed when cold crashing. And lastly, their dimensions are friendly for stashing in your keezer.
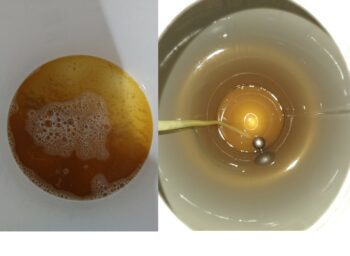 Residual Left in Cold Crash Keg
The floating dip tube in the cold crash keg was the perfect combination. With the precipitate dropping out to the bottom, when I went to transfer to my serving keg, the float kept pulling clear beer. As soon as I got any indication of cloudy beer in the line, I shut down the transfer. This worked great in my trials, with a good slurry of yeast & hop debris in a puddle of beer that was left behind.
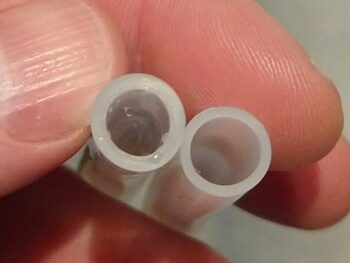 Original Tubing Next to Thin Wall Tubing
There was one phenomenon with the flexible dip tube I had to do a bit of work to overcome. The tubing that came with it was a bit stiff. I found that when doing long pours (filling a growler or pushing a keg full of Star San solution out with CO2) the tube created enough force to pin itself against the opposite wall of the keg and get stuck. When stuck, the end would stick above the beer level and start sucking in CO2 and blowing out foam. I purchased some thin wall silicone tubing from Amazon (7mm ID x 9mm OD) that was more flexible. This was much improved for these long pour events. If I did get any rare occurrences of it blowing foam, I simply shut off the flow of beer. This created an inertia shockwave in the tubing that was sufficient to reset things inside the keg and get the tubing back under the beer level. So if you run into this issue and it doesn’t right itself by simply shutting off the tap and starting up again, you can either give the keg a bump, or get some of this tubing and swap it out.
Conclusions
Overall, I found benefits of the floating dip tube in a couple of different uses. For those that want to serve from their keg soon after kegging (burst carbing and/or fermenting & serving in keg), the float helps get you to clear serving beer quickly. And if you want to rig up a cold crash keg, it’s a logical combination as the beer you transfer out will be pulled from above any of the sediment that drops down during cold crashing. Another tool in your toolbox.
Check Prices, Models & Availability:
- Torpedo Keg Buoy ™ Floating Dip Tube KEG655
- Complete Torpedo Lineup – Kegs & Accessories
Tubing Alternatives:
- Shop Around: Search for “7mm ID 9mm OD silicone tubing” on Amazon – look for something that’s food grade
- YXQ 20Ft Silicone Tubing 7mm ID 9mm OD Hose Rubber Flexible 1mm Thickness Translucent Tube Pipe Water Air for Pump Transfer – featured in this review
More Photos
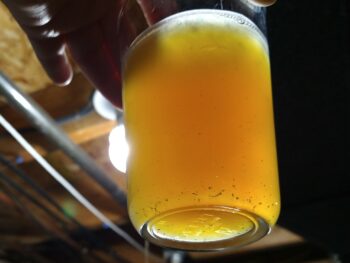 11 Days after Kegging- Regular Dip Tube
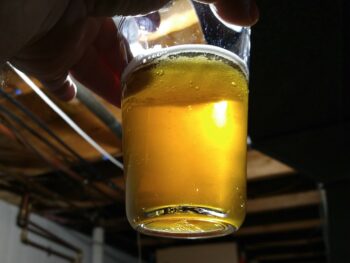 11 Days after Kegging- Floating Dip Tube
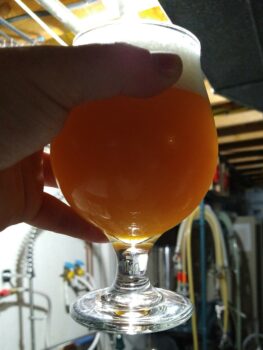 Last Half Gallon of Floating Dip Tube- Finally Cloudy
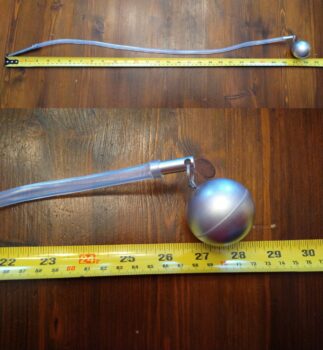 Overall Rough Length
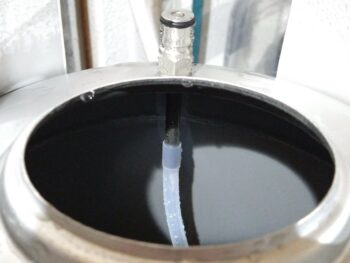 Position of Tube Inside Keg
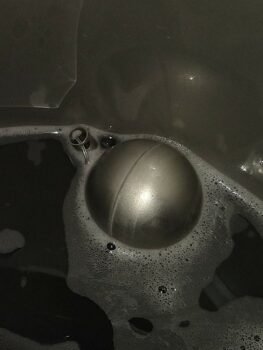 Sticking to Side Wall from Stiff Tubing
MoreBeer Used Ball Lock Review
Keg Deals!
kegdealsEverything For Your Kegerator!
Also: Kegerator Tips & Gear | Keg Repair Part #s | Recent Keg Finds
Our Top Draft Resources!
Check our our Top Draft Related Resources- Commentary: Pin Lock Keg Pricing and Availability
- Check Your CO2 Regulator for Leaks!
- How to get a keg ready for first use? New Keg Cleaning and Prep
- Portable Draft Beer Serving Options!
- Pin Lock Keg Pricing and Availability
- The Most Difficult Spot to Check for CO2 Leaks
- Keg O-Ring Materials Selection! – EPDM, Silicone and Buna-N?
- Why Do I Have Bubbles in My Beer Line? Diagnosing and Fixing Kegerator Foam Problems
- Five Benefits of Using Corny Kegs As Fermenters
- Rebuilding & Reconditioning Homebrew Kegs!
- Food Safe Replacement Keg O-Rings in Bulk
- Hands on Review: Kegland DuoTight Fittings & EVABarrier Tubing!
- Why Won’t My Beer Carbonate? Fixing Draft Beer Carbonation Problems
- What Does a Flow Control Faucet Do?
- Upgrade Your Kegerator – 6 Improvements!
- Serve Homebrew on Any Kegerator & Convert Commercial Kegerator to Homebrew
- Tips and Gear for Growler Filling
- What’s the Difference Between Ball Lock Kegs and Pin Lock Kegs?
- Checking for Draft System CO2 Leaks – Using The Pressure Gauge Method
- Tip: Consider Oetiker Stepless Clamps for Kegerator Gas and Beer Lines
- Hands On Review: Inkbird ITC-308 Dual Stage Temperature Controller +WiFi Version
- Universal Poppets Tips and Tricks!
- Convert Your Mark II Keg & Carboy Washer to a Recirculating Draft Line Cleaning Pump!
- Step by Step: Finding and Fixing Keg CO2 Leaks
- Kegerator Temperature Probe Placement – To Immerse or Not To Immerse? – three tests to determine optimal pla…
- Kegerator Beer Line Temperatures & Reducing Foam with a Recirculating Fan
- Kegging CO2 Use Estimations and Calculations
- Balancing Your Kegerator Draft System
- Building a Simple Ball Lock Draft Line Flushing Setup
- Build a Recirculating Draft Line Cleaning Pump
- Home Brew Keg Roundup – New & Used, 5 and 2.5 Gallon & More!
- Damp Kegerator? Fix Kegerator Condensation
- Homebrew Temp Controller Roundup! – Kegerator and Fermentation – concepts, applications and models
- Bulk Keg Orings and Keg Parts Reference
More Homebrew Finds!
- Last 50 Finds!
- Top Deals – a curated list of the best deals
- Homebrew Reviews – one of the largest libraries of homebrew reviews in existence!
- Our Top Posts – tips, how-tos, resources posts and more
This post contains affiliate links. We may make a commission when you use our links. This will never cost you extra. Thank you for supporting Homebrew Finds!
morebeerBy Brad Probert. Check out Brad’s website – beersnobby.com
Special Thanks to MoreBeer for providing the unit used for evaluation in this review.
Price, promotions and availability can change quickly. Check the product page for current price, description and availability.
Make sure the components you use are compatible and rated for your intended application. Contact manufacturer with questions about suitability or a specific application. Always read and follow manufacturer directions. review:b3buoy tag:tpr
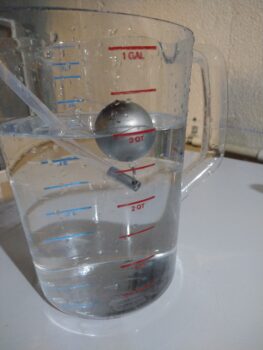


I used stainless steel washers to keep the pick up submerged. I’ll bet this tubing is cheaper.
I added a couple of stainless steel nuts to the key ring to ensure that the pick up was always under liquid.