
Using a Keg as a CO2 Source for Portable Serving!
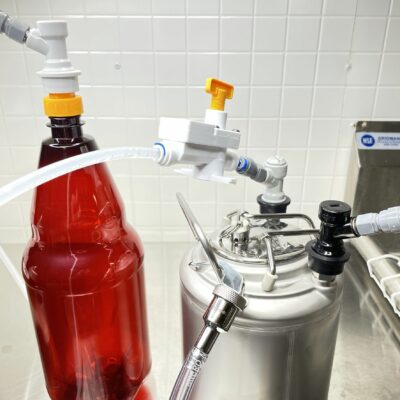
This technique uses an economical inline secondary regulator to utilize a spare keg (or growler)as a CO2 source to serve a keg. I’m not suggesting this setup as a replacement for your kegerator CO2 tank. You still need a standard CO2 tank. What this setup could be very useful for is as a replacement for those expensive little regulators or injectors and expensive (considering how much CO2 you get) little CO2 cartridges. One inexpensive purchase allows you to pressurize and serve your keg on the go for little to nothing.
Side Note: I’ve wanted to do this for years. There used to be a commercial sanke keg that had two chambers. One was used as a pressure chamber and the other held beer. I always wanted one of those. The problem was that it was extremely expensive and I just couldn’t justify the expense. This magic little secondary regulator makes something similar easily possible.
The Hardware That Makes This Possible…
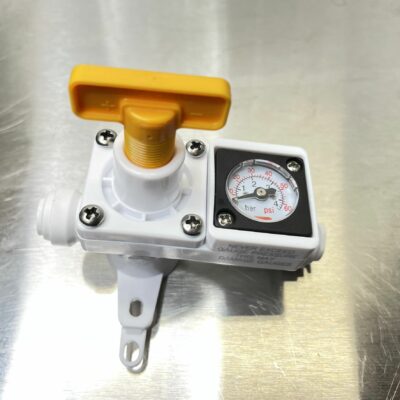
Kegland’s economical inline secondary regulators! As of this update there are three versions
- Kegland DuoTight Compatible Inline Secondary CO2 Regulator with Gauge
- via MoreBeer
- via William’s Brewing
- via Keg Connection
- via Amazon
- Duotight In-Line Regulator D1046 – DuoTight Compatible, No Gauge
- Inline Secondary CO2 Regulator – This is the original version, what I’d call v1. It has no gauge and is not DuoTight compatible
- In-Line Secondary CO2 Regulator D1045 – via MoreBeer
- In-Line Secondary CO2 Regulator affiliate link, note that multiple variations of this product may be available, as such a different version may appear at this link
Related: Hands on Review: Kegland Inline Secondary Regulator
This article contains affiliate links. We may make a small percentage if you use our links to make a purchase. You won’t pay more and you’ll be supporting Homebrew Finds and more content like this. Thank you for your support!
Upgrade to Digital!
Kegland has released a digital gauge option that works with their great inline secondary regulator and BlowTie Spunding Valve. They have also released a DuoTight version.
- Learn More! Hands on Review: Kegland Digital Gauges
- Digital Illuminated Mini Regulator Gauge 0-90 PSI – via William’s Brewing
- Digital Mini Pressure Gauge (0-90 psi) D1165 – via MoreBeer
Primary intended Use… Multi-Pressure Serving
Maintaining multiple CO2 pressures in your kegerator gives you the ability to… keep kegs at different pressures. This is a requirement to maintain different carbonation levels. It’s also handy if you want to force carbonate a keg more quickly, at a higher pressure, while maintaining your standard serving pressure on a keg that’s already being served or if you want to have a utility line for purging kegs and such.
The general options for pulling this off are…
- A multi-pressure primary CO2 regulator – example. This has two (or potentially more) high pressure bodies that allow you set different pressures.
- Secondary CO2 regulators – example. These have no ability to connect to a CO2 tank directly. They must be connected to a compatible primary.
Both good options, but generally expensive. Kegland Inline secondary regulators are, comparatively cheap and give you loads of flexibility.
This Post Explores an Alternate Use of These Regulators Adapting compatible containers to use as a pressure source for portable serving. This how-to features both the newer v2 with gauge and the original non-DuoTight model.
Other Requirements
A vessel to store CO2 (a Keg or Compatible Growler), tubing and fittings.
Important: Do not exceed stated pressures for any of your equipment. I’ll take it a step further and suggest that you don’t even get close to max pressures.
But first, more about DuoTight!
Kegland’s DuoTight Fittings are designed to work with EVABarrier Double Wall Tubing. They offer quick, reliable connections, easy implementation, a variety of fitting options and feature amazing versatility. They’re also, generally speaking, very well priced. DuoTights are push to connect fittings and require no tubing clamps.
Check out my extensive Hands on Review
Setup #1, Using a DuoTight v2 With Gauge to Pressurize a Keg for Portable Serving
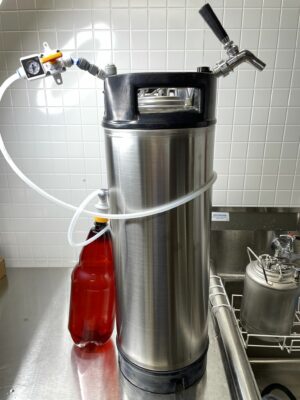 This setup shows a 5 gallon keg being pressurized by a 2.5L Growler – Hands on Review
Because v2 with Gauge – via MoreBeer – via William’s Brewing… has a gauge, it’s a lot easier to use than our v1 setup (see below). The fact that it’s DuoTight compatible also makes it a lot easier to setup vs v1.
This setup is as follows
- 2.5L Growler – Hands on Review – pressurized to about 35 PSI – Important: Do not exceed stated pressures for any of your equipment. I’ll take it a step further and suggest that you don’t even get close to max pressures. – Note: Any suitable pressure capable container can be used here. See below for some ideas.
- Carbonator Cap – via MoreBeer, via William’s Brewing – This piece would not be needed if you’re using a keg.
- DuoTight to Flare Fitting
- Gas Keg QD
- EVABarrier Tubing
- Inline Regulator with Gauge – via MoreBeer – via William’s Brewing
- Small Piece of EVABarrier Tubing
- DuoTight to Flare Fitting
- Gas Keg QD
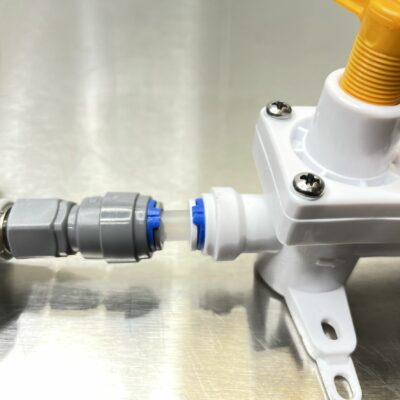 Like many DuoTight Fittings the two DuoTight Inline Secondary Regulator Models are compatible with Valuebrew’s locking clips. I used to think of those as optional, but now use them on every connection. They provide back pressure on the collar making a firmer connection and locking it in.
But Does It Work?
This keg was pressurized to serving pressure of 10 PSI prior to starting this test. It produced a good flow rate for most of the test. A 2.5 Liter growler reliably served about half this 5 gallon keg. A 2.5 or 3 gallon keg can reliably serve an entire 5 gallon keg.
CO2 Vessel Ideas:

- Although it’s not setup as a pressure source, the pictured growler size ball lock (it’s actually 96 ounces according to my testing) would make a dandy pressure source. You should generally be able to vend 2.5 or 3 gallons with this Corny Keg – 64 oz Ball Lock Keg KEG443 via MoreBeer – Review
- Any fully functioning and appropriately spec’d spare keg you have around – See our Keg Deals Roundup for recent deals.
- 2.5 and 3 gallon kegs are nice because they’re small and should be able to easily vend an entire 5 gallon keg.
- Used Single Handle 3 Gallon Cornelius Keg (Ball Lock)
- 2½ Gallon KegLand Kegs
- Corny Keg – 2.5 Gallon Ball Lock Keg KEG416
- Corny Keg – NEW (2.5 gallon) KEG419 – AEB Review
- AIH New 2.5 Gallon Corny Keg Ball Lock
- AIH New 3 Gallon Ball Lock Keg
- 2.5 Gallon Ball Lock Torpedo Kegs KEG422
- 2.5 Liter PET Growler Bottles – via William’s Brewing – Review
Setup #2, Using v1 Kegland Inline Secondary to Pressurize a Keg for Portable Serving
 Cheap Inline Regulator – via MoreBeer | via Amazon – Note: The original v1 version is not DuoTight compatible. It also doesn’t have a pressure gauge.
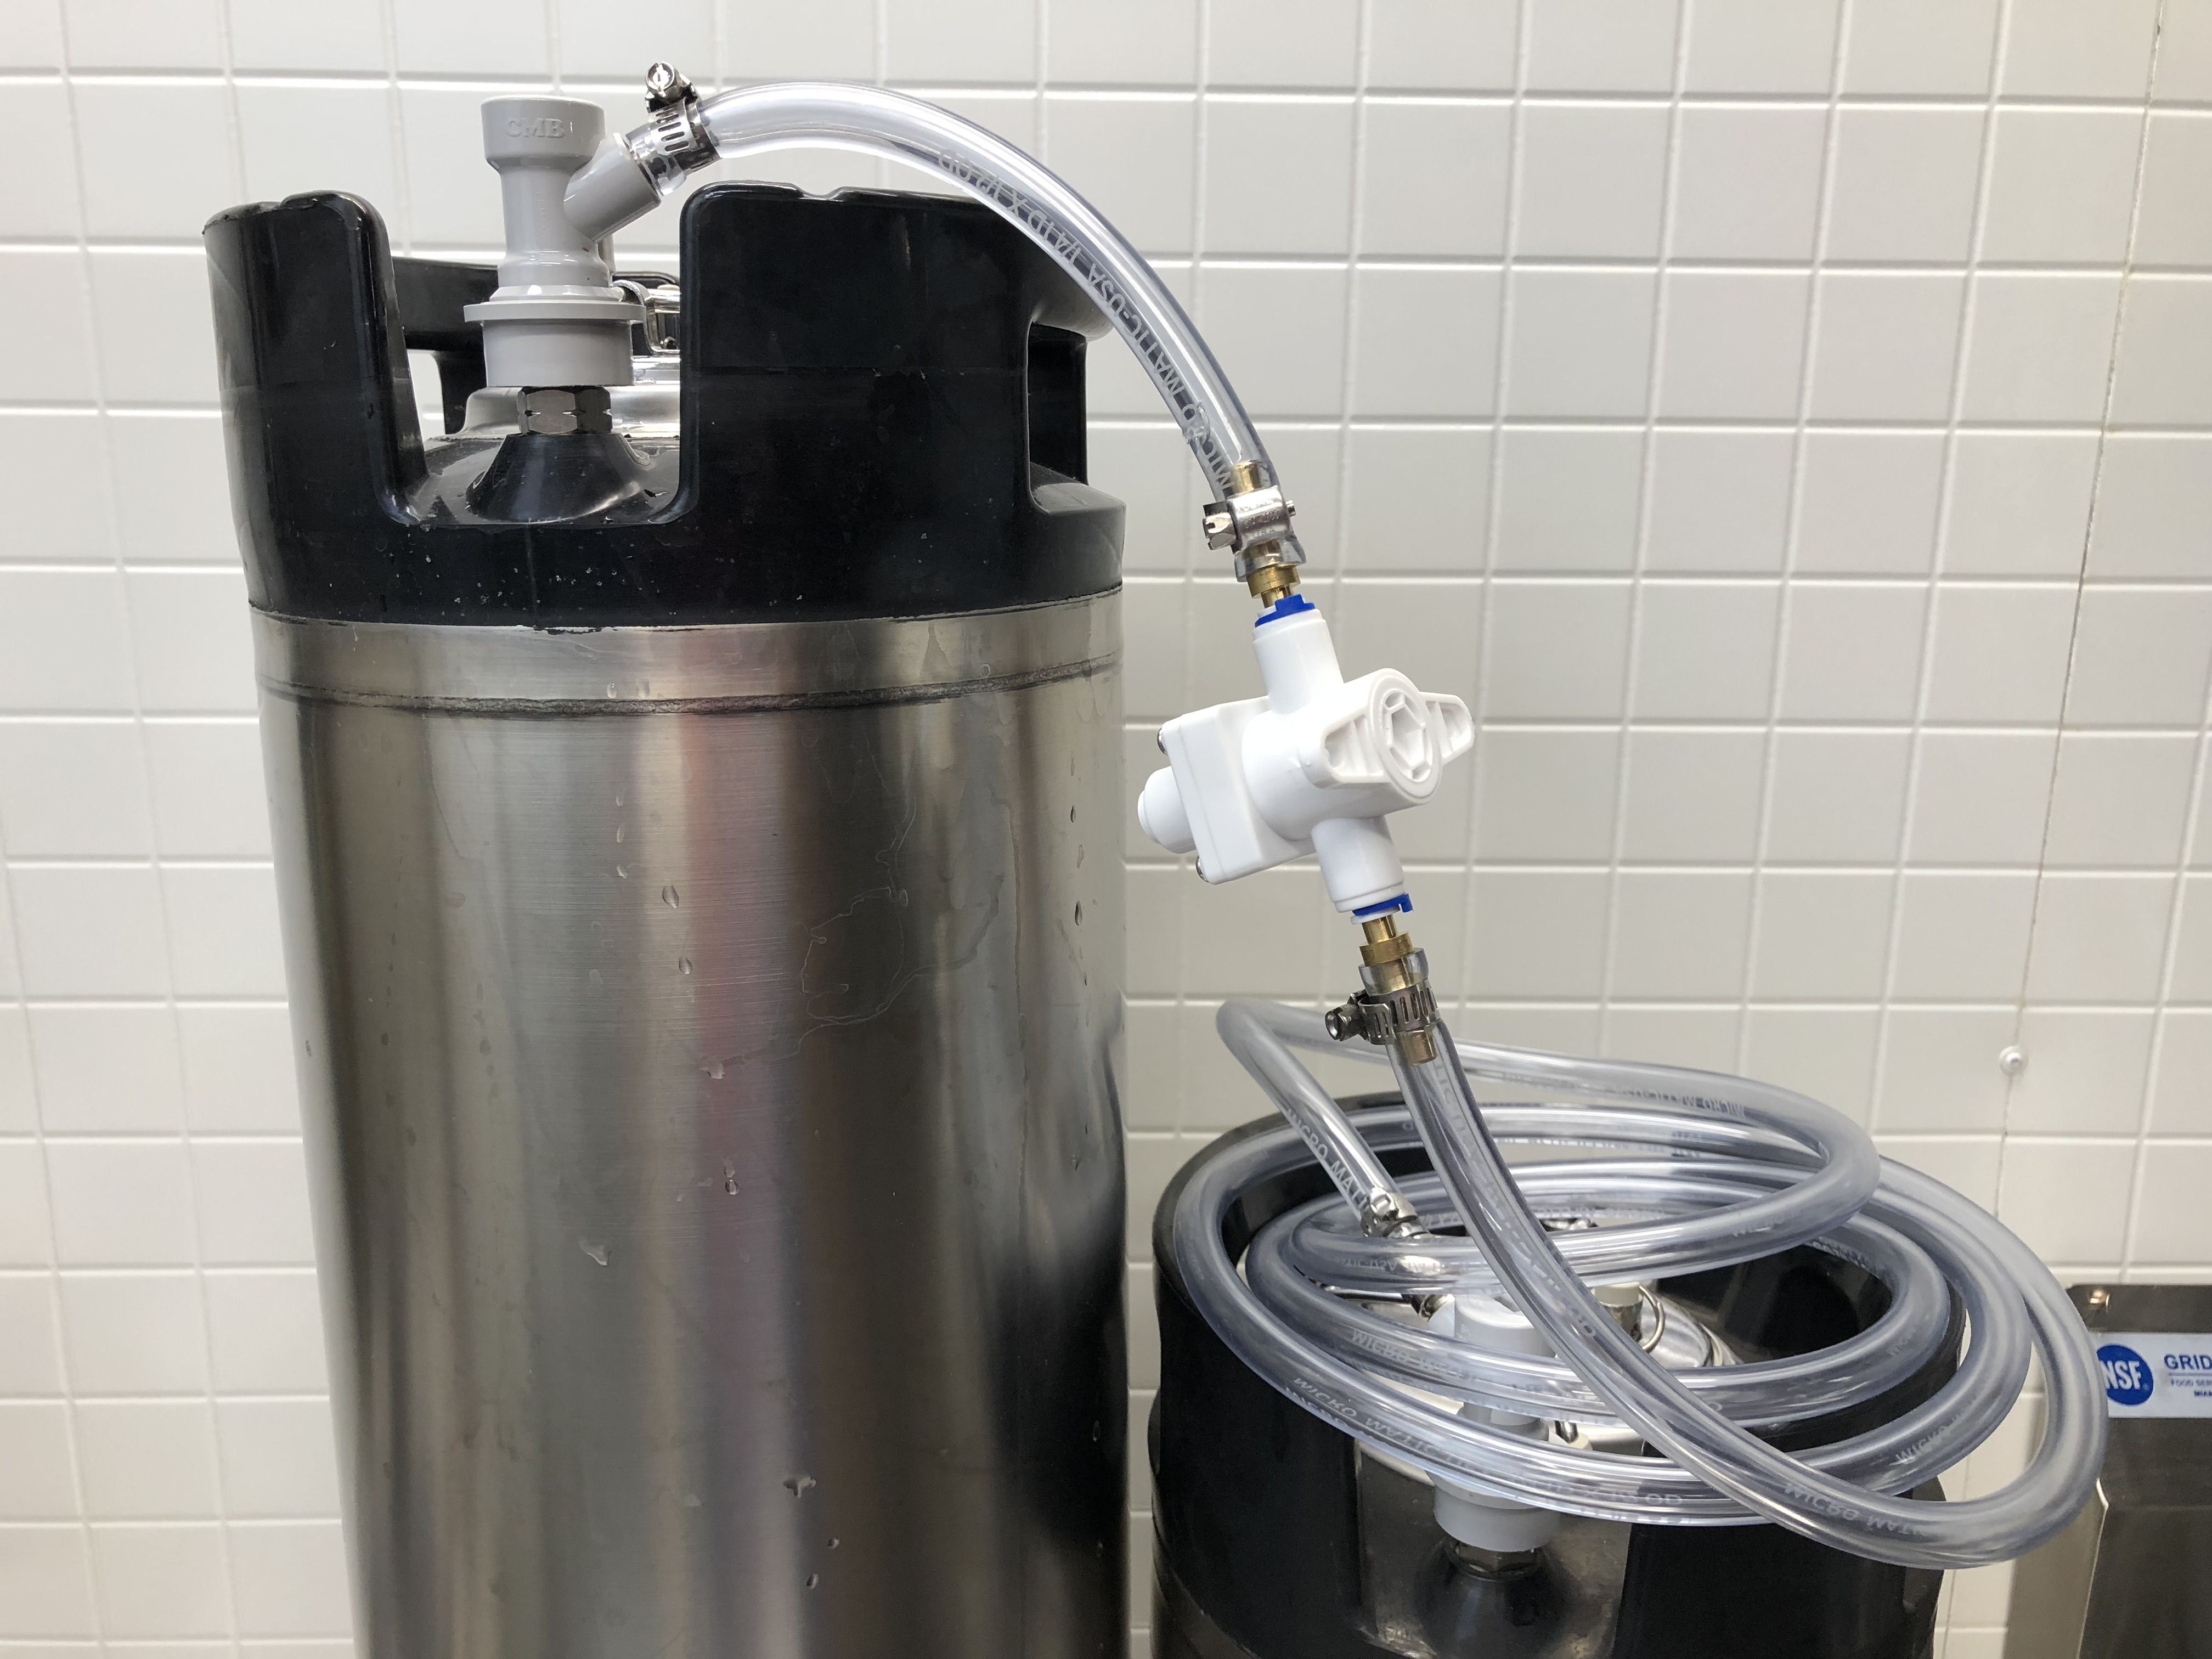 Here’s the setup. The left keg is the filled keg, the right keg is the pressure source. A gas to gas jumper connects the two with the inline secondary regulator in the middle. Note that the inline does have a flow direction, there’s an arrow on the side to let you know which way this is designed to flow. Also, although these are ball lock kegs, you could just as well use pin lock kegs.
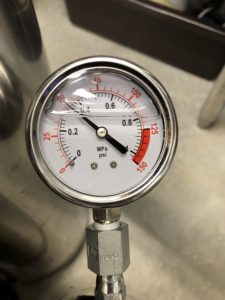 I charged the 2.5 gallon ball lock keg (pressure source) using my kegerator CO2 tank and regulator. The regulator maxed out at 50 PSI. Important: Make sure every component in your setup is rated for the amount of pressure you decide to use.
Does it work? Serving 5 gallons using a 2.5 gallon keg as a CO2 source
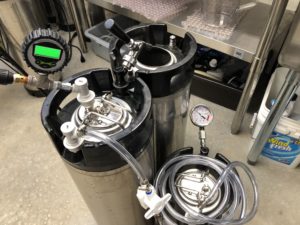 Here’s the setup. The shorter keg is the pressure source. There are two 5 gallon kegs. The one with the faucet contains 5 gallons of water, I’ll call that the “beer keg” from now on. The other 5 gallon keg is there to receive the test liquid. There’s some extra stuff here. I have a ball lock carbonation lid on the beer keg with a digital spunding valve on it. The pressure source keg has a higher PSI gauge on it, connected to a liquid QD. Those gauges are to monitor the test.
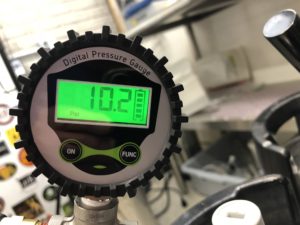 At the beginning of the test the beer keg was pressurized to about 10.2 PSI. Practically speaking, you could use a lower pressure.
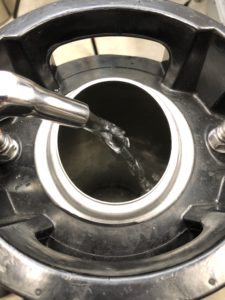 The test in progress
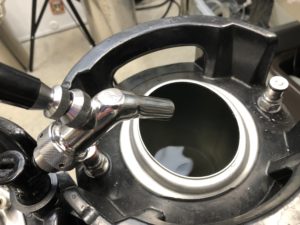 Test completed. 5 gallons served using a spare 2.5 gallon ball lock as a CO2 source. Whammo.
 A pressure reading after the serving test was completed. In order for this to be really valid, the 5 gallon keg should be about the same pressure after as it was before. It read 10.2 PSI at the beginning of the test and 10.3 PSI when the test was completed.
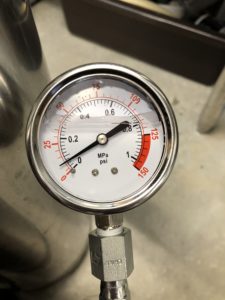 The gauge on the 2.5 gallon pressure source keg went from 50 PSI to about 12 PSI. 50 PSI x 2.5 gallons is about right to serve a 5 gallon keg at a 10 PSI serving pressure, This could have served a bit more, maybe another gallon. You could stretch this same amount of CO2 out to serve 2 x 5 gallon kegs if you decreased the serving pressure to 5 PSI, which is a reasonable pressure that you might want to use anyway. 50 PSI x 5 gallons should be able to serve 2 x 5 gallon kegs at 10 PSI serving pressure or about 4 x 5 gallon kegs at 5 PSI serving pressure.
Setting the Pressure on the Inline Regulator (No Gauge Models)
Since these do not have a gauge, you need some sort of a gauge to use for tuning in the pressure. The gauge doesn’t have to stay connected, it’s only used while you’re setting the regulator.
This is a perfect application of a Spunding Valve
- Step by Step – Setting Economy Inline Regulators with a Spunding Valve Gauge
- More About Spunding Vales – Build a Spunding Valve! – How and Why
How much CO2 did the pressure keg hold?
From my post, Kegging CO2 Use Estimations and Calculations – We can use the The “weight of CO2 used for serving a keg” formula to estimate this. That formula is (Serving Pressure + Atmospheric Pressure) x 1/2 x Keg Volume
So, for this 2.5 gallon keg at 50 PSI, those numbers would be…
- (50 + 14.7) x 1/2 x 2.5 = 80.87 grams or 2.85 ounces
Serving estimates: 1 x 5 gallon keg at 10 PSI serving pressure, 2 x 5 gallon kegs at 5 PSI serving pressure
For a 5 gallon keg at 50 PSI, those numbers would be…
- (50 + 14.7) x 1/2 x 5 = 161.74 grams or 5.7 ounces
Serving estimates: 2 x 5 gallon keg at 10 PSI serving pressure, 4 x 5 gallon kegs at 5 PSI serving pressure
Cost Savings!
Beyond the hardware savings of using this cheap inline regulator for this purpose, this technique should save you money on CO2.
MoreBeer’s CO2 Injector uses 16 gram cartridges. As of this posting those cost $10 for 6. That figures to $1.67 each. You need between 2 to 5 cartridges to serve a 5 gallon keg of beer. Let’s just use 3 for our estimations, that’s less than the average of those two numbers.
3 x $1.67 = $5.01 for each keg you serve
Versus The keg as a CO2 source method
In my example the 2.5 gallon keg at 50 PSI keg holds approximately 2.85 ounces (the equivalent of just over (5) 16 gram cartridges). 2.85 ounces is about .178 lbs. I pay $25 for 20 lbs of CO2. That figures to $1.25 per lb.
.178 lbs x $1.25/lb = 22 cents per 5 gallon keg
Decrease serving pressure to 5 PSI and you should be able to serve 2 x 5 gallon kegs with the same amount of CO2. That would be 11 cents per 5 gallon keg
Side Note: You need about 29 x 16 gram cartridges to get 1 lb of CO2. At $1.67 per 16 grams that equates to about $48 per lb of CO2. That means 20 lbs costs about… $1,200. I pay about $25 for 20 lbs of CO2 via tank exchange. This is for the purpose of illustration only, I’m not suggesting anyone uses these in that quantity.
How about serving your kegs for $0 CO2 costs? Keep reading…
An Upgrade – John Guest Push to Connect to Flare Fitting
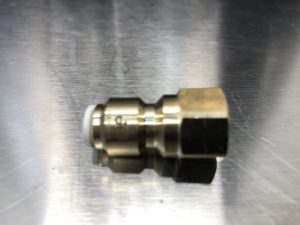 This fitting is a John Guest Female Flare to 1/4″ Tube model MI4508F4SLF – I’ve found it difficult to get the right push to connect style fittings. There are lots and lots of options. I’ve ordered some that just aren’t compatible. See links at the end of this post to help find this fitting.
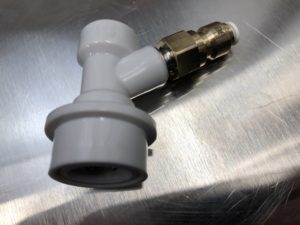 This installs on MFL ball or pin lock QDs. Here it is installed on my ball lock gas QD. You could just as easily install these on a 1/4″ MFL pin lock QD.
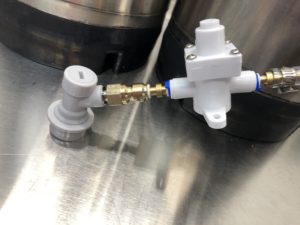 This assembly fits directly on the inline secondary regulator, eliminating the need for a section of tubing.
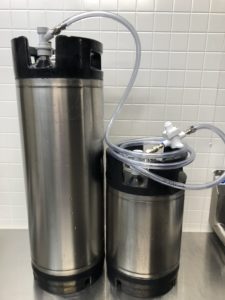 Here’s the setup using this fitting
Pros and Cons to using spare keg as a CO2 source for portable serving
Downsides: Size and portability are what come to mind. Instead of a handheld size setup, you have an extra 2.5 gallon or 5 gallon keg.
Upsides: If you have a spare keg, the costs to implement this are very low. It should also save money on CO2. There is also a convenience factor. Serve an entire keg without swapping out co2 cartridges.
How about $0 in CO2 Costs to Serve Kegs on the Go??
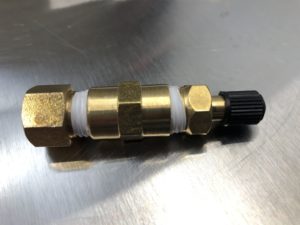 With the right fittings, you can add a Schrader type valve to your keg [See: Adding a Schrader Valve to a Homebrew Keg]. Doing so allows you to use your air compressor to pressurize the pressure keg.
Important: It’s very important that you know the pressure ratings of everything you’re using. Do not exceed stated pressures. I’ll take it a step further and suggest that you don’t even get close to stated pressures.
This technique involves using your compressor to fill the pressure keg, using atmospheric air to serve your keg. Compressors could also potentially expel non food grade lubricants. I’d suggest contacting your compressor’s manufacturer to inquire about your specific model.
Before you comment, email, tweet, etc [8 ways to connect] to me, PLEASE READ THIS….
Yes, this will cause oxidation given enough time. No, I am not recommending this for any long term arrangement.
If you’re sure you’re going to go through an entire keg quickly. Quickly to me means under several hours. Oxygen will cause oxidation, but those effects should be slim to none in the span of a short period of time. If you aren’t sure the beer will be consumed quickly, use CO2.
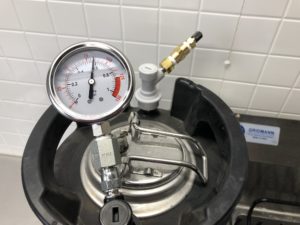 This keg has a pressure rating of not to exceed 130 PSI. Both the lid and the keg are stamped with that rating. My air compressor has a max pressure of 125 PSI. Even though the vessel itself is rated for 130 PSI, the PRV started to noticeably vent at about 90 PSI. The keg eventually leveled off at about 85 PSI.
I’ll use my CO2 estimation formula to estimate the amount of pressurized atmosphere this keg is holding. Not sure if that is as applicable, but my guess is that it is still a valid estimation.
(85 + 14.7) x 1/2 x 2.5 = 124.63 grams or 4.39 ounces
Conclusions
This economical inline regulator is a great little piece of equipment. Beyond it’s generally intended use of letting you easily serve multiple pressures and carbonation levels, it let’s you put spare kegs in use for serving on the go and saves you money on CO2.
Check Current Price, Specifications & Availability
- Kegland DuoTight Compatible Inline Secondary CO2 Regulator with Gauge – via MoreBeer – via William’s Brewing
- Duotight In-Line Regulator D1046 – DuoTight Compatible, No Gauge
- In-Line Secondary CO2 Regulator D1045 – This is the original inline secondary. Not DuoTight compatible, no gauge
John Guest MI4508F4SLF – 1/4″ Female Flare x 1/4″ Tube:
Somewhat difficult to find. Use the searches below and look for this exact model number and make sure the description reads 1/4″ female flare x 1/4″ tube
Parts for Schrader Valve Conversion:
- Milton (S-684-4) 1/4″ MNPT Male Tank Valve
- Anderson Metals Brass Pipe Fitting, Coupling, 1/4″ x 1/4″ Female Pipe
- LASCO 17-6783 1/4-Inch Female Flare by 1/4-Inch Male Pipe Thread Brass Adapter
- Dixon Valve TTB75 PTFE Industrial Sealant Tape, -212 to 500 Degree F Temperature Range, 3.5mil Thick, 520″ Length, 3/4″ Width, White
Buy DuoTight
- DuoTight Push In Fittings & EVABarrier Double Wall Draft Tubing at MoreBeer
- Search MoreBeer for “DuoTight” – to find components and accessories that may not show up on category pages.
- Kegland DuoTight Fittings and Accessories at William’s Brewing
- Search William’s Brewing for “DuoTight” – to find components and accessories that may not show up on category pages.
- DuoTight and EVABarrier at Keg Connection – coupon code HBF5OFF saves you 5%
- Search Amazon for “DuoTight” – offerings vary
- Search Amazon for “EVABarrier Tubing” – offerings vary
- DuoTight Compatible Locking Clips via Valuebrew
Related DuoTight Reviews on How-To’s!
DuoTight Reviews, Resource Posts & How-To’s!
DuoTights are so amazing – at least in my book 🙂 – that I have several reviews and related top posts
- Hands on Review: Kegland DuoTight Rigid Joiners
- Five Benefits of Using Corny Kegs As Fermenters
- Hands on Review: Kegland Ball Lock Cleaning Kit and Party Pump
- Hands on Review: Kegland Inline Secondary Regulator!
- Hands on Review: Kegland Digital Gauges!
- Hands on Review: Kegland BlowTie Spunding Valve!
- Build a DuoTight CO2 Gas Manifold! – for Kegland EVABarrier Tubing
- Troubleshooting and Fixing DuoTight Leaks
- Hands on Review: Kegland DuoTight Ball Lock QDs!
- Hands on Review: Kegland DuoTight Fittings & EVABarrier Tubing!
- Hands on Review: Nukatap Counter Pressure Bottle Filler!
- Building a Simple Ball Lock Draft Line Flushing Setup
I Recommend These for DuoTight Fittings!
duotightclipsDuoTight Hands on Review!
duotightreviewRelated Resources
- Build a Spunding Valve! – How and Why
- Setting Economy Inline Regulators with a Spunding Valve Gauge
- Adding a Schrader Valve to a Homebrew Keg
- Hands on Review: William’s Brewing Inline CO2 Regulator
- Balancing Your Draft System
- Portable Draft Beer Serving Options
More CO2 Related:
- Check Your CO2 Regulator for Leaks!
- What’s the difference between Primary and Secondary CO2 Regulators?
- Get a Bigger CO2 Tank… Save Time and Money!
- Using a CO2 Detector in Your Kegerator
- The Most Difficult Spot to Check for CO2 Leaks
- Build a DuoTight CO2 Gas Manifold! – for Kegland EVABarrier Tubing
- Checking for Draft System CO2 Leaks – Using The Pressure Gauge Method
- Step by Step: Finding and Fixing Keg CO2 Leaks
- Kegging CO2 Use Estimations and Calculations
- Making a Utility CO2 Line Using Luer Lock Disconnects
More Homebrew Finds!
- Last 50 Finds!
- Top Deals – a curated list of the best deals
- Homebrew Reviews – one of the largest libraries of homebrew reviews in existence!
- Our Top Posts – tips, how-tos, resources posts and more
- Let’s be Friends!
Recent Deals!
Also: Kegerator Tips & Gear | Keg Repair Part #s | Recent Keg Finds
Our Top Draft Resources!
Check our our Top Draft Related Resources- Commentary: Pin Lock Keg Pricing and Availability
- Check Your CO2 Regulator for Leaks!
- How to get a keg ready for first use? New Keg Cleaning and Prep
- Portable Draft Beer Serving Options!
- Pin Lock Keg Pricing and Availability
- The Most Difficult Spot to Check for CO2 Leaks
- Keg O-Ring Materials Selection! – EPDM, Silicone and Buna-N?
- Why Do I Have Bubbles in My Beer Line? Diagnosing and Fixing Kegerator Foam Problems
- Five Benefits of Using Corny Kegs As Fermenters
- Rebuilding & Reconditioning Homebrew Kegs!
- Food Safe Replacement Keg O-Rings in Bulk
- Hands on Review: Kegland DuoTight Fittings & EVABarrier Tubing!
- Why Won’t My Beer Carbonate? Fixing Draft Beer Carbonation Problems
- What Does a Flow Control Faucet Do?
- Upgrade Your Kegerator – 6 Improvements!
- Serve Homebrew on Any Kegerator & Convert Commercial Kegerator to Homebrew
- Tips and Gear for Growler Filling
- What’s the Difference Between Ball Lock Kegs and Pin Lock Kegs?
- Checking for Draft System CO2 Leaks – Using The Pressure Gauge Method
- Tip: Consider Oetiker Stepless Clamps for Kegerator Gas and Beer Lines
- Hands On Review: Inkbird ITC-308 Dual Stage Temperature Controller +WiFi Version
- Universal Poppets Tips and Tricks!
- Convert Your Mark II Keg & Carboy Washer to a Recirculating Draft Line Cleaning Pump!
- Step by Step: Finding and Fixing Keg CO2 Leaks
- Kegerator Temperature Probe Placement – To Immerse or Not To Immerse? – three tests to determine optimal pla…
- Kegerator Beer Line Temperatures & Reducing Foam with a Recirculating Fan
- Kegging CO2 Use Estimations and Calculations
- Balancing Your Kegerator Draft System
- Building a Simple Ball Lock Draft Line Flushing Setup
- Build a Recirculating Draft Line Cleaning Pump
- Home Brew Keg Roundup – New & Used, 5 and 2.5 Gallon & More!
- Damp Kegerator? Fix Kegerator Condensation
- Homebrew Temp Controller Roundup! – Kegerator and Fermentation – concepts, applications and models
- Bulk Keg Orings and Keg Parts Reference
This post may contain affiliate links. We may make a commission when you use our links. This will never cost you extra. Thank you for supporting Homebrew Finds!
greatdealsImportant: It’s very important that you know the pressure ratings of everything you’re using. Do not exceed stated pressures. I’ll take it a step further and suggest that you don’t even get close to stated pressures.
Make sure the components you use are compatible and rated for your intended application. Contact manufacturer with questions about suitability or a specific application. Always read and follow manufacturer directions. tag:lnksfxd top:kegasco2 tag:tpr



Such a great idea! I’m going to try this technique for carbonating and serving kegs that I keep outside in the winter when there is no room in my keezer. Now I can have 5 beers on tap inside and another 5 outside without having to buy another tank and regulator.