
Hands on Review: Chugger Pumps X-Dry Series Homebrew Pump!
Update: July 19, 2024
This review is by Homebrew Finds Reader Benji S. Benji has been brewing for 10 years. His favorite style is Festbier. He’s an all grain brewer and member of WIZA (Whidbey Island Zymurgy Association). Check him out on Instagram at neon_hop
Making beer is all-together extremely fun, rewarding, messy, and labor intensive. Want an example? Look no further than the need to transfer large volumes of liquid, at varying temperatures, between and through multiple containers. Mashing, sparging, boiling, racking, and cleaning all require gallons of liquid transfer. Liquid is both heavy and resistant to being easily moved around en masse. Introducing new equipment into your brew day can often mean finding new and interesting ways you now have to fight against both of these obstacles. Having recently acquired a Spike CF5 conical, I’ve found myself in this exact position, often wondering “How do I even fill and clean this thing effectively?”. In terms of equipment, adding a Brewing pump to the equation has become the de facto ways to help answer these questions.
My Homebrew Pump Selection Criteria
I’ve been brewing for well over a decade, but using a pump in the process is new to me. Approaching a new piece of equipment requires some evaluation of what you want it to do, what expectations you have for how it will work, and what your budget will be to balance against. The feature set I arrived on during my search largely came down to this:
Stainless Steel head to reduce the chance for plastic pieces from rubbing of the propeller
Head assembly should be fairly easy to take apart to aid in cleaning
- 1/2” NPT connections on the ports, as I already had 1/2” connectors to convert them to quick disconnects
- At least 3” of cord length as the power outlets tend to be a bit far away where I typically brew
- Needs to be 115v
- Price range of $100-150
- Targeted Uses (in order of importance): CIP cleaning of my conical, transferring from the kettle to the conical, fly sparging
Compare Prices, Review Continues Below
- Chugger X-Dry Series Pump Stainless Steel via MoreBeer
- Chugger X-Dry Series Pump Stainless Steel via Adventures in Homebrewing
- CHUGGER PUMP XCPSS-IN-1 X-DRY with Run Dry Protection, SS 115 Volt Inline Home Brewing System Beer Pump, 55″ Cord w/Plug, 1/2″ MPT Connections, ETL-Certified, US Food Compliant Materials
- Center Inlet Version: CHUGGER PUMP CPSS-CI-1 Stainless Steel 115 Volt Center Home Brewing System Beer Pump, 55” Cord WITH Plug, Inlet 3/4” x Outlet 1/2” MPT, ETL-Certified, USFDA Food Compliant Materials – affiliate link, note that multiple variations of this product may be available, as such a different version may appear at this link
- Tri-Clamp Version: CHUGGER PUMP TRI-XCPSS-IN-1 Tri Clover X-DRY Run Dry Protection, Molded 1 1/2″ Tri-Clamp Fittings, SS, 115 Volt Home Brewing System Beer Pump, ETL-Certified, Approved Carbon Bearing Material. – affiliate link, note that multiple variations of this product may be available, as such a different version may appear at this link
- Search “Chugger x-dry” at Amazon – offerings vary
- Search “Chugger Homebrew Pump” at eBay – offerings vary
This seller on eBay can have good deals on Chugger pumps. Price and availability vary.
This article contains affiliate links. We may make a small percentage if you use our links to make a purchase. You won’t pay more and you’ll be supporting Homebrew Finds and more content like this. Thank you for your support!
The Process – Brewing with the Chugger X-Dry
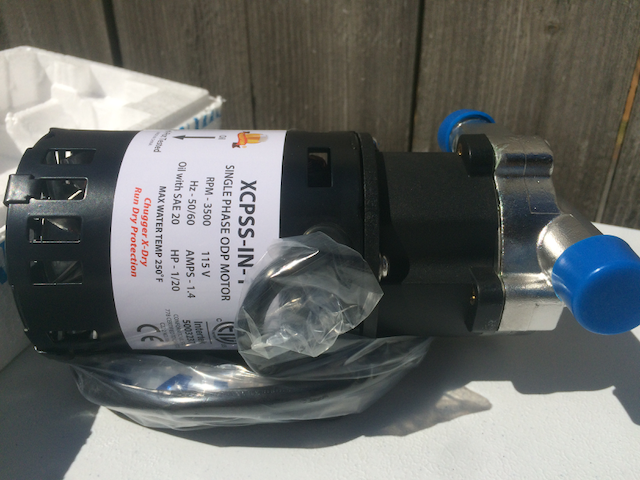
I recently got the chance to evaluate these criteria, and the usage of a pump in general, with the Chugger X-Dry, model XPCSS-IN-1. As I’d recently pressure transferred a batch out of the conical, this was a perfect opportunity to do a CIP with the Chugger and have a low risk way to get a feel for it.
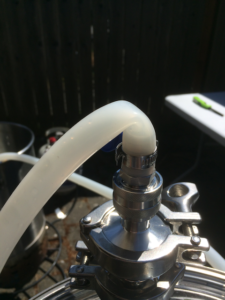
In order to take the most advantage of not having to manually transfer several gallons of hot PBW infused liquid to the conical, I first did a one-way transfer from the kettle to the conical, moving over about 3-4 gallons. Once the kettle was emptied out, I then connected the Chugger to the CIP and bottom port for a recirculating CIP setup, which ran continuously for 40 minutes. With the PBW liquid drained, I then transferred 6-7 gallons of hot water from the kettle into the conical for a rinse with the CIP. After draining off 4 of these gallons, I recirculated the water again to ensure everything got a good rinse.
This process gave me a chance to test out switching hose connections, starting and stopping the pump, gauging temperature build up, and general experience across two different runs.
Evaluation Terms
A bit about how I evaluate equipment; I split results into three categories which broadly are classified as so:
- Good: Things that I found were of good quality, value, performance, or experience. These are generally things that match or exceed expectations.
- Bad: Things that I found were of poor quality, value, performance, or experience. These are generally things that don’t meet expectations or create problems with usage.
- Ugly: Things that I found could have been a better experience, were minor quality issues, or reduced the perceived price to value of the equipment.
Results – Hands on Review
-The Good-
Instruction Manual and Packaging
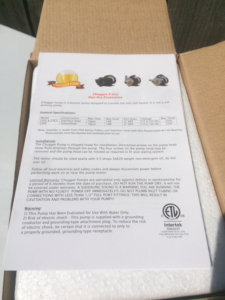
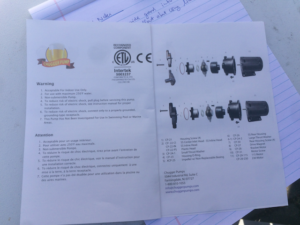
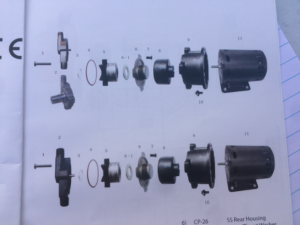
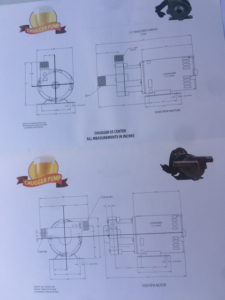
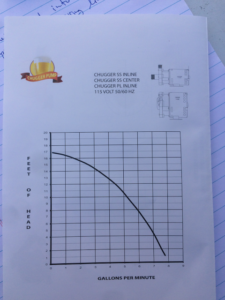
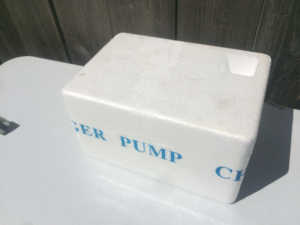
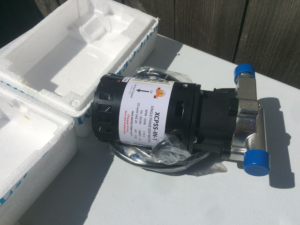
The Chugger X-Dry came in a relatively small box, but was really well packaged in a styrofoam encasing. The instruction manual is in full color, includes a photo blowout of the pump components, and diagrams for spacing measurements. These last two pieces feel really nice as I’m…not the greatest at reassembling things after taking them apart at times.
Ready out of the Box
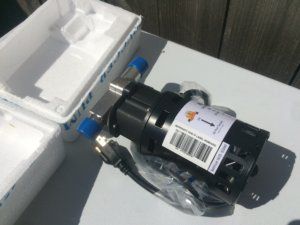
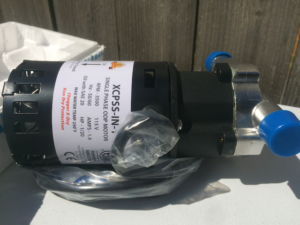
The X-Dry comes out of the box assembled and ready to go. No screws or washers to deal with, just remove some plastic on the cord, the covers on the NPT ports, and you are ready to go. Of course as with any new equipment, you should give it a good cleaning before you use it with anything drinkable.
Disassembly and Reassembly
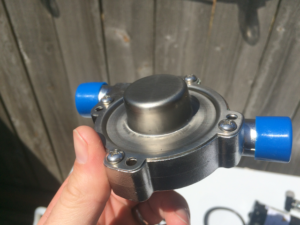
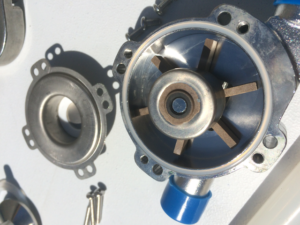
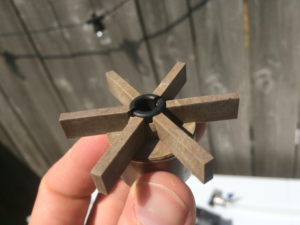
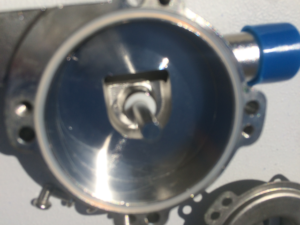
Removing the screws holding on the head to the body was surprisingly easy to do. Once the screws attaching the head to the body are removed, the entire head comes off in one solid piece. As the X-Dry is a magnetic drive pump, the propeller inset sinks into a well surrounded by a magnet. This has the effect of it “snapping” into place smoothly when putting the head back on. Taking the head itself apart requires removing 4 more smaller screws. Reassembly was also a snap and at no point did I feel like I was in danger of stripping any of the screw heads (something I’d worry about if I was planning to frequently disassemble the head).

Materials Construction
The body, propeller casing, and head all feel like solid industrial metal construction. No thin or flimsy metal parts to be found. The part that is plastic (namely the head collar) gave me no sense of cheapness in materials or construction. All in all the pump is very solidly built. Of course the flip side of this construction is that the whole thing is a bit heavier than I was expecting.
Friendly to Mistakes
This was my first experience using a pump, so it’s safe to say I made a number of mistakes. When draining my kettle, I accidentally allowed it to empty to the point that air entered the lines. In another instance, I didn’t notice that the line was crimped going into my conical, stopping the flow of liquid. In both cases, the Chugger continued to function in a (seemingly) normal manner. The highlight feature of the X-Dry is the carbon bearing that prevents the pump from seizing if run dry. Having done this multiple times while figuring out the pump, and the normal procedures to using it, I can now appreciate the extra forgiveness to make mistakes.
One thing to watch out for is that the instructions mention that a squealing sound will tell you the pump is being run dry, but I never actually encountered this. I even attempted to run the pump entirely dry and wasn’t able to produce anything other than a slightly higher pitch to the running sound of the pump.
Video Player
00:00
00:00
Noise Level
Having heard that most brewing pumps tend to be quite loud, I was pleasantly surprised at the noise level of the X-Dry while it was running. You could easily have a conversation at normal volumes while this thing is running.
Video Player
00:00
00:00
Running Temp
I ran the X-Dry for well over an hour on a sunny 80F day, yet the entire time the pump stayed just warm to the touch. The air cooling mechanism works really well to keep things well regulated temperature wise.
-The Bad-
Easy to Cavitate
The X-Dry provides protection against seizing when run dry, but it still needs to be primed. This means flooding the pump head with whatever liquid you are moving before turning the pump on. As the pump doesn’t have a priming valve on the head, you are forced to gravity feed it into the pump. This leads to a lot more situations where air can enter the lines, causing cavitating as it enters and settles around the pump head.
Video Player
00:00
00:00
Valves (or lack thereof)
The X-Dry comes without any valves or ability to throttle flow. This means that without additional hardware you get two settings, on and off. I could see this lack of throttling being an issue in situations where you’re concerned with controlling flow rate, such as fly sparging. For my case, the lack of a shut off valve meant that every time I swapped my quick disconnects between connections I increased the change of introducing air into the lines (attributing to the previously mentioned issue with cavitation).
Open Body Design
The X-Dry has a largely open body design, meaning there is little protection for the pump internals from liquid spilled on top of it. This becomes a bigger issue when you consider the previous lack of a priming valve. Needing to keep the pump constantly below your liquid to gravity feed it increases the chances that dousing your pump in liquid will happen at some point. If I had the ability to mount it underneath a table or other surface, this would potentially provide a way to limit this chance. As it stands, I’m not confident in the odds of liquid and my pump not meeting someday.
-The Ugly-
Guidance on Maintenance Procedures
The instruction manual mentions that as part of the on-going maintenance, “The motor should be oiled yearly with 4-5 drops SAE20 weight non-detergent oil, do not over oil”. Unfortunately there is no indication on how or where this oil should be added. Given how thorough the included documentation was, I was surprised that it didn’t include maintenance procedures. I went on to check the Chugger website and found no guidance there, in either their manuals or FAQs. Maybe this is something so obvious they didn’t think it needed to be mentioned, but as someone that is…less mechanically inclined…this feels like a miss.
Head Alignment
The X-Dry calls out flexible head alignment positioning as one of it’s features. In reality, the screw hole positions give you 4 possible options. If we consider the most basic usage of the pump to be it sitting on the ground (as opposed to mounted somewhere by the body bracket), 2 of these positions can’t be used because the head ports would be too close to the ground. I consider this a fairly minor issue as most use cases won’t really call for you moving the head out of its initial alignment. At the point that you do, just know that you might need to have it mounted above the ground.
Minor QC Issues
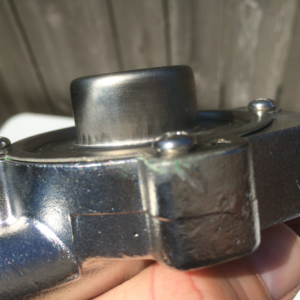
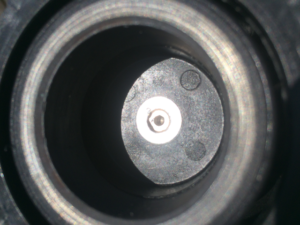
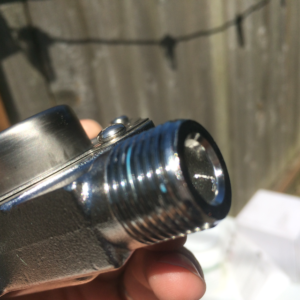
I found two minor QC issues and one puzzling corrosion with my pump out of the box. The two QC items were machining gouges on the stainless steel; one on the internals of one of the ports and the other in the motor body propeller casing. These both had left attached shreds of steel that were easy to scrape off with a screw driver. The puzzling bit of corrosion was some green oxidized copper looking stain on the pump head itself. I’ve heard of pockets of iron in stainless steel rusting, but not copper oxidation. As this issue was on the outside of the pump head I mostly just shrugged and moved on.
Conclusions
Looking over my original search criteria and how the Chugger X-Dry compared, it checked most of the boxes I was aiming for. The price point for this model is slightly out of my search band ($160 versus my max of $150), but otherwise satisfies a lot of the other attributes I was looking at. The stainless steel head, ease of disassembly, quality construction, and beginner friendliness are all solid attributes that would justify the price for me. The lack of a priming valve and the open body design are the two main sticking points. For this price level, the X-Dry comes awkwardly close to the Blichmann Riptide ($199), which claims to solve these issues. So for a homebrewer comparing the two, the question comes down to whether fixes to these issues are worth the extra $40.
Overall, my conclusion on the X-Dry was that it is a very solid pump for beginners, but the price point might be bit high compared to other models and the features they offer. On the other hand, the run dry protection is a great way to give yourself a safety net while figuring out how to add in a pump to your brewing setup. The performance and ease of maintenance of it will definitely make it a core part of my brew days and I’m excited to not have to lift heavy kettles around anymore.
Compare Prices:
- Chugger X-Dry Series Pump Stainless Steel via MoreBeer
- Chugger X-Dry Series Pump Stainless Steel via Adventures in Homebrewing
- CHUGGER PUMP XCPSS-IN-1 X-DRY with Run Dry Protection, SS 115 Volt Inline Home Brewing System Beer Pump, 55″ Cord w/Plug, 1/2″ MPT Connections, ETL-Certified, US Food Compliant Materials
- Center Inlet Version: CHUGGER PUMP CPSS-CI-1 Stainless Steel 115 Volt Center Home Brewing System Beer Pump, 55” Cord WITH Plug, Inlet 3/4” x Outlet 1/2” MPT, ETL-Certified, USFDA Food Compliant Materials – affiliate link, note that multiple variations of this product may be available, as such a different version may appear at this link
- Tri-Clamp Version: CHUGGER PUMP TRI-XCPSS-IN-1 Tri Clover X-DRY Run Dry Protection, Molded 1 1/2″ Tri-Clamp Fittings, SS, 115 Volt Home Brewing System Beer Pump, ETL-Certified, Approved Carbon Bearing Material. – affiliate link, note that multiple variations of this product may be available, as such a different version may appear at this link
- Search “Chugger x-dry” at Amazon – offerings vary
- Search “Chugger Homebrew Pump” at eBay – offerings vary
This seller on eBay can have good deals on Chugger pumps. Price and availability vary.
Convert it To Tri-Clamp!
Inkbird ITC-308 Digital Temperature Controller| Review
Related Reviews & Resources
- Install a Priming and Purging Port for Easy Pump Operation
- Hands on Review: Keggle Brewing Pump and Chiller Stand – compatible with the Chugger-X
- Hands on Review: Mark II Homebrew Pump w/Stainless Head
- Hands on Review: Blichmann Engineering Riptide Homebrew Pump
- Homebrew Pump Discounts, Deals and Resources
More Pump Reviews!
More Homebrew Finds!
- Last 50 Finds!
- Top Deals – a curated list of the best deals
- Homebrew Reviews – one of the largest libraries of homebrew reviews in existence!
- Our Top Posts – tips, how-tos, resources posts and more
- Let’s be Friends!
Recent Deals!
10 Most Recent Homebrew Resource Posts & How-To’s!
We are Homebrew Review HQ! Our 10 Most Recent Reviews
pinnedThis post may contain affiliate links. We may make a commission when you use our links. This will never cost you extra. Thank you for supporting Homebrew Finds!
greatdealsThank you to MoreBeer for providing the unit used for evaluation in this review.
Make sure the components you use are compatible and rated for your intended application. Contact manufacturer with questions about suitability or a specific application. Always read and follow manufacturer directions. tag:lnksfxd review:xdryreview tag:tpr


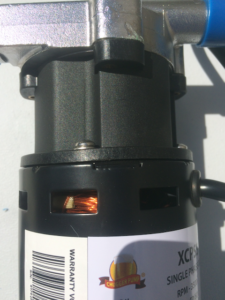
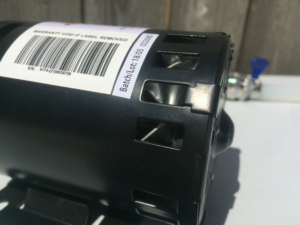


There is an arrow on the pump label that says “OIL HERE”