Category Archives: CO2

Get a Bigger CO2 Tank… Save Time and Money!

co2 tank salePictured: CO2 Tank from Beverage Elements

Get a Bigger CO2 Tank… Save Time and Money

Many times CO2 suppliers don’t charge a whole lot more to swap out or fill larger tanks. At my supplier it’s about $10 more to exchange a 20 lb tank vs a 5 lb tank.

At William’s Brewing a 10 lb exchange is $10 more vs a 5 lb tank. That’s double the CO2 for $10 more. A 20 lb tank is $20 more than a 5 lb tank. That’s 4 times the CO2 for $20 more.

See: C02 and Beer Gas Cylinder Exchange at William’s Brewing for current pricing.

Beyond that, getting a larger tank means a lot of time savings.  Less lugging your tank around to swap out or refill. With these savings a tank upgrade will could pay for itself in short order.

Of course you’ll want to make sure your system is leak free including the most difficult spot to check for leaks to so you don’t needlessly drain that big new tank.

More CO2 Related:

Continue reading

Check Your CO2 Regulator for Leaks!

We get a lot of people contacting us when trying to track down a C02 gas leak in their draft systems, and wondering how to test their regulator to make sure it is not leaking C02. This little knurled shut off cap is the answer. This 1/4″ female flare shut off cap features a sealing O ring, and knurling so you can tighten it without tools. Great for shutting off an unwanted 1/4″ male flare gas line.

Also is a good tool to use if you suspect your regulator is leaking gas. See the above picture for details on how to do this.

1/4″ Flare Shut Off Cap – Regulator Leak Tester

Related:

Also at William’s Brewing: C02 Tank Extension Hose

Continue reading

Great for Tailgates!… Using a Keg as a CO2 Source for Portable Serving!

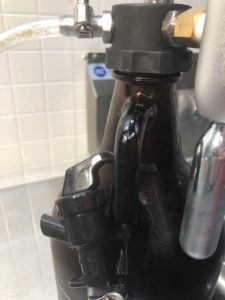
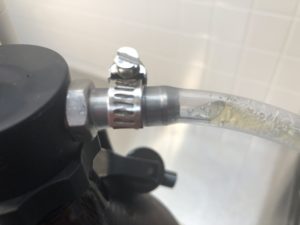
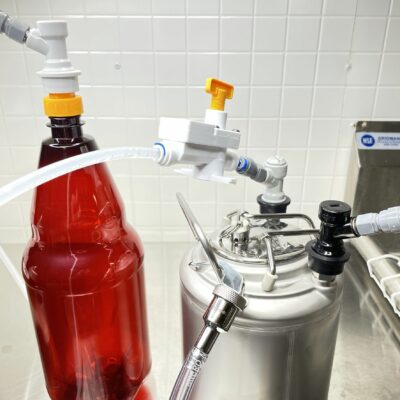
This technique uses an economical inline secondary regulator to utilize a spare keg (or growler)as a CO2 source to serve a keg. I’m not suggesting this setup as a replacement for your kegerator CO2 tank.  You still need a standard CO2 tank. What this setup could be very useful for is as a replacement for those expensive little regulators or injectors and expensive (considering how much CO2 you get) little CO2 cartridges. One inexpensive purchase allows you to pressurize and serve your keg on the go for little to nothing.

Side Note: I’ve wanted to do this for years.  There used to be a commercial sanke keg that had two chambers.  One was used as a pressure chamber and the other held beer.  I always wanted one of those.  The problem was that it was extremely expensive and I just couldn’t justify the expense. This magic little secondary regulator makes something similar easily possible.

The Hardware That Makes This Possible…

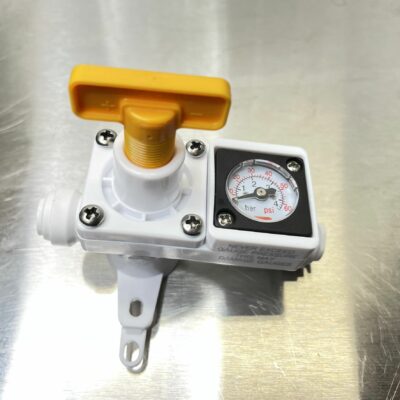
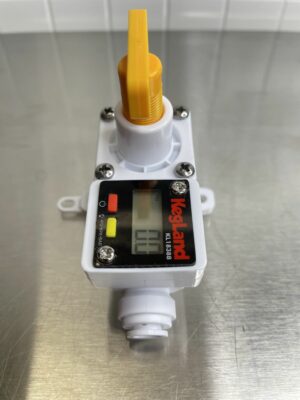
Kegland’s economical inline secondary regulators! As of this update there are three versions

Related: Hands on Review: Kegland Inline Secondary Regulator


This article contains affiliate links. We may make a small percentage if you use our links to make a purchase. You won’t pay more and you’ll be supporting Homebrew Finds and more content like this. Thank you for your support!


Upgrade to Digital!

Kegland has released a digital gauge option that works with their great inline secondary regulator and BlowTie Spunding Valve.  They have also released a DuoTight version.

Primary intended Use… Multi-Pressure Serving

Maintaining multiple CO2 pressures in your kegerator gives you the ability to… keep kegs at different pressures.  This is a requirement to maintain different carbonation levels. It’s also handy if you want to force carbonate a keg more quickly, at a higher pressure, while maintaining your standard serving pressure on a keg that’s already being served or if you want to have a utility line for purging kegs and such.

Continue reading

What’s the difference between Primary and Secondary CO2 Regulators?

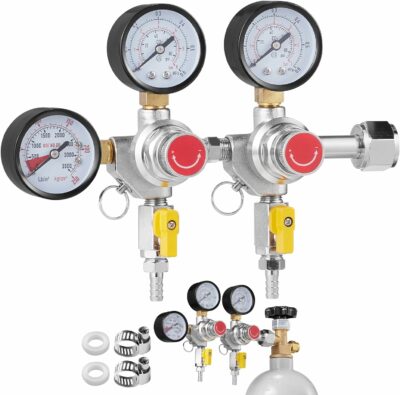
VEVOR CO2 Regulator Gauge with 0-60PSI, Heavy Duty CO2 Gauge Gas System, Draft Beer Regulator with Check Valve, Adjustable Pressure Regulator for Draft Beer Homebrew (Triple Gauge Regulator)Pictured: VEVOR CO2 Regulator Gauge with 0-60PSI, Heavy Duty CO2 Gauge Gas System, Draft Beer Regulator with Check Valve, Adjustable Pressure Regulator for Draft Beer Homebrew (Triple Gauge Regulator) – affiliate link, note that multiple variations of this product may be available, as such a different version may appear at this link

July 4, 2024

In the context of homebrewing or serving beer, a CO2 regulator hooks up to a compatible CO2 tank and steps down the pressure to carbonate and serve the beer properly. See: Balancing Your Kegerator Draft System  and Diagnosing and Fixing Kegerator Foam Problems

Single Body vs Multi Body Regulators

A typical CO2 regulator provides a single output pressure. It usually has two gauges, one for the high pressure side and one for the low pressure side, although it can have a single gauge. A multi-body regulator, provides multiple output pressures and typically has one high side gauge and one gauge for each serving pressure.


Get a Regulator!

Continue reading

Get a Bigger CO2 Tank… Save Time and Money!

co2 tank salePictured: CO2 Tank from Beverage Elements

Get a Bigger CO2 Tank… Save Time and Money

Many times CO2 suppliers don’t charge a whole lot more to swap out or fill larger tanks. At my supplier it’s about $10 more to exchange a 20 lb tank vs a 5 lb tank.

At William’s Brewing a 10 lb exchange is $10 more vs a 5 lb tank. That’s double the CO2 for $10 more. A 20 lb tank is $20 more than a 5 lb tank. That’s 4 times the CO2 for $20 more.

See: C02 and Beer Gas Cylinder Exchange at William’s Brewing for current pricing.

Beyond that, getting a larger tank means a lot of time savings.  Less lugging your tank around to swap out or refill. With these savings a tank upgrade will could pay for itself in short order.

Of course you’ll want to make sure your system is leak free including the most difficult spot to check for leaks to so you don’t needlessly drain that big new tank.

More CO2 Related:

Continue reading

Using a CO2 Detector in Your Kegerator

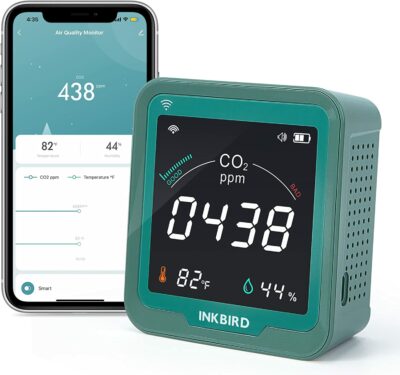
INKBIRD WiFi Indoor Air Quality Monitor, CO2 Detector, Accurate NDIR Sensor, Temperature and Relative Humidity, Indoor CO2 Meter with Data Logger, for Cars, Wine Cellars, Grow Tents, Homes (INK-CO2W).Pictured: INKBIRD WiFi Indoor Air Quality Monitor, CO2 Detecto

Losing a tank of CO2 because of leak is frustrating. It’s a waste of time and money. Adding a CO2 monitor can help warn you of leaks minimizing loss, wasted money, wasted time and frustration.

A CO2 Monitor Alarm in Your Kegerator

Placing a CO2 Monitor with alarm inside of your kegerator can serve as another line of defense to protect against co2 leaks and loss. CO2 should not be building up in your kegerator. A CO2 monitor with alarm can alert you of this condition.

Options with WiFi and a companion app are nice because you can get notifications on your compatible phone.

These are affiliate links. Note that multiple variations of these products may be available, as such a different version may appear at these links

Beyond CO2 Levels…

Some models display additional information that can be helpful information about your kegerator. These vary model to model and can sometime include temperature and humidity.

  • Temperature – monitor your kegerator temperature
  • Humidity – Help judge whether your Eva Dry (or similar) needs recharged for the purpose of handling excess kegerator and fermentation chamber wetness.  See: Damp Kegerator? Fix Kegerator Condensation

Not A Replacement for Checking for Leaks…

A do not consider a CO2 alarm as replacement for thoroughly checking for and addressing leaks. Rather this is another layer that could save you a trip to swap out a CO2 tank.

The Biggest Trouble Spot

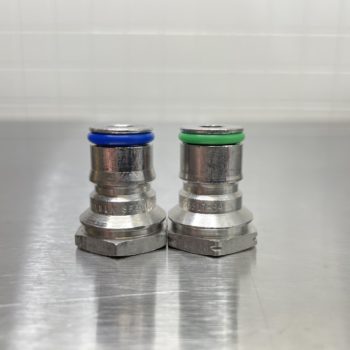
Color coded post o-rings. From our Keg Rebuild Post – Jump To: Replace O-Rings

In my opinion the most difficult spot to check and the cause of many a lost CO2 tanks are… gas post o-rings.

Testing at this point using the “spray bottle method” (spray Star San everywhere and check for bubbles) is impossible or at the very least difficult and messy.  Leaks will only surface here when a gas QD is actually engaged.  The problem is, you can’t easily see that spot when a QD is on.

The problem stated more simply… You need a QD on to see if it’s leaking, but you can’t see it if a QD is on. You can use what I call the pressure gauge method to check for overall leaks. But even using that method you know that you have a leak but it gives no indication where it’s at.

Be quick to replace gas side o-rings… I’m quick to replace gas post (and gas dip tube) o-rings. Beyond slow and no-carbing beers, a bad gas side o-ring can lead to empty tanks. That’s a waste of time and money and it’s frustrating.

These o-rings cost pennies each when you buy them in bulk. Liberally replacing these can save time, money and frustration.

Continue reading

The Most Difficult Spot to Check for CO2 Leaks

hard to find keg co2 leak

Updated: December 18, 2024

If you’ve found this article odds are pretty good you’re having trouble tracking down a pesky leaks.


Check for CO2 Leaks

First things first, if you haven’t already used traditional methods to try to track down your leak, check out my resources on the topic.

The Most Difficult Spot to Check for CO2 Leaks…

Continue reading

Hands On Review: Weekend Brewer CO2 Manifold

Why a Manifold?

CO2/Gas Distribution Manfiolds allow you to easily split CO2 lines so that you can use a single tank and regulator for multiple kegs.

What to Look for in a manifold

Some features to look for when shopping for a manifold are individual trunk control, integrated check valves, the right connection type, good build quality and… no leaks!

  • Individual control is really straight forward… a ball valve for each trunk.
  • As far as check valves, those are designed to prevent backflow between lines.  Although these are gas lines we’re talking bout, differences in pressure can cause back-feeding beer to flow into gas lines.  Check valves help to prevent that.
  • Look for a compatible connection type – MFL/Flare or the right size barb fitting.
  • Good general build and material quality
  • And… This may sound obvious, but…. look for something that does not leak.  Leaky manifolds result empty CO2 tanks and those are no fun.

Hands on Review The Weekend Brewer 4-way MFL CO2 Distributor Manifold

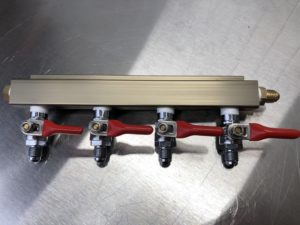
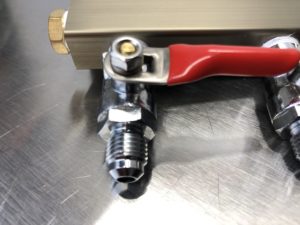
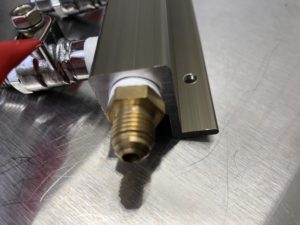
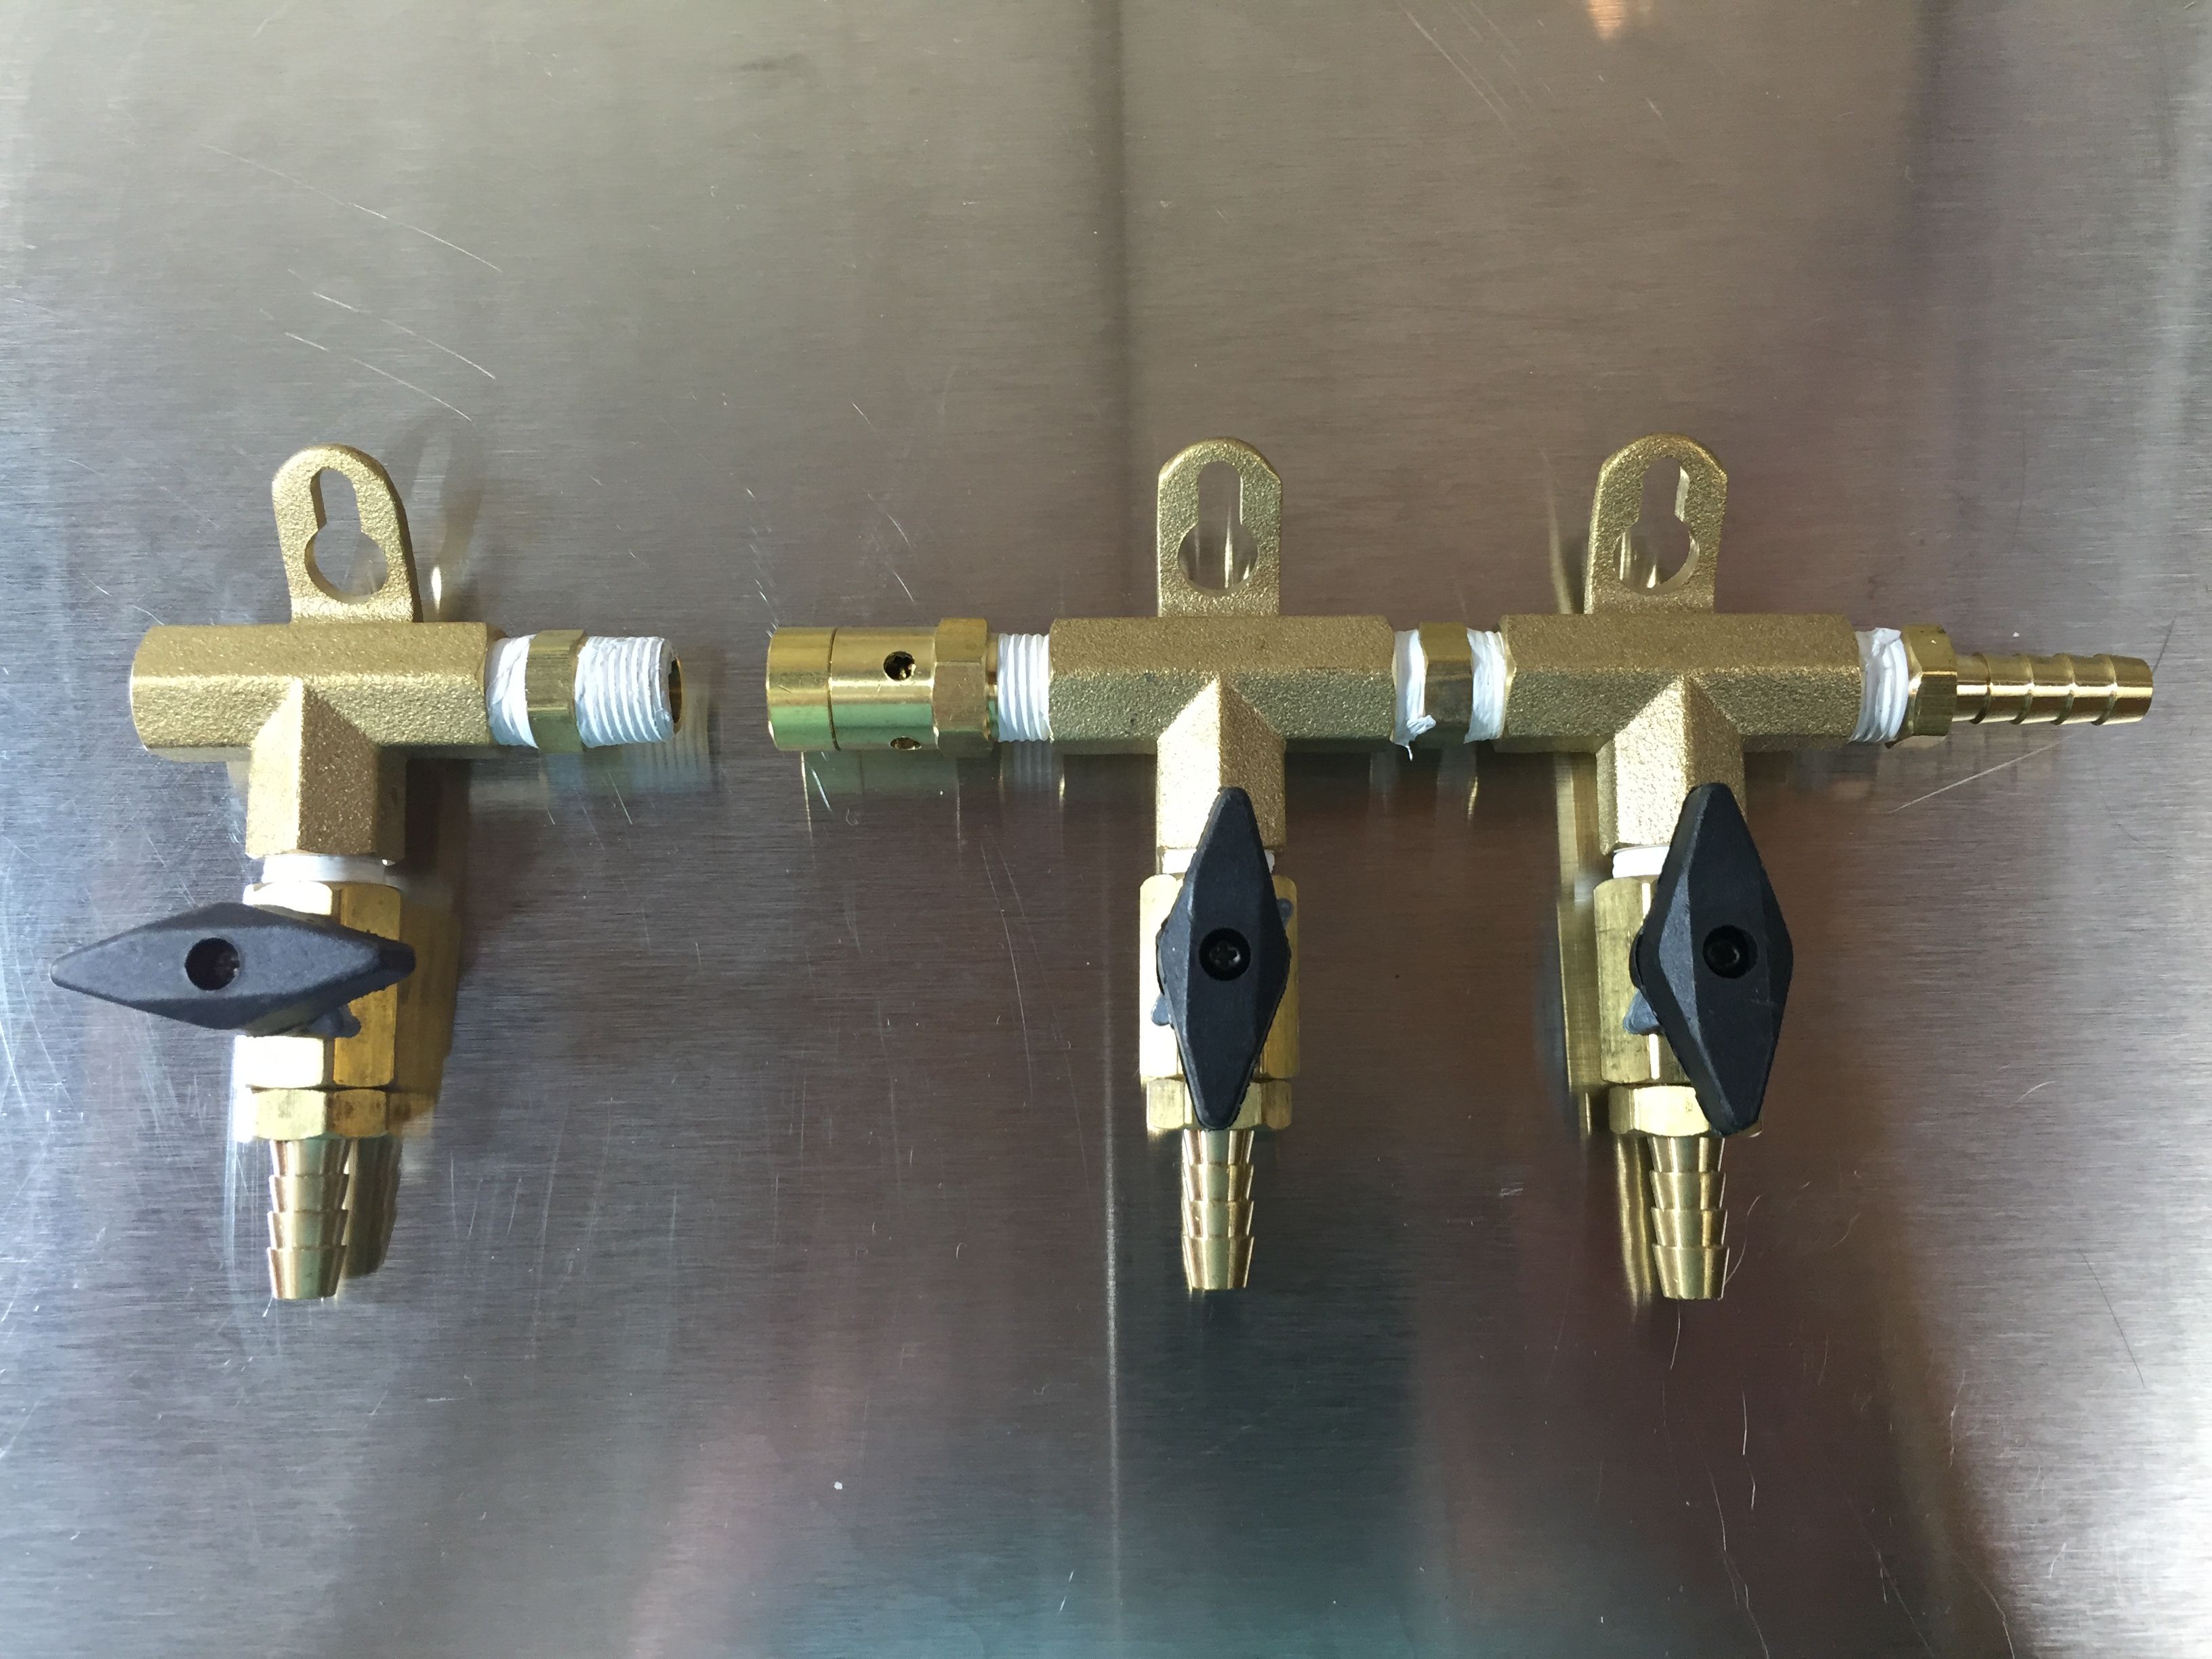
This particular model features four trunks with 1/4″ MFL Fittings along with a 1/4″ MFL inputClose up of the ball valve.  These feature inline check valves to help prevent back flow.  I chose 1/4″ MFL but the weekend brewer has lots of options available, including a build your own option, linked below.A look at the gas inlet.  MFL “in” connections like this seem to be more difficult to come by.  A barbed inlet seems to be more common.


Compare Prices:


Continue reading

Build a DuoTight CO2 Gas Manifold! – for Kegland EVABarrier Tubing

Updated: March 3, 2025

Kegland’s DuoTight Fittings are designed to work with their EVABarrier Tubing.  They offer quick, reliable connections, easy implementation, a variety of fitting options and work with double wall EVABarrier tubing.  These are push to connect and require no tubing clamps.  Combine these features with their generally low price and this system and tubing are a game changer for kegerator/keezer owners and builders.

DuoTights are… awesome.  Check out my extensive Hands on Review

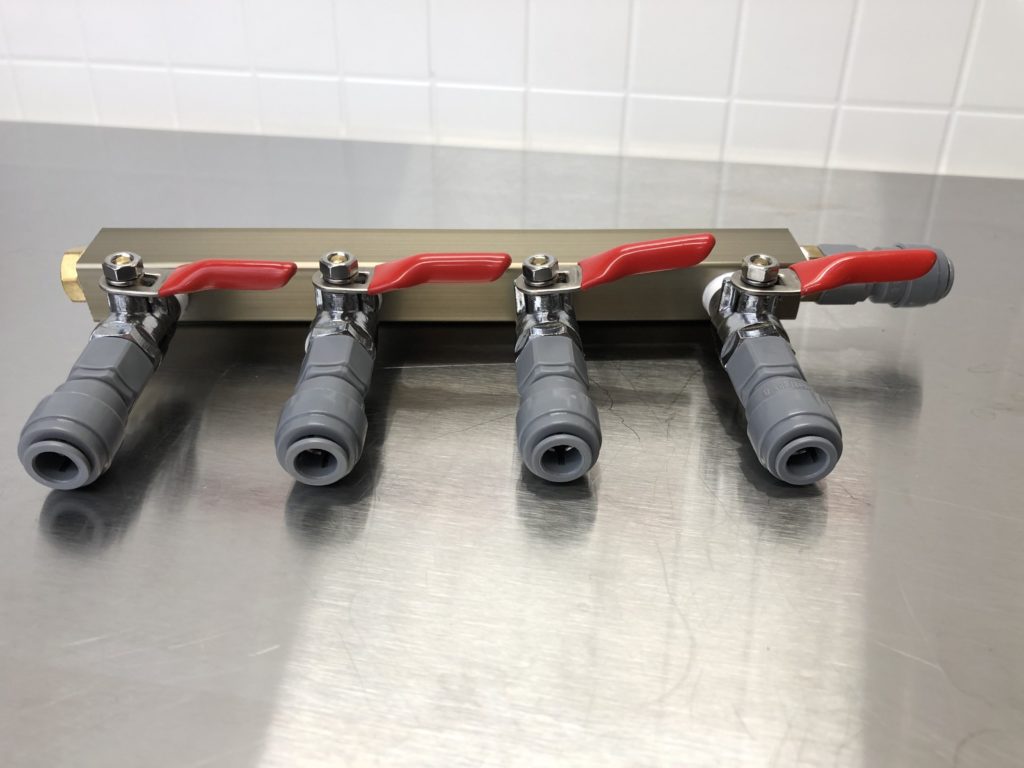
As of this posting, the system has no native manifold option available.  No need to fear, this post details three DuoTight manifold options that you can put together yourself.


Want to Learn More about DuoTights and EVABarrier Tubing?  

duotightreview


Buy DuoTight


Build 1 – Convert a Flare Based Manifold to DuoTight

Continue reading

Using a Keg as a CO2 Source for Portable Serving!

This technique uses an economical inline secondary regulator to utilize a spare keg (or growler)as a CO2 source to serve a keg. I’m not suggesting this setup as a replacement for your kegerator CO2 tank.  You still need a standard CO2 tank. What this setup could be very useful for is as a replacement for those expensive little regulators or injectors and expensive (considering how much CO2 you get) little CO2 cartridges. One inexpensive purchase allows you to pressurize and serve your keg on the go for little to nothing.

Side Note: I’ve wanted to do this for years.  There used to be a commercial sanke keg that had two chambers.  One was used as a pressure chamber and the other held beer.  I always wanted one of those.  The problem was that it was extremely expensive and I just couldn’t justify the expense. This magic little secondary regulator makes something similar easily possible.

The Hardware That Makes This Possible…

Kegland’s economical inline secondary regulators! As of this update there are three versions

Related: Hands on Review: Kegland Inline Secondary Regulator


This article contains affiliate links. We may make a small percentage if you use our links to make a purchase. You won’t pay more and you’ll be supporting Homebrew Finds and more content like this. Thank you for your support!


Upgrade to Digital!

Kegland has released a digital gauge option that works with their great inline secondary regulator and BlowTie Spunding Valve.  They have also released a DuoTight version.

Primary intended Use… Multi-Pressure Serving

Maintaining multiple CO2 pressures in your kegerator gives you the ability to… keep kegs at different pressures.  This is a requirement to maintain different carbonation levels. It’s also handy if you want to force carbonate a keg more quickly, at a higher pressure, while maintaining your standard serving pressure on a keg that’s already being served or if you want to have a utility line for purging kegs and such.

Continue reading

Hands on Review: Spotted Dog CO2 Pressurized Growler Dispenser – works with standard growlers

Pressurized CO2 Growler Dispenser Tap for Glass Beer Growlers by the Spotted Dog Company

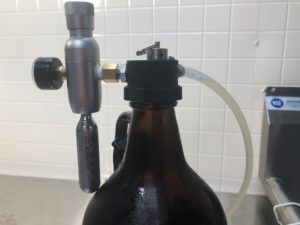
This setup consists of a regulator, growler dispense cap, faucet with tubing and dip tube.  It’s designed to fit standard glass growlers.  This allows you to serve tap beer from a standard growler as you want to.  Since it’s regulated, you can keep carbonation levels up and reduce oxidation.  Note that a growler is not included and you need to buy CO2 cartridges separately.

Hands on Review: Spotted Dog CO2 Pressurized Growler Dispenser
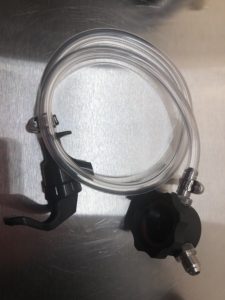
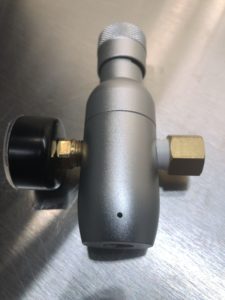
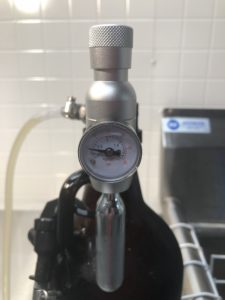
A look at the cap, faucet and tubingA look at the included mini CO2 regulator.  Note that this is a regulator as opposed to an injector.  Injectors give you no regulation of pressure other than the amount you choose to inject.  This is an actual regulator that you can set to a desired pressure.  That’s a key feature since this is intended to be used with compatible glass growlers.

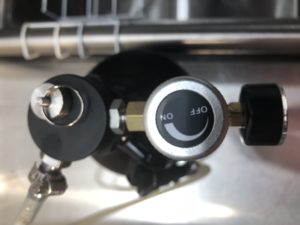
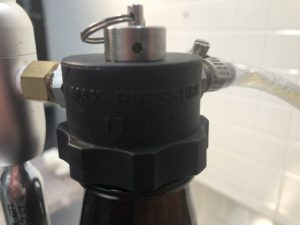
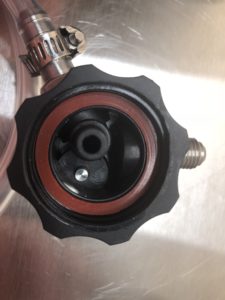
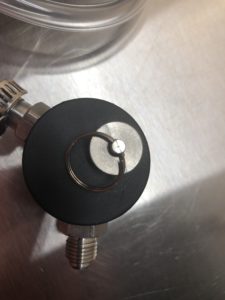
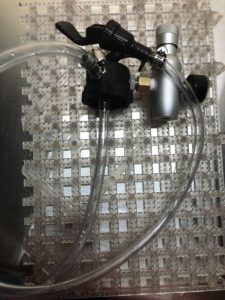
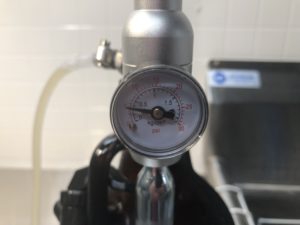
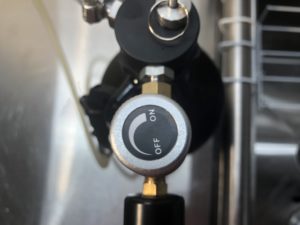
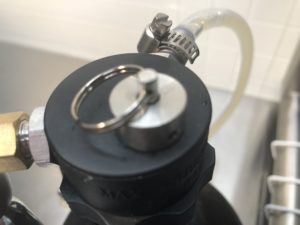
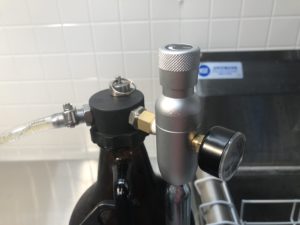
You can also use this with your homebrew keg… This regulator features a female flare connector (the brass piece on the right side of this photo).  That means you can install it on a ball lock or pin lock MFL QD [Search MFL keg disconnect] and use it on a ball lock or pin lock homebrew keg.  Whammo!A look at the faucet.  A standard picnic/cobra style tap with a small length of tubing attached.A look at the inside of the dispense cap.  Notice the included o-ring/gasket.  The cap feels sturdy and well built.A look at the cap top-down.  A PRV is installed on the top of the cap.  That’s for venting to help adjust pressure or when you’re ready to remove the cap.  The male flare at the bottom is for installation of the included regulator.A look at the entire assembly after a soak in PBW.  Note that I did not soak the regulator in PBW.  That was installed after cleaning and rinsing the cap, faucet, tubing and dip tube.Installed on a growlerA look at the front of the CO2 pressurized growler dispenserA close up of the regulator dial.  The gauge on this regulator reads 30 PSI.  Under no circumstances should this be set at 30 PSI.  I keep it under 10 PSI.  For serving I’ve found that just 1 or 2 PSI is sufficient.  It’s important that you read and follow all manufacturer’s instructions for this unit.  In the background: Gridmann Commercial Stainless SinkA top down look at the adjustment knobTop down look at the entire unitA side view look at the dispense cap.  My cap says “Max Pressure 15 PSI”.   I keep it under 10 PSI.  For serving I’ve found that just 1 or 2 PSI is sufficient.  It’s important that you read and follow all manufacturer’s instructions for this unit.A look at the PRV valve
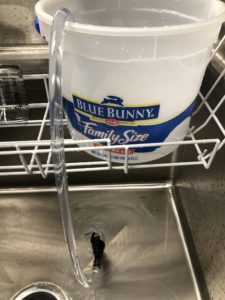
The picnic tap hangs nicely on the growler handleI found this easy to clean.  After removing the regulator, I rinsed the entire assembly, making sure there was some water left in the faucet tubing to help start a siphon.  Then I placed the unit in a tub of PBW and opened the faucet (below the unit and tub of PBW).  That starts a nice flow of PBW that you can let run out.  Of course, I did all of this in my Gridmann Commercial Stainless Sink.  I consider a quality utility sink an essential piece of homebrew gear.
Compatibility

Beyond standard growlers this will work with other compatible growlers that use standard 38mm caps.  Examples: The Prowler PET Growler and 128oz Stainless Steel Insulated Growler by Spotted Dog Company.  It will also work with some gallon size jugs as long as they are pressure capable and use standard threads.  For the larger gallon containers, you may need to swap out the dip tube tubing for a longer length.

Conclusions

The beauty of this setup is that it works on standard glass growlers.  Many locales or breweries only fill their branded or specially marked growlers.

This does have some safety implications, it’s important that your growler is in good condition and capable of holding pressure.  That’s always true whether you’re using this or not.  Growlers hold pressurized beer and should be capable of doing so at proper pressures.  Make sure to read and follow the directions that come from the manufacturer and set this to a safe PSI for your particular growler.  The good news is, not much pressure is needed to serve beer.  As I’ve already mentioned… you don’t need a lot of pressure to serve beer with this, just a 1 or 2 PSI.

This allows me to preserve beer, commercial or homebrew, using an easy to find standard growler so that I can drink it at my own pace.  This is well built and converts a compatible growler into a featured packed mini keg that helps to preserve beer so you can drink it at your desired pace.


From the product description, check product page for current description, price and availability:

  • PRESSURIZED growler dispensing has never been easier with the new Pressurized Growler Dispenser Tap. Fill up your favorite standard glass growler, attach the tap cap and regulator, use a single 12g CO2 cartridge and you’re ready to dispense!
  • BREWERY FRESH beer every time you go for another pint. The CO2 mini regulator lets you dispense your favorite craft beer at it’s proper serving pressure like it is straight from the tap!
  • PRESSURE RELIEF VALVE allows for easy oxygen purging to keep your beer fresh for weeks. Don’t settle for flat, tasteless growler beer ever again!
  • UNIVERSAL fit with all standard 64oz and 128oz glass growlers with 38mm threaded caps. Save money over expensive pressurized growler systems by using your existing growler with the Growler Dispenser Tap!
  • Don’t forget the cartridges! Cartridges are sold separately. We recommend 12g or 16g threaded food grade CO2 cartridges. Search Amazon for B07GNVKTS9 to find ours. A 12g cartridge will easily dispense 64oz of beer.

Get the Gear

Pressurized CO2 Growler Dispenser Tap for Glass Beer Growlers


The Weekend Brewer 6-Pack 12g 3/8″ Threaded Disposable CO2 Cartridges (6, 12g)


Related: Hands On: the Growler Saver Pressurized Growler Cap – note that GrowlerSaver is now defunct | Tips and Gear for Growler Filling

More Photos
More Growler Reviews!

Convert Standard Growlers to Swing Top!

Growler Tips!


Growler Tips & Resources:


Also: Kegerator Tips & Gear | Keg Repair Part #s | Recent Keg Finds

Our Top Draft Resources!

Check our our Top Draft Related Resources
standarddraft

pinned

This post may contain affiliate links. We may make a commission when you use our links. This will never cost you extra. Thank you for supporting Homebrew Finds!

greatdeals

Make sure the components you use are compatible and rated for your intended application.  Contact manufacturer with questions about suitability or a specific application.  Always read and follow manufacturer directions. review:co2growler tag:tpr

Special thanks to Spotted Dog Company for providing the unit used for evaluation

Hands On Review: Mini CO2 Regulator from MoreBeer – Serve Your Beer On The Go

A Hands on review of this Mini CO2 Regulator via MoreBeer

MoreBeer bills this as an affordable, easy to transport CO2 regulator that works with both ball lock and pin lock disconnects.

About, from MoreBeer: “Be the hit of the next party, tail gater, softball game, etc when you show up with a keg of your homebrew!  This compact, affordable CO2 regulator allows you to leave your heavy, bulky CO2 system at home.  Use this small, portable, adjustable regulator along with a threaded 16g CO2 cartridge (not included) to pour kegged beer anywhere! Depending on your style of keg you will either need a ball-lock or pin-lock quick disconnect.”

Why Use a Mini CO2 Regulator?

Portable Serving: As an on-the-go regulator.

Backup – I’m out of CO2 and I want to pour a beer! Use as a backup if your main CO2 tank runs out.  Swap out the CO2 line for this regulator and you’ve got a temporary solution to keep you up and going until you can get more CO2.

Serve Beers at Alternate Carbonation Levels: This regulator goes up to 30 PSI.  That’s enough to serve higher carbonation beers like Hefeweizens and Belgians.  If you don’t have a dual or triple pressure setup, you could use this regulator to serve beers at higher pressures.  You could carbonate using your existing regulator (and full size tank) or naturally carbonate with priming sugar.  After the beer is completely carbonated, use this to serve at the higher pressure.

Continue reading

Hands on Review: Brewer’s Edge Micro CO2 Regulators – Serve Your Beer On The Go

Brewer’s Edge Micro Regulator ReviewThis review is by Homebrew Finds Contributor Brad Probert.  Brad is an engineer, expert homebrewer and experienced reviewer.  Grab a link to Brad’s website at the end of this review.

Brewer’s Edge Micro Regulator

A lot of people migrate from bottling to kegging over time. The common reason cited by most of us is the extra hassle involved with the bottling process and cleaning/sanitizing bottles. But there are a few additional reasons I look back on bottling in the past tense. For example, when you have “1” keg of something, it sounds lonely and feels like it needs a companion. This logic then leads you to grow to having 2 or 3 different beers hanging around at one time. This sounds very practical when you say “3 beers”, but if you open up your beer fridge and have 100+ bottles of beer you look like you have a problem. Another one I learned was that although having to dump out a batch of lackluster beer is sad in any occasion, it’s much more sad to open 20+ bottles and pour them down the drain rather than pop the top on one keg.


Check Current Pricing, Specs & Availability, Review Continues Below:


Even though kegging has its advantages, one notable downside is it makes it a lot more difficult to share your homebrew. There’s some good gear out there like pressurized growlers, bottle fillers, and equipment to mobilize your keg. But if you’ve ever brought a keg with you to a party, you know CO2 is a challenge. Disassembling your kegerator to lug a 5 # CO2 tank and its hoses around isn’t practical. So there are a number of options out there that make use of small 16 gram (and some up to 74 gram) CO2 cartridges.

There are simple ones that just have a trigger and you shoot a small burst of CO2 into your keg from time to time. These are OK, but you find yourself babysitting the keg all night because they’re not intuitive to the rest of the party-goers and you typically have people telling you that you’re out of beer when it just needs a trigger shot. So the better bet are the ones with a built-in pressure regulator where you can set a serving pressure and leave it (until you really run out of CO2).

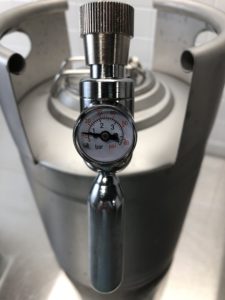
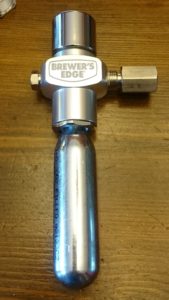
Brewer’s Edge has a micro regulator that comes with an adjustable pressure knob, and a female fitting to allow you to screw in a standard gas quick-connect. It accommodates the typical 16 gram CO2 cartridge but also allows you to change out your adaptor and attach the big daddy 74 gram CO2 cartridge. It has a dial that allows you to set and leave a pressure from 0 – 30 psi, and let the regulator do its job of bleeding in more CO2 as needed as beer is drank out of the keg while you go worry about something else.

Continue reading

Checking for Draft System CO2 Leaks – Using The Pressure Gauge Method

check for co2 leaks

For the most part, checking for keg liquid and CO2 leaks is pretty straightforward.  Is beer leaking?  Then you’ve got a liquid leak.  Is there six inches of beer in your kegerator?  That one’s really easy to spot.  If beer is shooting out like a geyser, you’ve got a… fast leak. 🙂

For kegerator CO2 leaks, it’s a generally a little more work, but still pretty easy… spray everything with Star San solution (diluted of course) and look for bubbles.

Related: Step by Step: Finding and Fixing Keg CO2 Leaks

A Problem Spot…

Continue reading

Hands On Review: MoreBeer’s Expandable CO2 Manifold System

morebeer co2 manifold review

Updated: 5/17/2024

Hands on Review MoreBeer CO2 Manifold System

MoreBeer’s gas CO2 manifold system comes in a variety of sizes including 2, 3, 4 and 6 way variants.  An add-on is also available that allows you to add more runs to the manifold as you have need.

I have long extolled the virtues of this system.  This is one of a few things in homebrewing that can actually grow with you.  Example – I could not add 4 gallons to my 6 gallon extract kettle.  I had to replace it.  This system actually grows with you.  Here is a hands on look.

Continue reading

Making a Utility CO2 Line Using Luer Lock Disconnects

Part of Our Homebrew Tips and Tricks Series.  Check out the complete list – Homebrewing Tips, Tricks & Shortcuts! This is a Top Post! See: All Top Posts


What are Luer Lock Disconnects?

Luer Locks are a generally inexpensive and effective disconnect system.  I think these are typically used in the healthcare industry, Luer Locks provide a solid, pressure capable connection with a quick twist.

Valved/Quick Disconnects vs Disconnects

Luer Lock connectors are not what I would call “quick disconnects” meaning that they are not valved to allow easy disengagement while pressure is turned on.  You need to turn off CO2 pressure to disengage these.

Tip: If you’re using these for kegs, disconnect the ball lock gas QD before you disconnect your Luer Lock.  This will prevent the keg from emptying itself of CO2.

A Hybrid Approach

Of course you could use all valved QDS or all Luer Locks in your kegerator setup.  I use a hybrid approach.

Valved QDs for most of my keg lines and Luer Locks to operate a “utility” CO2 line.  One of my CO2 lines has a female Luer Lock on it.  I have a selection of attachments that consist of: The attachment, 5 inches or so of CO2 line and a male Luer Lock.

With this setup I can easily swap out more specialized attachments that I don’t typically need to be hooked up all the time.  Since Luer Locks are generally cheap, this setup saves a good bit of money vs and entirely valved QD approach.


Continue reading