Category Archives: Kettle Accessories

CO-Z 5 Piece Titanium Step Drill Bit Set and Case + Center Punch – [Add a Weldless Bulkhead to Your Kettle]

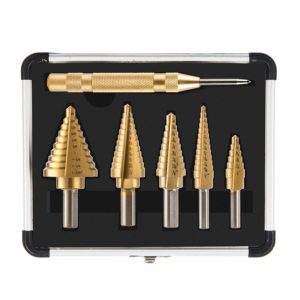
CO-Z HSS 5PCS Titanium Step Drill Bit Set with Automatic Center Punch, 50 Sizes in 5 High Speed Steel Drill Bits Set for Sheet Metal with Aluminum Case, Multiple Hole Stepped Up Bits for DIY Lovers

CO-Z HSS 5PCS Titanium Step Drill Bit Set with Automatic Center Punch, 50 Sizes in 5 High Speed Steel Drill Bits Set for Sheet Metal with Aluminum Case, Multiple Hole Stepped Up Bits for DIY Lovers

More Info

From the product description, check product page for current description, price and availability:

  • HSS STEEL CONSTRUCTION: High-speed steel construction for longer cutting edge life even at extreme temperatures
  • TITANIUM COATING: Coated by titanium, this step drill set performs well in heat, corrosion and rust resistance.
  • AUTOMATIC CENTER PUNCH: Delivers an automatic, high-impact, spring-loaded strike when pressed against surface, adjustable cap regulates striking force
  • 50 SIZE IN 5: The bits set includes five standard step drill bits that can replace 50 individual drill bits.
  • A MUST-HAVE FOR HANDYMAN OR PROFESSIONALS: Perfect for home repairs and light jobs such as drilling holes in plastic, aluminum, copper and many other types of sheet metal.


Possible Uses: Drill a hole in your kettle based brew kettle, mlt or hlt so that you can add a weldless bulkhead, ball valve or thermometer.

CO-Z HSS 5PCS Titanium Step Drill Bit Set with Automatic Center Punch, 50 Sizes in 5 High Speed Steel Drill Bits Set for Sheet Metal with Aluminum Case, Multiple Hole Stepped Up Bits for DIY Lovers


This post contains affiliate links. We may make a commission when you use our Amazon links. This will never cost you extra. Thank you for supporting Homebrew Finds!

pinned

amazon


Make sure the components you use are compatible and rated for your intended application.  Contact manufacturer with questions about suitability or a specific application.  Always read and follow manufacturer directions.

12″ Stainless Steel Kettle Screen – $5.28 with three stacking deals

KETTLE SCREENS

Proflow Dynamics has an extensive selection of homebrew gear, fittings and disconnects anchored by their lineup of Stainless Steel Camlock QDs.

More About ProFlow Dynamics


Deal #1> This is on sale for $6.91.

Deal #2> As of this posting, promo code BREW15% takes an additional 15% off this kettle screen.

Deal #3> Using the link below takes another 10% off!  These three stacking deals make this just $5.28Price, promotions and availability can change quickly.  Please note that product prices and availability are subject to change. Prices and availability were accurate at the time this post was published; however, they may differ from those you see when you visit the product page.  Check the product page for current price, description and availability.

KS-12 Kettle Screen, 12″

pinned

This post may contain affiliate links. We may make a commission when you use our links. This will never cost you extra. Thank you for supporting Homebrew Finds!

greatdeals

prod:pfd12screen

Stainless Steel Cam Lock QDs at Proflow Dynamics – 15%+10% Off w/Stacking Deals

homebrew cam lock

Proflow Dynamics has an extensive selection of homebrew gear, fittings and disconnects anchored by their lineup of Stainless Steel Camlock QDs.

More About ProFlow Dynamics


Camlock QDs at PFD!  I’ve used ProFlow Dynamics Quick Disconnects on my kettles, mash tun, pumps and tubing for a longtime.  They have worked great for me.  I put male connectors kettles, mash tuns and pumps and use female connectors for tubing.  Standardizing on this (or the opposite) means you can use tubing as jumpers and always have the availability to connect your gear.

These are made from Stainless Steel and are available in lots of configurations.  Those are classified by Type and Size.  Type may mean something in “commercial cam lock fitting circles”, but I was initially confused by this.  Types are akin to model numbers.  For example, Type A is Female NPT to Male Cam and Groove.

  • Generally Great Prices: ProFlow already has generally great prices.  Some of the best everyday prices for fittings, QDs, ball locks & more
  • 15% Off Coupon: BREW15% takes an additional 15% off their lineup of homebrewing gear.
  • Another 10% Off: Using any link in this post will save you another 10%!

Camlock QDs at PFD | ProFlow’s Homebrew Lineup – remember coupon code BREW15% + any link in this post for ANOTHER 10% off


pinned

This post may contain affiliate links. We may make a commission when you use our links. This will never cost you extra. Thank you for supporting Homebrew Finds!

greatdeals

Price, promotions and availability can change quickly. Check the product page for current price, description and availability. pst:pfdcam

15% + 10% Off ProFlow Dynamics Homebrew Gear – Disconnects, Fittings, Pumps, False Bottoms, Kettle Screens, Hop Filters, Pickups & More


proflow dynamics homebrew sale

Proflow Dynamics has an extensive selection of homebrew gear, fittings and disconnects anchored by their lineup of Stainless Steel Camlock QDs.

More About ProFlow Dynamics


Stacking Deals!

  • Generally Great Prices: ProFlow already has generally great prices.  Some of the best everyday prices for fittings, QDs, ball locks & more
  • 15% Off Coupon: BREW15% takes an additional 15% off their lineup of homebrewing gear.
  • Another 10% Off: Using any link in this post will save you another 10%!

ProFlow’s Homebrew Lineup

Price, promotions and availability can change quickly.  Please note that product prices and availability are subject to change. Prices and availability were accurate at the time this post was published; however, they may differ from those you see when you visit the product page.  Check the product page for current price, description and availability

pinned

This post may contain affiliate links. We may make a commission when you use our links. This will never cost you extra. Thank you for supporting Homebrew Finds!

greatdeals

pst:pfdsale

The SpinCycle Whirlpool Returns from Brew Hardware!

spincycle whirlpool return

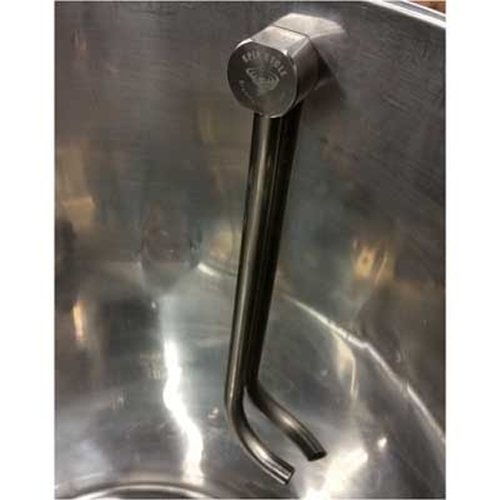
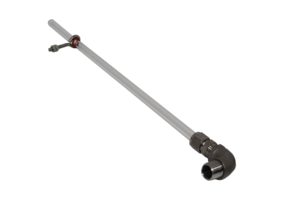
Recirculating wort back into the kettle to whirlpool the wort makes for much faster cooling and will also make a concentrated pile of trub and hop particles in the center of the kettle bottom. This whirlpool port assembly installs high up on your kettle wall above the typical wort level and then extends down before curving to the side to force the recirculated liquid towards the sidewall.

The BrewHardware purpose-built unit called the Spin Cycle starts with a weldless bulkhead design with captured O-ring and extended male threads and has the 1/2″ drop tube fully welded in. The result is a compact way to whirlpool without the need to put a ball valve on the port (the port is meant to be installed well above the max liquid level). It includes the base unit with the welded drop tube, the captured high temp silicone oring, a thin SS washer and a 1/2″ NPS locknut to hold it all together.

pinned

This post may contain affiliate links. We may make a commission when you use our links. This will never cost you extra. Thank you for supporting Homebrew Finds!

greatdeals

Price, promotions and availability can change quickly. Check the product page for current price, description and availability. prod:spincycle

MoreBeer! Adjustable Dial Thermometer for your Kettle – $59.99, Save $20 + Free Shipping, Limited Supply + KOTW & Hop Deals are Live

MoreBeer! Adjustable Dial Thermometer - 3 in. Face x 2 in. Probe MT516

MoreBeer! Adjustable Dial Thermometer – 3 in. Face x 2 in. Probe via MoreBeer

More Info

From the product description, check product page for current description, price and availability:

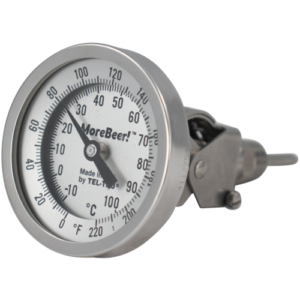
This MoreBeer! adjustable thermometer is great for any brewer that doesn’t have their kettle’s thermometer port at eye-level, which is probably most of us! Instead of bending or crouching to read your kettle thermometer, adjust this thermometer to whatever orientation that best suits your brew system. The face of the thermometer can be angled up to 90°, allowing it to be easily read while you’re standing over your boil kettle, mash tun or hot liquor tank. The dial face can also be rotated a full 360° for even more orientation options. This is a great feature if you want the dial needle to point straight up-and-down when you hit a certain temperature, making it even easier to reference the thermometer at a glance.

Be sure to read the instructions before attempting to adjust the face orientation! Screws on the body of the thermometer need to be loosened (not removed) before adjusting.

  • Temperature Range: 0-220°F
  • Probe Length: 2″
  • Dial Face Size: 3″

Limited Availability Deal of the Day: As of this posting, this is marked down to $59.99 as a MoreBeer Deal of the DayShipping is also free to addresses in the contiguous US with most $59 Orders. Availability: This is available today only, while supplies last. Quantities are limited. Check the MoreBeer’s Deal of the Day to check today’s offering.

Product Description – Here – Use coupon code BEERDEAL to get this discount.

MoreBeer! Adjustable Dial Thermometer – 3 in. Face x 2 in. Probe MT516

pinned

This post contains affiliate links. We may make a commission when you use our links. This will never cost you extra. Thank you for supporting Homebrew Finds!

morebeer

Threaded 24″ Sight Glass… $11.99!

Threaded 24″ Sight Glass by William’s Brewing


From the product description, check product page for current description, price and availability:

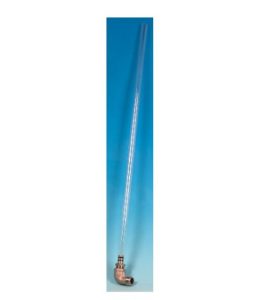
This 24″ polycarbonate sight tube features a 1/2″ male NPT threaded inlet, to attach to any 1/2″ female NPT port on a sparge water tank or brewkettle. For this to work, you also have to have a 1/2″ female NPT port on your pot. Maximum temperature 220° F. This is 24″ long (cut to size), so it can fit everything from a shorter kettle to a converted keggle.

Although this can be used in a brewing pot, it is another thing to clean. We recommend sight tubes for use with water in a sparge water tank, as cleaning is not required.


As of this posting, this is selling for $19.99. Price, promotions and availability can change quickly.  Please note that product prices and availability are subject to change. Prices and availability were accurate at the time this post was published; however, they may differ from those you see when you visit the product page.  Check the product page for current price, description and availability

40% Off Clearance!  William’s has launched a year end clearance sale.  Loads of items are discounted by 40%.  They are suggesting that you order early because selection is limited and they only have a few of some items.  No coupon or promo code is required.  Add items to your cart to see discounted price.  Check William’s for current selection and availability.

Threaded 24″ Sight Glass

Check sale or product page for current availability & pricing


This post may contain affiliate links. We may make a commission when you use our links. This will never cost you extra. Thank you for supporting Homebrew Finds!

pinned

Visit William’s Brewing – Web Only Clearance Sale

williams

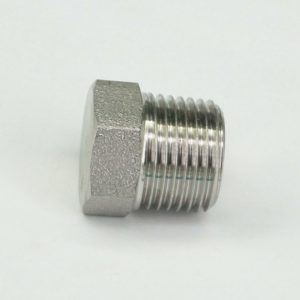
1/2″ 304 Stainless Steel Hex Plug – plug unused kettle ports

Sorekarain 1/2 NPT Male 304 Stainless Steel Hex Head Plug Forged Pipe Fitting 6000 PSI

Sorekarain 1/2 NPT Male 304 Stainless Steel Hex Head Plug Forged Pipe Fitting 6000 PSI


From the product description, check product page for current description, price and availability:

  • Stainless Steel
  • NPT Thread
  • Plumbing Fitting
  • High Pressure

You can use this to plug unused compatible 1/2″ FPT ports in your kettle based boil kettle, mash tun or hlt.

Sorekarain 1/2 NPT Male 304 Stainless Steel Hex Head Plug Forged Pipe Fitting 6000 PSI – affiliate link, note that multiple variations of this product may be available, as such a different version may appear at this link


This post contains affiliate links. We may make a commission when you use our Amazon links. This will never cost you extra. Thank you for supporting Homebrew Finds!

pinned

amazon

Make sure the components you use are compatible and rated for your intended application.  Contact manufacturer with questions about suitability or a specific application.  Always read and follow manufacturer directions.

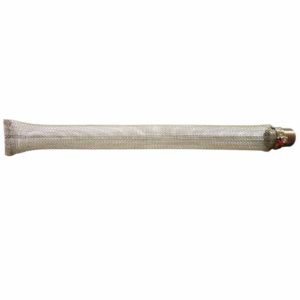
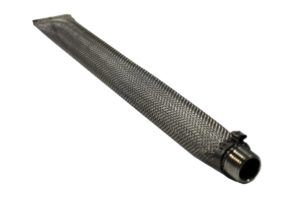
12″ Stainless Steel Bazook Screen for Homebrew Kettle or Mash Tun

Stainless 12'' Ss Bazooka Screen for Homebrew Beer Kettle or Mash Tun 12"tube w/ 1/2" Fitting

Stainless 12” Ss Bazooka Screen for Homebrew Beer Kettle or Mash Tun 12″tube w/ 1/2″ Fitting by Happybrew


From the product description, check product page for current description, price and availability:

  • Completely stainless steel
  • 12″ long
  • Easy to install
  • 1/2″ male NPT thread to fit may brew pots

Install in your compatible boil kettle or mash tun.

Stainless 12” Ss Bazooka Screen for Homebrew Beer Kettle or Mash Tun 12″tube w/ 1/2″ Fitting


This post contains affiliate links. We may make a commission when you use our Amazon links. This will never cost you extra. Thank you for supporting Homebrew Finds!

pinned

amazon

adamztop5

15% + 10% Off ProFlow Dynamics Homebrew Gear – Disconnects, Fittings, Pumps, False Bottoms, Kettle Screens, Hop Filters, Pickups & More

proflow dynamics homebrew sale

Proflow Dynamics has an extensive selection of homebrew gear, fittings and disconnects anchored by their lineup of Stainless Steel Camlock QDs.

More About ProFlow Dynamics


Stacking Deals!

  • Generally Great Prices: ProFlow already has generally great prices.  Some of the best everyday prices for fittings, QDs, ball locks & more
  • 15% Off Coupon: BREW15% takes an additional 15% off their lineup of homebrewing gear.
  • Another 10% Off: Using any link in this post will save you another 10%!

ProFlow’s Homebrew Lineup

Price, promotions and availability can change quickly.  Please note that product prices and availability are subject to change. Prices and availability were accurate at the time this post was published; however, they may differ from those you see when you visit the product page.  Check the product page for current price, description and availability

pinned

This post may contain affiliate links. We may make a commission when you use our links. This will never cost you extra. Thank you for supporting Homebrew Finds!

greatdeals

pst:pfdsale

The Steam Slayer from Brew Hardware – Kettle Steam Condenser Assembly – eliminates need to vent from your brewing room

STEAM SLAYER - KETTLE BOIL STEAM CONDENSER ASSEMBLY

The Steam Slayer via Brew Hardware is designed to eliminate the need to vent steam from your brewing room.

More Info

From the product description, check product page for current description, price and availability:

The Steam Slayer(tm) is a brand new product that eliminates the need to vent steam from your brewing room. More and more people are converting over to electric brewing systems allowing brewing indoors and even in quite confined spaces. The rude awakening occurs when you evaporate a gallon or more water into the air and your walls and ceiling drips with condensation. In some cases it is impossible or unreasonable to install fan-based exhaust systems to vent that steam. Enter the Steam Slayer!

Condensing boil steam is a relatively common practice in large scale industry and some breweries. Homebrewtalk.com user “Brundog” did a lot of experimentation and documentation and many folks built clone systems in turn. When it came time to install one on the shop brewing kettle, we couldn’t leave well enough alone with off the shelf parts.

How It Works:
You will install a 1.5″ TC port in the upper sidewall of your electric powered boil kettle, typically as high as you can get it without interfering with the closure of the kettle’s lid. The unit is equipped with a fine mist sprayer that fits inside the main body and is fed with cold tap water. When you reach a boil in your kettle, you will put the lid on and start the flow of cold water into the unit. Steam will enter the tee and encounter the spray turning the steam back into water. The waste water runs out the bottom of the unit into the included silicone hose which you will position over a catch bucket. Depending on your tap water pressure, and the selected sprayer option, you will typically consume 6-10 gallons of water in a 60 minute boil. This water can be discarded or saved for cleaning your equipment afterwards.

What’s Included:

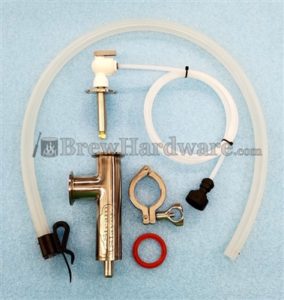
  • Main Body Tee with 1.5″ TC top and side flanges and welded 5/8″ hose barb on the bottom.
  • 1.5″ TC sprayer adapter with your choice of 6 or 9 gallon per hour sprayer tip. The GPH ratings are at 40 PSI. We find the 6GPM works great on 45 PSI on a 7 gallon boil. If you have low pressure, you may need the 9GPM sprayer. If you are doing 10 or 15 gallon batches, you may need the 9 GPH. We are still trying to figure out better guidelines.
  • Right angle water shut off valve with push in connection five feet of 1/4″ poly supply line (5ft is standard, select longer runs in the dropdown selection above.
  • Water supply connection fitting with push in connection: Your choice of 3/4″ Female Garden Hose or In-Line faucet connection valve (select in the drop down above). More about this in the instructions below.
  • 3 feet of 1/2″ ID silicone hose for waste water drain. The tubing must reach from the bottom of the steam slayer body to the TOP of your catch bucket. If you need more tubing, it can be purchased by the foot and we can combine the added length onto the standard 3′ if you direct us to.
  • Hose holder clip to keep drain hose positioned at the inside top of your collection bucket.

* Note that the clamp and gasket to attach the unit to the kettle is not included, nor is the hardware to install the actual TC port in the kettle. See the list of available accessories if you need any of those parts.

Instructions:
First, keep in mind that this is a new process for small scale homebrewing and we’re all learning the best practices. When you buy this unit, consider yourself a part of a beta test. These instructions will evolve.

  1. Clamp the main unit to the existing kettle port and the sprayer TC to the top of the unit. The integrated hose barb should be facing down towards the floor.
  2. Install your water source fitting. If you selected the Garden Hose fitting, attach it to your garden hose bib, a garden hose, a slop sink faucet, or a washing machine supply port. If you selected the inline faucet supply fitting, shut off the cold water valve under your sink, remove the hose feeding your faucet and install the inline fitting. Replace the faucet hose on top and turn the water back on to check for leaks. The inline faucet fitting is shown on the right. Just below that we show where it would install under a sink or toilet.
  3. Connect the 1/4″ Poly line to your source water fitting and the shutoff valve on the top of the Steam Slayer. Making sure the ends are cut cleanly, simply push the tubing into the fittings all the way and install the C-shaped retaining clips.
  4. Install the silicone waste tubing on the unit’s barb and attach the holder clip to the end. We include a 5/8″ OD stainless steel ring that should be inserted into the end of the silicone to expand the tubing large enough to fit the holder clip tightly. The waste tubing should be trimmed so that it only extends into your catch bucket/vessel by 1-2 inches. The open end of this tubing must never be submergedor the steam slayer will not work properly.
  5. Once your boil begins, turn on the cooling water and place your kettle lid on the kettle. Since the condensing action creates a mild vacuum, the lid does not need a gasket. If you notice steam leaking out of the lid, make sure it is not warped creating extra spaces.
  6. Adjust your boil intensity to approximately HALF of what you’re used to using and plan for about half as much boil off. For a typical example, we used to run our 5500 watt element at 65% when the kettle is full of 7 gallons and the lid off. We experienced 1.5 gallons per hour of boil off. With the Steam Slayer installed, we run at 32% and experience .75 gallons of boil off per hour. In other words, to use the Steam Slayer, your electric kettle must be equipped with a power controller.

Frequently Asked Questions:

1. Can I go through the lid?

Yes. In order to through the lid, you will need to install a 1.5″ TC port towards the edge and then clamp on a 1.5″ TC 90 degree elbow. From there the Steam Slayer gets clamped on as noted above. You may need to place a counterweight on top of the lid, opposite the TC port to keep it firmly seated on the kettle.

2. I use the BIAB method and I’m concerned that a side mount TC port will reduce my kettle capacity.

You can put a TC blank cover over the port during the mash and then fit the Steam Slayer after you pull the grain bag.

3. How do I run the hot waste water directly to a plumbing drain.

We don’t know for sure. We do know that you want the water to freely drain out. Even in cases where the output hose bends into a loop where water collects in the hose is enough to stop the vacuum on the kettle. You may get steam to escape via the lid if there is any back pressure on the drain hose. If your sewer pipe is well below your brewing location, you can run a horizontal drain line over to the kettle, install a P-trap and then end in an oversized vertical entrance pipe. Treat this like the catch bucket and run the silicone drain hose to it using the holder clip to hold it to the upper lip of the pipe.

About, from Brew Hardware: “Sometimes we have a grand plan for a given fitting. This time we’re just spit balling to see what sticks. We took the profile of a ball lock keg post and replaced the poppit and spring with just two large bored out holes. The other end is a generous 3/8″ OD hose barb that will work with 3/8′ ID silicone, 5/16″ Racking tubing, or whatever.”


  • Since Brew Hardware introduced this, availability has been an issue.
  • We keep a close eye on the Steam Slayer.  If it’s sold out again – connect with us – and we’ll give you a heads up when it’s back.

STEAM SLAYER – KETTLE BOIL STEAM CONDENSER ASSEMBLY

pinned

This post may contain affiliate links. We may make a commission when you use our links. This will never cost you extra. Thank you for supporting Homebrew Finds!

greatdeals

Make sure the components you use are compatible and rated for your intended application.  Contact manufacturer with questions about suitability or a specific application.  Always read and follow manufacturer directions. prod:bwsslay

304 Stainless Steel Clip on Trub Guard from Brew Hardware – $10

CLIP-ON TRUB GUARD

CLIP-ON TRUB GUARD via Brew Hardware

From the description: “Keep most of that trub out of your drain without a filter device.

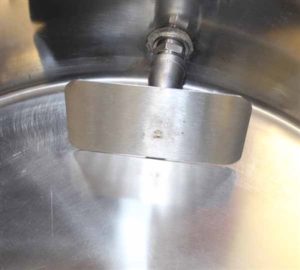
This is a slight reconfiguration of our heat shield assembly that allows clipping to the side of a kettle dip tube to keep your pile of trub away from the exit point. This is especially useful when you whirlpool your boiled wort to make a neat pile in the center of the pot. That pile usually stays put until it becomes exposed to air and then it collapses and falls towards the sidewalls of your pot. This simple clip on guard will stay in place during the whole boil and keep most of the trub out of the pickup at the end of the draining process.

We position the clip for best fit on our truebulkheadelbarb but it will also work with a street elbow threaded into a welded coupling bulkhead that acts as a mini diptube.

The 3″ high x 5″ wide stainless plate should be touching the bottom of the pot for best results. The plate and clip are 304 stainless steel.”

CLIP-ON TRUB GUARD

pinned

This post may contain affiliate links. We may make a commission when you use our links. This will never cost you extra. Thank you for supporting Homebrew Finds!

greatdeals

The Steam Slayer from Brew Hardware – Kettle Steam Condenser Assembly – eliminates need to vent from your brewing room

STEAM SLAYER - KETTLE BOIL STEAM CONDENSER ASSEMBLY

The Steam Slayer via Brew Hardware is designed to eliminate the need to vent steam from your brewing room.

More Info

From the product description, check product page for current description, price and availability:

The Steam Slayer(tm) is a brand new product that eliminates the need to vent steam from your brewing room. More and more people are converting over to electric brewing systems allowing brewing indoors and even in quite confined spaces. The rude awakening occurs when you evaporate a gallon or more water into the air and your walls and ceiling drips with condensation. In some cases it is impossible or unreasonable to install fan-based exhaust systems to vent that steam. Enter the Steam Slayer!

Condensing boil steam is a relatively common practice in large scale industry and some breweries. Homebrewtalk.com user “Brundog” did a lot of experimentation and documentation and many folks built clone systems in turn. When it came time to install one on the shop brewing kettle, we couldn’t leave well enough alone with off the shelf parts.

How It Works:
You will install a 1.5″ TC port in the upper sidewall of your electric powered boil kettle, typically as high as you can get it without interfering with the closure of the kettle’s lid. The unit is equipped with a fine mist sprayer that fits inside the main body and is fed with cold tap water. When you reach a boil in your kettle, you will put the lid on and start the flow of cold water into the unit. Steam will enter the tee and encounter the spray turning the steam back into water. The waste water runs out the bottom of the unit into the included silicone hose which you will position over a catch bucket. Depending on your tap water pressure, and the selected sprayer option, you will typically consume 6-10 gallons of water in a 60 minute boil. This water can be discarded or saved for cleaning your equipment afterwards.

What’s Included:

  • Main Body Tee with 1.5″ TC top and side flanges and welded 5/8″ hose barb on the bottom.
  • 1.5″ TC sprayer adapter with your choice of 6 or 9 gallon per hour sprayer tip. The GPH ratings are at 40 PSI. We find the 6GPM works great on 45 PSI on a 7 gallon boil. If you have low pressure, you may need the 9GPM sprayer. If you are doing 10 or 15 gallon batches, you may need the 9 GPH. We are still trying to figure out better guidelines.
  • Right angle water shut off valve with push in connection five feet of 1/4″ poly supply line (5ft is standard, select longer runs in the dropdown selection above.
  • Water supply connection fitting with push in connection: Your choice of 3/4″ Female Garden Hose or In-Line faucet connection valve (select in the drop down above). More about this in the instructions below.
  • 3 feet of 1/2″ ID silicone hose for waste water drain. The tubing must reach from the bottom of the steam slayer body to the TOP of your catch bucket. If you need more tubing, it can be purchased by the foot and we can combine the added length onto the standard 3′ if you direct us to.
  • Hose holder clip to keep drain hose positioned at the inside top of your collection bucket.

* Note that the clamp and gasket to attach the unit to the kettle is not included, nor is the hardware to install the actual TC port in the kettle. See the list of available accessories if you need any of those parts.

Instructions:
First, keep in mind that this is a new process for small scale homebrewing and we’re all learning the best practices. When you buy this unit, consider yourself a part of a beta test. These instructions will evolve.

  1. Clamp the main unit to the existing kettle port and the sprayer TC to the top of the unit. The integrated hose barb should be facing down towards the floor.
  2. Install your water source fitting. If you selected the Garden Hose fitting, attach it to your garden hose bib, a garden hose, a slop sink faucet, or a washing machine supply port. If you selected the inline faucet supply fitting, shut off the cold water valve under your sink, remove the hose feeding your faucet and install the inline fitting. Replace the faucet hose on top and turn the water back on to check for leaks. The inline faucet fitting is shown on the right. Just below that we show where it would install under a sink or toilet.
  3. Connect the 1/4″ Poly line to your source water fitting and the shutoff valve on the top of the Steam Slayer. Making sure the ends are cut cleanly, simply push the tubing into the fittings all the way and install the C-shaped retaining clips.
  4. Install the silicone waste tubing on the unit’s barb and attach the holder clip to the end. We include a 5/8″ OD stainless steel ring that should be inserted into the end of the silicone to expand the tubing large enough to fit the holder clip tightly. The waste tubing should be trimmed so that it only extends into your catch bucket/vessel by 1-2 inches. The open end of this tubing must never be submergedor the steam slayer will not work properly.
  5. Once your boil begins, turn on the cooling water and place your kettle lid on the kettle. Since the condensing action creates a mild vacuum, the lid does not need a gasket. If you notice steam leaking out of the lid, make sure it is not warped creating extra spaces.
  6. Adjust your boil intensity to approximately HALF of what you’re used to using and plan for about half as much boil off. For a typical example, we used to run our 5500 watt element at 65% when the kettle is full of 7 gallons and the lid off. We experienced 1.5 gallons per hour of boil off. With the Steam Slayer installed, we run at 32% and experience .75 gallons of boil off per hour. In other words, to use the Steam Slayer, your electric kettle must be equipped with a power controller.

Frequently Asked Questions:

1. Can I go through the lid?

Yes. In order to through the lid, you will need to install a 1.5″ TC port towards the edge and then clamp on a 1.5″ TC 90 degree elbow. From there the Steam Slayer gets clamped on as noted above. You may need to place a counterweight on top of the lid, opposite the TC port to keep it firmly seated on the kettle.

2. I use the BIAB method and I’m concerned that a side mount TC port will reduce my kettle capacity.

You can put a TC blank cover over the port during the mash and then fit the Steam Slayer after you pull the grain bag.

3. How do I run the hot waste water directly to a plumbing drain.

We don’t know for sure. We do know that you want the water to freely drain out. Even in cases where the output hose bends into a loop where water collects in the hose is enough to stop the vacuum on the kettle. You may get steam to escape via the lid if there is any back pressure on the drain hose. If your sewer pipe is well below your brewing location, you can run a horizontal drain line over to the kettle, install a P-trap and then end in an oversized vertical entrance pipe. Treat this like the catch bucket and run the silicone drain hose to it using the holder clip to hold it to the upper lip of the pipe.

About, from Brew Hardware: “Sometimes we have a grand plan for a given fitting. This time we’re just spit balling to see what sticks. We took the profile of a ball lock keg post and replaced the poppit and spring with just two large bored out holes. The other end is a generous 3/8″ OD hose barb that will work with 3/8′ ID silicone, 5/16″ Racking tubing, or whatever.”


  • Since Brew Hardware introduced this, availability has been an issue.
  • We keep a close eye on the Steam Slayer.  If it’s sold out again – connect with us – and we’ll give you a heads up when it’s back.

STEAM SLAYER – KETTLE BOIL STEAM CONDENSER ASSEMBLY

pinned

This post may contain affiliate links. We may make a commission when you use our links. This will never cost you extra. Thank you for supporting Homebrew Finds!

greatdeals

Make sure the components you use are compatible and rated for your intended application.  Contact manufacturer with questions about suitability or a specific application.  Always read and follow manufacturer directions. prod:bwsslay
15% + 10% Off ProFlow Dynamics Homebrew Gear – Disconnects, Fittings, Pumps, False Bottoms, Kettle Screens, Hop Filters, Pickups & More

proflow dynamics homebrew sale

Proflow Dynamics has an extensive selection of homebrew gear, fittings and disconnects anchored by their lineup of Stainless Steel Camlock QDs.

More About ProFlow Dynamics


Stacking Deals!

  • Generally Great Prices: ProFlow already has generally great prices.  Some of the best everyday prices for fittings, QDs, ball locks & more
  • 15% Off Coupon: BREW15% takes an additional 15% off their lineup of homebrewing gear.
  • Another 10% Off: Using any link in this post will save you another 10%!

ProFlow’s Homebrew Lineup

Price, promotions and availability can change quickly.  Please note that product prices and availability are subject to change. Prices and availability were accurate at the time this post was published; however, they may differ from those you see when you visit the product page.  Check the product page for current price, description and availability

pinned

This post may contain affiliate links. We may make a commission when you use our links. This will never cost you extra. Thank you for supporting Homebrew Finds!

greatdeals

pst:pfdsale

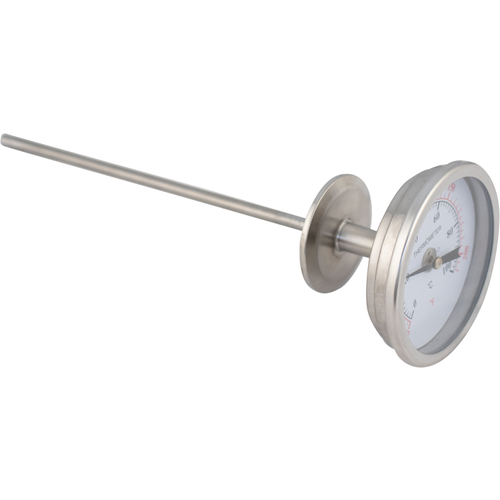
Stainless Steel Tri-Clamp Thermometer! – $49.99, Save $10 + Free Ship Eligible, Limited Availability

1.5 in. T.C. Thermometer - 3.25 in. Face x 7.5 in. Probe H594Stainless Steel Tri-Clamp Thermometer from MoreBeer

More Info

From the product description, check product page for current description, price and availability:

Stainless steel dial thermometer with 1.5″ tri-clamp fitting. Thermometer face measures 3.25″ and measures from 32-220°F (0-100°C). Probe measures 7.5″ in length from the tip to the T.C. fitting.


Limited Availability Deal of the Day: As of this posting, this is marked down to $49.99 as a MoreBeer Deal of the DayShipping is also free to addresses in the contiguous US with most $59 Orders. Availability: This is available today only, while supplies last. Quantities are limited. Check the MoreBeer’s Deal of the Day to check today’s offering.

Product Description – Here – Use coupon code BEERDEAL to get this discount.

1.5 in. T.C. Thermometer – 3.25 in. Face x 7.5 in. Probe H594

More Tri-Clover/Tri-Clamp!  Tri-Clamp Fittings at Proflow Dynamics


pinned

This post contains affiliate links. We may make a commission when you use our links. This will never cost you extra. Thank you for supporting Homebrew Finds!

morebeer

Weldless Sight Glasses – from $10.14

weldless sight glass homebrew

Proflow Dynamics has an extensive selection of homebrew gear, fittings and disconnects anchored by their lineup of Stainless Steel Camlock QDs.

More About ProFlow Dynamics


15% Off Sight Glasses> PFD already has generally great prices.  As of this posting, promo code BREW15% takes an additional 15% off sight glasses.

Stacks With> Using the link below takes another 10% off!  These two stacking deals mean that weldless sight glasses start out at just $10.14 (11″ Economy). Price, promotions and availability can change quickly.  Please note that product prices and availability are subject to change. Prices and availability were accurate at the time this post was published; however, they may differ from those you see when you visit the product page.  Check the product page for current price, description and availability

Weldless Sight Glasses – use coupon code BREW15% | ProFlow’s Homebrew Lineup

pinned

This post may contain affiliate links. We may make a commission when you use our links. This will never cost you extra. Thank you for supporting Homebrew Finds!

greatdeals

pst:pfdsight

15% + 10% Off ProFlow Dynamics Homebrew Gear – Disconnects, Fittings, Pumps, False Bottoms, Kettle Screens, Hop Filters, Pickups & More

proflow dynamics homebrew sale

Proflow Dynamics has an extensive selection of homebrew gear, fittings and disconnects anchored by their lineup of Stainless Steel Camlock QDs.

More About ProFlow Dynamics


Stacking Deals!

  • Generally Great Prices: ProFlow already has generally great prices.  Some of the best everyday prices for fittings, QDs, ball locks & more
  • 15% Off Coupon: BREW15% takes an additional 15% off their lineup of homebrewing gear.
  • Another 10% Off: Using any link in this post will save you another 10%!

ProFlow’s Homebrew Lineup

Price, promotions and availability can change quickly.  Please note that product prices and availability are subject to change. Prices and availability were accurate at the time this post was published; however, they may differ from those you see when you visit the product page.  Check the product page for current price, description and availability

pinned

This post may contain affiliate links. We may make a commission when you use our links. This will never cost you extra. Thank you for supporting Homebrew Finds!

greatdeals

pst:pfdsale

Weldless Sight Glasses – from $10.14

weldless sight glass homebrew

Proflow Dynamics has an extensive selection of homebrew gear, fittings and disconnects anchored by their lineup of Stainless Steel Camlock QDs.

More About ProFlow Dynamics


15% Off Sight Glasses> PFD already has generally great prices.  As of this posting, promo code BREW15% takes an additional 15% off sight glasses.

Stacks With> Using the link below takes another 10% off!  These two stacking deals mean that weldless sight glasses start out at just $10.14 (11″ Economy). Price, promotions and availability can change quickly.  Please note that product prices and availability are subject to change. Prices and availability were accurate at the time this post was published; however, they may differ from those you see when you visit the product page.  Check the product page for current price, description and availability

Weldless Sight Glasses – use coupon code BREW15% | ProFlow’s Homebrew Lineup

pinned

This post may contain affiliate links. We may make a commission when you use our links. This will never cost you extra. Thank you for supporting Homebrew Finds!

greatdeals

pst:pfdsight

Blichmann Hop Blocker Screen – $35.99, Save 40%!

blichmann hop block

Blichmann Hop Blocker via William’s Brewing


From the product description, check product page for current description, price and availability:

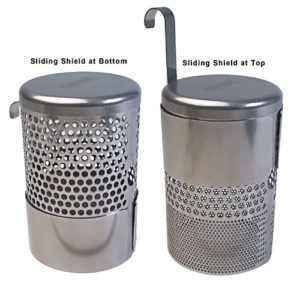
This Blichmann Boilermaker accessory fits inside any size Boilermaker (it has a hole in the back to accomodate the 1/2″ Boilermaker dip tube, seen in the above picture in the middle right side of each HopBlocker), and will captures up to 95% of brew kettle particulates. Based on preferential flow, the HopBlocker directs clear wort to the kettle drain valve and keeps particulates on the bottom of the pot where they belong. 5.5″ tall and 3.75″ wide, the HopBlocker is perforated with holes, the finer holes at the bottom, and larger at the top.

A sliding stainless blocking screen (shown in the starting bottom position at left) initially blocks wort from pouring through the finer holes, leaving the fine break material undisturbed at the bottom of the pot, while draining the majority of the wort through the coarse filter first. When the kettle is almost empty, you lift up the sliding screen with the handle (shown at right above) to expose the finer holes to finish the transfer of the wort from the kettle to your fermenter. The HopBlocker can filter up to 1 pound of pellet hops from a boil in larger kettles. The HopBlocker is designed to filter pellet hops only, for whole hops, you will need to have them secured in a straining bag during the boil.

Two HopBlockers are shown for illustration only, only one is included in the box.


As of this posting, William’s Brewing has a fall clearance sale going on that discounts a large selection of items by 40%.  Note: discounted prices are reflected in your cart.  No coupon or promo code is required.  Check William’s for current selection and availability.  See: Fall Clearance at William’s Brewing – that sale makes this just $35.99, that’s a savings of $20.

Blichmann Hop Blocker

Check sale or product page for current availability & pricing

Also: Hands on Review Blichmann BoilerMaker G2 Kettles


This post may contain affiliate links. We may make a commission when you use our links. This will never cost you extra. Thank you for supporting Homebrew Finds!

pinned

Visit William’s Brewing – Web Only Clearance Sale

williams