Category Archives: New Releases

Announcing: Blichmann Hellfire Burner XL – holds up to 1 BBL!

BLICHMANN HELLFIRE BURNER XL FOR 1 BBL SIZE KETTLES

BLICHMANN HELLFIRE BURNER XL FOR 1 BBL SIZE KETTLES via Great Fermentations


From the product description, check product page for current description, price and availability:

Made for extra large kettles, such as the Blichmann 55 gallon (1 BBL!) This model of the HellFire Burner comes with all the great features of the regular HellFire burner, but with larger legs that offer extra stability and width for extra large kettles. This model can accommodate kettles up to 25 inches (to the ends of the retaining bars) and is still super powerful! With a maximum output of 140,000 BTUs on propane or 80,000 on natural gas (with optional natural gas conversion kit, sold separately,) this burner will have you brewing those extra large batches like a pro! Stop messing with competitor’s burners that just can’t perform, and go with a Blichmann HellFire Burner XL today!

Stop messing with competitor’s burners that just can’t perform, and go with a Blichmann HellFire Burner today!


BLICHMANN HELLFIRE BURNER XL FOR 1 BBL SIZE KETTLES

pinned

This post may contain affiliate links. We may make a commission when you use our links. This will never cost you extra. Thank you for supporting Homebrew Finds!

greatdeals

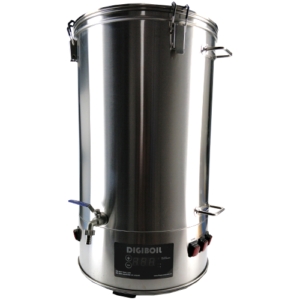
Announcing: DigiBoil Electric Kettles – 9.25 to 17.1 Gallons

We have seen the recently announced Digiboil elsewhere.  The news here is that MoreBeer has announced the availability three models of Digiboil both 35L/9.25 Gallon models and a 65L/17.1 Gallon version.  The 35L is available in both 110v and 220v variations, while the 65L is available in 220 v.  Prices start at just $159.99 and shipping is free to many US addresses.  Check MoreBeer for current price, specs and availability.

Digiboil Electric Kettles at MoreBeer1

pinned

This post contains affiliate links. We may make a commission when you use our links. This will never cost you extra. Thank you for supporting Homebrew Finds!
morebeer

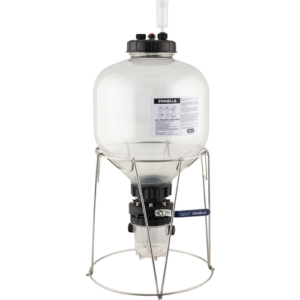
Announcing: FermZilla Conical Fermenters! Fermentasaurus Gen 2

FermZilla Conical Fermenter - 7.1 gal. / 27 L FE110

MoreBeer has announced the availability of Fermentasaurus Gen 2, dubbed FermZilla Conicals.  They are available in both 7.1 gallon/27 Liter and 13.2 Gallon/50 Liter Sizes

They boast a slew of new improvements including larger openings, larger dump valves, higher temp ratings, less headspace and more.

As of this posting, these have been listed but are not for sale yet.  Keep and eye on hombrew finds [8 Ways to Connect with HBF] and we’ll let you know when they’re available.

Check out our review of Gen 1… Hands on Review: Fermentasaurus Conical Fermenter

More Fermentation Related!


pinned

This post contains affiliate links. We may make a commission when you use our links. This will never cost you extra. Thank you for supporting Homebrew Finds!

morebeer

Announcing: WildBrew Sour Pitch!

Lallemand WildBrew Sour Pitch Lactic Acid Bacteria for Brewing 10g - Beer Yeast

Lallemand WildBrew Sour Pitch Lactic Acid Bacteria for Brewing 10g – Beer Yeast


From the product description, check product page for current description, price and availability:

WildBrew™ Sour Pitch is a high-performance, high-purity lactic acid bacteria specifically selected for its ability to produce a wide range of sour beer styles. WildBrew™ Sour Pitch produces a clean and balanced citrus flavor profile typical of both traditional and modern sour beer styles. When inoculated at optimal temperature and the right conditions, it is a powerful, safe and easy way to handle bacteria for various beer souring techniques, such as a typical kettle souring process. Besides providing an outstanding performance, WildBrew™ Sour Pitch is capable of delivering consistent results for brewers. Styles brewed with this bacteria include, but are not limited to, Berliner Weisse, Gose, lambic, American Wild, and Sour IPA.


As if this posting, this is eBay offering is selling for $19.99.  The price drops as you purchase more. Shipping is also free to many US addresses.  Prices, shipping and availability can change quickly. Please note that product prices and availability are subject to change. Prices and availability were accurate at the time this post was published; however, they may differ from those you see when you visit the product page. Check the product page for current price, description and availability.

Lallemand WildBrew Sour Pitch Lactic Acid Bacteria for Brewing 10g – Beer Yeast

More Fermentation Related!


pinned

This post may contain affiliate links. We may make a commission when you use our links. This will never cost you extra. Thank you for supporting Homebrew Finds!
greatdeals

adyeast

prod:lbdbsp

Announcing: Imperial Yeast Sour Batch Kidz

F08 Sour Batch Kidz – Imperial Organic Yeast via MoreBeer


From the product description, check product page for current description, price and availability:

F08 Sour Batch Kidz is a combination of two Brettanomyces strains, Lactobacillus, and a low attenuating Belgian saison yeast. The blend is ideal for lambics, farmhouse ales, Flanders reds and any other beer you wanna get funky with.

  • Temp: 68-76°F, 20-24°C
  • Flocculation: Low
  • Attenuation: 80%+
  • Cell Count: 200 Billion

F08 Sour Batch Kidz – Imperial Organic Yeast IYF08

Complete Lineup of Imperial Yeast at MoreBeer

More Fermentation Related!


pinned

This post contains affiliate links. We may make a commission when you use our links. This will never cost you extra. Thank you for supporting Homebrew Finds!

morebeer

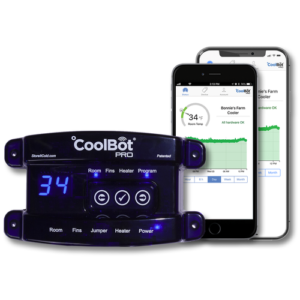
Announcing: CoolBot Pro WiFi Enabled Walk-In Controller

CoolBot Pro Walk-In Cooler Controller (WiFi Enabled) FE636

CoolBot Pro Walk-In Cooler Controller (WiFi Enabled) via MoreBeer


From the product description, check product page for current description, price and availability:

The CoolBot Pro brings you all the great features of the standard CoolBot with added WiFi connectivity, allowing you to monitor and control your cold room from your smartphone through the free mobile app. The CoolBot Pro enables a standard air conditioner to cool a room or space down to 34°F. Easily installs with no tools or electrical knowledge required.

The CoolBot Pro comes paired with the Jumper WiFi relay module, which installs on the outside of your cold room. Once the jumper is connected to your wireless network, you can use the free mobile app to control your CoolBot from virtually anywhere with a WiFi connection. Monitor your cold room remotely, adjust temperatures on the fly, or program the app to send you notifications if something is amiss. Whether you’re on the go during a busy work week or taking some well-earned R&R, CoolBot Pro has your back!

Standard A/C units available from any hardware or appliance store have lots of power, but they are electronically restricted to not go below 60°F. This is because they would freeze up. Commercial refrigeration for walk-in coolers combat freeze with increased surface area on the fins and fans. Instead the CoolBot technology uses multiple sensors, a heating element and programmed micro-controller to control your air conditioner in such a way that the unit can go below 60°F and not freeze up. The CoolBot cannot give you 100% of the BTUs listed on your air conditioner, nor is suitable for large brewery or winery walk-ins. But it is perfect for wine cellars, beer storage, fermentation, and many other applications.

Easy to install within 30 minutes with no tools or electrical knowledge required. While we can’t tell you exactly what size space you can cool because of ambient temperatures and insulation factors, we recommend you google CoolBot. They have sold over 45,000 of these so there are lots of reviews and actual installs out there. We offer free shipping on this unit, ship fast from both coasts, and have great customer service.

This type of system is also very efficient. Most commercial systems are power hogs with large fans that are always running. Residential A/C units are made for efficiency. The CoolBot Pro will also shut down the compressor for a short time when the unit is running at its highest level of inefficiency, as it nears freeze up.

  • Trusted CoolBot technology now with WiFi connectivity and mobile app
  • Allows a standard window air conditioner to cool a room to 34°F
  • Interactive refrigeration for Brewing, Winemaking, Restaurants, Agricultural Purposes & More
  • Mobile app: remote temperature reading and adjustments, receive critical alerts, data storage and reporting
  • Cool Bot Pro and Jumper WiFi relay module included
  • Free mobile app features require WiFi connection
  • Made in the USA
  • Controller Dimensions: 6.5″ x 3.4″ x 1.1″
  • Jumper Dimensions: 4″ x 3.6″ x 1.1″

CoolBot Pro Walk-In Cooler Controller (WiFi Enabled) FE636

pinned

This post contains affiliate links. We may make a commission when you use our links. This will never cost you extra. Thank you for supporting Homebrew Finds!

morebeer

Announcing: Social Kitchen & Brewerys Puttin’ on The Spritz Brut IPA – new to MoreBeer’s Brewmaster Series

puttin on the spritz brut ipa

From MoreBeer:

If you’re blue, and you don’t know where to go to, why don’t you go where dry beer sits? Puttin’ on the Spritz!

There’s a new style on the scene that has everyone tapping their toes, and we’re excited to bring you the beer that started the tune. In our latest addition to the BrewMaster Series lineup we have the original Brut IPA – Puttin’ on the Spritz! This hybrid IPA is the brainchild of Kim Sturdavant of Social Kitchen & Brewery in San Francisco, California. We first met Kim on our journey to brew with and understand the amyglucosidase enzyme (the signature ingredient responsible for a Brut’s dry character). Kim, being the stand-up fella that he is, was kind enough to not only share his knowledge of the AMG enzyme, but also the very recipe that shook up the brew scene and inspired countless iterations of the style.

To purchase your Puttin’ On The Spritz kit, click here!

Curious about Brut IPA’s? Check out our article There and Back Again, A Brut IPA Tale!


pinned

This post contains affiliate links. We may make a commission when you use our links. This will never cost you extra. Thank you for supporting Homebrew Finds!

morebeer

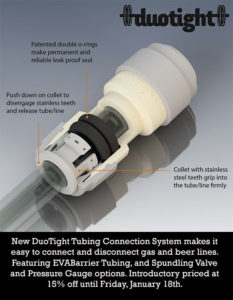
Announcing: New Kegland DuoTight Tubing System! – Clamp Free Design + Hands on Review

William’s Brewing has announced the availability of Kegland’s new DuoTight Connection System.  From William’s “The Kegland DuoTight System combines patented DuoTight O ring push fittings with EVABarrier lined barrier tubing in an easy to connect and disconnect system. No need to use hose clamps or cut tubing to remove.”

The lineup includes a number of options including a very economical Spunding Valve options.  What’s a Spunding Valve?   Build a Spunding Valve! – How and Why

Kegland DuoTight Fittings and Accessories!

More DuoTight!

This post may contain affiliate links. We may make a commission when you use our links. This will never cost you extra. Thank you for supporting Homebrew Finds!

pinned

Visit William’s Brewing – Web Only Clearance Sale

williams

Announcing: MoreBeer’s New Kit Design – Tap Handle Graphics for Every Kit & More!


from MoreBeer:
We just finished redesigning all of our recipe kits for the new year and are stoked to show them off! First off each kit now includes a cut out that perfectly fits our new Tap Handle (Part# D1282). The recipe sheet also now includes a section for tasting notes and extended record keeping, allowing you log every important aspect of your brew day and fermentation. We have also included updated recipe tips and directions to our easy to use online Brewing Calculators. Did we mention they also have some new bad ass graphics for each kit!

To check out the new graphics and purchase your Recipe Kits, click here!


Check sale or product page for current availability & pricing


pinned

This post contains affiliate links. We may make a commission when you use our links. This will never cost you extra. Thank you for supporting Homebrew Finds!

morebeer

Price, promotions and availability can change quickly. Check the product page for current price, description and availability. tag:b3kit

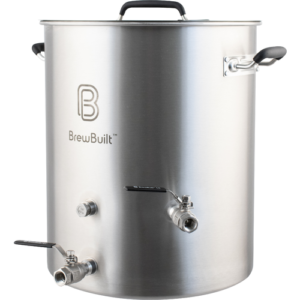
Announcing: The BrewBuilt Whirlpool Kettle!

BrewBuilt­™ Whirlpool Kettle

BrewBuilt­™ Whirlpool Kettle via MoreBeer.  Available in 10, 15, 22, 31 and 50 gallon sizes.


From MoreBeer: Our best-selling BrewBuilt kettles are now available with a welded whirlpool inlet!

Whirlpooling has become more and more popular among the homebrewing community, and with good reason. There are several distinct advantages that any brewer can gain by whirlpooling, including increased hop utilization, improved beer clarity, and faster chill times. Our whirlpool kettles place the coupler inlet 45° offset from the front of the kettle, and about 1/3 of the way up. This allows the kettles to be lined up on a brewstand without the valves interfering. The vertical placement allows for efficient whirlpooling, while still being low enough to allow for half batches and avoid splashing/hot-side-aeration. Although the whirlpool method can be applied by simply stirring your wort with a spoon or mash paddle, pairing a purpose-built whirlpool kettle with a brew pump will vastly increase efficiency and decrease the risk of contamination.


More Info

From the product description, check product page for current description, price and availability:

Whirlpool Hop Additions
The character imparted by late hop additions can be greatly improved when added during whirlpool. Below-boiling temperatures plus constant recirculation leads to extracting more flavor and aroma from the hops, while contributing far less bitterness than when added during the boil.

Reducing Trub in the Fermenter
When transferring from kettle to fermenter, you want to leave as much of the trub behind as possible. Clearer wort going into your fermenter means clearer beer when fermentation is complete. In large amounts, trub can also impart off-flavors to your finished beer. Creating a whirlpool will pull the suspended matter toward the center of the kettle and, when allowed to settle, form a cone of trub that’s much easier to keep out of your fermenter during transfer. Less trub in the fermenter also allows more room for beer and blowoff, which is especially useful when fermenting high gravity beers.

Faster, More Efficient Chilling
If you’re using an immersion chiller to cool your wort, whirlpooling can significantly reduce your chilling time. Using a whirlpool to create a rotating flow will assist the transfer of heat from the wort to the water running through the chiller, leading to a faster and more efficient cool down.

Designed for Brewing. Built to Last.
Our line of BrewBuilt brew kettles, made from 304 stainless steel, offer an unparalleled mix of features for a great price. At the very top of the list are three welded-in-place couplers that offer a lifetime of leak-free use. As you can imagine, welding in a coupler costs more than punching a hole and using a gasketed (i.e. weld-less) fitting. Welded fittings offer a permanent connection that, in our opinion, is worth every penny. The second unique feature that we absolutely love about these brew kettles is the notched lid with silicone plug. This notch allows you so much flexibility; you can use an immersion chiller, one of our Ultimate Sparge Arms for mashing, tie off hop bags, take a temp reading during cooling, or whatever else you can dream up.

This Brew Kettle has a lot to offer…
Some other features we dig include the internal volume markers from the bottom to the top – so handy for instant reads. The silicone sleeved handles on the kettle and the lid are a cool feature to protect your hands. The tri-clad bottom with a 4mm core of aluminum sandwiched between two layers of stainless steel offers even heat distribution during the boil and also makes it a perfect choice for anyone wanting to use an induction burner. The bottom coupler is also cool with 1/2″ male threads on the outside and 1/2” female threads on the inside. Those internal threads are so handy… you can easily install a pick-up tube, stainless quick disconnects, a kettle screen, or any other fitting that features 1/2″ MPT threads.

Beefy 304 Stainless
These kettles are made from 304 grade stainless. That means you will have less corrosion issues than with a kettle made from lower grade 201 type stainless. We put these kettles through a corrosive salt water test in the MoreBeer! shop and they passed with flying colors. We also made sure the rivets and riveted handles were also made of stainless steel for a long term, trouble free life. The 10 and 15 gallon sizes are made from 1.0mm thick stainless steel. The 22, 31 and 50 gallon sizes are made with 1.2mm stainless – that’s pretty thick stuff – and you will know it when you pick one up. The included ball valves are a two-piece design that allows for easy cleaning (we prefer these over 3-piece for ease of assembly) and is also made from 304 stainless.

Size Ratios and Stuff
Our whirlpool kettles place the coupler inlet 45° offset from the front of the kettle, and about 1/3 of the way up. This allows the kettles to be lined up on a brewstand without interference from the valves. The vertical placement allows for efficient whirlpooling, while still being low enough to allow for half batches and avoid splashing/hot-side-aeration. All BrewBuilt kettles follow the recent trend to a 1.2:1 ratio where the height is 1.2 times the diameter. This is a proven commercial ratio that has been adopted in homebrewing to achieve a more consistent 10% evaporation rate during the boil. We do like this ratio for boiling. For Mashing we would prefer a little bit shallower but that is a small compromise. Dimensions for a hot-liquor tank, if you are thinking brewing system down the road, are irrelevant as any ratio kettle will do.

Unique 22 Gallon Size
This size was born from customer feedback. Many customers making 10 gallons actually want to end up with 10 gallons at the end of kegging. That means you can be starting a boil with 13-14 gallons of wort to account for boil off, kettle loss, and fermenter loss. The 22 Gallon size kettle allows you to boil those quantities with plenty of room for boil overs. Want to make a 15 gallon batch with friends… you can squeeze that in to! You’ll never regret having a little extra kettle.

Final Words
With welded fittings, a bunch of cool features, and a solid, thick 304 stainless steel core this kettle is a pretty amazing value. The welded coupler with whirlpool valve is a nice upgrade from the standard BrewBuilt Brewing Kettles. Simply pair one these whirlpool kettles with a brew pump and you’ll be on your way! Be sure to see the “You Might Also Need” section below for quick disconnect fittings. Remember, if you order from MoreBeer! we ship free anywhere in the continental USA!

Features List at a Glance

  • Three welded couplers for a lifetime of leak free use
  • 45° offset whirlpool port. Valve and internal elbow included
  • Notched lid with silicone plug for flexibility
  • 304 Stainless construction for longevity
  • 1.0mm (10 & 15 gal) or 1.2mm (22, 31 & 50 gal) thick side walls resists denting
  • 4mm Tri-Clad Aluminum bottom sandwiched between two layers of stainless steel for no scorching
  • 1/2″ FPT internal threads for attaching various kettle fittings
  • Internally etched volume markers from top to bottom for easy reading
  • Silicone coated handles for heat protection
  • 1.2:1 Ratio is optimal for boiling evaporation rate
  • 2 x Two-piece, 304 stainless ball-valves for easy cleaning
  • Lid is designed to conveniently hang from a handle
  • Stainless handles with stainless rivets for secure lifting
  • 1/2″ MPT stainless plug and plumbers tape included for thermometer port


BrewBuilt­™ Whirlpool Kettle at MoreBeer

pinned

This post contains affiliate links. We may make a commission when you use our links. This will never cost you extra. Thank you for supporting Homebrew Finds!

morebeer

The Steam Slayer from Brew Hardware – Kettle Steam Condenser Assembly – eliminates need to vent from your brewing room

STEAM SLAYER - KETTLE BOIL STEAM CONDENSER ASSEMBLY

The Steam Slayer via Brew Hardware is designed to eliminate the need to vent steam from your brewing room.

More Info

From the product description, check product page for current description, price and availability:

The Steam Slayer(tm) is a brand new product that eliminates the need to vent steam from your brewing room. More and more people are converting over to electric brewing systems allowing brewing indoors and even in quite confined spaces. The rude awakening occurs when you evaporate a gallon or more water into the air and your walls and ceiling drips with condensation. In some cases it is impossible or unreasonable to install fan-based exhaust systems to vent that steam. Enter the Steam Slayer!

Condensing boil steam is a relatively common practice in large scale industry and some breweries. Homebrewtalk.com user “Brundog” did a lot of experimentation and documentation and many folks built clone systems in turn. When it came time to install one on the shop brewing kettle, we couldn’t leave well enough alone with off the shelf parts.

How It Works:
You will install a 1.5″ TC port in the upper sidewall of your electric powered boil kettle, typically as high as you can get it without interfering with the closure of the kettle’s lid. The unit is equipped with a fine mist sprayer that fits inside the main body and is fed with cold tap water. When you reach a boil in your kettle, you will put the lid on and start the flow of cold water into the unit. Steam will enter the tee and encounter the spray turning the steam back into water. The waste water runs out the bottom of the unit into the included silicone hose which you will position over a catch bucket. Depending on your tap water pressure, and the selected sprayer option, you will typically consume 6-10 gallons of water in a 60 minute boil. This water can be discarded or saved for cleaning your equipment afterwards.

What’s Included:

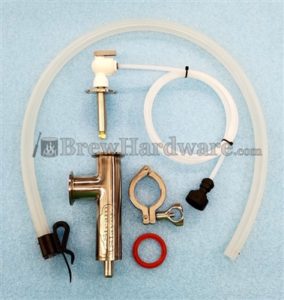
  • Main Body Tee with 1.5″ TC top and side flanges and welded 5/8″ hose barb on the bottom.
  • 1.5″ TC sprayer adapter with your choice of 6 or 9 gallon per hour sprayer tip. The GPH ratings are at 40 PSI. We find the 6GPM works great on 45 PSI on a 7 gallon boil. If you have low pressure, you may need the 9GPM sprayer. If you are doing 10 or 15 gallon batches, you may need the 9 GPH. We are still trying to figure out better guidelines.
  • Right angle water shut off valve with push in connection five feet of 1/4″ poly supply line (5ft is standard, select longer runs in the dropdown selection above.
  • Water supply connection fitting with push in connection: Your choice of 3/4″ Female Garden Hose or In-Line faucet connection valve (select in the drop down above). More about this in the instructions below.
  • 3 feet of 1/2″ ID silicone hose for waste water drain. The tubing must reach from the bottom of the steam slayer body to the TOP of your catch bucket. If you need more tubing, it can be purchased by the foot and we can combine the added length onto the standard 3′ if you direct us to.
  • Hose holder clip to keep drain hose positioned at the inside top of your collection bucket.

* Note that the clamp and gasket to attach the unit to the kettle is not included, nor is the hardware to install the actual TC port in the kettle. See the list of available accessories if you need any of those parts.

Instructions:
First, keep in mind that this is a new process for small scale homebrewing and we’re all learning the best practices. When you buy this unit, consider yourself a part of a beta test. These instructions will evolve.

  1. Clamp the main unit to the existing kettle port and the sprayer TC to the top of the unit. The integrated hose barb should be facing down towards the floor.
  2. Install your water source fitting. If you selected the Garden Hose fitting, attach it to your garden hose bib, a garden hose, a slop sink faucet, or a washing machine supply port. If you selected the inline faucet supply fitting, shut off the cold water valve under your sink, remove the hose feeding your faucet and install the inline fitting. Replace the faucet hose on top and turn the water back on to check for leaks. The inline faucet fitting is shown on the right. Just below that we show where it would install under a sink or toilet.
  3. Connect the 1/4″ Poly line to your source water fitting and the shutoff valve on the top of the Steam Slayer. Making sure the ends are cut cleanly, simply push the tubing into the fittings all the way and install the C-shaped retaining clips.
  4. Install the silicone waste tubing on the unit’s barb and attach the holder clip to the end. We include a 5/8″ OD stainless steel ring that should be inserted into the end of the silicone to expand the tubing large enough to fit the holder clip tightly. The waste tubing should be trimmed so that it only extends into your catch bucket/vessel by 1-2 inches. The open end of this tubing must never be submergedor the steam slayer will not work properly.
  5. Once your boil begins, turn on the cooling water and place your kettle lid on the kettle. Since the condensing action creates a mild vacuum, the lid does not need a gasket. If you notice steam leaking out of the lid, make sure it is not warped creating extra spaces.
  6. Adjust your boil intensity to approximately HALF of what you’re used to using and plan for about half as much boil off. For a typical example, we used to run our 5500 watt element at 65% when the kettle is full of 7 gallons and the lid off. We experienced 1.5 gallons per hour of boil off. With the Steam Slayer installed, we run at 32% and experience .75 gallons of boil off per hour. In other words, to use the Steam Slayer, your electric kettle must be equipped with a power controller.

Frequently Asked Questions:

1. Can I go through the lid?

Yes. In order to through the lid, you will need to install a 1.5″ TC port towards the edge and then clamp on a 1.5″ TC 90 degree elbow. From there the Steam Slayer gets clamped on as noted above. You may need to place a counterweight on top of the lid, opposite the TC port to keep it firmly seated on the kettle.

2. I use the BIAB method and I’m concerned that a side mount TC port will reduce my kettle capacity.

You can put a TC blank cover over the port during the mash and then fit the Steam Slayer after you pull the grain bag.

3. How do I run the hot waste water directly to a plumbing drain.

We don’t know for sure. We do know that you want the water to freely drain out. Even in cases where the output hose bends into a loop where water collects in the hose is enough to stop the vacuum on the kettle. You may get steam to escape via the lid if there is any back pressure on the drain hose. If your sewer pipe is well below your brewing location, you can run a horizontal drain line over to the kettle, install a P-trap and then end in an oversized vertical entrance pipe. Treat this like the catch bucket and run the silicone drain hose to it using the holder clip to hold it to the upper lip of the pipe.

About, from Brew Hardware: “Sometimes we have a grand plan for a given fitting. This time we’re just spit balling to see what sticks. We took the profile of a ball lock keg post and replaced the poppit and spring with just two large bored out holes. The other end is a generous 3/8″ OD hose barb that will work with 3/8′ ID silicone, 5/16″ Racking tubing, or whatever.”


  • Since Brew Hardware introduced this, availability has been an issue.
  • We keep a close eye on the Steam Slayer.  If it’s sold out again – connect with us – and we’ll give you a heads up when it’s back.

STEAM SLAYER – KETTLE BOIL STEAM CONDENSER ASSEMBLY

pinned

This post may contain affiliate links. We may make a commission when you use our links. This will never cost you extra. Thank you for supporting Homebrew Finds!

greatdeals

Make sure the components you use are compatible and rated for your intended application.  Contact manufacturer with questions about suitability or a specific application.  Always read and follow manufacturer directions. prod:bwsslay

Announcing: Propper Starter Canned Wort!

Propper Starter Canned Wort via MoreBeer


From the product description, check product page for current description, price and availability:

Propper Starter™ is condensed wort in a can, allowing you to make a yeast starter in minutes! No need to make a mess in the kitchen measuring out DME, and no need to waste time boiling and cooling before you pitch your yeast. Simply open a can of Propper Starter™, pour it into your flask along with 16 oz of bottled or distilled water, then add your yeast. It’s that simple!

Comes in 4-packs. One can of Propper Starter™ with 16 oz of water will make a 1L starter with a gravity of 1.040. It is recommended to use the 1:1 dilution rate, regardless of the original gravity of your wort.

Yeast starters offer higher cell counts at the time the yeast is pitched, leading to faster, healthier fermentations and better tasting beer! They’re especially recommended if brewing beers that have an original gravity of 1.060 or higher.

Instructions:

  • Sanitize flask, stir bar, top of can and yeast pack
  • Swirl and open can, then pour contents into flask
  • Add 16 oz of bottled or distilled water to flask
  • Pitch yeast and swirl flask to mix
  • Add stir bar to flask, cover with foil, and mix on stir plate*

Recommended Use:

  • For high gravity beers (1.060 OG or higher)
  • For cold pitching lagers
  • For yeast packs that recommend a starter
  • For yeast packs nearing expiration

Ingredients: water, barley malt extract, yeast nutrient

Shelf life of 12 months. Store at room temperature.


Propper Starter™ Canned Wort (4-Pack) OYL999

More Fermentation Related!


pinned

This post contains affiliate links. We may make a commission when you use our links. This will never cost you extra. Thank you for supporting Homebrew Finds!
morebeer

Announcing: The Top Draw Pick Up Tube From William’s Brewing!

The Top Draw Beer Pickup Tube from William’s Brewing!


From the product description, check product page for current description, price and availability:

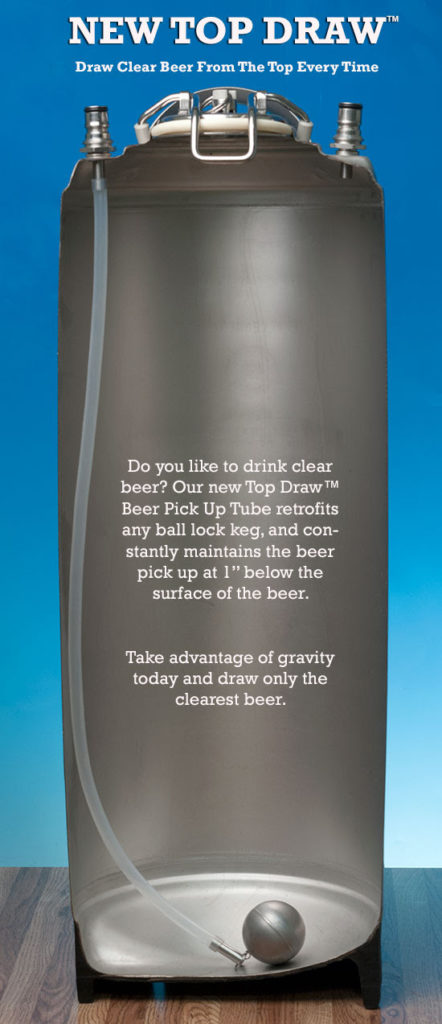
Do you want to drink the clearest beer possible from your keg as quickly as possible? The Top Draw™ Beer Pick Up Tube fits any ball or pin lock keg, and replaces the rigid stainless dip tube with a stainless float pick up on a 22″ food grade silicone hose. This flexible hose holds a 1″ stainless beer pickup tube which is held 1″ below the surface of the beer by the float.  As the level of the beer in the keg drops, the pick up tube remains 1″ above the surface, always drawing the clearest beer all the way until empty.

Installs in a couple minutes – just unscrew the beer post on your ball lock keg, insert the provided short pick up tube, and attach the silicone tubing to the underside of the tube. Now dangle the hole assembly in the keg and you are done.  For shorter kegs, cut the silicone tube to length.

Includes 22″ of tubing, stainless float with attached pickup tube, and short replacement stainless beer dip tube with seating O ring.

Made from 304 stainless steel, and the silicone hose is made in Texas to our exacting USA food grade standards.


I’m a big proponent of the idea behind the Top Draw.  In fact, I’ve used a similar, but very difficult product to find, for years,  See: Cask Widge Floats for Fermenting and Serving Using Corny Kegs? – I’m super excited that William’s Brewing has introduced this product.  It’s a great idea and I’m glad it’s readily available to US homebrewers!!

Top Draw Beer Pick Up Tube

Also: Kegerator Tips & Gear | Keg Repair Part #s | Recent Keg Finds

Our Top Draft Resources!

Check our our Top Draft Related Resources

standarddraft

This post may contain affiliate links. We may make a commission when you use our links. This will never cost you extra. Thank you for supporting Homebrew Finds!

pinned

Visit William’s Brewing – Web Only Clearance Sale

williams

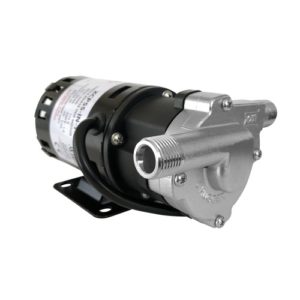
Announcing: Chugger X-Dry Series Pump via MoreBeer! + Hands on Review

Chugger X-Dry Series Pump - Stainless Steel H332X

Chugger X-Dry Series Pump  Stainless Steel from MoreBeer


From the product description, check product page for current description, price and availability:

Introducing the X-Dry Series Chugger Pumps! These pumps offer the same great quality we’ve come to expect from Chugger, but now feature Run-Dry Protection. Although the Chugger still needs to be primed before each use, the X-Dry Series offers a new level of protection from damage due to cavitation.

The Chugger lineup of pumps represents a great value for an even better price. These pumps are workhorses in the brewery. Featuring a robust flow rate of 7 gpm, and a magnetic drive designed to handle back-pressure, these pumps are a great addition to any brewing setup! The Stainless Steel Chugger showcases their molded Stainless Steel Pump Head. This stainless pump is a steal for the price, and we’ve been more than happy with the quality! Use this to ease transfers between kettles, cool wort via a counterflow chiller, or recirculate icewater for quicker chilling!

The Chugger pump has 1/2″ mpt inlet and outlet, allowing easy configuration for any application! We recommend setting these pumps up with a Ball valve on the outflow side, this way you can throttle down the outgoing flow rate, allowing for more efficient sparges or cooling! The pump head can also be rotated 360° (in 90° intervals) allowing for even more customization!

Features:

  • Run Dry Carbon Bearing
  • Stainless Steel Pump Head
  • Food Grade up to 250° F
  • 1/2″ mpt inlet and outlet
  • High Flow rate of 7 gpm
  • Max Head 18.6 ft
  • 115v 55″ cord and plug attached
  • 50/60 Hz, 1.4 amp
  • 1/20 HP, 3500 RPM
  • No more issues with crossthreading plastic heads or snapping off fittings

Chugger X-Dry Series Pump – Stainless Steel H332X

Related: Hands on Review: Chugger Pumps X-Dry Series Homebrew Pump!

Also: Homebrew Pump Discounts, Deals and Resources

pinned

This post contains affiliate links. We may make a commission when you use our links. This will never cost you extra. Thank you for supporting Homebrew Finds!
morebeer

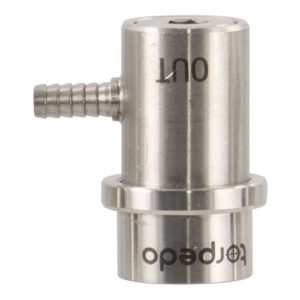
Torpedo Line of Stainless Steel Ball Lock Disconnects from MoreBeer

17229MoreBeer’s Torpedo Ball Lock Beverage Disconnects are available in both beverage and gas configurations with either MFL connections or barbs.  They will, of course, work with MoreBeer’s Torpedo kegs, but they will also work with any ball lock Corny Keg.

  • At their regular price of $19.99, they’re a good value in my book.
  • Get Free Shipping: Shipping is free with a qualifying $59 order to many US addresses
  • Easy Filler Item….  If you’re looking for a filler item to help you qualify for free shipping, consider grabbing some PBW

Torpedo Ball Lock QDs at MoreBeer

Check sale or product page for current availability & pricing


Also: Kegerator Tips & Gear | Keg Repair Part #s | Recent Keg Finds

Our Top Draft Resources!

Check our our Top Draft Related Resources

standarddraft

pinned

This post contains affiliate links. We may make a commission when you use our links. This will never cost you extra. Thank you for supporting Homebrew Finds!

morebeer

Price, promotions and availability can change quickly. Check the product page for current price, description and availability. pst:b3torqds

Announcing: New 1,600 Watt Heating Element from William’s Brewing

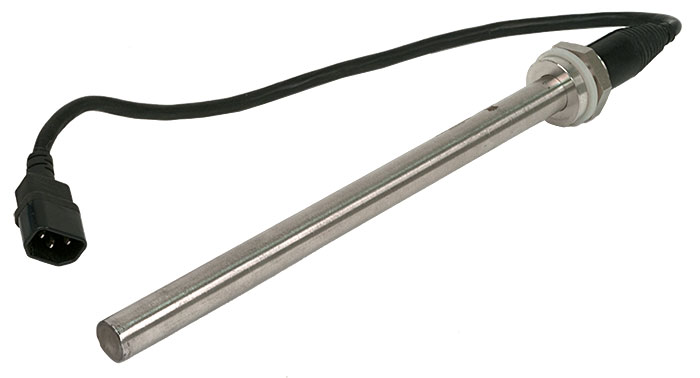
1600 Watt Stainless Heating Element

1600 Watt Stainless Heating Element from William’s Brewing


From the product description, check product page for current description, price and availability:

This 304 grade stainless heating element is 1600 watts, and is designed for heating mash and strike water. Malt solution will burn onto the element, so this should be used for heating water only. It will heat up to 10 gallons of strike or sparge water to 175° F. in approximately 1½ hours, providing the ambient temperature is 65° F. or warmer. It must be plugged into a suitable thermostat* for use, and should never be plugged into a wall outlet (because it will never turn off). It must be operated submerged in water, and never dry. Ideal for building your own electric strike and sparge water heater.

To give you some idea of the heating power of this wand, we mounted it in a Brewer’s Edge 76 Quart BrewKettle filled with 10 gallons of water at a starting temperature of 67° F. with the wand plugged into a Brewer’s Edge Mash Heat Control. The log is below:

  • 10:20AM 67° F.
  • 10:34AM 77° F.
  • 11:00AM 112° F.
  • 11:30AM 143° F.
  • 11:59AM 175° F.

It can be mounted weldessly in a 1.25″ diameter hole that you drill with your metal rated holesaw or suitable step drill bit (hole saw not included), and features a silicone sealing washer to seal against leaks.

It must be installed in a stainless steel pot, and should not be used handheld or for another other application than heating water.

The stainless element length is 12″, and the overall length with the cord mount on the back is 16″.

It features a 20″ cord which must be plugged into a heavy duty (15 amp) computer power cord (not included). A good cord to buy for this is the Tripp Lite Heavy Duty Computer Power Cord, 15A, 14AWG (NEMA 5-15P to IEC-320-C13).

*Suitable thermostats include controls that have a capacity of 15 amps or greater.


As of this posting, this is is selling for just $36.99. Price, promotions and availability can change quickly.  Please note that product prices and availability are subject to change. Prices and availability were accurate at the time this this post was published; however, they may differ from those you see when you visit the product page.  Check the product page for current price, description and availability

1600 Watt Stainless Heating Element

This post may contain affiliate links. We may make a commission when you use our links. This will never cost you extra. Thank you for supporting Homebrew Finds!

pinned

Visit William’s Brewing – Web Only Clearance Sale

williams

Announcing: The Pumpzilla Brewing Pump with Stainless Steel Head

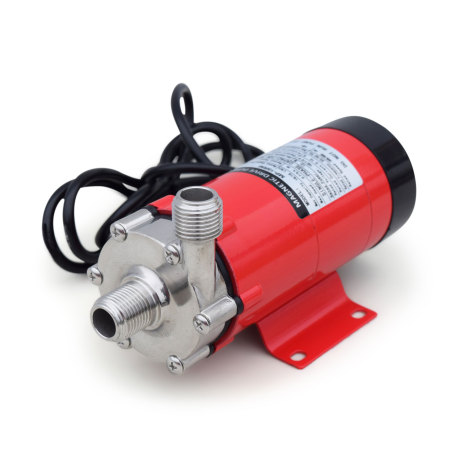
PUMPZILLA BREWING PUMP WITH STAINLESS STEEL HEAD

PUMPZILLA BREWING PUMP WITH STAINLESS STEEL HEAD via Great Fermentations


From the product description, check product page for current description, price and availability:

Get pumped with the Pumpzilla Brewing Pump, only available at Great Fermentations. The Pumpzilla is a great addition to your brewing setup, and is designed to make your brew day easier. The Pumpzilla is perfect for recirculating, whirlpooling, or simply moving wort from one vessel to another. It can handle liquids up to 100C / 212F degrees which makes it perfect to use on all steps of the brewing process.

The Pumpzilla features a stainless steel head which is the best material to use for brewing. A lot of brewing pumps in this price range have polysulfone (plastic) heads. The majority of the fittings you attach to your pump are stainless steel, and overtime those polysulfone threads will wear down from the constant screwing and unscrewing of stainless steel fittings. That’s why we use a stainless steel head with the Pumpzilla.

  • Stainless Steel head
  • Can be set on a flat surface by itself without tipping over
  • Quiet Operation
  • Center inlet design makes it easy to prime this pump as the head is easily flooded with wort
  • Inlet and outlet fittings are 1/2 in. female NPT so they will work with any of your standard homebrew fittings
  • Water resistant (not proof!) casing
  • 5 ft. Cord
  • Max Flow – 5 Gal / 19L per minute
  • Max Lift – 11 ft
  • Heat Rating: 100C (212F)
  • Voltage – 120v 60Hz
  • Current – 0.75A

PUMPZILLA BREWING PUMP WITH STAINLESS STEEL HEAD

Hands on Review: Pumpzilla Brewing Pump

pinned

This post may contain affiliate links. We may make a commission when you use our links. This will never cost you extra. Thank you for supporting Homebrew Finds!
greatdeals

Price, promotions and availability can change quickly. Check the product page for current price, description and availability.

Announcing: The BrewSSSiphon – Stainless Steel Auto Siphon!

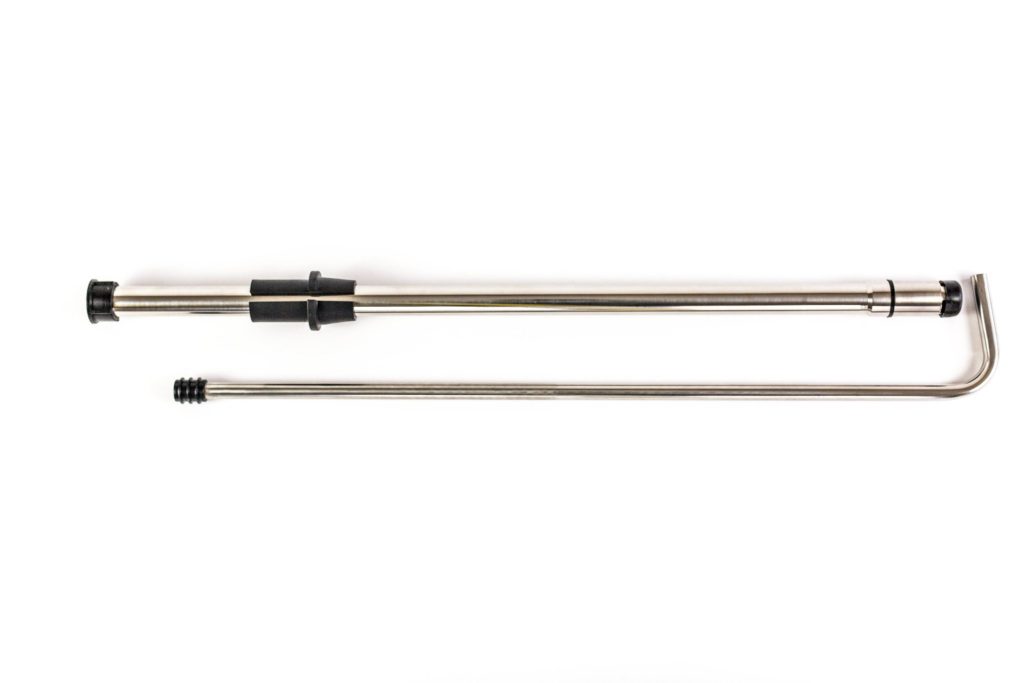
The BrewSSSiphon from BrewSSSential!


From the product description, check product page for current description, price and availability:

Are you sick and tired of broken racking canes?

Wish you didn’t have to keep around two siphon starters for your clean beers and your sours?

If so, we’ve got you TOTALLY covered.

Fabricated entirely out of 304 Stainless Steel and high-temperature Silicone, our BrewSSSiphon™ can be completely disassembled and baked in an oven at 225 degrees F for total sanitation assurance.

That clingy Lacto won’t stand a chance & should dry hops ever clog your wort transfer, just remove the check valve assembly, clean it, sanitize it, and get back to work. Its that sensible.

As beautiful as it is versatile, this will be the last transfer tool you’ll ever need!


Note from HBF: This strikes a real chord with me and addresses a frustration that I personally have.  All of my equipment is ported.  I have quick disconnects on every connection and most brew days things go smoothly.  Periodically I run into issues and need to siphon something.  Pretty much without fail, I’ll get a plastic auto-siphon out (usually still new in the package), clean and sanitize it and start to use it and it almost immediately breaks.  I don’t know why it happens, but it almost always does, making a bad situation worse.  Afterwards, I order another one so I have something (to probably break) the next time I have an issue.  The plastic siphons I’ve used have been some of the most frustrating pieces of homebrew equipment that I’ve owned.

As of this posting, multiple packages are available with prices starting at $79.95. Price, promotions and availability can change quickly.  Please note that product prices and availability are subject to change. Prices and availability were accurate at the time this this post was published; however, they may differ from those you see when you visit the product page.  Check the product page for current price, description and availability

The BrewSSSiphon!

Check out our review!  Hands on Review: The BrewSSSiphon – Stainless Steel Auto Siphon!

pinned

This post may contain affiliate links. We may make a commission when you use our links. This will never cost you extra. Thank you for supporting Homebrew Finds!
greatdeals

Announcing: Kegland Magnetic Stirrer – 5 L Capable

kegland stir plate

Kegland Magnetic Stirrer from William’s Brewing

More Info

From the product description, check product page for current description, price and availability:

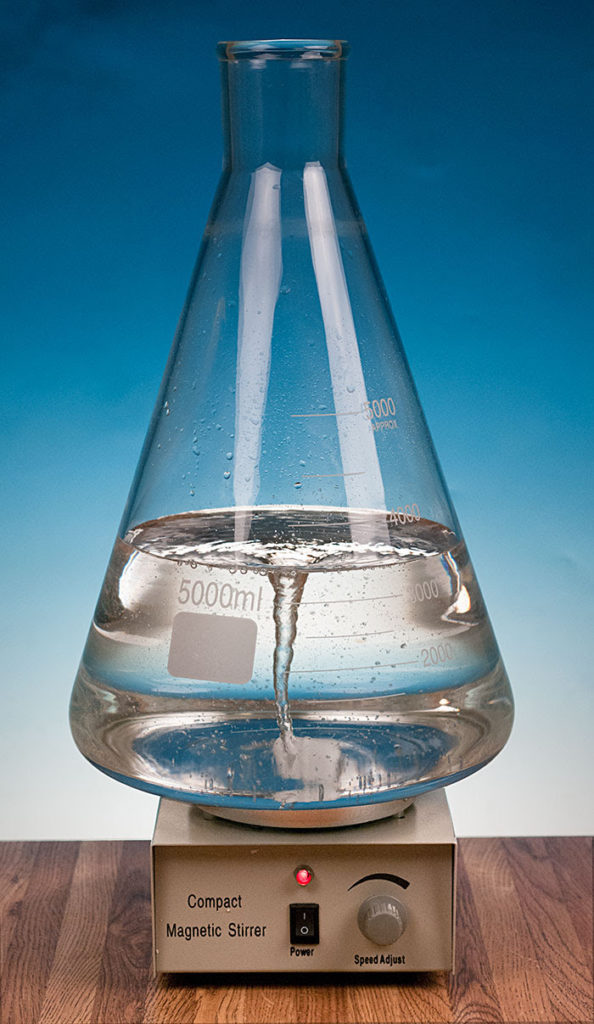
The powerful KegLand Magnetic Stirrer Stir Plate will stir up to 3500 ml in a 5000 ml flask, and is perfect for all yeast culturing needs. It includes a magnetic stir bar. Suitable for Erlenmeyer Flasks from 1000 to 5000 ml.”

Use this in combination with a compatible Erlenmeyer Flask to make a yeast starter.  A stir plate… keeps yeast in constant contact with nutrients, encourages CO2 to off gas and continuously incorporates oxygen all of that means higher cell counts.


KegLand Magnetic Stirrer

Check sale or product page for current availability & pricing


More Fermentation Related!


This post may contain affiliate links. We may make a commission when you use our links. This will never cost you extra. Thank you for supporting Homebrew Finds!

pinned

Visit William’s Brewing – Web Only Clearance Sale

williams

Announcing: Kegland Mini Kegs – multiple options 2 to 10 liters

kegland mini kegs

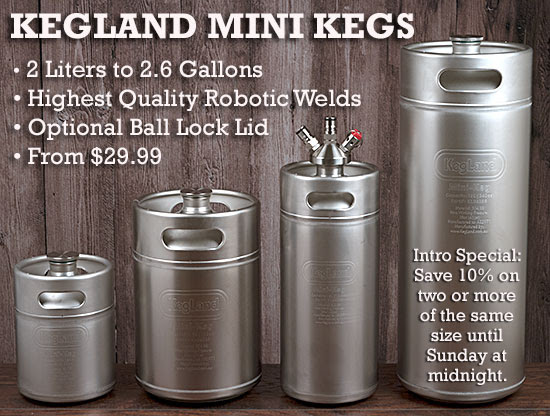
William’s Brewing has announced the availability of Kegland’s line of mini kegs.  These are avialable in 2, 4, 5 and 10 liter sizes.  A ball lock tap lid is also available.

About from William’s Brewing: “The KegLand Stainless Steel Mini Beer Kegs are specifically designed for home brewing/growler dispensing. They are suited to small batches and suited to people who want to fit them into their home refrigerators. You can naturally carbonate using priming sugars or force carbonate and serve your beer with the optional ball lock lid (item P07, see at right). They come with a silicone gasket sealed stainless threaded lid, so you can fill them with beer and let them naturally carbonate, or carbonate as needed with the optional P07 ball lock lid. You will be given a chance to buy this lid (you do not need a Ball Lock Lid for every keg) when you put this in your cart.

These fit into a standard domestic refrigerator. The optional Ball Lock lid for these kegs use a flexible silicone dip tube the kegs can also be dispensed on their side or upright. The flexible silicone dip tube of lid P07 is heavier than beer, and will sink to the bottom even if the kegs are on their side. Kegs are equipped with a 30 PSI relief valve, and have a maximum pressure of 45 PSI.

Kegland Mini Kegs use the gold standard acid bath electrolosis to pacify the 304 grade stainless steel making the more resistant to rust than any other mini keg on the market. These are the only mini keg that uses a special robotic technique to weld the kegs from the inside out. This means KegLand gets a superior welding finish that is more sanitary than any other mini keg available. Although there are many other mini kegs that come from China simply none have the quality and finish as the genuine KegLand minikegs.”

Kegs at William’s Brewing

Also: Kegerator Tips & Gear | Keg Repair Part #s | Recent Keg Finds

Our Top Draft Resources!

Check our our Top Draft Related Resources

standarddraft

This post may contain affiliate links. We may make a commission when you use our links. This will never cost you extra. Thank you for supporting Homebrew Finds!
pinned

Visit William’s Brewing – Web Only Clearance Sale

williams