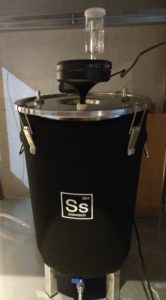
Category Archives: Reviews & Top Posts

Hands on Review: Plaato Digital Airlock – WiFi Fermentation Analyzer for Homebrewing

This review is by Homebrew Finds Contributor Brad Probert.  Brad is an engineer, expert homebrewer and experienced reviewer.  Grab a link to Brad’s website at the end of this review.

Plaato Digital Airlock

There are more products entering the market for monitoring your fermentation progress digitally, and recording the data. I’ve used a wireless digital hydrometer for a year now. Worlds are opened when you can track your gravity over time and adjust fermentation conditions based on what you see. Dry hop addition timing and fermentation temperature adjustments can be custom-tailored to each batch to make sure it reaches its best potential.

The Plaato digital airlock design principle is based on chemistry. The major resulting products of fermentation are alcohol (ethanol) and Carbon Dioxide (CO2). Research has shown that the change in gravity of fermenting beer is roughly proportional to the creation of CO2. To get the math to work, you start with the Original Gravity and volume of wort so you know how much total sugars are there. Then as you measure CO2, you can keep track how much of that sugar has been converted to alcohol. The team at Plaato started with this principle and then conducted a bunch of fermentations to develop the algorithm that runs in the Plaato software to track the gravity.


Related: Hands on Review: Tilt Bluetooth Fermentation Hydrometer


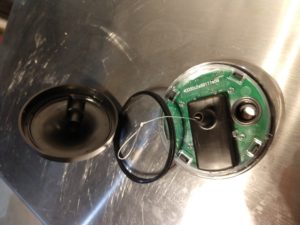
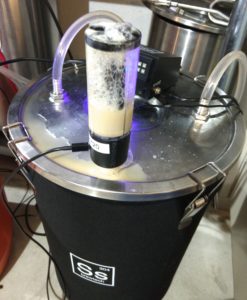
The digital airlock is roughly the size of a 3-piece airlock, and you fill it half-way up with water. CO2 pushes up through that water in the form of gas bubbles. The body of the Plaato airlock has a “bubble divider” that takes the blobs of CO2 and divides them into evenly sized bubbles to pass by the sensor. The airlock is actually counting the number of bubbles, not measuring the time between bubbles. In this manner, it can tell the difference between a small bubble and a large “glug”. The fermentation of 5 gallons of wort produces many hundreds of thousands of these uniform-sized bubbles to be counted.

The data is transmitted via Wi-Fi to Plaato servers, and the App on your smartphone reads that data and plots it out. It plots three things: 1) gravity, 2) running total of bubbles produced, and 3) room temperature from a sensor in the body of the airlock. The meter is powered by a standard USB cable (6 ft cable provided, you need to provide the AC/DC converter plug).

Screenshot showing manual gravity corrections

The airlock has a learning feature so if you take a gravity reading yourself during fermentation and want to adjust the reading from your Plaato, you can manually enter this. With all of this data from all of the airlocks going home to the mothership, Plaato has the ability to adjust/improve their bubble count algorithm from every customer’s fermentation.


Get the Gear: PLAATO Airlock – WiFi Fermentation Analyzer for Homebrewing – affiliate link, note that multiple variations of this product may be available, as such a different version may appear at this link


Continue reading

Hands on Review: Ss Brewtech InfuSsion Mash Tun

This review is by Homebrew Finds Contributor Brad Probert.  Brad is an engineer, expert homebrewer and experienced reviewer.  Grab a link to Brad’s website at the end of this review.

Ssbrewtech InfuSsion Mash Tun

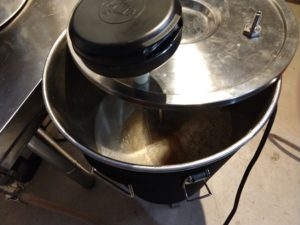
At first glance, you might think the Brewtech InfuSsion mash tun was only created to lure those mashing in Igloo coolers into something more sophisticated. And that might be the appeal to some. For me, I was looking for a mash tun as I moved from e-BIAB to a 2-vessel electric system. I wanted a mash tun that’s only job was mashing. The InfuSsion provided that simplicity of function, while still being technologically advanced.

Two Vessel Setup

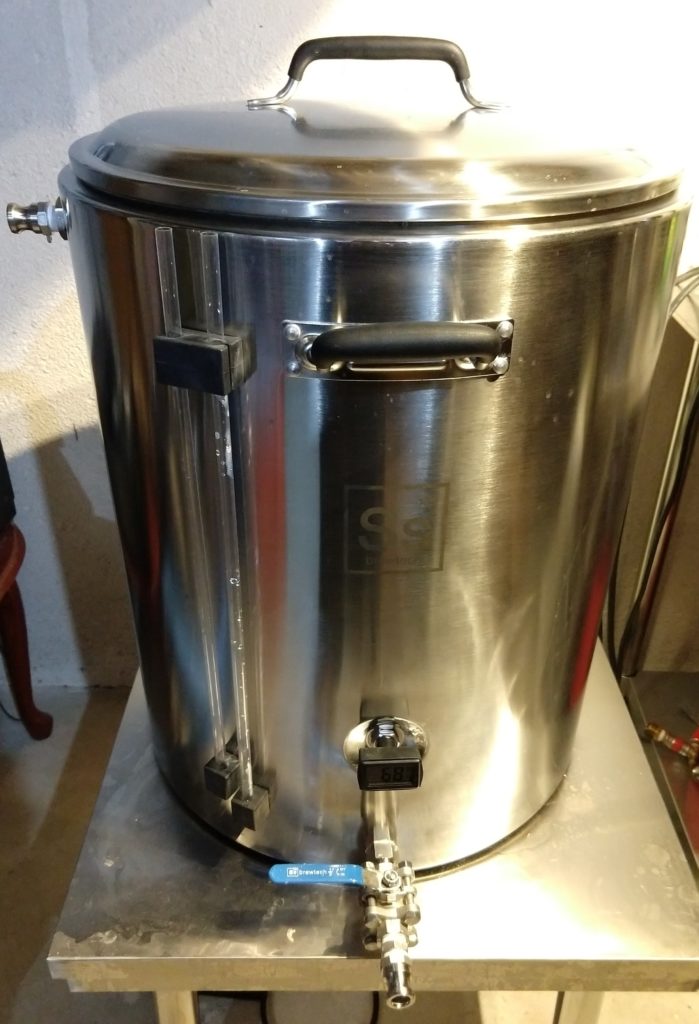
The InfuSsion mash tun is a combination stainless steel kettle and insulated cooler. The inside of the mash tun is durable stainless steel, as is the outside. In between is sandwiched high density insulating foam to make a full inch of engineered layers. With the foam inside the walls you can’t directly heat the mash tun as you’d risk melting the foam. Of course with the foam in there, it means you’re less likely to need to add heat.


Compare Prices and Selection, Review Continues Below


Continue reading

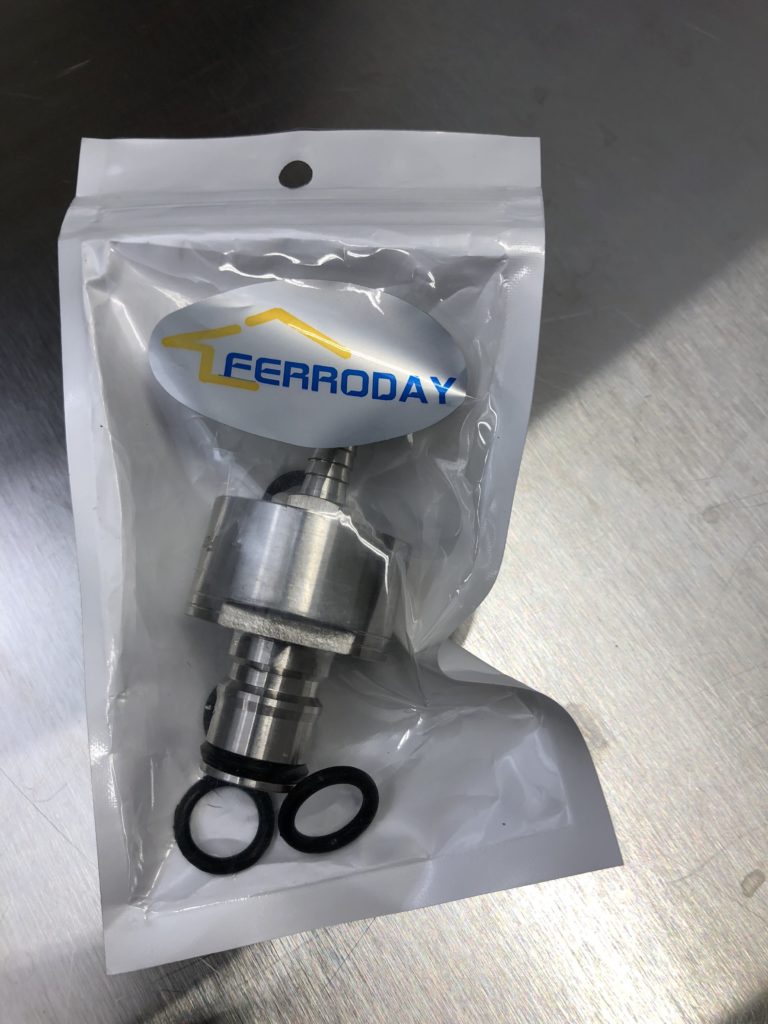
Hands on Review: Ferroday Stainless Steel Carbonation Cap for PET Bottles & Draft Line Cleaning Builds

This is a hands on look at a Stainless Steel Carbonation Cap by Ferroday along with some information about what these are used for and some related build projects.

What are stainless steel carbonation caps used for?

  • PET Bottles as Growlers: These are generally intended to convert 1L and 2L bottles to growlers.  Fill up a 1L or 2L PET bottle with your favorite homebrew.  Put one of these on (purge the headspace by squeezing if you want to) and then pressurize for transport.  This should help to reduce oxygen pickup and maintain carbonation levels.
  • Fine tune or rapidly carbonate beer: You can also use this cap to rapidly carbonate beer.  Same process as for transport, just set your regulator to the proper pressure and shake or agitate the PET bottle to help introduce CO2.  Or hook it up to CO2 and let it sit in you kegerator.
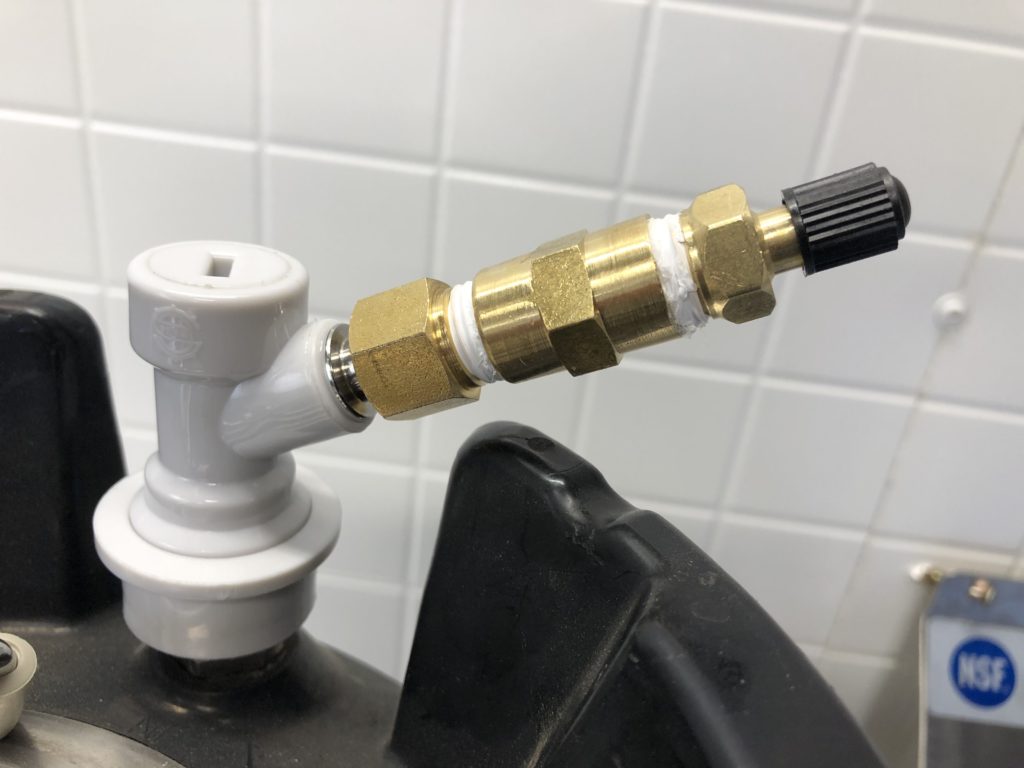
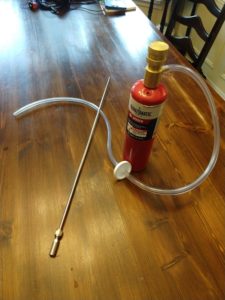
  • Draft Line Cleaning Projects:  I have developed three draft line cleaning projects using similar SS Caps – Build A Recirculating Draft Line Cleaning Pump | Mark II Keg and Carboy Cleaner Draft Line Cleaning Pump ConversionBuilding a Simple Ball Lock Draft Line Flushing Setup

And MORE…


Check Current Price, Specs & Availability:


Universal Liquid and Gas Carbonation Caps

The really big question that needs to be answered, if you want to build a draft line cleaning setup using one of these, is whether or not it is universal.  Ball Lock Kegs have gas and liquid posts along with corresponding QDs.  Black goes on liquid, grey or white goes on gas.  They ARE NOT interchangeable.  The beauty of some stainless steel carbonation caps is that they are universal, meaning they can accept both gas and liquid QDs.  That’s very important for draft line cleaning builds because we want to connect a liquid QD to this.  The problem is, not all stainless steel carbonation caps are universal.

Continue reading

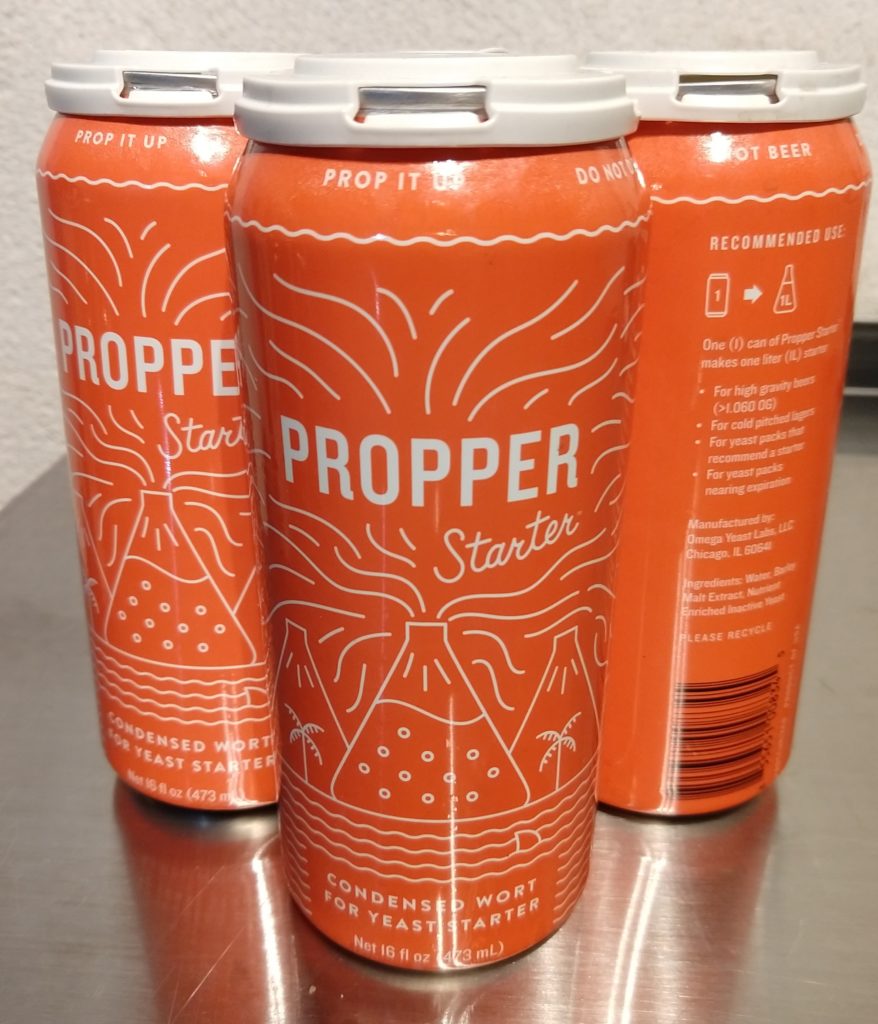
Hands on Review: Propper Starter Canned Starter Wort!

Propper Starter Canned Wort by Omega Labs

Updated: September 18, 2024

This review is by Homebrew Finds Contributor Brad Probert.  Brad is an engineer, expert homebrewer and experienced reviewer.  Grab a link to Brad’s website at the end of this review.

Propper Starter Canned Starter Wort

I never used to be a fan of starters. I willfully ignored stories people would tell about their starters because I didn’t want starters to matter. Extra work strung out to a few days before brew day was something I just couldn’t get excited about. But then I did some experiments splitting a batch and fermenting one with a starter and one without. I then saw firsthand how the starter saved a couple of challenging lager fermentations. I could no longer be a denier.

I set about trying to make the process as easy as possible with a flask, stir plate, and even a small electric coffee kettle to allow me to keep the process contained to my basement brewing area. It was manageable, but I still couldn’t overcome the dislike of having to buy DME (and running short when I needed it), and the whole cooling process after I boiled the wort starter. Then I stumbled upon the Propper Starter canned starter wort in my LHBS. Could this be my savior?


Compare Prices Propper Starter Canned Wort, Review Continues Below

Continue reading

Hands on Review: Mark II Homebrew Pump w/Stainless Head

Updated: 5/3/2024

This review is by Homebrew Finds Contributor Brad Probert.  Brad is an engineer, expert homebrewer and experienced reviewer.  Grab a link to Brad’s website at the end of this review.

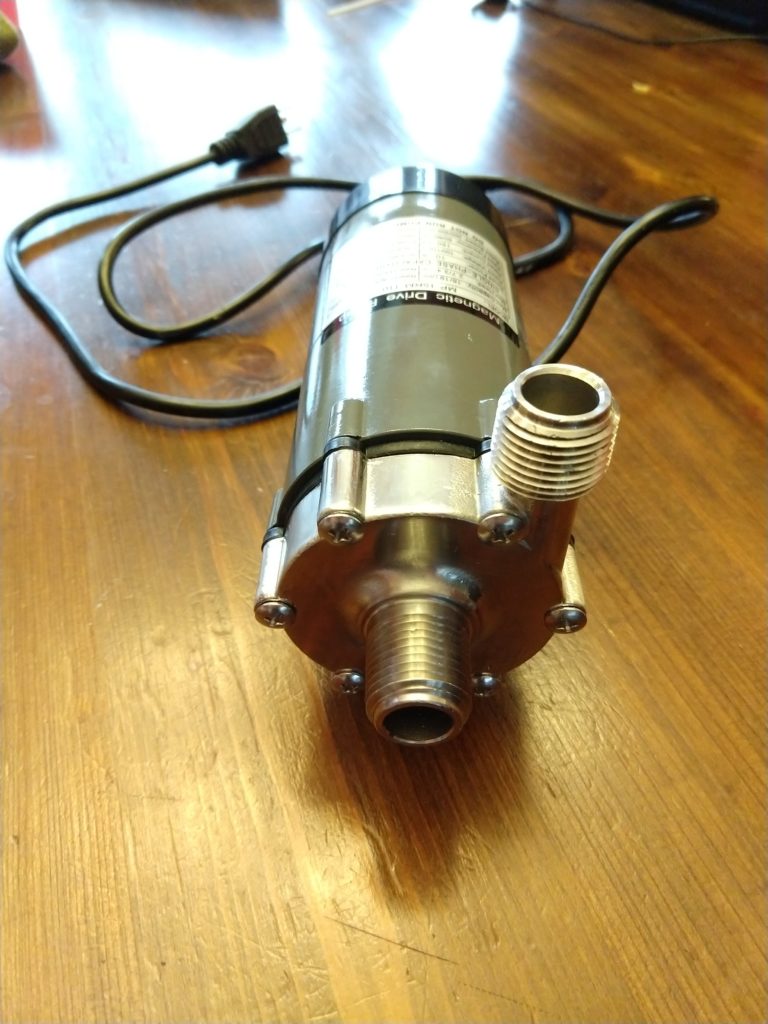
Mark II Pump with Steel Head

Let’s face it, pumps aren’t the most exciting piece of homebrew equipment you own. With the exception of the RipTide pump, they don’t have “features” you can impress your friends with. There are a few basic requirements, and once you get those met, you’re just looking for the lowest price. For me, the basic requirements are: 1) Magnetic drive, 2) Ideally a stainless steel head, 3) Temperature & splash protection, and lastly 4) Maximum head.

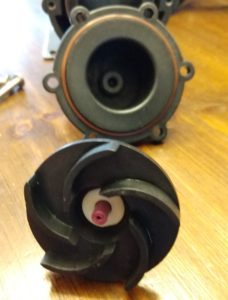
The MkII’s Magnetic Impeller

Several vendors offer what’s called a “Mark II Pump”. So you need to dig deeper than just the name when comparing pump offerings from different shops. One requirement, which is pretty much standard across beer brewing pumps, is what’s called a magnetic drive. Magnetic drive means you don’t have to worry about grease from shaft bearings getting into your wort. The other advantage is that you can close a valve- partially or completely- on the output side of your pump to reduce flow, and it causes no stress to your pump. Magnetic drive is pretty much standard in beer brewing pumps, but I bring it up because shopping on Amazon or eBay you might get drawn into something that isn’t.


Check Current Price & Availability:

MARK II BEER PUMP via Proflow Dynamics


Limited Time Deal!

PFD is taking 30% off their homebrew category when you use promo code BF30%. Considering their already, generally, great everyday prices, this is an outstanding deal!

ProFlow’s Homebrew Lineup – remember coupon code BF30% to get an additional 20% off

  • This works with the MK II Pump!
  • Shipping is an additional cost based on your location.  Because of minimum shipping costs, it may make sense to place a larger order.  Additional items may ship for minimal cost.

MK II Brewing Pump – remember coupon code BF30%


About Pump Features and Specs – What does Pump Head Mean?

Pump heads come in either stainless steel or some kind of plastic/resin. Some resins have a better temperature durability, so after many hours of operation they are less likely to break down and lose pressure/flow capability. Stainless steel doesn’t have this issue, but it also has more durable threads. Most wort pumps come with 1/2″ Male NPT at inlet and outlet so you can screw on hose attachments or ball valves. I’ve had bad luck with stripping threads off a polysulphone pump head even with the most careful attention paid to not cross-threading it.

The next key differentiator between pumps is temperature capability. Some are designed to handle cooler liquids and are maybe only rated to something like 80F or 180F. This simply isn’t good enough for brewing, you want something that can handle boiling wort temperatures (212F or hotter).

Continue reading

Using a Keg as a CO2 Source for Portable Serving!

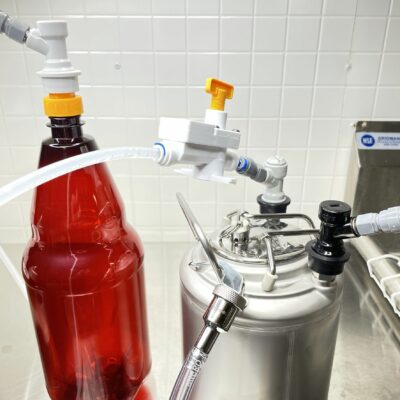
This technique uses an economical inline secondary regulator to utilize a spare keg (or growler)as a CO2 source to serve a keg. I’m not suggesting this setup as a replacement for your kegerator CO2 tank.  You still need a standard CO2 tank. What this setup could be very useful for is as a replacement for those expensive little regulators or injectors and expensive (considering how much CO2 you get) little CO2 cartridges. One inexpensive purchase allows you to pressurize and serve your keg on the go for little to nothing.

Side Note: I’ve wanted to do this for years.  There used to be a commercial sanke keg that had two chambers.  One was used as a pressure chamber and the other held beer.  I always wanted one of those.  The problem was that it was extremely expensive and I just couldn’t justify the expense. This magic little secondary regulator makes something similar easily possible.

The Hardware That Makes This Possible…

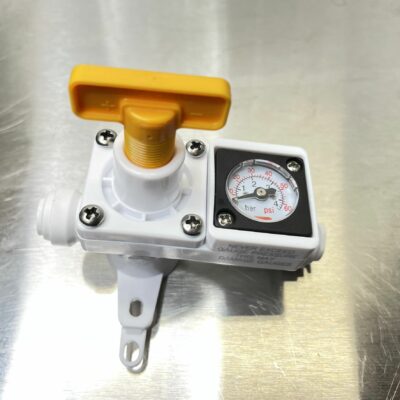
Kegland’s economical inline secondary regulators! As of this update there are three versions

Related: Hands on Review: Kegland Inline Secondary Regulator


This article contains affiliate links. We may make a small percentage if you use our links to make a purchase. You won’t pay more and you’ll be supporting Homebrew Finds and more content like this. Thank you for your support!


Upgrade to Digital!

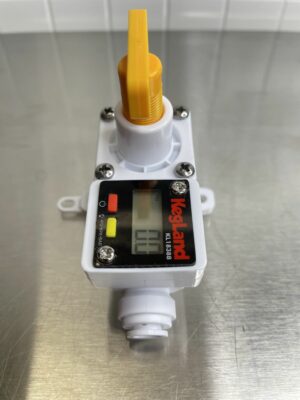
Kegland has released a digital gauge option that works with their great inline secondary regulator and BlowTie Spunding Valve.  They have also released a DuoTight version.

Primary intended Use… Multi-Pressure Serving

Maintaining multiple CO2 pressures in your kegerator gives you the ability to… keep kegs at different pressures.  This is a requirement to maintain different carbonation levels. It’s also handy if you want to force carbonate a keg more quickly, at a higher pressure, while maintaining your standard serving pressure on a keg that’s already being served or if you want to have a utility line for purging kegs and such.

Continue reading

My Favorite Size of Star San & Why

Star San Acid Sanitizer, 8 oz No Rinse Food Grade Homebrew Beer Wine Moonshine

Star San is my sanitizer of choice.  It is effective, food safe and no-rinse.  It is also very cost effective if you use the spray bottle method.

My Favorite Size and Why

Considering the shelf life of Star San concentrate is 1 to 2 years, If you’re using the Spray Bottle Method (See: Tip: Star San Tips, Tricks and Guidelines – Using Star San In a Spray Bottle), I generally recommend purchasing the 8 ounce size.

8 ounces of concentrate yields about 39 gallons of mixed solution.  The spray bottle method is very efficient, so you don’t end up using much sanitizer per batch.

8 oz = ~ 157 Batches

Let’s say you use 1/4 gallon (which I personally think is high) for each batch, the 8 ounces size yields enough mixed solution for around 157 batches.  That figures to about 13 batches per month over a 1 year period.  If you use 1/8 gallon (which I think is more realistic) that equates to about 26 batches per month over a 1 year period.

More Per Ounce, But Less Costly Overall

The larger 16 and 32 ounces sizes may be a lower cost per ounce, but if you’re unable to use it within Star San’s shelf life, you’ll just be throwing sanitizer away or using less effective past date sanitizer.  Getting a smaller bottle more often means your Star San is fresher.

The 8 ounce size of Star San is becoming more difficult to find. In that case 16 oz makes the most sense to me.

starsanofferings

Star San Tips & Tricks

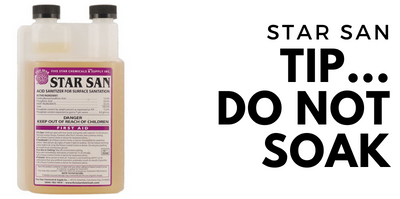
Recommendation: Do Not Soak

Related:

Continue reading

What Does a Flow Control Faucet Do?

what does a flow control faucet do

Updated: November 14, 2024

In order to properly serve a pint of beer from your kegerator you need to have a balanced system.  You decide what carbonation level you’d like to serve and what temperature you want your beer to be and set a CO2 pressure based on those two factors.  To pour a proper pint, well carbonated without excessive foam, you need to balance your system.  Balancing offsets your set CO2 pressure with the proper amount of resistance.  Not enough resistance = fast pouring and excessively foamy beers.  Too much resistance = beer pours too slowly or not at all.   Each component along the way provides some resistance.  Typically most of the resistance comes in the form of adding more beer line.  More line = more resistance.  For a full rundown of this see: Step by Step Balancing Your Kegerator Draft System

What do flow control faucets do?

Flow control faucets feature a built in flow compensator that allows you to adjust the resistance your faucet is exerting.  That means less tubing and potentially less foaming and wasted beer. The compensation feature also makes it easier to serve higher carbonation beers as you can set the faucet to provide resistance to offset the increased pressure needed to store and serve these beers at higher pressures.  Instead of replacing your beer line with ever increasing lengths of tubing, you simply turn a knob to increase resistance.

In my opinion Intertap and Perlick are top faucet manufacturers and both have a flow control model.

Continue reading

Hands on Review: Maple Landmark Solid Red Oak Tap Handle – Made in Vermont

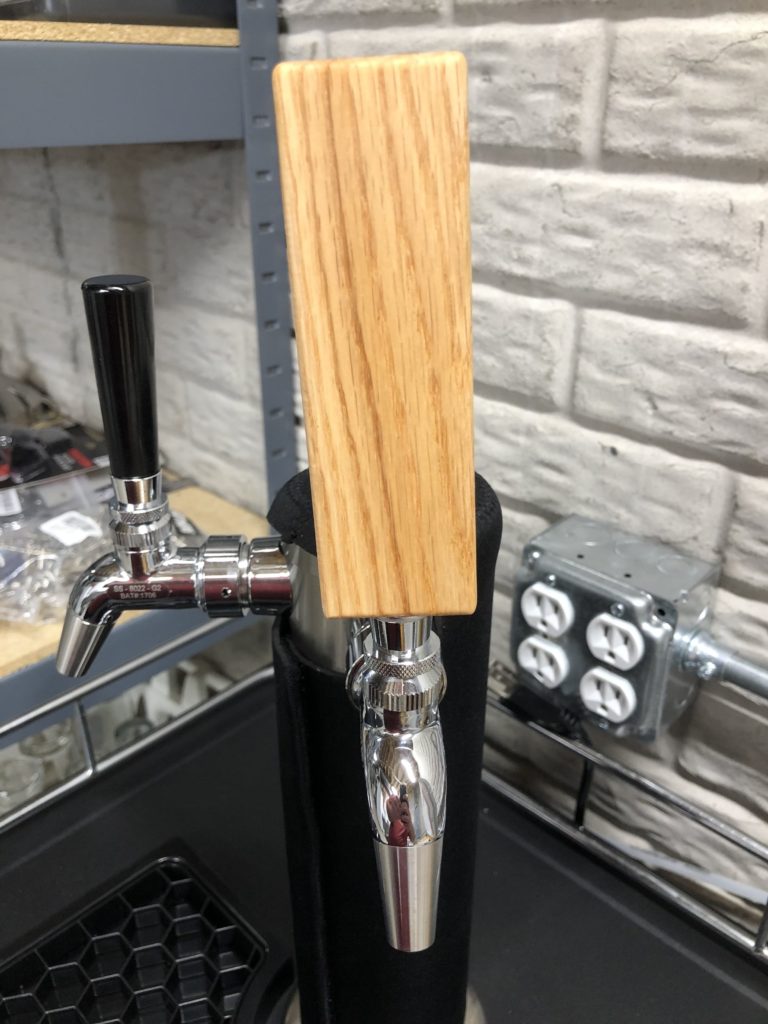
Maple Landmark hand makes hardwood tap handles (and more)  in their shop in Middlebury, Vermont, USA. They make tap handles out of both Oak and Maple woods. Each product page has a number of size and shape options.

Here’s a hands on look at Maple Landmark’s Solid Red Oak Tap Handle.

Hands on Review: Maple Landmark Tap Handles

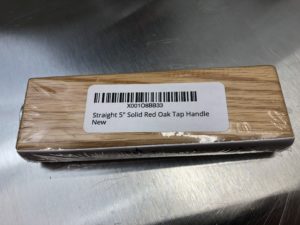
In the package
Other side includes the description and ASIN number


adyeast


Check Current Pricing, Review Continues Below:

  • Straight 5″ Solid Red Oak Tap Handle – affiliate link, note that multiple variations of this product may be available, as such a different version may appear at this link
  • More options in Oak and Maple woods. Each product page has a number of size and shape options.

Continue reading

Hands on Review: Sensafe eXact Smart Brew iDip Water Test Kit

Contents of the Sensafe iDip Smart Brew Water Test Kit

Updated: 5/21/2024

This review is by Homebrew Finds Contributor Brad Probert.  Brad is an engineer, expert homebrewer and experienced reviewer.  Grab a link to Brad’s website at the end of this review.

Sensafe Smart Brew iDip Water Test Kit

One of the first all-grain brewing books I bought when I moved from extract to all-grain left an impression on me of the importance of your brewing water when doing all-grain mashes. To make it easy to hit my target profile I bought distilled water from the store and then added the appropriate brewing salts to it. That worked well for several years until I got tired of buying and hauling water around and decided to use city water run through some carbon filters.

My filtered water on its own tasted good, but the beer made from it had lost its pizzazz. I knew that to gain it back I needed to figure out my base water and then add the appropriate minerals to hit the target water profile like I used to target when working from distilled water. Knowing my target profile was useless to me if I didn’t know what I was starting from.

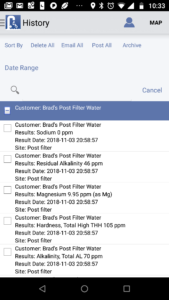
App screenshot showing test results – this is one screen of results, scrolling down shows more information

Sensafe makes water test kits targeted to the beer brewer. There is a Smart Brew Starter Kit that contains their iDip digital tester, and test strips for different measurable aspects of your water important to brewing. Once you install the free App on your Android or Apple device, you’ll see you only have access to pH, Chlorine, and Total Alkalinity. To actually use all of the 6 different test strips provided in the kit, you need to pay an additional $18.99 through the App to unlock the full set of beer-centric tests.

Through use of the 6 different test strips (25 strips of each type), and some calculations performed in the App, you are able to get the following readings on your water from the Starter Kit: Total Alkalinity, Calcium, Chloride, Total Hardness, pH, Sulfate, Magnesium, Residual Alkalinity, and Sodium. The Advanced Kit measures the same things, but instead of measuring pH by dissolving a test strip in the iDip reader, it comes with a separate pH/temperature meter.

The heart of this system is the eXact iDip photometer. It is a small hand-held, waterproof (IP67) tester. It has a small sample container that you fill with your test water, then stir around the test strip for whichever test you are running. A push of the button on the iDip gives you a countdown to ensure you mix the test strip in the water for a long enough time, and then it uses a 525 nm light source and a photometer to measure the amount of light that can transmit through. The results are then displayed on the meter’s digital screen as well as transmitting via Bluetooth to your paired smart device running the App.

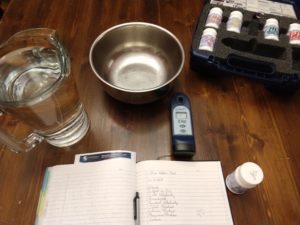
Ready for testing


Limited Time DEAL:

Industrial Test Systems Exact® iDip® Photometer 486101-SB-K Smart Brew Starter Kit with Meter, Blue

This has dropped to $238.40 at Amazon. That’s just $1.89 shy of the best historical direct from Amazon price I found, notwithstanding Lightning Deals or coupons. Shipping is also free to many US addresses. Prices and availability can change quickly Check product page for current info – More About Prices

Industrial Test Systems Exact® iDip® Photometer 486101-SB-K Smart Brew Starter Kit with Meter, Blue – affiliate link, note that multiple variations of this product may be available, as such a different version may appear at this link


Check Current Price and Availability:

Industrial Test Systems Exact® iDip® Photometer 486101-SB-K Smart Brew Starter Kit with Meter, Blue – affiliate link, note that multiple variations of this product may be available, as such a different version may appear at this link


Continue reading

Hands on Review: MoreBeer’s Fermentap Magnetic Stir Plate

MoreBeer’s Fermentap Stir Plate along with a 3,000 mL Erlenmeyer Flask

This review is by Homebrew Finds Contributor Brad Probert.  Brad is an engineer, expert homebrewer and experienced reviewer.  Grab a link to Brad’s website at the end of this review.

Limited Time Deal!

Limited Availability Deal of the Day: As of this posting, this is marked down to $58.99 as a MoreBeer Deal of the DayShipping is also free to addresses in the contiguous US with most $59 Orders. Availability: This is available today only, while supplies last. Quantities are limited. Check the MoreBeer’s Deal of the Day to check today’s offering.

Product Description – Here – Use coupon code BEERDEAL to get this discount.

Fermentap Magnetic Stir Plate Y705

This is valid 5/30/24 only while supplies last


About Stir Plates and Erlenmeyer Flasks

Stir plates are pretty simple machines. There’s a small electric motor in a housing with a flat surface for you to set your vessel on that has wort needing to be stirred. When the motor spins, a magnetic field is created as a by-product of the electric motor. This is used together with a small plastic-coated magnet that looks like a small capsule, called a stir bar. If your flask is filled with wort, the stir bar spins around at the speed of the electric motor in the stir plate and creates turbulence in your wort. It creates a vortex like an underwater tornado as the spinning motion pulls wort down towards it and then flings it away when it contacts the stir bar.

This underwater tornado is the key to the stir plate’s success in preparing starters. This stir plate motion has two functions: 1) Keeping the yeast constantly in suspense and not letting them settle out, 2) The constant circulation of wort helps expose all of the wort to the surface where it can interact with incoming oxygen and purge CO2 developed by the yeast’s fermentation processes. There have been experiments done that show you can more than double the amount of yeast cell growth in a starter made with a stir plate versus a starter that doesn’t.

The vessel of choice for starters made on a stir plate is the Erlenmeyer flask (named after a German chemist who invented it in 1860). Its wide, flat base make it stable to sit on your brew table or on the stir plate without concerns of it getting bumped and tipping over. And very importantly, its flat bottom allows your stir bar to rest in the center and spin. A glass growler with its domed-in bottom, will not keep the magnet centered and then won’t work to stir the wort.


Check Current Price and Availability:

Fermentap Magnetic Stir Plate – Magnetic Y705 via MoreBeer


When looking for Erlenmeyer flasks, you want to make sure you get one made with Borosilicate glass. It is less sensitive to growth/shrinkage with temperature extremes, meaning it can go through thermal shock with less risk of breaking. But there’s an important caution here. Borosilicate is not recommended for direct heating. I heard from a Customer Service Manager at a homebrew shop about the horrific pictures he got from someone that was carrying their boiling starter wort from stove to sink when the glass bottom broke and showered his [sandaled] foot with glass and 200 degree wort. So boil in a separate vessel before pouring into your flask, or let it sit and cool a bit before you move to the cooling stage.

Continue reading

Hands on Review: MoreBeer’s OxyWand Oxygenation Kit – with Side by Side Trials

MoreBeer’s OxyWand Oxygenation Kit – tank not included

This review is by Homebrew Finds Contributor Brad Probert.  Brad is an engineer, expert homebrewer and experienced reviewer.  Grab a link to Brad’s website at the end of this review.

OxyWand Oxygenation Kit

Frequently cited benefits of proper wort aeration are avoiding these fermentation problems: 1. Long lag time from yeast pitch to start of fermentation, 2. Stuck or incomplete fermentation, or 3. Excessive ester production affecting flavor. What can be overlooked in these explanations is that not all fermentations are created equal. The more “challenging” your fermentation, the more prone to these problems you’ll be. Fermentations for yeast are more challenging if you’re fermenting cold, if you’re using re-pitched versus fresh yeast, the age of your yeast is on the older side, or you have a higher gravity wort. In these cases, adding oxygen can make a difference.

To evaluate this, I brewed a few different batches of beer to test for the presence of these potential issues while evaluating three different aeration techniques. The first technique was a simple process I’ve used for years. While transferring the wort from kettle to fermentor, I let it pass through a strainer and splash down into the fermentor. It’s passive and easy, which is why this is my standard process.

2 Micron Aeration Stone from MoreBeer’s Oxygenation Kit

Continue reading

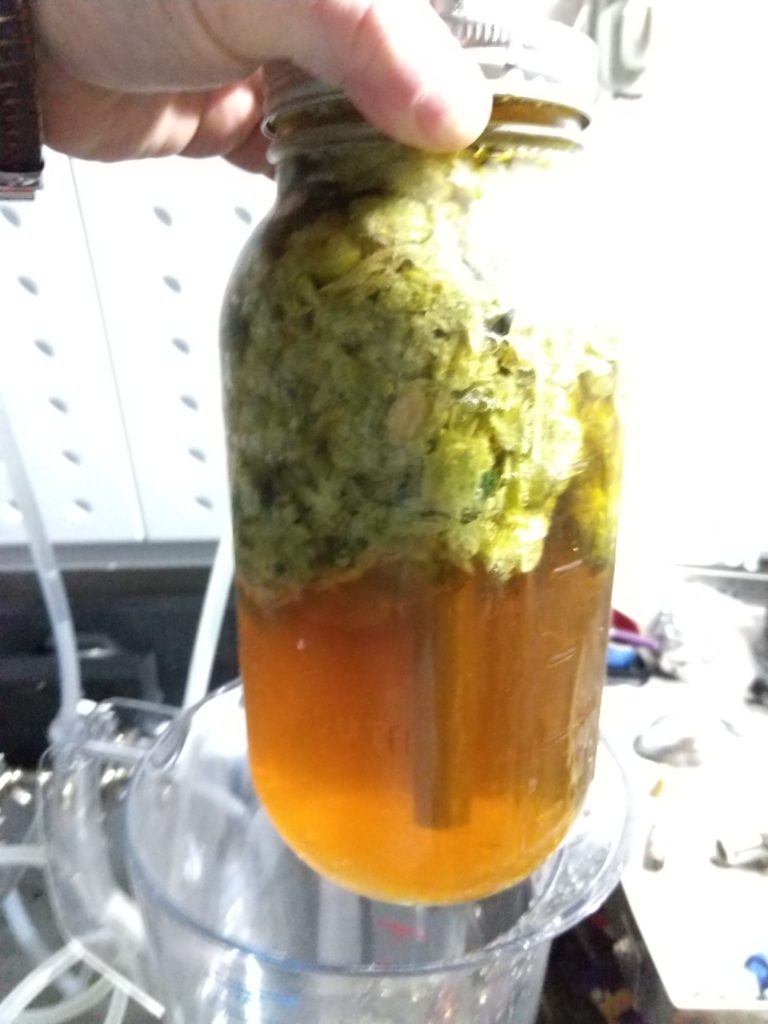
Hands on Review: Jaybird Ball Lock Canning Jar Hop Randall from NorCal – convert a Mason Jar into a Hop Randall

This review is by Homebrew Finds Contributor Brad Probert.  Brad is an engineer, expert homebrewer and experienced reviewer.  Grab a link to Brad’s website at the end of this review.

NorCal Canning Jar Randall

The original intent of the Randall was to infuse beers with additional hop flavors and aromas, but it can be used to infuse your beer with a variety of flavors. In addition to hops, fruits are often used, but also things like vanilla beans and cocoa nibs. The beauty of the Randall is that you can experiment with these different additions without dedicating the whole keg of beer to it. If it isn’t just right, you can change it up, and you haven’t ruined a whole keg of beer with what “seemed like a good idea at the time”.


adstarsan


With all of your additions, the flavor impact is fairly minor. Think of it more like adding complimentary flavors, not making a flavor showcase. For hops, the flavor and aroma addition are different than other hop additions due to the temperature you add them. There’s no boiling isomerization so you’re not getting bitterness. And it’s not like dry hopping where you’re soaking them in ~70 degree beer for a couple of days. With the Randall, the hops have a couple seconds of contact time at 35 degrees (or whatever you like to keep your keezer serving pressure set to).

Continue reading

Hands on Review: The BrewSSSiphon – Stainless Steel Auto Siphon!

This review is by Homebrew Finds Contributor Brad Probert.  Brad is an engineer, expert homebrewer and experienced reviewer.  Grab a link to Brad’s website at the end of this review.


BrewSSSiphon Stainless Steel Auto Siphon

A siphon is a pretty basic piece of homebrew equipment. It comes in every homebrewing starter kit I’ve ever seen. But of course, as with everything in homebrewing, there are upgrade options. If you’re like me, the day you discovered a thing called an auto siphon, you were saying “You’re kidding me. I just pump that inside tube up and down a couple times and I get the beer flowing?” And then you laugh at how ridiculous it was to be filling a length of tubing with water, plugging one end, trying to force it on the hard plastic racking cane with one hand, etc.

One upgrade from the auto siphon is moving from the 3/8” to 1/2″ siphon (another moment of disbelief for me, “Seriously- there was one that flows twice as fast out there all this time!?”). And there’s the sterile siphon starter. This looks even easier than an auto siphon to get beer flowing, but it’s only for those that ferment in carboys.

To this uncrowded field of options for a common brewing tool enters the BrewSSSiphon. Yes, it has that many ‘s’ in its name. With homebrewers’ infatuation of stainless steel, I suppose it was only a matter of time.

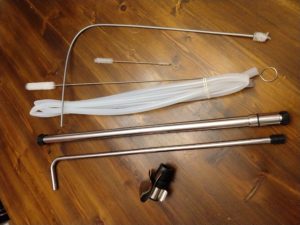
Contents of the “Complete Kit”

The siphon comes with a choice of three different levels. The first is if you just want to purchase the siphon on its own. The second level is called the Basic Kit which adds the siphon clip (see more about that below). The third level is called the Complete Kit, which has the siphon, clip, a set of 3 cleaning brushes (long enough to clean the entire length of the tubes), and a length of silicone tubing for your wort transfers. The tubing is right-sized for an air-tight fit on the transfer tube, but thin-walled so it’s easy to slip on and stay put without a clamp.


Get the Gear: The BrewSSSiphon – via BrewSSSential


Continue reading

Hands on Review: Spotted Dog CO2 Pressurized Growler Dispenser – works with standard growlers

Pressurized CO2 Growler Dispenser Tap for Glass Beer Growlers by the Spotted Dog Company

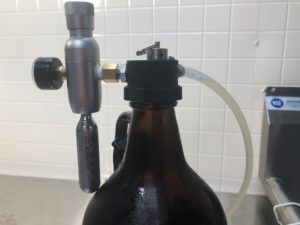
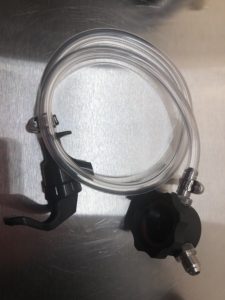
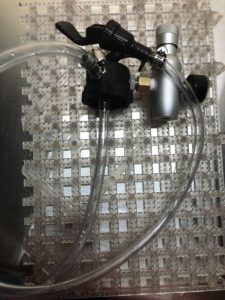
This setup consists of a regulator, growler dispense cap, faucet with tubing and dip tube.  It’s designed to fit standard glass growlers.  This allows you to serve tap beer from a standard growler as you want to.  Since it’s regulated, you can keep carbonation levels up and reduce oxidation.  Note that a growler is not included and you need to buy CO2 cartridges separately.

Hands on Review: Spotted Dog CO2 Pressurized Growler Dispenser

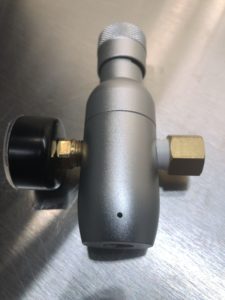
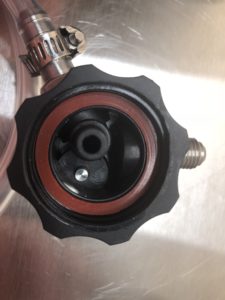
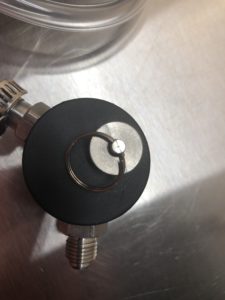
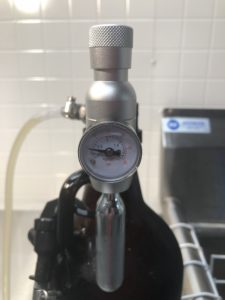
A look at the cap, faucet and tubingA look at the included mini CO2 regulator.  Note that this is a regulator as opposed to an injector.  Injectors give you no regulation of pressure other than the amount you choose to inject.  This is an actual regulator that you can set to a desired pressure.  That’s a key feature since this is intended to be used with compatible glass growlers.

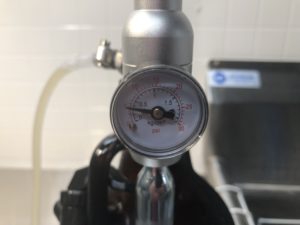
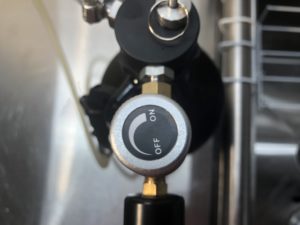
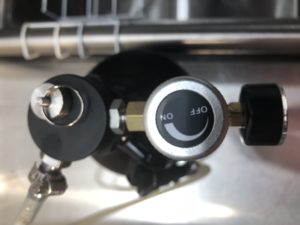
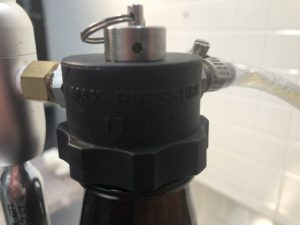
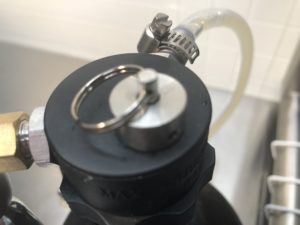
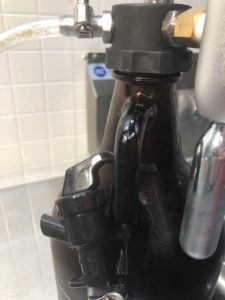
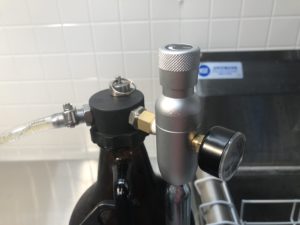
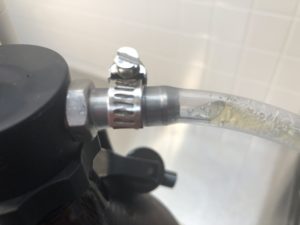
You can also use this with your homebrew keg… This regulator features a female flare connector (the brass piece on the right side of this photo).  That means you can install it on a ball lock or pin lock MFL QD [Search MFL keg disconnect] and use it on a ball lock or pin lock homebrew keg.  Whammo!A look at the faucet.  A standard picnic/cobra style tap with a small length of tubing attached.A look at the inside of the dispense cap.  Notice the included o-ring/gasket.  The cap feels sturdy and well built.A look at the cap top-down.  A PRV is installed on the top of the cap.  That’s for venting to help adjust pressure or when you’re ready to remove the cap.  The male flare at the bottom is for installation of the included regulator.A look at the entire assembly after a soak in PBW.  Note that I did not soak the regulator in PBW.  That was installed after cleaning and rinsing the cap, faucet, tubing and dip tube.Installed on a growlerA look at the front of the CO2 pressurized growler dispenserA close up of the regulator dial.  The gauge on this regulator reads 30 PSI.  Under no circumstances should this be set at 30 PSI.  I keep it under 10 PSI.  For serving I’ve found that just 1 or 2 PSI is sufficient.  It’s important that you read and follow all manufacturer’s instructions for this unit.  In the background: Gridmann Commercial Stainless SinkA top down look at the adjustment knobTop down look at the entire unitA side view look at the dispense cap.  My cap says “Max Pressure 15 PSI”.   I keep it under 10 PSI.  For serving I’ve found that just 1 or 2 PSI is sufficient.  It’s important that you read and follow all manufacturer’s instructions for this unit.A look at the PRV valve
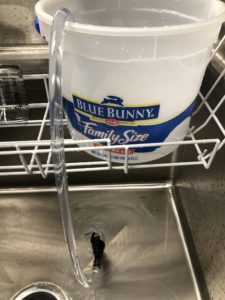
The picnic tap hangs nicely on the growler handleI found this easy to clean.  After removing the regulator, I rinsed the entire assembly, making sure there was some water left in the faucet tubing to help start a siphon.  Then I placed the unit in a tub of PBW and opened the faucet (below the unit and tub of PBW).  That starts a nice flow of PBW that you can let run out.  Of course, I did all of this in my Gridmann Commercial Stainless Sink.  I consider a quality utility sink an essential piece of homebrew gear.

Compatibility

Beyond standard growlers this will work with other compatible growlers that use standard 38mm caps.  Examples: The Prowler PET Growler and 128oz Stainless Steel Insulated Growler by Spotted Dog Company.  It will also work with some gallon size jugs as long as they are pressure capable and use standard threads.  For the larger gallon containers, you may need to swap out the dip tube tubing for a longer length.

Conclusions

The beauty of this setup is that it works on standard glass growlers.  Many locales or breweries only fill their branded or specially marked growlers.

This does have some safety implications, it’s important that your growler is in good condition and capable of holding pressure.  That’s always true whether you’re using this or not.  Growlers hold pressurized beer and should be capable of doing so at proper pressures.  Make sure to read and follow the directions that come from the manufacturer and set this to a safe PSI for your particular growler.  The good news is, not much pressure is needed to serve beer.  As I’ve already mentioned… you don’t need a lot of pressure to serve beer with this, just a 1 or 2 PSI.

This allows me to preserve beer, commercial or homebrew, using an easy to find standard growler so that I can drink it at my own pace.  This is well built and converts a compatible growler into a featured packed mini keg that helps to preserve beer so you can drink it at your desired pace.


From the product description, check product page for current description, price and availability:

  • PRESSURIZED growler dispensing has never been easier with the new Pressurized Growler Dispenser Tap. Fill up your favorite standard glass growler, attach the tap cap and regulator, use a single 12g CO2 cartridge and you’re ready to dispense!
  • BREWERY FRESH beer every time you go for another pint. The CO2 mini regulator lets you dispense your favorite craft beer at it’s proper serving pressure like it is straight from the tap!
  • PRESSURE RELIEF VALVE allows for easy oxygen purging to keep your beer fresh for weeks. Don’t settle for flat, tasteless growler beer ever again!
  • UNIVERSAL fit with all standard 64oz and 128oz glass growlers with 38mm threaded caps. Save money over expensive pressurized growler systems by using your existing growler with the Growler Dispenser Tap!
  • Don’t forget the cartridges! Cartridges are sold separately. We recommend 12g or 16g threaded food grade CO2 cartridges. Search Amazon for B07GNVKTS9 to find ours. A 12g cartridge will easily dispense 64oz of beer.

Get the Gear

Pressurized CO2 Growler Dispenser Tap for Glass Beer Growlers


The Weekend Brewer 6-Pack 12g 3/8″ Threaded Disposable CO2 Cartridges (6, 12g)


Related: Hands On: the Growler Saver Pressurized Growler Cap – note that GrowlerSaver is now defunct | Tips and Gear for Growler Filling

More Photos

More Growler Reviews!

Convert Standard Growlers to Swing Top!

Growler Tips!


Growler Tips & Resources:


Also: Kegerator Tips & Gear | Keg Repair Part #s | Recent Keg Finds

Our Top Draft Resources!

Check our our Top Draft Related Resources
standarddraft

pinned

This post may contain affiliate links. We may make a commission when you use our links. This will never cost you extra. Thank you for supporting Homebrew Finds!

greatdeals

Make sure the components you use are compatible and rated for your intended application.  Contact manufacturer with questions about suitability or a specific application.  Always read and follow manufacturer directions. review:co2growler tag:tpr

Special thanks to Spotted Dog Company for providing the unit used for evaluation

Hands on Review: LaMotte Brew Lab Plus Water Test Kit

This review is by Homebrew Finds Contributor Brad Probert.  Brad is an engineer, expert homebrewer and experienced reviewer.  Grab a link to Brad’s website at the end of this review.

LaMotte Brew Lab Plus Water Test Kit

When I started all-grain brewing, I bought bottles of distilled water from the store and then added minerals to achieve my target water profile. After years of that, I finally switched over to using our city water, passed through a 3-stage water filter system (not Reverse Osmosis, but two types of carbon filter + sediment filter). The water on its own tasted good, so I figured I’d be fine. But my beers were boring and uninspiring. I brewed with just water as-is from the filter, and I also tried adding my brewing salts like I used to when brewing with distilled water. In both cases, not good enough.

I of course recognized the water was the common factor in all of the different boring beers. It was a personally-learned lesson that supported all those homebrew articles I’d read stressing how important water was in brewing great beer. So now I recognized the problem, but I couldn’t do anything about it without knowing the starting water profile coming out of my filter system.

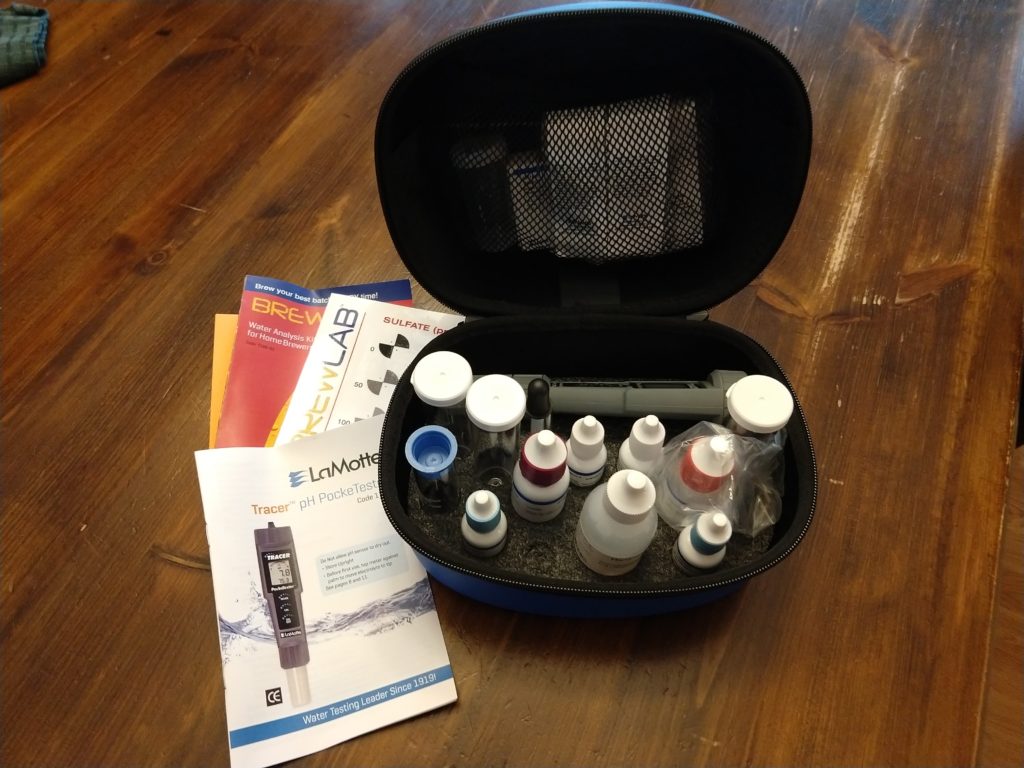
LaMotte worked together with John Palmer to make a water test kit for homebrewers. The kit focuses exclusively on the minerals that are important to brewing. If you read a city water report, you find that there’s a whole bunch of stuff in there that doesn’t apply to brewing. This kit just focuses on the data that you need to enter your starting water profile into your favorite water calculator.

BrewLab Plus Kit – See the Palmer Brewing Solutions Approved stamp toward the top of the label

The other thing that tells you it’s geared to homebrewers is that even though it’s doing something “science-y”, it doesn’t require any kind of laboratory equipment beyond what comes in the kit. You measure out your water sample into the tubes they provide, then add various chemicals one drop at a time, looking for a color change. The most complicated thing you have to do is swirl a tube around to mix things up well.


Check Prices, Description & Availability:


LaMotte has three kits, with two of them aimed at the average homebrewer. The BrewLab Basic kit contains everything you need to test for these 7 things: Chloride, Sulfate, Alkalinity, Total Hardness, Calcium Hardness, Magnesium Hardness, and Sodium. If you step up to the BrewLab Plus kit, it adds in a pH meter. An even bigger step up to the BrewLab Pro kit, and that adds in the ability to measure Total Dissolved Solids and Dissolved Oxygen.

If you’re measuring your water mineral levels, it probably means you’re adding brewing salts to hit a target profile for both flavor and mash performance. There are several mash pH predictive software options out there. The advice for all of them is to take your own measurements during your brew process and write them down. Compare your numbers to those that come from the predictions, and you’ll start to learn which ingredients and process steps will match the prediction, and which will need some adjustment.

Continue reading

Hands on Review: Brew Floors Epoxy Flooring

This review is by Homebrew Finds Contributor Brad Probert.  Brad is an engineer, expert homebrewer and experienced reviewer.  Grab a link to Brad’s website at the end of this review.

Brew Floors Epoxy Flooring

As kids, we build forts out of blankets, pillows, boxes, etc. And the really lucky kids have tree forts in their yards. In the homebrewing world, the tree forts are the dedicated brewing areas in basements, garages, or sheds. And like a good tree fort, you want to customize it to your taste. A good portion of the brew area customization revolves around the practical aspect of brewing beer- good closet or shelf space, custom hooks and gizmos to hang your lengths of tubing to dry, and a source of good brewing tunes. What’s standard in most of the different brewing spaces is poured concrete flooring. Industrial and efficient, but it lacks a certain pizzazz.


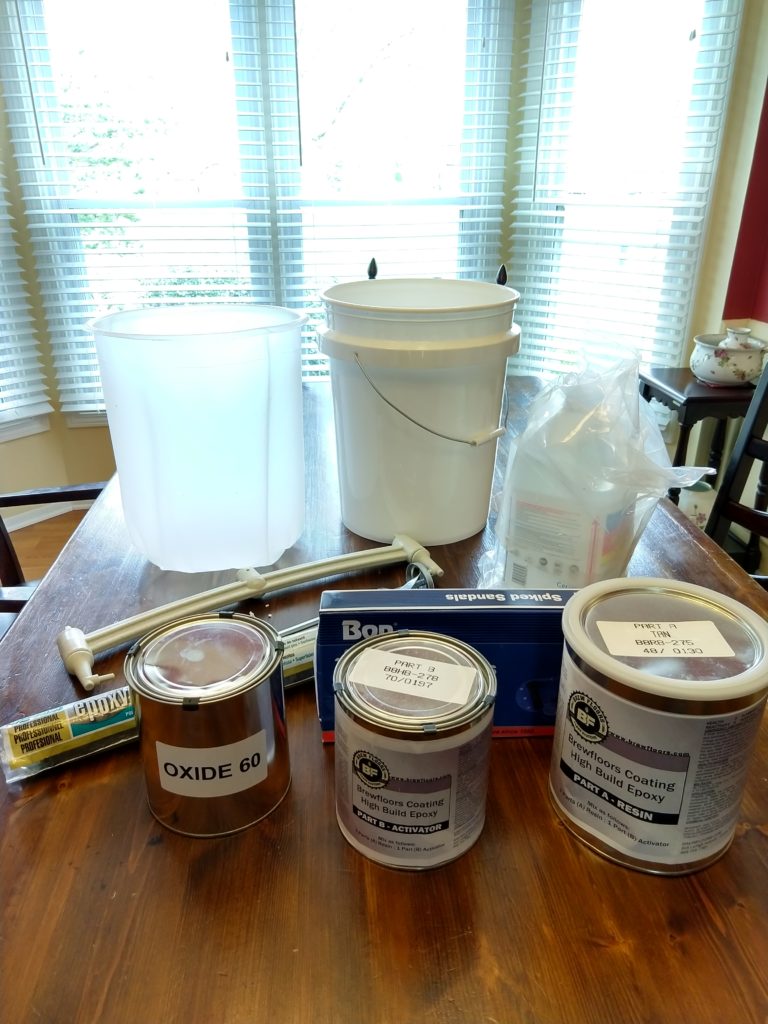
Enter Brew Floors. They sell kits for the DIY crowd- whether you’re a professional brewery or a home brewery. Heck, I suppose you probably don’t even have to use it in <gasp> a brewery! It’s an epoxy resin system, meaning it comes as a 2-part liquid that once combined makes a new compound that hardens into a durable, shiny, waterproof layer. They have various level kits from small to large square footage, as well as products that are thicker for use in more industrial areas, available in 4 different colors.

Continue reading

Hands on Review: Brew Perfect WiFi Digital Hydrometer

This review is by Homebrew Finds Contributor Brad Probert.  Brad is an engineer, expert homebrewer and experienced reviewer.  Grab a link to Brad’s website at the end of this review.

Update: Brew Perfect/Beer Bug has been discontinued, consider TILT

Hands on Review: TILT Bluetooth Hydrometer

tilt review

Brew Perfect WiFi Hydrometer

There are people say that you don’t need continuous data logging of gravity of your fermenting beer. I can almost guarantee you those are people that have never done it. By logging, you get access to a lot of information you don’t otherwise have, which allows you to know certain things better.

First is detecting the start of fermentation. If you’re just looking at airlock activity, you don’t know if a lack of activity is a leak somewhere, or the yeast that haven’t started yet. Or maybe your temperature is just a bit too low. By tracking the gravity, you can tell when the actual sugar conversion to alcohol has started.

To determine when fermentation is finished, you could gauge by airlock activity. But I can now tell you confidently that airlock activity goes on well past the point when the gravity is finished dropping. Of course you could take gravity readings and look for 3 days with the same reading. However, what works better is being able to distinguish the flat line after tracking gravity throughout your fermentation. This is a pretty clear signal that’s detectable before that 3 day sampling. Tracking gravity, I can see most of my beers are finished in a matter of days, with the longer ones being maybe just over a week.

The final benefit I’ve seen is that I can tell based on gravity changes when I’m headed toward a stalled/stuck fermentation. There have been multiple occasions where I see a nice steady gravity drop start to slow down and flatten out before I’m near the expected FG. With data logged every 15 minutes, you can see these trends as they’re happening. And then you can react by bumping up the fermentation temperature.
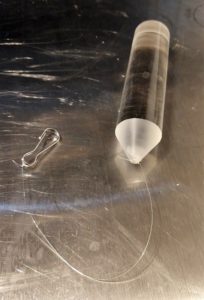
Brew Perfect Gravity Torpedo

The physics that make the Brew Perfect work have to do with buoyancy. There is a heavy cylindrical plastic rod that they call their “gravity torpedo” that dangles down, submerged in your wort. This hangs on fishing line clipped to a loop coming out of the base unit. The buoyancy forces that want to push this up in the wort are proportional to the density of the wort. By measuring the force on the fishing line, the Brew Perfect can estimate the density/gravity of the wort. An important note for those of us that like to do batches less than 5 gallons, is the torpedo has to be completely submerged in the wort in order to get accurate readings. So you need to either match the fermentor size close to your batch size, or figure out some fishing line extensions to let your torpedo hang lower.

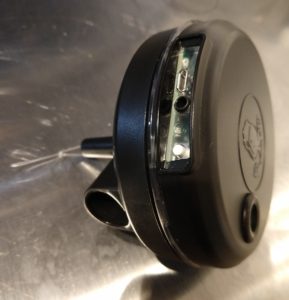
tilt review


The brains of the Brew Perfect is a circuit board tucked in a black plastic housing. This takes the gravity measurements, as well as measure the temperature of the air as it passes through it. The housing is tapered to fit into a bung where an airlock would normally go in your fermentor. Inside the housing is a channel that lets you either connect a blow-off tube or an airlock. There’s a button on the housing that you push as part of programming routines, a micro-USB plug for charging the onboard battery, and an input for an optional temperature sensor. If you purchase the optional temperature sensor, the idea is you slide it down in a thermowell to monitor temperature in the body of your beer rather than the gas coming off of it.
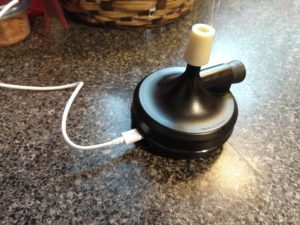
The base unit charging

Hands on Review

To start off, you use the Brew Perfect app and your smartphone to get it synced up and reporting info to the cloud. It does this in a cool way that uses your smartphone screen as a kind of strobe light that talks to a sensor in the main housing. After several unsuccessful attempts, I found I had to really block ALL outside light between my phone screen and the unit to get it to work. The good news is, you only have to do this once.

The logging data gets exported to a Brew Perfect server somewhere using your home WiFi connection. You can then access that data from the app on your smartphone, or after you login to your account on their website. The graphics implementation on the app is snazzy and looks impressive to wow your homebrew buddies, “Yeah, this is my Galaxy Wheat Ale fermenting at home in my basement right now.”
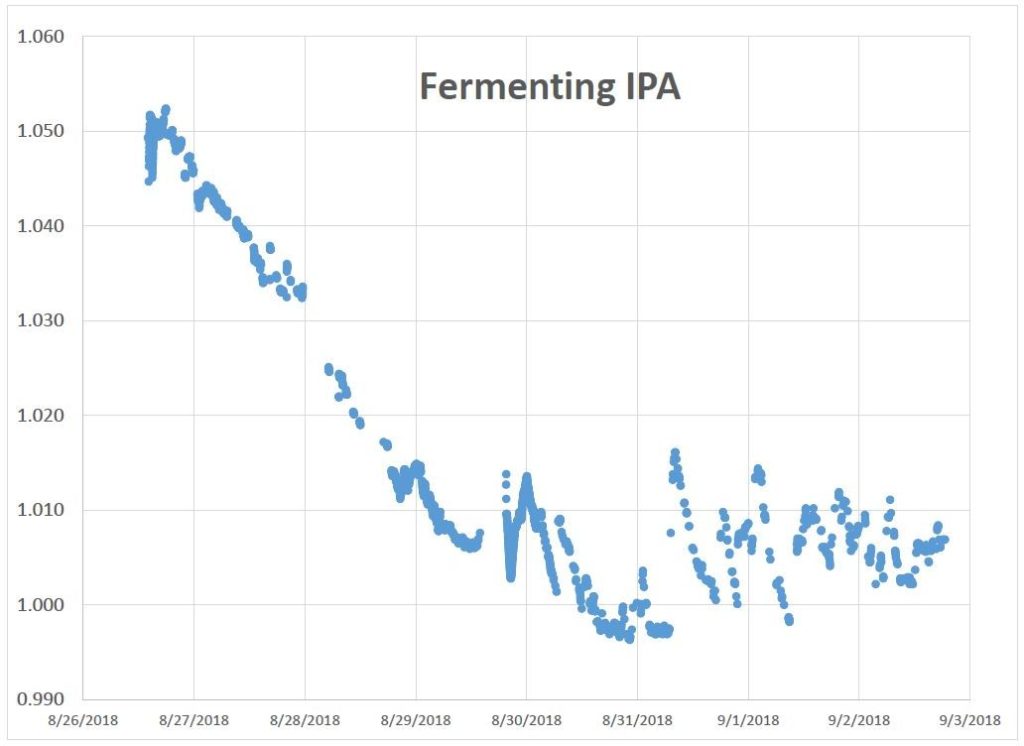
Plot of Gravity Data Through Fermentation and Dry Hopping

I did have a few issues with the data logging, though. The app was setup to a default data log every 10 minutes. The onboard battery was supposed to last 2 weeks at that rate. But I saw the battery life dropping rapidly at a rate that was only going to last a couple days. I found that it was logging data once or twice per minute. Occasionally it would log data every 5 minutes, 10 minutes, or in some cases only every 5 hours. Changing the sample rate in the app didn’t affect this sampling frequency. Luckily the unit works while plugged in to a USB charger, so I plugged it in and let it log away.

I had another issue with the high data sample rate. When looking at the plot of gravity over time, the app defaults to displaying 25 data points. With this plot, it drastically smooths out the data and it becomes difficult to see the subtle changes in gravity you’re looking for. If I switched it over to “All Data”, I could see that detail. However, due to the large amount of data being collected, the plot in the App couldn’t handle it after a few days and the request for all data just blanked everything out. I was able to see all data points through the Brew Perfect website on my computer, though.


Related: Our 10 Most Recent Reviews | Great Deals – Our Last 50 Finds


I also had a near heart attack at the end of my fermentation. I clicked on the button that said “Finish Brew”. I assumed this would stop logging new data, but keep all of the data I had. However, it wiped everything out and took me back to a default screen allowing me to start a new brew session if I wanted. I couldn’t find my data anywhere on the app. Luckily, I had the brew session up on my computer, and before refreshing anything, I clicked on the button to export the data to .CSV. I was able to get everything up to the last time I had reviewed the data on my laptop, which luckily was pretty much my full brew session. But I definitely recommend exporting your data periodically to .CSV so you don’t accidentally get burned by this.

At the start of fermentation, I saw no activity in my airlock attached to the Brew Perfect unit, even though I could see from the data that fermentation had clearly started hours earlier. The Brew Perfect team said this could be because the two halves of the black plastic housing might be over-tightened (they unscrew for cleaning inside). I tinkered around with this, but could never get my airlock to bubble.

Perhaps related to this unsealed issue, I found the temperature data to really just be a measure of the room temperature in my basement rather than the temperature of the beer in my fermentor. Whether I was below room temperature at the start of fermentation or above it at the end, the Brew Perfect basically just bounced around the room temperature. If you want to record the temperature, it seems the additional probe would be the way to go (although I didn’t test that).

Reviewing the data, I could see that fermentation started quickly (within 7 hours after pitching yeast), and I could see a good steady progression of the gravity dropping. I didn’t have any fermentation stalling, which was good given the several hours of blank spots in my data before I learned I needed to keep it plugged in so as not to drain the battery. As the fermentation was finishing and I was approaching my FG, I started to get a lot of ‘noise’ in the data. The gravity started a sawtooth pattern with swings in gravity of 10 – 15 points over a 6-8 hour time span. This made determining true completion of fermentation difficult to judge. Since it was swinging back and forth around the expected FG, I judged it complete and started adding my dry hops. Checking gravity with my refractometer when transferring to the keg, it confirmed that it was indeed oscillating around the FG.

Conclusions

Continuous data logging of gravity in your fermentor is something I expect will become commonplace in homebrewing. With most new technologies there is a learning curve early adopters have to deal with for the privilege of being on the leading edge. The Brew Perfect hydrometer has some nice features like WiFi connectivity for data logging and a visually pleasant app to view your fermentation. It also has some issues that I tried to capture here and any workarounds I came across so you can judge for yourself if the Brew Perfect is right for you to join the future!

Update: Brew Perfect has been discontinued, consider TILT

tilt review

Homebrew Reviews and More!  Check out our extensive homebrewing reviews library, our collection of resource posts and connect with us!


More Photos
More Homebrew Finds!

Recent Deals!

10 Most Recent Homebrew Resource Posts & How-To’s!

We are Homebrew Review HQ!  Our 10 Most Recent Reviews

Special Thanks to Brew Perfect for providing the unit used for evaluation in this review.

By Brad Probert.  Check out Brad’s website – beersnobby.com

Inkbird ITC-308 Digital Temperature Controller| Review

review:brewperfect tag:tpr

Hands on Review: 3 Stage Water Filter by Reverse Osmosis Revolution

This review is by Homebrew Finds Contributor Brad Probert.  Brad is an engineer, expert homebrewer and experienced reviewer.  Grab a link to Brad’s website at the end of this review.
Reverse Osmosis 3-Stage Filter Review

You can take just about any aspect of your homebrew process and find someone to speak passionately about how “vitally important” that step is in the process of making your best beer. We all have our own personal filters (no pun intended) on which advice makes its way through the noise and leaves a lasting impression on us. For me, it’s been water. I’ve heard about the importance of brewing water from multiple sources. Even those doing blind taste tests on different brewing variables, or writing about shortcuts to your brewing process point to the importance of your water chemistry.

The bulk of my all-grain brewing experience has been using distilled water and adding brewing salts to get my desired water profile. I was satisfied with the end results of the beer, but I definitely was not satisfied with the task of buying 10 – 12 gallon jugs of distilled water from the grocery store (or more than one store because they were out). So I researched home water filtration options.


Get the Gear: Whole House 3-Stage Water Filtration System, 3/4″ port with 2 valves and extra 3 filters set affiliate link, note that multiple variations of this product may be available, as such a different version may appear at this link


I assumed reverse osmosis (RO) would be the filtration process of choice. However, I was shocked to find that the “standard” RO system created around 4 gallons of waste water for every gallon of RO water. Everyone told me, “water your house plants with it”. I don’t have houseplants. With kids, dogs, and a cat, I figure I’ve got enough things to take care of around the house without having to store water in buckets and find creative ways to use it. The idea of dumping 40 gallons of water down the drain to get 10 gallons of brewing water seemed ridiculous to me so I looked for other options. What’s more, the flow rate of the RO systems dictated you’d have to plan ahead to gather your brew water the day before over the span of several hours, and I really wasn’t interested in making my brew process longer.

Our city water has good taste and the water report says it doesn’t have any mineral content above the recommended levels for brewing. The main thing I wanted out of a water filter system was to avoid the occasional chlorine aroma I get.

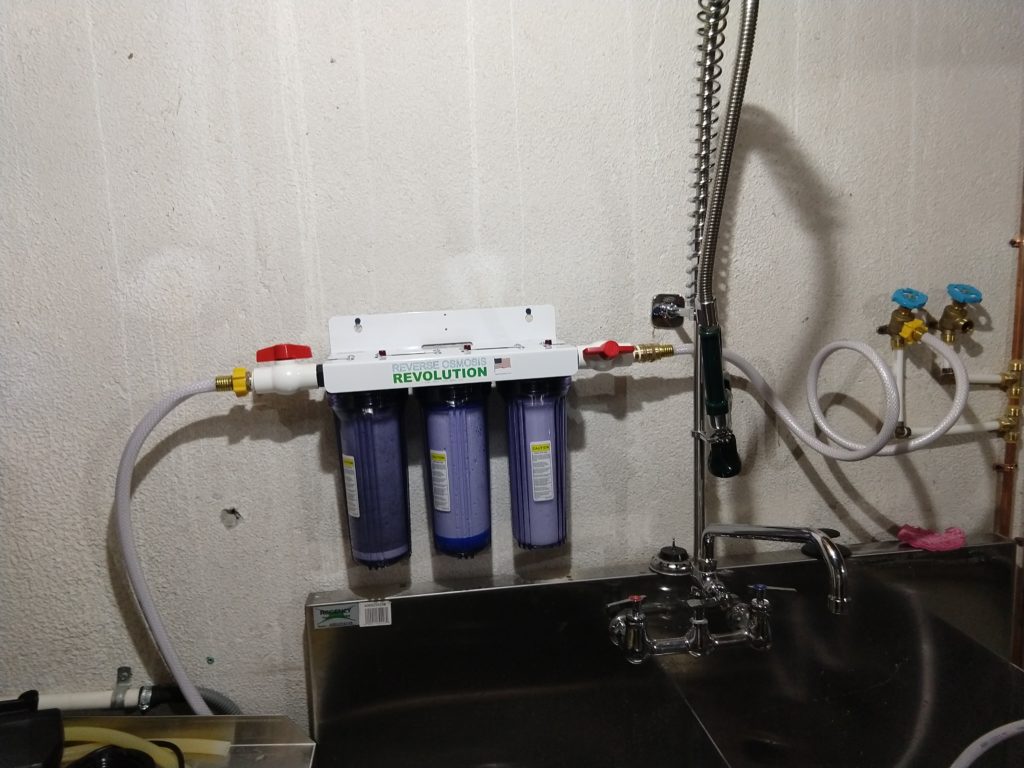
I settled in on a 3-stage water filtration system from Reverse Osmosis Revolution. Although their name says Reverse Osmosis, this 3-stage filter system is not an RO system. The first stage has a 5 micron sediment filter to filter out things like dirt, dust, sand, etc. Being on city water, I don’t expect these type of contaminants, but it is still a good process step to help protect the downstream filter stages. The second stage is a granular activated carbon filter that’s targeted to remove chlorine and VOCs (volatile organic compounds) which can give you undesirable odors. The third stage is another carbon filter, this time a carbon block filter. It’s also designed to address odor-causing factors in your water, it just goes about it in a slightly different way.

The sediment filter has a life of 3 – 12 months, depending on the level of sediment in your water. The carbon filters both have a life of 6-12 months, at which point the carbon is expected to be used up from the chemical reactions of its carbon-fueled filtration process.

Continue reading