Category Archives: Reviews & Top Posts

Hands on Review: BouncerMD Inline Beer Filter!
6/19/2024

This review is by Homebrew Finds Contributor Brad Probert.  Brad is an engineer, expert homebrewer and experienced reviewer.  Grab a link to Brad’s website at the end of this review.

BouncerMD “Mac Daddy” Inline Filter

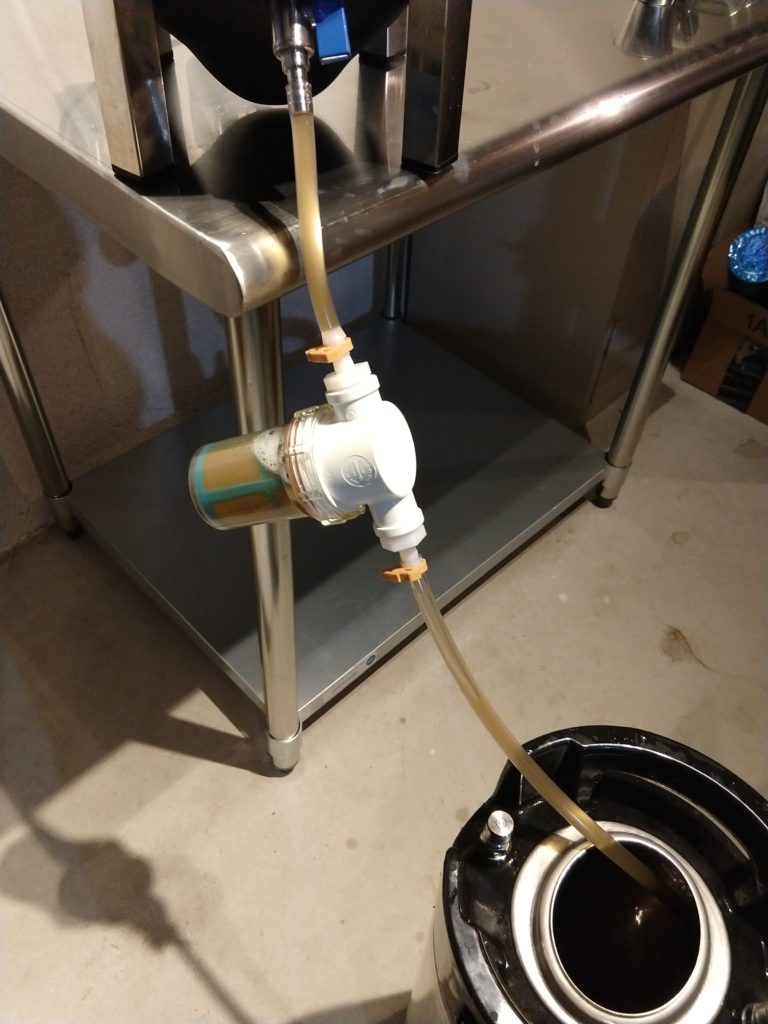
As popular as unfiltered beer is right now, there are still a lot of times in the brewing process when you want to filter your in-process beer to some degree. For me, it’s hop trub when transferring from the kettle to the fermentor. Dry hopping can also get you unwanted debris when transferring into your keg. You’ve got process options like whirlpooling or gear additions like bazooka screens for inside your kettle. The Bouncer filter is another option you can add to your toolbox.
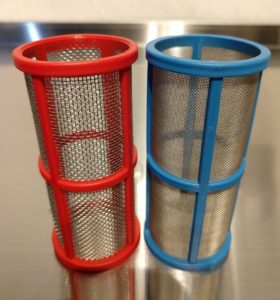
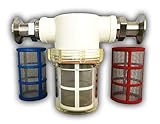
Course filter on the left, Fine filter on the right

The Bouncer filter is like a miniature version of a home water filter. There’s a plastic housing that has inlet and outlet ports, and a clear plastic body that holds the stainless mesh filter screen and screws onto the main housing. The filter screen is made of stainless steel and nylon, and comes in two different mesh sizes. The coarse filter is 20 squares per inch (915 microns), and the fine filter is 50 squares per inch (305 microns).

The Bouncer itself also comes in two sizes- Normal and Mac Daddy. The Normal size comes with barbed fittings to hook up your 3/8” ID transfer hose. The Mac Daddy comes with two sets of fittings- one for 3/8” ID hose and the other 1/2″ ID hose so you can select whatever size matches your siphon or brew kettle valve. The larger Mac Daddy filter also gives you 224% more filter surface area than the base model.

The filter unit is rated for temperatures up to 150F. That means it’s good post-chilling, but not suitable for the hot inlet side into a plate chiller for example. Another creative use of the filter is as a Randall to infuse hops or other ingredient flavors into your beer when serving. More on that in my hands on trial below.


Check Pricing and Availability:

Bouncer Replacement Parts

Continue reading

Hands on Review: Kegland Inline Secondary Regulator!

DuoTight Inline Regulator that has been updated to digital, see below for walk through of that process.

Updated: November 21, 2024


Limited Time Deal, Save via William’s Regulator Sale!

  • For a short time William’s Brewing is discounting their entire lineup of CO2 regulators and accessories by 15%.
  • No coupon code is required. Discounted prices show up in cart.
  • Shipping is free or reasonably priced flat rate to addresses in the contiguous US depending on your order size for most items.

William’s Brewing Regulator Sale

These are included in the mix! Now is a great time to add individual control to your kegs!


Multi-Pressure CO2 Options

Maintaining multiple CO2 pressures in your kegerator gives you the ability to… keep kegs at different pressures.  This is a requirement to maintain different carbonation levels. It’s also handy if you want to force carbonate a keg more quickly, at a higher pressure, while maintaining your standard serving pressure on a keg that’s already being served or if you want to have a utility line for purging kegs and such. continues below…

The general options for pulling this off are…

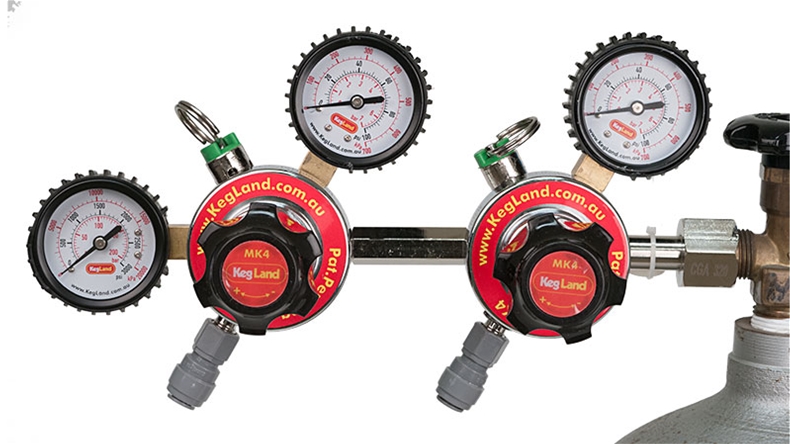
  • A multi-pressure primary CO2 regulator – example. This has two (or potentially more) high pressure bodies that allow you set different pressures.
  • Secondary CO2 regulators – example. These have no ability to connect to a CO2 tank directly. They must be connected to a compatible primary.

Both good options, but generally expensive.

Kegland to the rescue. Kegland has introduced economical inline secondary regulators. As of this review there are three options.

But first, more about DuoTight!

Kegland’s DuoTight Fittings are designed to work with EVABarrier Double Wall Tubing.  They offer quick, reliable connections, easy implementation, a variety of fitting options and feature amazing versatility.  They’re also, generally speaking, very well priced.  DuoTights are push to connect fittings and require no tubing clamps.

Check out my extensive Hands on Review

Hands on Review Kegland Inline Regulator w/Gauge

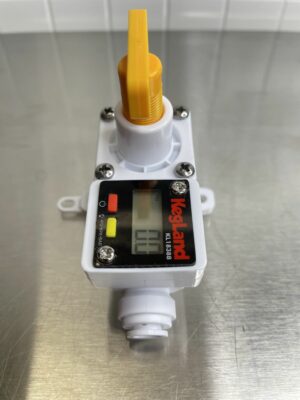
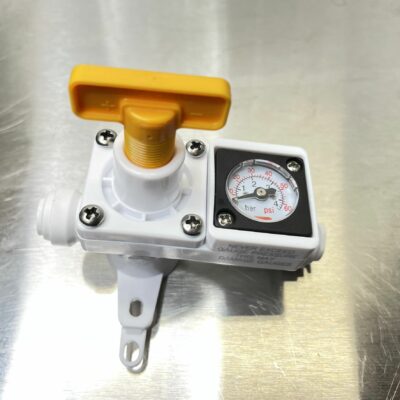
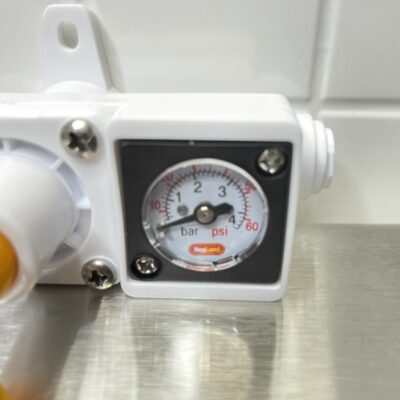
A look at the regulator. It has a pressure gauge, adjustment knob, inlet and outlet DuoTight ports and mounting holes.A closer look at the pressure gauge. This one goes to 60 PSI. Other gauge options may be available. This is a huge improvement vs v1. v1 feature no gauge. There is an updated DuoTight compatible inline (v2) version that has no gauge. That keeps costs down but still adds DuoTight compatibility. If you choose a model without a gauge, this is another great application of a Spunding Valve.
Continue reading

Adding Fruit to Your Homebrew Using Amoretti Fruit Purees and Artisan Natural Flavorings + Recipe for Wildberry Rye Ale!

This review is by Homebrew Finds Contributor Brad Probert.  Brad is an engineer, expert homebrewer and experienced reviewer.  Grab a link to Brad’s website at the end of this review.

Using Amoretti Fruit Puree in Homebrew

I’ll be upfront and admit I’m not a fruit beer brewer. I do enjoy a few commercially available fruit beers, but it’s more as an occasional change of pace than something I regularly seek out or buy on a regular basis. And it hasn’t been until recently that I’ve actually brewed a fruit beer myself. A friend wanted me to make a Peach Pale Ale, and that was my first foray into brewing one. I didn’t use Amoretti products on that beer, but it’s worth a brief explanation of my experience there, in order to contrast it to my experience with the Amoretti products.

Brewing the peach beer, I didn’t have the option of fresh, delicious tasting peaches to make a beer using fresh fruit. Conceptually, this seems like the ultimate solution, but this can limit your creativity to either time of year, or quality of product substantially. My first experimental batch was using a canned puree product. Thick and “sludgy”, this gave a great mouthfeel and cloudiness, but it had a distinct “dried fruit flavor” to me. It wasn’t as bright and popping as I had wanted.

For the second batch, I did a combination of the same canned puree, but also added some natural flavoring extract I got from my LHBS. That got me more brightness and pop in the flavor, but it also came with hints of alcohol-y flavors, and somewhat artificial aroma. In the end, through working a combination of this canned puree and flavor extract, I got a beer that turned out well, but I didn’t feel either was exactly the perfect tool for fruit beer.

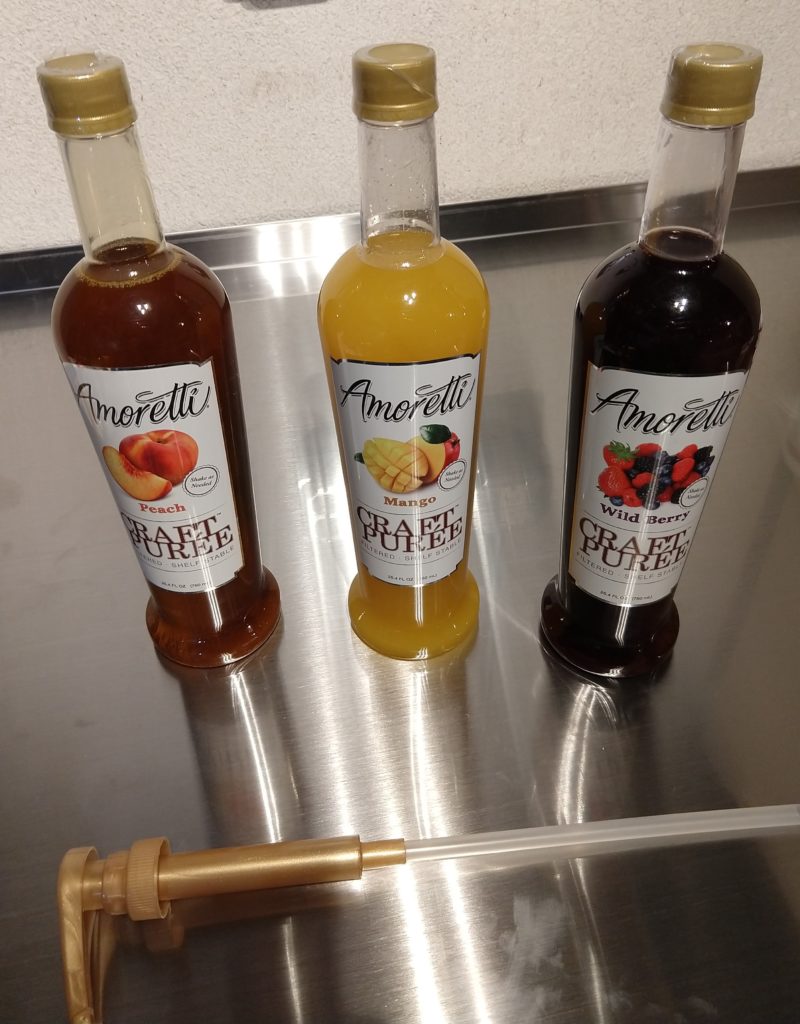
I saw Amoretti fruit purees and thought I’d give them a try to see if they provided a better option. Amoretti set me up with some bottles of their craft puree as well as their artisan natural flavor compounds. Both are advertised as additions to your beers, with concentration recommendations printed on the containers. The craft puree comes in a large bottle with a hand pump like a soap dispenser. Specifically designed for you to either add flavoring in bulk to your whole keg, or just a squirt into your glass before you fill it with beer. To make a sort of fruit-flavored-Radalizer.


Shop for Amoretti:

Continue reading

Hands on Review: Fermonster Fermentors

Updated: 5/9/2024

This review is by Homebrew Finds Contributor Brad Probert.  Brad is an engineer, expert homebrewer and experienced reviewer.  Grab a link to Brad’s website at the end of this review.

Fermonster PET Fermentor

With all of the fermentor choices out on the market, there are plenty of good reasons to not be fermenting in that plastic bucket that came with your starter homebrew kit. Most of us make that realization when we can no longer fool ourselves into calling it “white”, and it carries the aroma of all the previous hop varieties it’s seen. PET Plastic fermentors are the logical next step up from the HDPE plastic buckets.

PET Is far less porous than HDPE. Because of that, it makes for a great oxygen barrier. As a material, HDPE passes through 50x the amount of oxygen over a given time than PET. So PET makes for better long ferments like if you’re lagering (or are just the forgetful type). Glass is an even better oxygen barrier, not allowing any oxygen to permeate it. But from a practical perspective, just like Coca-Cola figured out, glass is heavy and creates a nasty mess when you drop it. PET Is also cooler than that plastic bucket because the fermentor is clear, which allows you to view the exciting chemistry going on inside your brew.

The Fermonster comes in different sizes and options. They come as big as 7 gallons or as small as 1 gallon. And also intermediary sizes of 6 gallons and 3 gallons. You can get it without a spigot or with one if you want to do gravity beer transfers instead of using a siphon.


Limited Time DEAL

fermonster sale

Fermonster Fermenter Sale!


Compare Models and Prices, Review Continues Below


Continue reading

Hands on Review: Wort Hog Turnkey Electric e-BIAB System

highgravitybrew.com wort hog review

This review is by Homebrew Finds Contributor Brad Probert.  Brad is an engineer, expert homebrewer and experienced reviewer.  Grab a link to Brad’s website at the end of this review.

Wort Hog 120V eBIAB System

When it comes to electric Brew In A Bag (eBIAB) systems, there are several choices out there. I’ve tried both 240 Volt and 120 Volt systems. While I love the speed of heating water/wort on the 240V systems, I don’t love the constraints/expense of wiring a 240V plug in a convenient place. The 1500 Watt and 1600 Watt eBIAB units out there are good, but they do lack when it comes to speed of heating strike water or getting a really vigorous boil. The Wort Hog 120V system slides into this niche with the convenience of a 120V system, but using a 2250W Blichmann heating element to give a notable boost.


adyeast


Also Consider… BrewZilla!

BrewZilla and DigiBoil at MoreBeer

Hands on Review: BrewZilla Gen 4 All Grain Brewing System

System Overview

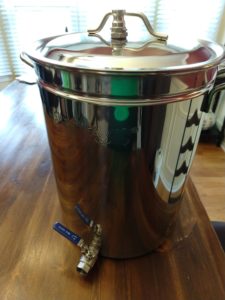
The Wort Hog Turn Key System via High Gravity Fermentations Supplies uses a Bayou Classic 11-gallon kettle. I’d never seen a Bayou Classic kettle in person before, and I’ll admit I had a pre-conceived opinion of them. I thought of them as “cheap turkey fryers” based on their low price and marketing, but I found my baseless opinion was completely off. This 11-gallon kettle has a super shiny, polished exterior, but most importantly it was made of a very robust thick gauge stainless steel. With high quality, clean welds, this baby is certainly going to live up to wear and tear for a long time, and cleaned up very easily.


Continue reading

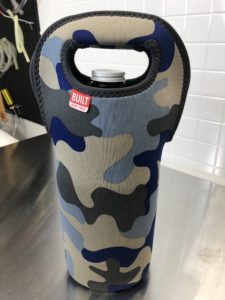
Hands on Review: Insulated Neoprene Growler Tote by Built NY

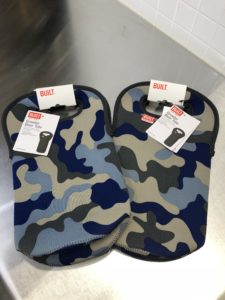
This is a hands on look at Built NY’s Insulated Neoprene Growler Tote.  It’s made from stretchy neoprene (wet suit material) which helps protect and insulate 64 oz growler bottles during travel.  It also stores flat when not in use and is machine washable.

I picked up two of these, because… sometimes I like to tote two growlers. 🙂
Continue reading

Hands On Review: Insulating Neoprene Kegerator Tower Wrap – Fight the First Foamy Pint!

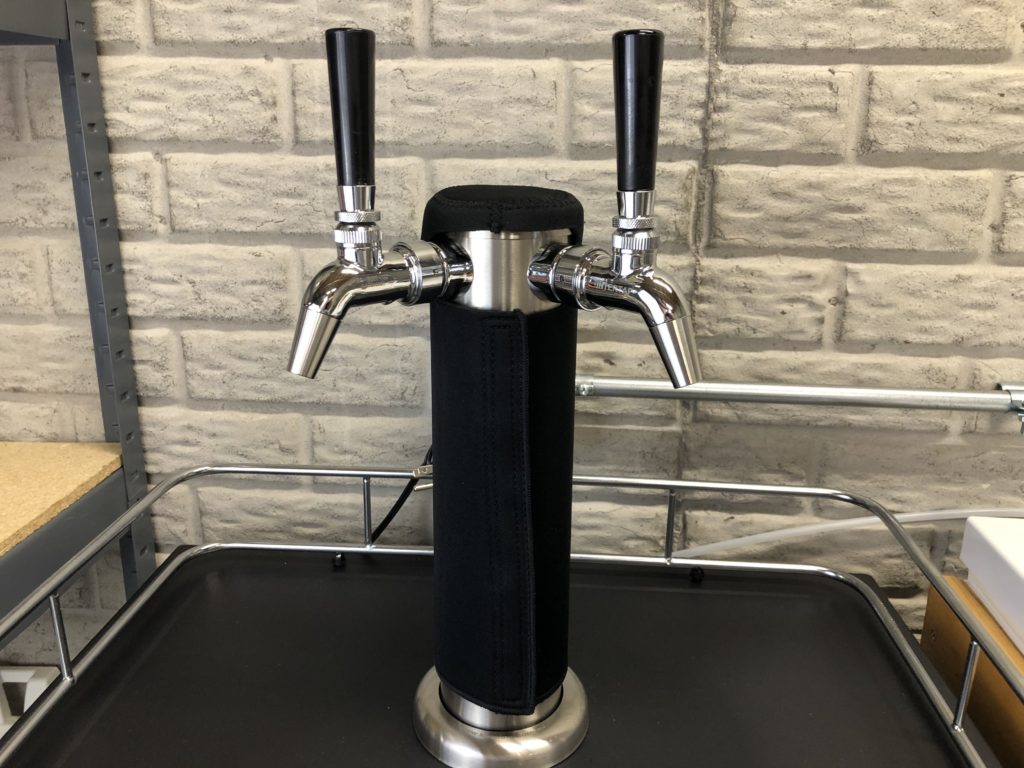
The idea behind a Neoprene insulating tower wrap is to help insulate the tower to help keep beer in your lines cold.  Warming of beer in the lines is a leading cause of first foamy pints.  The beer warms up and CO2 comes out of solution more easily.  When you vend this warm beer it has a tendency to foam.  Keeping lines as cold as possible reduces or eliminates this effect.  The additional insulation could also help you save some electricity.

Here’s a hands on look at Redwood City Brew Supply‘s (via Amazon) Neoprene wrap.  Multiple sizes and configurations are available.  I have a two tap KOMOS Kegerator – Hands on Review – so I went with the two tap 3″ version.

Continue reading

Jester King Brewery Homebrew Recipes – Straight from the Brewery!

The fine brewers at Jester King based in Austin Texas have released homebrew recipes for 6 of their beers.  Kudos to Jester King for sharing with the homebrewing community!

Recipes include…

  • Biere De Miel, an ale brewed with Texas wildflower honey
  • Das Wunderkind!, a blend of young, fresh ale with mature, barrel-aged ale
  • Gotlandsdricka, an ale brewed with smoked malt, juniper, and sweet gale
  • Kvass, an ale brewed with miche bread
  • Noble King, a hoppy ale
  • Snörkel, an ale brewed with oyster mushrooms and smoked sea salt

Update: Recipes have since been removed from their website after an update.  No fear, we have them archived!  And, we have additional recipes along with a source for Jester King’s Mixed Culture

Continue reading

Kegerator Tubing – Barbed vs Flare Fittings – what should you use?

YaeBrew Gas Manifold, Beer Gas Distributor, Air Distributor CO2 Manifold - Splitter 5/16" Barb Fittings (4 Way)Pictured: YaeBrew Gas Manifold, Beer Gas Distributor, Air Distributor CO2 Manifold – Splitter 5/16″ Barb Fittings (4 Way)

I think that the general consensus among homebrewers and home kegerator builders is that… MFL/Flare/Swivel connections are superior to barbed connections.  That’s just my read on the situation, no scientific basis for that statement.  After all, MFL swivel thingies look cool, they’re easy to attach and you can take tubing on and off easily and.  The total solution, including swivels also generally costs more… more expensive = more better… right?

My take on the matter…

For gas lines: Personally, I prefer barb fittings on CO2 lines as they don’t loosen over time.  Use a quality clamp and you have a solid connection that should not loosen or leak over time.  Moving kegs and lines around could conceivably loosen MFL connections and a CO2 leak is invisible.  Even a small, slow leak could equal an emptied CO2 tank.

For liquid lines: A liquid leak is a lot more obvious.  A little dripping from a liquid MFL line would tell you that the line has loosened.  I generally use flare swivels on liquid lines.  I do still use barbs on tail pieces because that’s kind of a tight spot on my kegerator that makes it difficult to turn a wrench.

Of course you can use whatever you want.  If you use MFL, I suggest periodically tightening swivels to make sure you always have a good, solid connection.

Continue reading

Tip: Dissolving Dry Malt Extract More Easily – Hot or Cold Water?

812325 Briess - Dry Malt Extract - Golden Light - 3 lbs.Pictured: 3 lbs Briess Golden Light Dry Malt Extract (DME) via Amazon

This is a quick and simple tip… Dry Malt Extract dissolves more easily into cold water than it does into hot water.  That seems a little counter-intuitive to me, but I’ve found it to be true.  It seems to clump up a lot less and just generally dissolve more easily.

Thank you to John Palmer author of How to Brew for this tip

Continue reading

Finding Harder To Find Yeast Strains – Bootleg Biology, The Yeast Bay, East Coast Yeast and More

unique homebrew yeast

White Labs and Wyeast are pretty well ubiquitous.  Most shops carry both or at least one of these great lineups.  In addition to their many regular options, both companies periodically have special seasonal releases.  They produce outstanding yeast, bacterias and blends.

If you’re looking to try something new… This post aims to help you find some of the smaller yeast houses

Continue reading

Hands on Review: Keg Connection Kegerator Conversion Kits

kegconnection.com kegerator review

This review is by Homebrew Finds Contributor Brad Probert.  Brad is an engineer, expert homebrewer and experienced reviewer.  Grab a link to Brad’s website at the end of this review.

Kegerator Conversion Kits from Keg Connection

Most everyone that homebrews, started out by bottling their homebrew. And a lot of people that have done it for a few years eventually move to kegging. If you haven’t made the move yet, you might be trying to decide between buying a pre-configured kegerator or getting a kegerator kit and a fridge or freezer to build yourself something custom. When I first moved to kegging I was too intimidated to go the custom route and bought a pre-configured kegerator. If I had known then how simple a kit was, I definitely would have gone the custom route and got more for my money.


Limited Time Deal:

  • Keg Connection is discounting their entire lineup of keg kit kegging systems by 15%.
  • There are multiple options to choose from. No coupon code is required.
  • HBF Readers Save More! HBF5OFF takes another 5% off.
  • Shipping is a flat fee no matter how much you order to addressed in the contiguous US.

Save on Keg Kits at Keg Connection!  – remember promo code HBF5OFF to get the extra 5% off


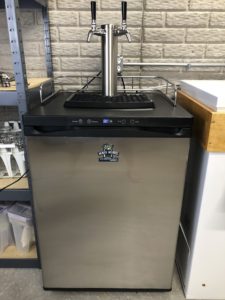
I recently scavenged my original 2-tap kegerator for parts when building my upgraded 4-tap keezer. But then I decided I had a use for the kegerator again, so I needed to get a kit to bring it back online. Keg Connection carries a myriad of kits. If I was starting from scratch and customizing my own keg-bearing refrigerator, I could get a kit a kit that had the shanks and everything to put the taps into the door. Or a tower kit to come up out of the top of a small dorm-sized fridge. In my particular case, I still had the 2-tap tower and shanks, so I only needed some of the components. Keg Connection lets you customize to any level with reasonable price adjustments for whatever you add or delete. So I got only what I needed.


Check Current Price and Availability:

Continue reading

Hands on Review: KOMOS Stainless Steel Kegerators! – Designed for Homebrewers

keg king kegerator reviewKOMOS Kegerators, are designed for Homebrewers from the ground up.  They have loads of features including the ability to operate at either draft serving temperatures or fermentation temps.


A Note On Branding of This Kegerator

Since this review was published, this Kegerator has gone through at least three branding changes.  Initially it was the Keg King, then it became the “Kegerator with Stainless Steel Intertap Faucets” and then it became the Kegland Kegerator.  Now, it’s the KOMOS kegerator.

Differences Between the Reviewed Unit and the Current KOMOS Kegerator

Beyond, branding, the KOMOS Kegerator sports two notable upgrades.  First it uses EVABarrier double walled tubing.  Second… it’s equipped with DuoTight connections.  I’ve been very impressed with both of these, so these are nice improvements.  There may be some other small differences.

Related: DuoTight Review


See Prices, Current Models and Specs, Review Continues Below:

Komos Kegerators at MoreBeer

Continue reading

Hands on Review: Ss Brewtech FTSs2 Heating and Cooling System

Updated: 5/3/2024

This review is by Homebrew Finds Contributor Brad Probert.  Brad is an engineer, expert homebrewer and experienced reviewer.  Grab a link to Brad’s website at the end of this review.

Brewtech FTSs2 Heating and Cooling System

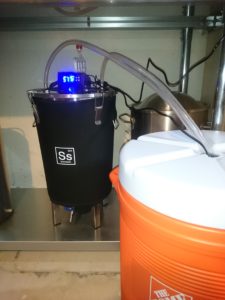
From multiple accounts, the temperature at the start of fermentation is key in controlling the flavor nuances of various yeast strains. Even if you have an elaborate system of heat pads, blankets, towels, water buckets, etc. that allows you to hone in on your desired temperature, it can’t react to changes in your fermentation. If things start to really heat up overnight while you’re sleeping, or during the day when you’re at work, you’re out of luck. Once you start caring about fermentation temperature, it doesn’t take long before you conclude you need something that has its own control to adjust and react to temperatures in real time.


Compare Prices and Selection, Review Continues Below:

Continue reading

Hands on Review: Cool Brewing Corny Keg Cooler Bag

cool brewing keg cooler bag review

Updated: 6/18/2024

This review is by Homebrew Finds Contributor Brad Probert.  Brad is an engineer, expert homebrewer and experienced reviewer.  Grab a link to Brad’s website at the end of this review.

Cool Brewing Corny Keg Cooler Bag

There’s no question that bottled homebrew is a vastly more convenient method of sharing your brews than kegging. You can bring in a bottle to share with co-workers in an innocent looking bag for them to take home, or show up to a house party with a 6-pack. However, there’s also no question that taking that whole fermentor full of beer and transferring it into ONE container is a much easier task of packaging. And not having to figure out how much bottling sugar is needed for your lager vs. ale that was fermented at a cold temperature but bottled at a warm temperature, is also nice.

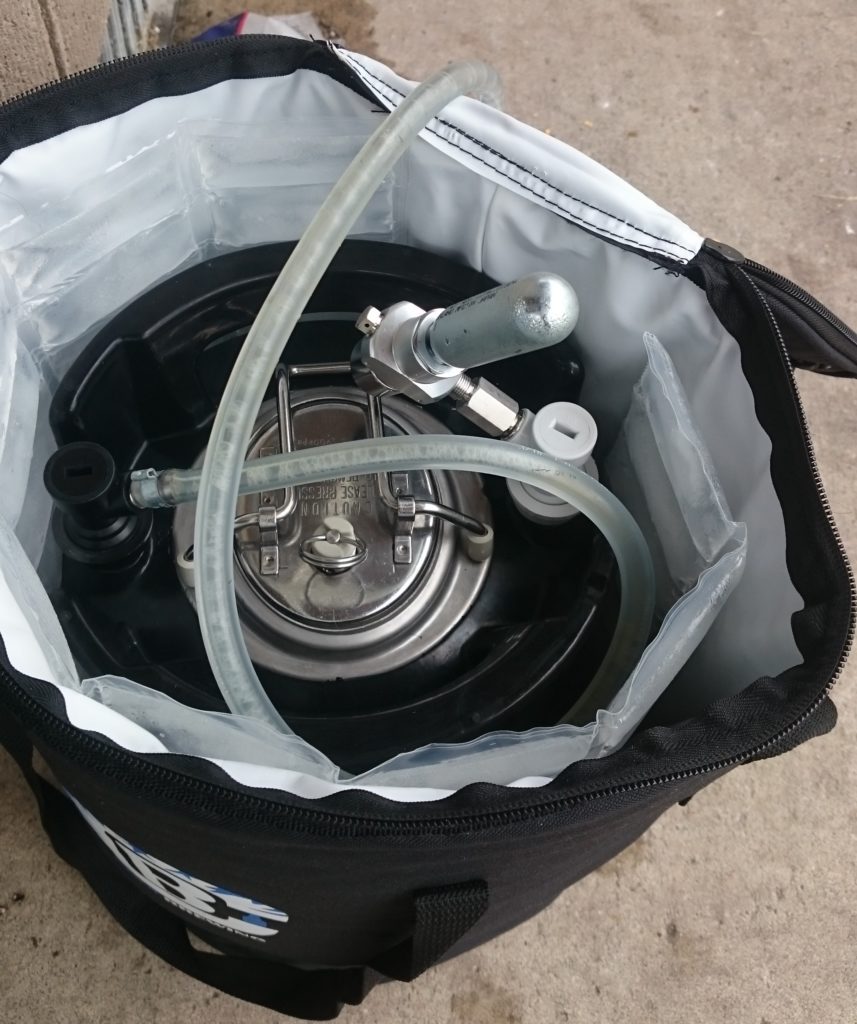
Just like there are products out there that make bottling easier, there are also products out there that make sharing your draft homebrew easier, too. While you can certainly fill a growler with your draft beer and have a nice compact mobile size, for those that really want it easy, Cool Brewing comes to your rescue. They make insulated bags so you can just stick your entire keg into the bag, throw in some ice, a picnic tap, and a portable CO2 regulator and you’re ready to go.


Check Current Price, Description and Availability:

Continue reading

Whiskey Barrels for Homebrewing!

Oak Barrels for Aging Homebrew!

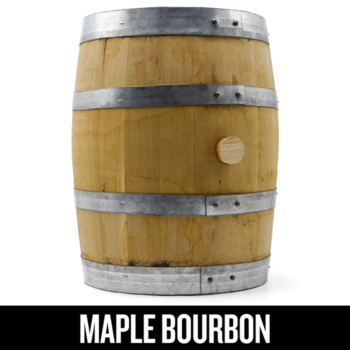
Oak barrels can be used to used to age stouts and porters, age other beer styles, make sour beers and more.

New oak barrels can be had in sizes ranging from 1 liter all the way up to 1 barrel/53 gallons. As with most things 5 gallons seems to be a sweet spot for a lot of brewers. Larger barrels can be good for prolific homebrewers or group brews and smaller 1 to 5 liter sizes are great if you’re wanting to give barrel aging a try without a huge amount of expense or space.

Continue reading

Hands on Review: Tilt Bluetooth Fermentation Hydrometer!

tilt review

Updated: September 11, 2024

This review is by Homebrew Finds Contributor Brad Probert.  Brad is an engineer, expert homebrewer and experienced reviewer.  Grab a link to Brad’s website at the end of this review.

Tilt Bluetooth Fermentation Hydrometer

I get pretty excited about most homebrew gear. As an engineer, I love trying to find new tools that let me brew more consistently, or give me control over processes that previously were just a spectator sport. The Tilt Bluetooth hydrometer is one of those devices that pulls back the curtain a bit on a part of the brew process that’s a bit more mysterious. It lets you see what’s going on within your fermenting beer in a way that makes you wonder how you managed without it before.


Deals on TILT are Rare, Why?

TILT is a MAP item. MAP = Minimum Advertised Price.  It’s an agreement between sellers and manufacturer’s not to sell an item below a certain price.  This gear generally sells for about the same price no matter where you purchase it from and is rarely discounted.

Rare, Limited Time DEAL on TILT!

tilt deal

  • As of this posting SoCal Brewing Supply is discounting everything sitewide by 15% when you use coupon code welcome10.
  • This is valid on first time orders.
  • Shipping is also free to most US addresses.

Based on my experience with TILT deals, I’d suggest getting in on this sooner rather than later.

Tilt Hydrometers at SoCal Brewing Supply – remember promo code welcome10


Check Current Prices & Availability

Check product pages and searches for current availability, description and pricing

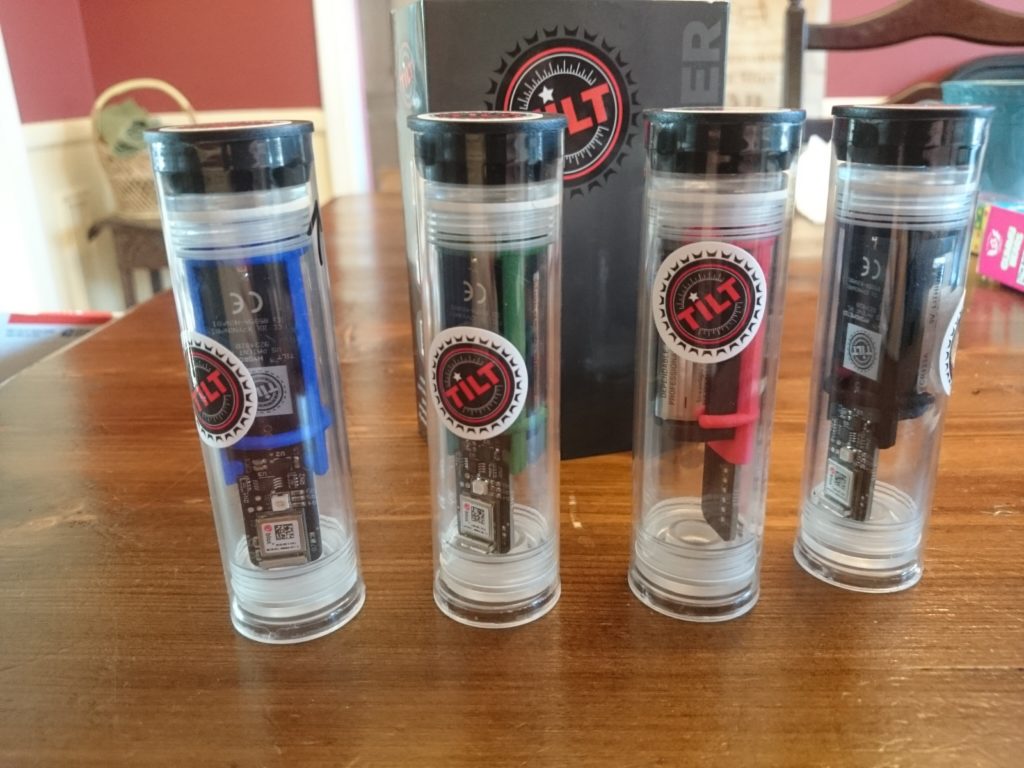
A note about colors: The function of all models is the same. If you want multiple TILTs you should choose different colors because your app can monitor only one of each color

TILT Wrench

Related


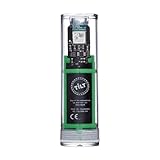
The device comes in a compact clear polycarbonate tube, sealed on each end to keep the battery and fancy circuitry dry as it floats along in your fermentor. It’s completely no-strings-attached, and you just drop it in your fermentor and the Bluetooth chip on board broadcasts to your smartphone or tablet to report Standard Gravity and temperature. It makes use of a novel concept to track your gravity. It has a digital inclinometer on board, which measures how much it’s “tilt”-ed . The weight of the device makes it want to sink in your beer, and buoyancy of the cylinder counteracts it. The thicker your wort is, the Tilt doesn’t sink as much and as a result has a greater tilt. As your fermentation progresses and the gravity drops, the buoyancy decreases and Tilt sinks lower and becomes more vertical. The circuitry measuring the angle does some calculations and outputs the angle as a gravity measurement.

Continue reading

Canada: Build a Spunding Valve! – How and Why

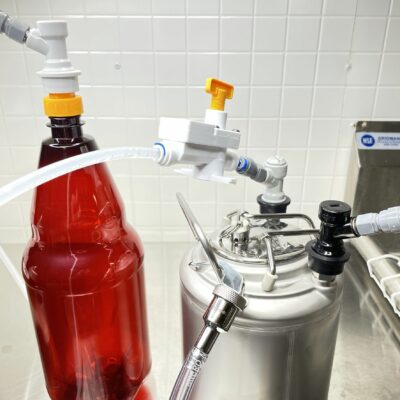
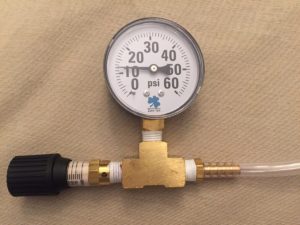
A Spunding Valve allows you to maintain a set pressure.  If pressure in the vessel exceeds the set point, it is expelled.  It generally consists of an adjustable PRV valve, a tee, a gauge and a way to connect to your keg.

This is a version of our Spunding Valve Build that features components that are generally available in Canada.


Are you a US Homebrewer?

Check out the US Version of this Post – Build a Spunding Valve! – How and Why


Related Resources:


Homebrewing Applications of a Spunding Valve

  • Pressurized fermentation.  Ferment in a 5 or 10 gallon corny keg and use your Spunding Valve instead of an airlock.  This allows you to ferment at your desired pressure.
  • Dry hop under pressure.  This allows you to dry hop earlier while reducing oxygenation.  Active yeast are more likely to metabolize oxygen that’s introduced during dry hopping during active fermentation.  Since CO2 is not exiting beer as vigorously under pressure, wanted compounds, flavors and aromas are more likely to stay in your beer under pressure.
  • Naturally and accurately carbonate beer right in the keg.
  • An airlock replacement.  Keep the valve wide open for non-pressurized fermentations.  Only do this if you have plenty of head space.  This wouldn’t make a great blow off tube.
  • Keg to keg transfers.  Use the Spunding Valve to allow excess gas to exit the receiving keg as you transfer under pressure.  Helps you achieve a slow, controlled and pressurized transfer.
  • Fix over-carbonated beers.
  • Test for keg leaks.  Pressurize your keg to serving pressure.  Put the Spunding Valve on (with the pressure set well above your serving PSI) and note the reading.  The gauge should remain steady.  If pressure drops, you know you have a keg leak.  The digital build, see below, is especially helpful for this task,  The digital gauge reads with .1 PSI resolution making pressure changes easy to spot.  It’s worth noting that this checks the entire keg including gas body o-ring.  That spot is hard to check and other way as it’s only in function when the gas QD is on.  When the gas QD is on… it’s difficult to spray and check for bubbles underneath the gas QD.  Thanks to Scott Janish for this tip!
  • As an airlock for long term aging of beers.  Airlocks can run dry over time.  A Spunding Valve will not.
  • Utilize CO2 from fermentation for flushing kegs and fermenters.

Continue reading

Get Food Grade Buckets for Cheap – or FREE – use for fermenters and grain storage

Bucket photo courtesy of MoreBeer – Search MoreBeer for “Bucket”  – For illustrative purposes, I’m not suggesting that you buy this.  Read the tip below.

Why Buckets?

Buckets are super handy around your home brewery and beyond.  Potential Uses: Convert to a Fermenter, Convert to a Mash Tun, Grain Storage, lugging around stuff on brew day, general storage, use to help with cleaning and sanitation.


Continue reading

Hands on Review: GrowlerWerks uKeg 128 Pressurized Growler!

growlerwerks ukeg review

Updated: 5/3/2024

This review is by Homebrew Finds Contributor Brad Probert.  Brad is an engineer, expert homebrewer and experienced reviewer.  Grab a link to Brad’s website at the end of this review.

Hands on Review: GrowlerWerks uKeg 128

When I initially migrated from bottling to kegging, I was glad to be free of bottle wrangling. I didn’t have to keep boxes of empties, deal with cleaning/sanitizing, or the bottle-filling process. I also didn’t have to deal with bottling sugar calculators that had me making bottle bombs with cold-fermented lagers, or ales that sat mysteriously for weeks without developing carbonation of any intensity. But not long after leaving the bottles behind, I ran into the issue of how to share my beers. Of course I could invite people over, but there’s always that party at a friend’s house or a neighbor that really likes NEIPA but can’t make it to your tasting party.

To keep your homebrew mobile, you can go the way of glass growlers like the brewery taprooms do. It’s got the same appeal at home as it does at the brewery- cheap and easy. But it limits you on key aspects of freshness and ability to stay cold at a party. If you think about it, it’s akin to taking a 4-pack of your favorite beer you want to share, opening the bottles and pouring it into an empty pop bottle, and screwing the lid on it. Let’s face it, your homebrew is a labor of love, and it’s natural to want to show it off to friends & neighbors. So when you think a bit about the best way to present your baby, it’s not surprising homebrewers look for something beyond the glass growler with screw-on lid.

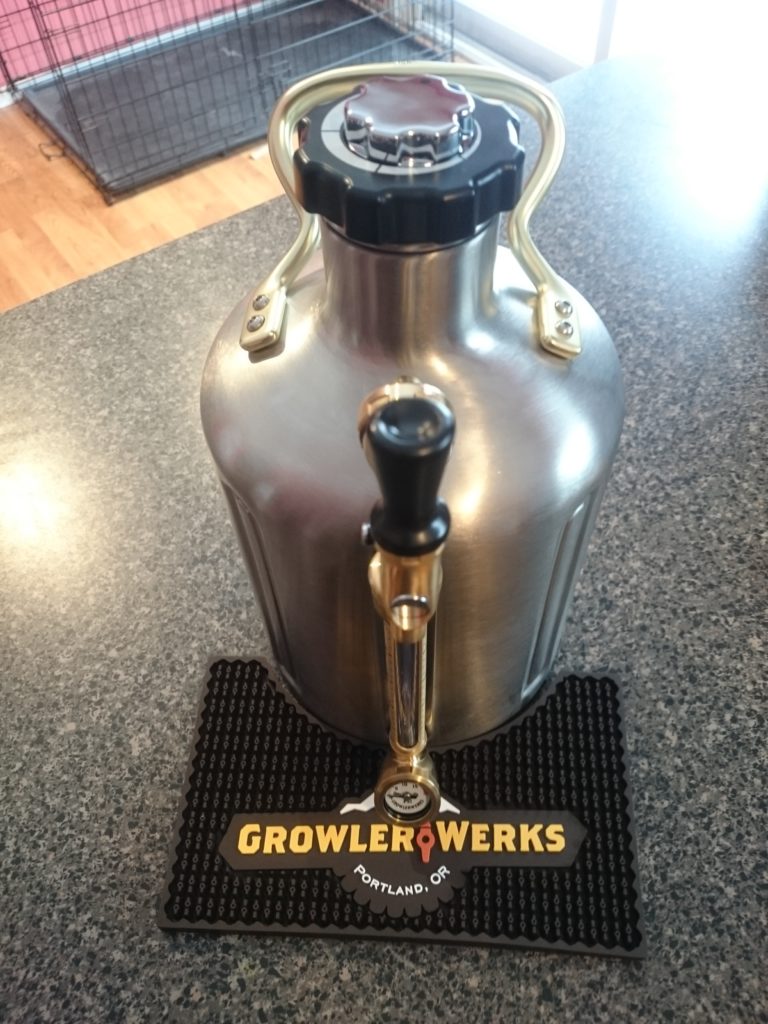
GrowlerWerks came onto the homebrewing scene when it completed its successful Kickstarter campaign in December of 2014. They initially launched with a high-tech upgrade to the standard glass growler with their 64 oz pressurized/insulated growler. The 128 oz version came along about a year later with all the same features, but with a full gallon capacity. That’s a great difference. The uKeg 64 holds four 16-oz pints. That works well for loaning out a sample to a friend. The uKeg 128 holds eight 16-oz pints. Now you’re talking something useful to bring to a party. The 64 almost felt like more trouble than it was worth to take to a party, unless you were bringing more than one brew. But with the 128 you don’t have to show up and then hide it until your craft brew friends find you and get to sample it before it’s gone.


Check Current Pricing and Availability:

Continue reading