Category Archives: Reviews & Top Posts

Hands on Review: EcoVessel BOSS Stainless Steel Triple Insulated Growler with Infusion Basket

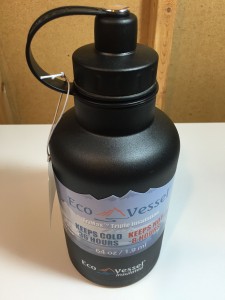
Eco Vessel Beer Growler

Hands on Review EcoVessel BOSS Growler

The EcoVessel BOSS Growler boasts stainless steel construction, triple insulation, an infusion basket and a unique cap that gives you two choices and features a plastic strap that attaches to the growler.  It has a standard 64 ounce capacity and comes in multiple color options.

cln_img_8988Top of the growler.  This growler has two openings.  A larger one for filling and pouring and a smaller one for drinking.  Both have gasketed seals.

cln_img_8989
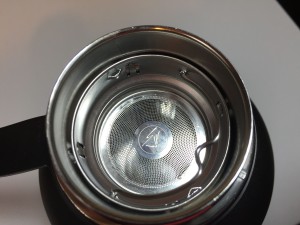
A look at the top of the infusion basket

Continue reading

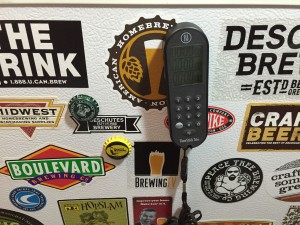
A Look At: Anova Touch Screen Heat Stick and Circulator

Review Anova Sous Vide for Homebrew

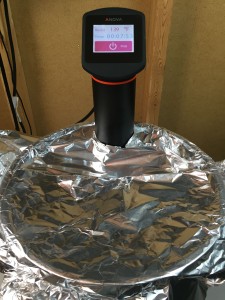
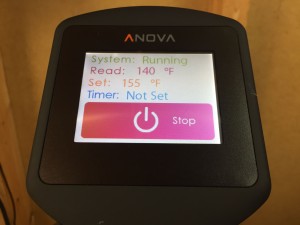
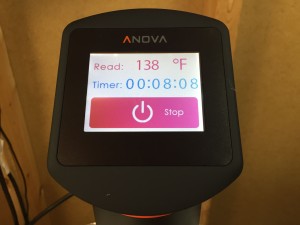
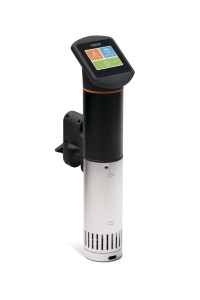
Here’s a look at Anova’s Precision Sous Vide Immersion Circulator.  This Anova Precision Immersion Circulator is 1,000 Watts, heats 4 to 6 gallons of water to 99 deg C (nearly boiling), mounts to the side of your kettle with a built in clamp, has a touch screen control for both temp and time (either F or C) and has a built in recirculating pump for keep consistent temps.  Everything that goes into the water is stainless steel, and it can be disassembled for cleaning.

Brewing uses could include: getting and keeping strike water at temp, direct use (with a filter bag in a mash tun or BIAB mash), maintaining temperature for sour mashes and getting to a boil more quickly (or helping to maintain a boil) for both all grain and extract batches.

Features:

  • 360 degree directional pump for maximum circulation
  • Touch screen display with °C & °F readouts
  • User-Adjustable temperature calibration
  • All stainless steel (wetted parts)
  • Easy disassembly for cleaning

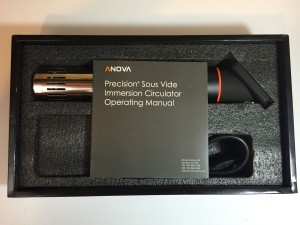
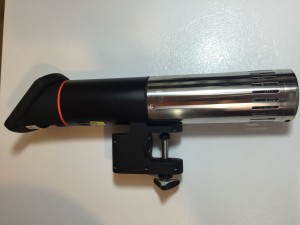
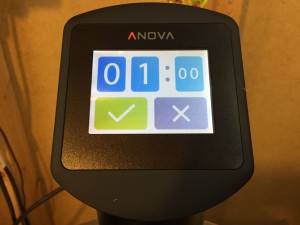
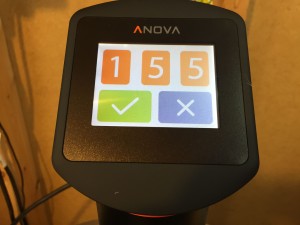
Review Anova Sous Vide for HomebrewA look at that Anova and included manual in the boxReview Anova Sous Vide for HomebrewThe Anova Precision Sous Vide Immersion CirculatorReview Anova Sous Vide for HomebrewSetup and control is easy via the integrated touch screen.  This screen is for setting the option heat time.Review Anova Sous Vide for HomebrewSetting the temperatureReview Anova Sous Vide for HomebrewIt’s worth noting that although there is a time setting, it is not required.

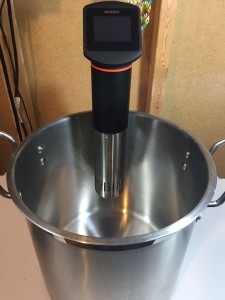
Review Anova Sous Vide for HomebrewInstalled. This has an integrated mounting clamp that secures the heat stick to the side of the kettle.

Review Anova Sous Vide for Homebrew

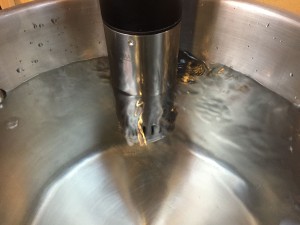
You can see the water rippling from the flow of the Anova’s integrated circulator

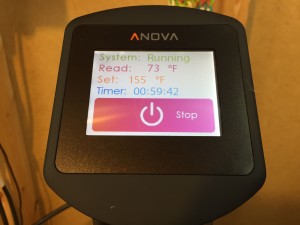
Review Anova Sous Vide for HomebrewI completed a quick heating test with about 5 gallons of water in a 6-ish gallon kettle.  The water started out at 73 deg F.

Review Anova Sous Vide for Homebrew
The 5 gallons gained about 65 degrees in 51 minutes.

Anova Sous Vide Immersion Circulator - 120V Circulator Cooker

Anova Sous Vide Immersion Circulator – 120V Circulator Cooker (Black) – affiliate link, note that multiple variations of this product may be available, as such a different version may appear at this link

A newer version (with different specifications) is also available…
Anova Culinary Precision Cooker/Immersion Circulator (Black) – affiliate link, note that multiple variations of this product may be available, as such a different version may appear at this link

Anova also has an article on their website about brewing with the Anova One on their blog

Anova Sous Vide Immersion Circulator

Heating up Strike Water

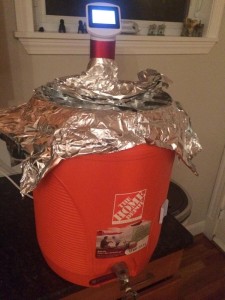
from Twitter Follower Danny – “I have successfully heated up to 9.5G of water to 160F in my MT with this. Highly recommend” – photo on right click to enlarge.

This post contains affiliate links. We may make a commission when you use our Amazon links. This will never cost you extra. Thank you for supporting Homebrew Finds!

pinned

amazon

A Look At: Camco 50′ Premium Drinking Water Hose

camco rv drinking water hose review

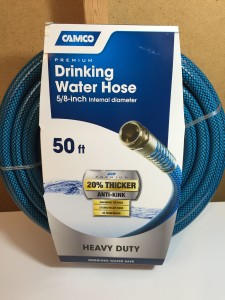
Here’s a look at 50′ size of Camco’s Premium Drinking Water Hose.

camco rv drinking water hose reviewClose up on the center portion of the packaging.  Premium – 20% Thicker – Machined Fittings – Strain Relief Ends – HD Reinforced

camco rv drinking water hose reviewBottom side of the packaging.  Camco Premium Drinking Water Hose.  5/8″ Internatl Diameter.  50 ft, 15.2 meters.

camco rv drinking water hose reviewClose up on the UPC label.  Made in the USA.

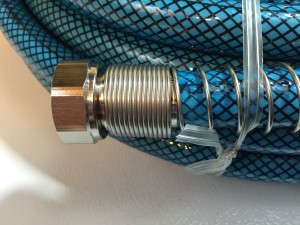
camco rv drinking water hose reviewClose up on the female end

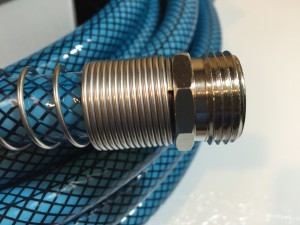
camco rv drinking water hose reviewClose up on the mail end

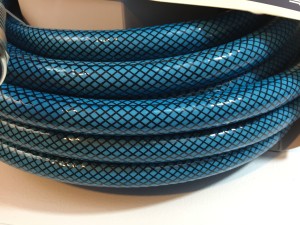
camco rv drinking water hose reviewSide view

This is a heavy duty, high quality hose.  It feels much more heavy duty vs the one that I am replacing (recently burst – fortunately I was close by).

img_purchased

This is available in 10, 25, 35 and 50 ft sizes.

Camco 22853 Premium Drinking Water Hose (5/8″ID x 50′) – affiliate link, note that multiple variations of this product may be available, as such a different version may appear at this link

Camco 22843 Premium Drinking Water Hose (5/8″ID x 35′) – affiliate link, note that multiple variations of this product may be available, as such a different version may appear at this link

Camco 22833 Premium Drinking Water Hose (5/8″ID x 25′) – affiliate link, note that multiple variations of this product may be available, as such a different version may appear at this link

Camco 22823 Premium Drinking Water Hose (5/8″ID x 10′) – affiliate link, note that multiple variations of this product may be available, as such a different version may appear at this link

This post contains affiliate links. We may make a commission when you use our Amazon links. This will never cost you extra. Thank you for supporting Homebrew Finds!

pinned

amazon

Hands On Review: 25 Quart Igloo Marine Ultra Cooler

Igloo Marine Ultra Cooler

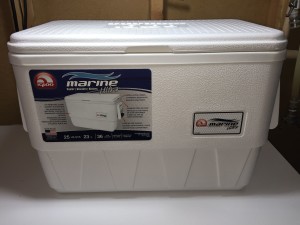
15 Quart Marine Cooler by Igloo.  Features – Ultratherm insulated body, Stain and odor resistant liner, UV Inhibitors to protect against sun damage, Reinforced comfort grip handles, Dimensions 20in L x 12in W x 14in H.

I picked up Igloo’s 25 Quart Marine Cooler after I saw someone with one at an event and I really like the size and the looks of it.  I got this primarily for carrying and keeping beer and other items cold.  I’m not suggesting this as a good cooler to use as a mash tun (no drain).  I’m suggesting it’s a good cooler to use as a… cooler.

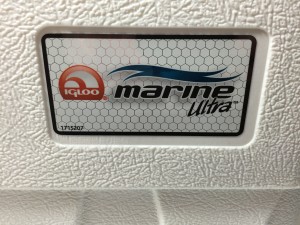
Igloo Marine Ultra CoolerClose up of the right hand side logo – Igloo Marine Ultra

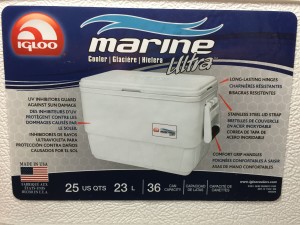
Igloo Marine Ultra Cooler ReviewThe left hand side label – click to zoom.  UV Inhibitors Guard Against Sun Damage.  Long Lasting Hinges.  Stainless Steel Lid Strap.  Comfort Handles.  Made in the USA.  25 Quarts/23 Liters.  36 Can Capacity.

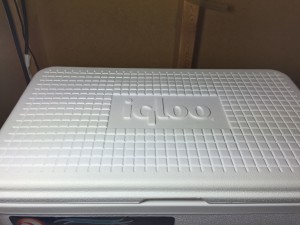
Igloo Marine Ultra Cooler ReviewThe lid

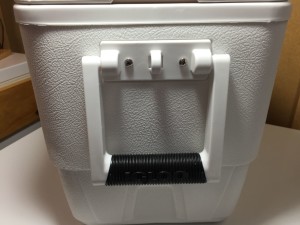
Igloo Marine Ultra Cooler ReviewHandle close up

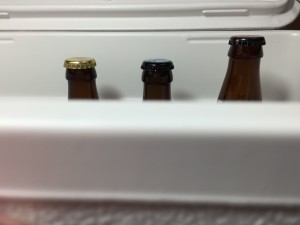
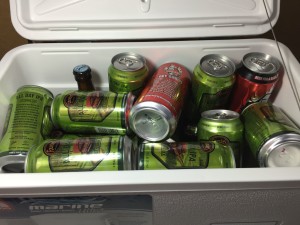
Igloo Marine Ultra Cooler ReviewThis holds both larger/taller German Style bottles and 22 oz bottles.

Igloo Marine Ultra Cooler ReviewThe 22 oz bottles come very close to poking up over the top of the cooler, however, the lid has an indentation and closes fine with 22 oz bottles.

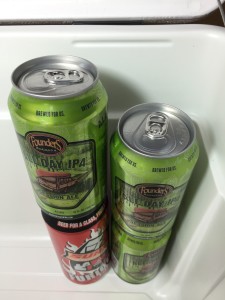
Igloo Marine Ultra Cooler ReviewYou can stack two 12 ounce cans, you can also stack a 16 oz can and a 12 oz can.  Two 16 oz cans are too tall.

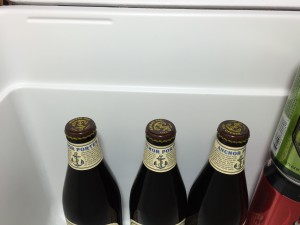
Igloo Marine Ultra Cooler ReviewOf course standard and standard-ish (like these Anchor Porter) beer bottles work just fine.

Igloo Marine Ultra Cooler ReviewLoading it up

Igloo Marine Ultra Cooler ReviewMore beer

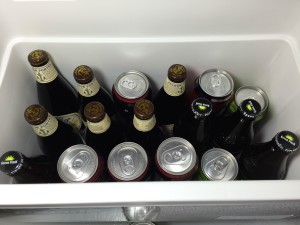
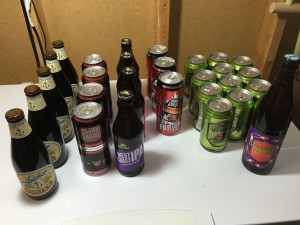
img_img_8393Without a lot of thought while packing… this cooler held all of this beer.

Igloo Cooler ReviewI’ve owned this since early 2015.  I really like it’s build quality and size.  It’s well made.  It’s compact, but can still hold quite a bit including the ability to carry larger 22 oz bottles.

Igloo Marine Ultra Cooler (White, 25-Quart)

This post contains affiliate links. We may make a commission when you use our Amazon links. This will never cost you extra. Thank you for supporting Homebrew Finds!

pinned

amazon

review:igloo25marine

How to Build a Mash Tun from the AHA

How to Build a Mash Tun

A how-to from the American Homebrewer’s Association


Get a Deal on AHA Membership!

The benefits of AHA membership are numerous and valuable. If you’re not a member of the American Homebrewer’s Association, I think you should consider joining.

Get $5 off AHA memberships when you use coupon code HBF. Applies to new and renewed memberships and print or digital.

$5 Off AHA Membership! – remember promo code HBF


This walks you through putting together a Cooler Mash Tun Build based on this 48 Quart Coleman Cooler.

This setup is based on Denny Conn’s great design.  Denny is a legendary homebrewer. Among other things, he is the co-author of Experimental Homebrewing and the keeper of Wyeast 1450 Denny’s Favorite 50.  Check out Denny’s Author Page on Amazon see more of his books.


Related:

  • Making a Mash Tun MLT – Start All Grain Brewing! – our comprehensive resource on the topic
  • Loads of All Grain Brewing Info!  All Grain Tips & Gear Resource Page
  • Coleman 48 Quart Cooler affiliate link, note that multiple variations of this product may be available, as such a different version may appear at this link, featured in the AHA’s build
  • Search Amazon for “Coleman 48 quart cooler” to shop for other options – additional colors may be available, make sure it’s the same style as the original build features.
  • Rubber Mini Keg Bung – affiliate link, note that multiple variations of this product may be available, as such a different version may appear at this link


How to Build a Mash Tun – via the American Homebrewer’s Association

Unless you’re using the brew in a bag technique, a mash tun is an essential piece of equipment when advancing to all-grain brewing. Mash tuns come in all shapes, sizes and materials, and the ideal vessel for you will depend on your current procedures and future goals as a homebrewer. Mash tuns can be purchased from a homebrew shop, or easily made at home with limited skill and tools.

Continue reading

Toasting your own Wood Chips by Matt Del Fiacco

roasting your own wood chips for homebrew

Toasting your own Wood Chips

by Matt Del Fiacco

Like many new brewers, when I first started brewing I was eager to find interesting ingredients I could use, from Sriracha (bad idea) to vanilla beans (used 2 beans per gallon, terrible plan). Around this time, I tried my first bourbon-barrel stout, and feel in love with the wood characters of the beer. Wood-aged beer quickly became a passion, but the desire to experiment was still there. I noticed early on that at my local homebrew shop, all of my options were Oak of some kind, but what about Maple? What about Mesquite? Continue reading

Expert Q and A – Juno Choi from BSG HandCraft

Juno Choi BSG

Juno Choi, Marketing Manager at BSG HandCraft and Founder of Chop Liver Craft Beer Festivals has been a craft beer lover since 1998 and a homebrewer since 2000. He’s worked in a number of spots in the homebrewing and craft beer industry including his current spot at BSG HandCraft and a 10 year stint at Northern Brewer. In Juno’s current role at BSG HandCraft he oversees the various marketing content of the division including but not limited to the website, social media, conferences, and new products. He is also a Certified Cicerone® and Certified Beer Judge through the BJCP.

I got to know Juno not too long after tasting Patagonia IPA, a beer that he put together for the National Homebrewers Conference. It’s a great beer… you should brew it! Not only is Juno a great brewer and a great guy, he’s also a knowledgeable industry insider.

Juno took questions on the morning of Friday February 27, 2015.  You can read those questions and answers below.  If you’re not seeing the discussion click “# Replies” below.

This is a Top Post! See: All Top Posts

pinned

This post may contain affiliate links. We may make a commission when you use our links. This will never cost you extra. Thank you for supporting Homebrew Finds!

greatdeals

toppost:junochoi

A Look At: ITC-1000 Temperature Controller + PDF Manuals & Build Instructions

ITC-1000 Temperature Controller

Here’s at the ITC-1000.  First, some background… The STC-1000 is a very popular homebrewing temperature controller.  One caveat of the STC-1000 (for some) is that the vast majority (maybe all?) display in Celsius only.  Yes you can do some firmware re-flashing and such things, but as far as off the shelf units, the vast majority read in Celsius,

Enter the Inkbird ITC-1000… It’s 110 V, Dual Stage (can control both heating and cooling output), has an alarm to indicate sensor failure or high temperature and… it displays in Fahrenheit… finally!  It’s also said to be more user friendly than the STC-1000.

The STC-1000 was already a great controller, arguably the best value in temperature controllers.  These improvements seem to make a great thing even better.

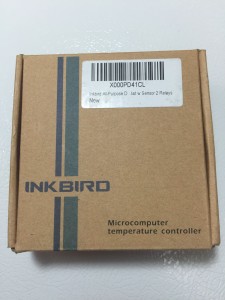
ITC-1000 Homebrew Temperature Controller BuildThe Inkbird ITC-1000 box

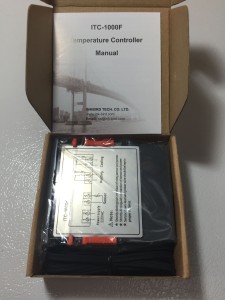
ITC-1000 Homebrew Temperature Controller BuildBox opened.  You get the dual stage controller, temperature probe and manual.

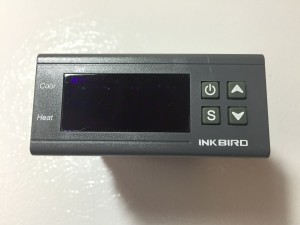
ITC-1000 Homebrew Temperature Controller BuildFront of the ITC-1000

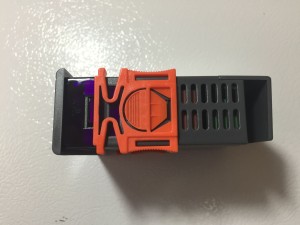
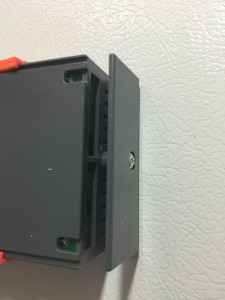
ITC-1000 Homebrew Temperature Controller BuildSide view

ITC-1000 Homebrew Temperature Controller BuildThe top of the controller displays a wiring diagram.

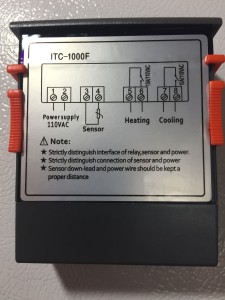
ITC-1000 Homebrew Temperature Controller BuildBack of the controller.  This removable plate partially shields the wire connections.

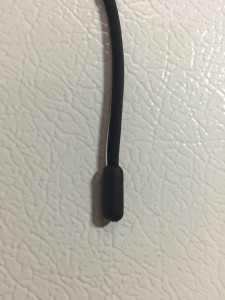
ITC-1000 Homebrew Temperature Controller BuildTemperature probe.

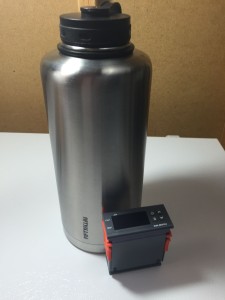
ITC-1000 Homebrew Temperature Controller BuildFor size comparison next to the Lifeline 7508 Stainless GrowlerReview.

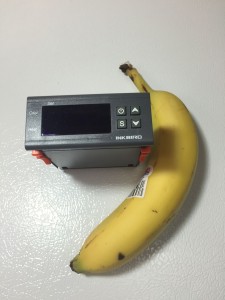
ITC-1000 Temp ControllerFor size comparison next to… a banana.  Yes, I ate this banana.  It was pretty tasty.

Inkbird All-Purpose Digital Temperature Controller Fahrenheit &Centigrade Thermostat w Sensor 2 Relays – affiliate link, note that multiple variations of this product may be available, as such a different version may appear at this link

PDF Manual:
Note – These are the current versions, as of this posting, however, software versions and manuals change over time. – ITC-1000F

Build Instructions:
ITC-1000 Step by Step Build – AHA guide, intended for the STC-1000 but compatible with the ITC-1000

Also Consider: Inkbird Pre-Wired Dual Stage Temp Controller

This post contains affiliate links. We may make a commission when you use our Amazon links. This will never cost you extra. Thank you for supporting Homebrew Finds!

pinned

amazon

Inkbird ITC-308 Digital Temperature Controller| Review

Make Your Own Stir Plate: 3D Printed Stir Plate Magnet Mounting-Thingy!

3D Printed Stir Plate

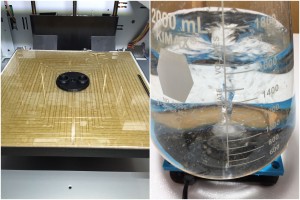
In my quest to build a stir plate using a computer cooling type fan, I found that the most difficult part of getting that to work well was mounting the magnets properly.  I settled on two magnets and in spite of several attempts I was unable to get an efficient (or even stable) mount for the magnets.  Magnet alignment is an important part of stir plate design.  Uneven or mis-spaced magnets mean easily thrown stir bars and poor performance.

I decided to design and print a 3D printed mounting aid to make magnet mounting easier and more precise.  I’ve since dubbed this the HBF Stir Plate Mounting-Thingy.  In my opinion, it turned out pretty amazing.

Continue reading

Hands On Review: TimeStick Trio Timer

TIMESTICK TRIO

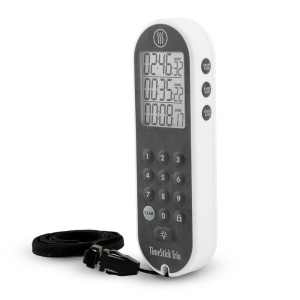
The ThermoWorks TimeStick has been around for quite some time.  I’ve owned two and used them extensively.  If you’re not familiar with ThermoWorks, they are the makers of the nearly universally lauded Thermapen – Review and along those lines produce quality equipment.

ThermoWorks has released the TimeStick Trio.  That unit features three independent timers and is available to order as of this posting.

ThermoWorks kindly provided me with a pre-release unit and to prove that they are fans of homebrewing they have also lifted the media embargo just for Homebrew Finds.  That means you’re hearing it here first.  Their official announcement, along with other website’s coverage will come later.

Check it out – Here

Also Consider – Thermapen Open Box Sale

On to the review…
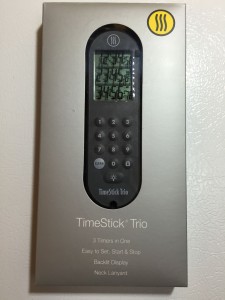
ThermoWorks TimeStick Trio ReviewIn the box.  It reads – 3 Timers in One, Easy to Set, Start & Stop, Backlit Display, Neck Lanyard
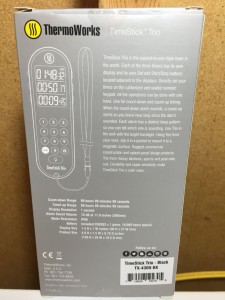
TIMESTICK TRIO thermoworks reviewBack of the box

TIMESTICK TRIO thermoworks reviewTop of the back of the box.  It reads…

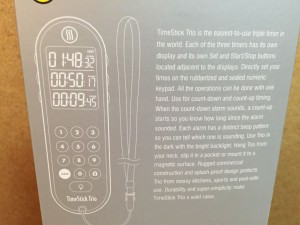
“TimeStick Trio is the easiest-to-use triple timer in the world. Each of the three timers has its own display with its own Set and Start/Stop buttons. No confusion on how to set a timer, how much time is left, which one is sounding or how to stop any of the three.

Directly set your times on the rubberized and sealed numeric keypad. All the operations can be done in one hand. No Up/Down buttons that over-run your settings. When you set a Count-Down time, the Start button starts the timer. When the alarm sounds, a Count-Up starts so you know how long since the alarm sounded. Pause and continue any timer at any time. Each alarm has a distinct beep pattern so you can tell which alarm is sounding.

To use as a Count-Up Timer, simply start at 00:00:00 and hit Start. It’s like having three separate stopwatches in one.

Use Trio in the dark with the bright backlight. Hang Trio from your neck, slip it in a pocket or mount it to a magnetic surface. Rugged commercial construction and splash proof seals protect Trio from messy kitchens, sports or pool side use. The keypad can be locked to prevent accidentally disrupting a timer operation. Durability and super-simplicity make TimeStick Trio a solid value.”
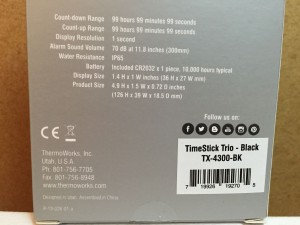
TimeStick Trio ReviewBottom of the back of the box

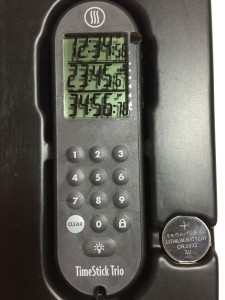
TimeStick Trio ReviewUnboxed.  To the right you can see the included CR2032 Lithium Battery.
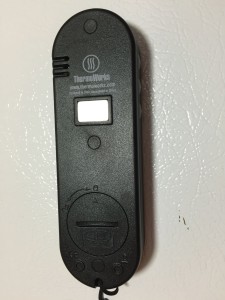
TimeStick Trio ReviewBack of the TimeStick Trio.  A built in magnet can be seen on the top third along with the battery door to the bottom.  The battery door features an oring for water resistance.  The TimeStick Trio is splash proof but directions say not to submerge the unit.

TimeStick Trio ReviewFront of the TimeStick Trio

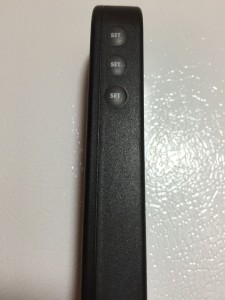
TimeStick Trio ReviewEach of the three timers have corresponding set buttons on the side
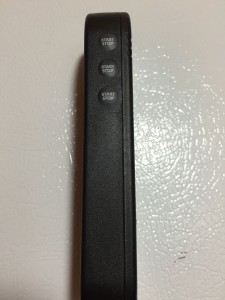
TimeStick Trio ReviewIn addition to separate set buttons for each timer, the other side features independent Start/Stop buttons.  ThermoWorks set out to make an easy to use three timer device.  That’s really one of the areas where this shines.  The corresponding buttons make it easy to quickly set, start and stop the three timers individually.
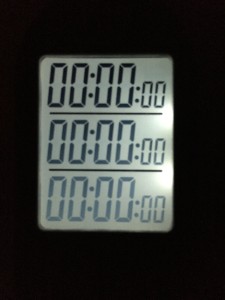
TimeStick Trio ReviewBacklit display

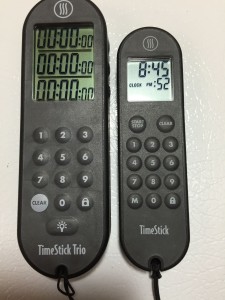
TimeStick Trio ReviewFor size comparison, next to the original TimeStick
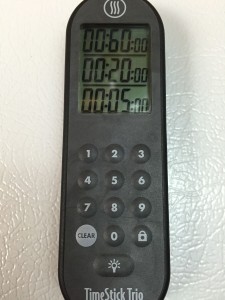
TimeStick Trio ReviewMultiple timers set

TimeStick Trio ReviewMultiple timers going.  Note that each timer plays a distinct sound pattern so you can tell what’s what.
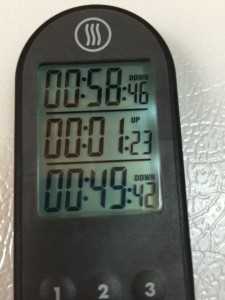
TimeStick Trio ReviewTimers can be either up or down.  To set a down timer just hit the set button, key in the time on the number pad and hit set.  To set an up timer just set the time to zero and hit the start button.  You can easily tell if a timer is up or down on the display.  Notice the middle timer in this picture reads up with the top and bottom timers read down.

75per_img_7837Resetting the timers is also easy.  Hitting the set button once resets the corresponding timer to the last set time.  Hitting zero, clears the timer.
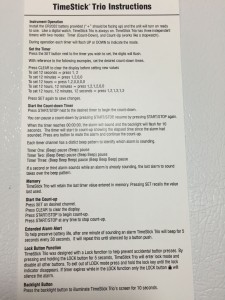
TimeStick Trio ReviewHere are the included instructions.

TimeStick Trio ReviewThe included magnet makes it handy.  Here is the Trio stuck to my fermentation deep freeze.

I haven’t had the TimeStick Trio long, but first impressions are that this thing is classic ThermoWorks – well designed and thought out and well built.  The multiple timers make it a huge win for homebrewers.  Thank you to ThermoWorks for providing an evaluation unit and for choosing to make this initial announcement to… homebrewers.  Kudos to ThermoWorks.

Check sale or product page for current availability & pricing

Check it out – Here

pinned

This post may contain affiliate links. We may make a commission when you use our links. This will never cost you extra. Thank you for supporting Homebrew Finds!

greatdeals

3D Printed 6ml Measuring Cup for Measuring Star San

3D Printed Measuring Cup for Star San

I think 3D Printing has a bunch of possible applications for homebrewing.  From tap handles to stir plates to… custom sized measuring cups and on and on.

I stumbled across these customizable measuring cups by wstein on thingiverse.  The author provides files for several sizes of cups and also includes the ability to customize these to the specific size you’re looking for.  See below for links to both the original STL files and a customized 6 ml version.  I thought this would be handy to create a purpose sized measuring cup for Star San.

First, some background… I use the Spray Bottle Method for sanitizing.  With that technique you measure out 6 mls of Star San and combine with 1 Gallon of water.  Then you use a Spray Bottle to soak and sanitize surfaces.  Check out of full description of the method including math for the 6 mls.

On to the measuring cup…

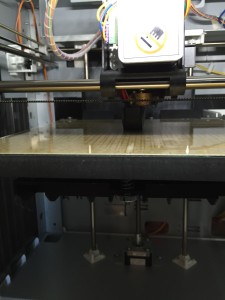
75per_img_7413Printing on my XYZprinting Da Vinci 1.0 3D Printer

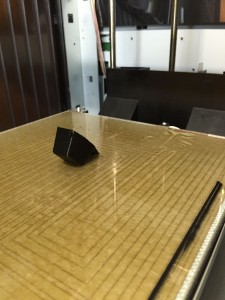
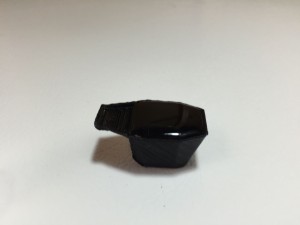
3D Printing HomebrewingCompleted 6 ml measuring cup.  This is small and didn’t take long to print.  I didn’t record the exact time, but maybe… 20 minutes or so.

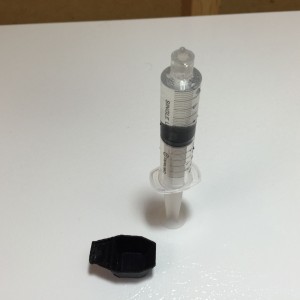
Measuring SyringeHere’s the measuring cup next to a 12 cc Syringe

6 ml measuring cupHere is a picture of 6 mls in the cup.  I’d say it’s pretty close.

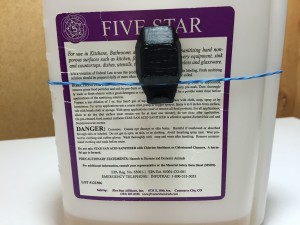
3D Printed Measuring Cup for Star SanThe cup affixes nicely on the side of a bottle of PBW using a rubber band.

I’d like to come up with a two ended measuring spoon.  One side would be 6 ml for Star San and the other side one ounce for both Star San and PBW.  The 6 ml side would just be for Star San where the one could be used for either Star San or PBW.  Dosing for Star San = 1 ounce per 5 gallons and dosing for PBW = 1 to 3 ounces per gallon.  If you are a design whiz and come up with such a thing, Email Us, and I’ll share your file.  Otherwise, this will have to wait for me to learn Solidworks.

This is a Top Post! See: All Top Posts

pinned

This post may contain affiliate links. We may make a commission when you use our links. This will never cost you extra. Thank you for supporting Homebrew Finds!

greatdeals
toppost:3dprintedstarsan

Variable Speed AC Fan for DIY Stir Plate or Kegerator Circulation

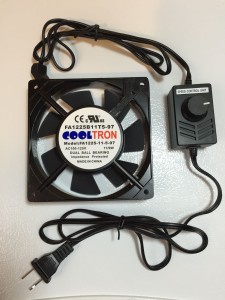
img_img_7320Fan with included AC Wiring and Variable Speed Control.

I picked this cooling fan up primarily to put together a Stir Plate design that works with it.  I chose this model because… 1. It’s a good size (4.7″ square), 2. Is already wired for AC and, 3. Includes a variable speed function.

Note: Since this article was published the appearance of this fan has changed.  Still similar specs, but a difference appearance.  Check the product page for current specifications, price and availability.

AC Infinity AI-120SCX Speed Control Fan Kit for Cabinet Cooling, Single 120mm

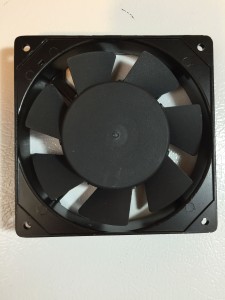
DIY Homebrew Yeast Stir PlateFront of the Fan

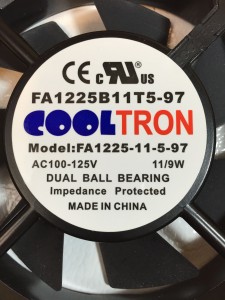
DIY Homebrew Yeast Stir PlateBack of the fan.  This side actually rotates.  If you were looking to put together a stir plate, this is the side you’d put the magnet on.

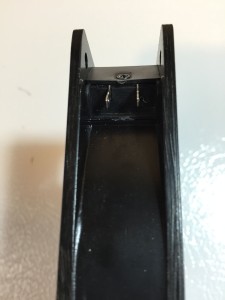
DIY Homebrew Yeast Stir PlateHere’s where the AC wire plugs in.

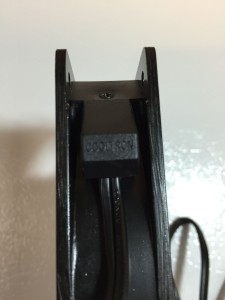
DIY Homebrew Yeast Stir PlateThis shows the AC wire plugged in.

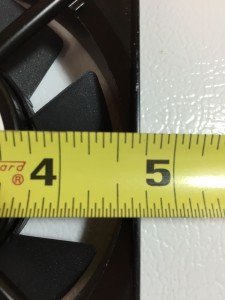
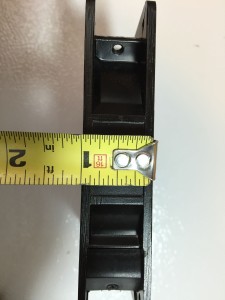
DIY Homebrew Yeast Stir PlateThe specs say this is 4.7″ square.  From side to side, I get 4 11/16″.  As you’ll see it’s large enough to hold a 5 Liter Erlenmeyer.

DIY Homebrew Yeast Stir PlateI’d call this just a hair under 1″ thick

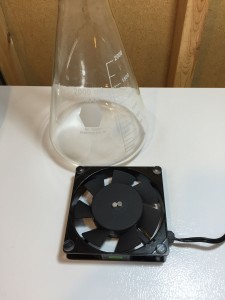
DIY Homebrew Yeast Stir PlateFor size reference, with a 2L Erlenmeyer in the background.

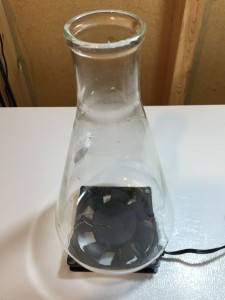
DIY Homebrew Yeast Stir PlateWith a 2L Erlenmeyer on Top.

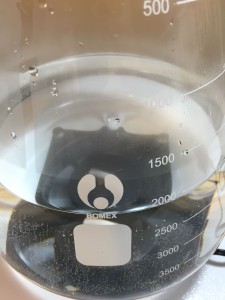
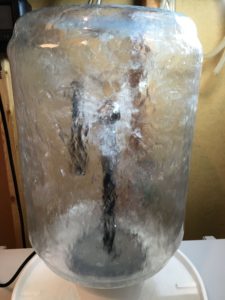
DIY Homebrew Yeast Stir PlateThis thing is all but begging to become a stir plate.  I put four of these rubber bumpers in the four corners (to hold the erlenmeyer in place and give it a little bit of clearance) and then put four magnets in the center.  Those just stuck on there with magnetic force and they ended up deciding to stack themselves two high.  It’s kind of hard to tell with this photo, but this is a 5L Erlenmeyer Flask with 2L of water with a vortex using that setup.  I’m not suggesting this as a final design.  I’m only that this fan is a great candidate for conversion.

DIY Homebrew Yeast Stir PlateThis photo shows the magnet/rubber bumper setup

I use a similar fan for recirculating air in my kegerator.  See: Kegerator Beer Line Temperatures & Reducing Foam with a Recirculating Fan

AC Infinity AI-120SCX Speed Control Fan Kit for Cabinet Cooling, Single 120mm

SEOH 2L Narrow Mouth Erlenmeyer Flask with Heavy Duty Rim 1/pk

Erlenmeyer Flask (5000 ml) Y450

pinned

This post may contain affiliate links. We may make a commission when you use our links. This will never cost you extra. Thank you for supporting Homebrew Finds!

greatdeals

adamztop5

Make sure the components you use are compatible and rated for your intended application.  Contact manufacturer with questions about suitability or a specific application.  Always read and follow manufacturer directions.

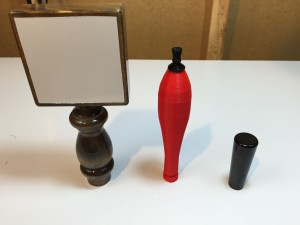
3D Printed Pub Style Tap Handle

75per_img_7266

Updated: July 22, 2024

3D Printed Tap Handles!

A while back I got an XYZprinting Da Vinci 3D Printer.  I think 3D Printing has a bunch of possible applications for homebrewing.  From tap handles to stir plates and on and on.

Got a great homebrew-related 3D printer project?  Let us know so we can spread the word!


Note that the 3D printer featured in this post out of production.


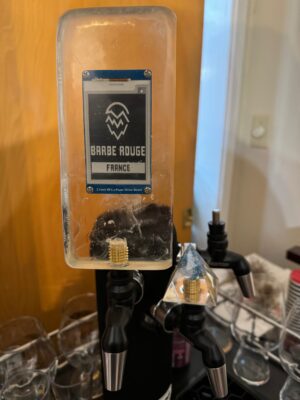
Related: Make an E-Paper Tap Handle!

Continue reading

Hands On Review: American Weigh AWS-100 Digital Gram Scale – 100g x 0.01g – for homebrew hops & more

aws-100 gram scale review

Why a Digital Gram Scale for Homebrewing?

Homebrewers are generally weighing things in two categories.  Moderately large amounts of things – like grain – and smaller amounts of things – like hops and water salts.  Although weighing both types of things involve a scale, they are really wildly different activities.

An accurate gram scale is great for weighing smaller amounts of things like hops, water salts and smaller amounts of other ingredients.

Features to Look for in a Homebrewing Gram Scale

  • Digital readout – most scales are digital now, so this one should not be a problem
  • The Tare Feature – Tare allows you to subtract the weight of the container you’re using to get a true weight of the contents.  Add your empty container to the scale and press the tare button.  This zeros out the scale.  Now add the thing you’re weighing and the scale displays just the weight of the contents of your container.  In my opinion the tare function is essential for any good homebrewing scale.
  • Precision – Look for a minimum of 1/10th gram precision (Example – 1.1 grams) if you’re wanting to weigh hops.  Look for a minimum of 1/100th gram precision (Example. 1.11 grams) if you’re wanting to weigh water salts.
  • Capacity – Higher precision and accuracy generally equate to lower capacity.  That’s okay, just understand what capacity you’re buying.  100 grams = about 3.52 ounces.

Hands on Review: American Weigh Model AWS-100 Digital Gram Scale

This scale has 1/100th gram resolution making it great for accurately weighing hops, small amounts of specialty grains and water salts.  It has a 100 gram (3.52 ounce) capacity.

cln_img_6812The front of the box.  Reads: Hundredth of a gram accuracy (0.01 g), 100g Maximum Capacity, Flip-Open Protective Cover, Includes two AAA, 10 Year Warranty.


Check Prices, Review Continues Below:

  • PREMIUM QUALITY: Renowned as the leading manufacturer of digital scales, American Weigh Scales excels in precision innovation. With numerous models designated as Amazon’s choice, rest assured, we've got you covered for all your weighing requirements. Purchase confidently, backed by our ten-year warranty, ensuring long-term peace of mind.
  • POCKET SIZED: The unique AWS-100 pocket scale is designed to be robust, long-lasting, and conveniently pocket-sized, catering to a wide range of portable weighing needs, including food, tablets, powder, gemstones, coins, jewelry, gold, or silver.
  • ACCURACY: The AWS-100 scale boasts a 100g x 0.01g capacity, ensuring precision with every weigh-in. This scale is equipped with high-precision sensors for precise weight readings. Moreover, the protective cover serves as a practical weighing tray, enhancing the scale's versatility.
  • MEASUREMENTS: It measures in grams, ounces, carats, and grains, making it versatile for various applications, from weighing gold and medication to cooking ingredients. Additionally, the LCD display changes color seamlessly as you switch between different weighing modes.
  • TARE FUNCTION: Simplify weighing tasks with the convenient tare function, allowing for the measurement of items within containers or on weighing pans. Simply place your container or pan on the scale, press the tare button, and add your items for accurate measurement.
  • Weighs up to 100 grams in 0.01 gram increments. Units of measure include gram, ounce, carat and grain
  • Backlit LCD display helps make the numbers viewable and easy to read
  • Flip-open lid protects the delicate weighing surface and includes basic instructions
  • Backed by a powerful 10 year warranty, runs on 2 AAA batteries (included)
  • Easy recalibration with included 100g American Weigh calibration weight, ensuring accurate readings at all times

Note that multiple variations of this product may be available, as such a different version may appear at these links

Continue reading

A Look At: ZChiller – Spiral Star Design Counterflow Wort Chiller

zchiller wort chiller

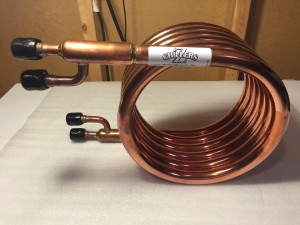
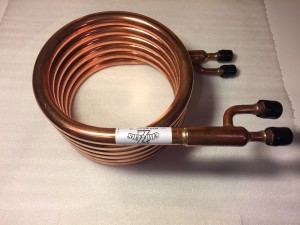
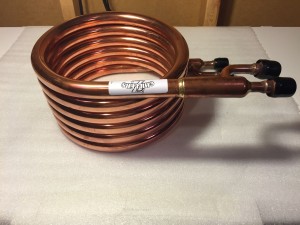
ZChillers are made in the US, double tube counter flow wort chillers.  The interior tubing is a Spiral Star Design.  This spiraling increases the surface area of copper that’s in contact with your wort.  It also increases turbulence.  More movement across more surface area means your wort chills quickly.

zchiller wort chillerA top down look a the large ZChiller

zchiller wort chillerSlightly different angle.

zchiller wort chillerA top down look at the coils

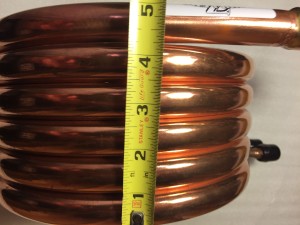
zchiller wort chillerThe coils measure about 5″

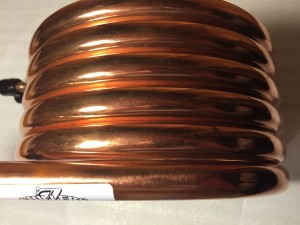
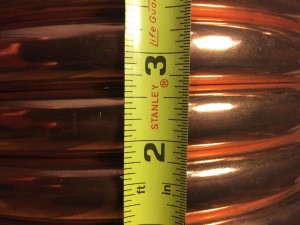
zchiller wort chillerA close up to measure individual coils.  I’d call it 3/4″.

zchiller wort chillerThe Large ZChiller

Large ZChiller PerformanceHere is performance data for the Large ZChiller.  Chilling performance graphs for all models are available on ZChillers Website in the News Section.

Three Models Are Available…

Standard ZChiller – 9″ diameter, 3.5″ tall, made from 102″ of copper tubing. Our original design created with small-batch homebrewers in mind. Compact, efficient, and recommended for batches of 7.5 gallons or less.

Large ZChiller – 9″ diameter, 5.125″ tall, made from 154″ of copper tubing. Our most versatile chiller, the Large ZChiller can handle much larger batches that require a higher degree of cooling while at the same time retaining the ability to be used for small batches as well. If you want flexibility and true brewing freedom, this is the chiller for you.

Square ZChiller – 8.75″ side length, 7.25″ tall, made from 134″ of copper tubing. Distinctive design delivers cooling rates comparable to the Large ZChiller with a brand new look to spice up your brewing rig. If you’re looking for a unique chiller with a bit of flash that can handle a variety of batch sizes, look no further.

This post contains affiliate links. We may make a commission when you use our links. This will never cost you extra. Thank you for supporting Homebrew Finds!

pinned

aih

Hands on Review Blichmann 1/2″ Linear Flow Valve – Install in any kettle

Hands on Review: Blichmann Engineering Linear Flow Valve

Blichmann Engineering’s Linear Flow Valve was first introduced as part of their BoilerMaker G2 Kettle.  It is a ball lock valve replacement.  Since that kettle was released the Liner Flow Valve has been released as a separate product.

Check Prices and Availability, Review Continues Below

Adventures in Homebrewing

Great Fermentations

Continue reading

Hands On Review: Blichmann Engineering BoilerMaker G2 Homebrew Kettles

Review of Blichmann Engineering G2 BoilerMaker Kettle

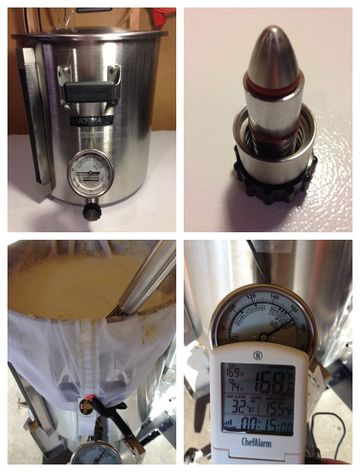
Blichmann Engineering’s G2 Kettle is available in 7.5 through 55 gallon sizes.  The BoilerMaker G2 is designed and manufactured in the US.  It includes a Sight Glass w/Laser Etched Volume Markers, Adjustable Angle BrewMometer Thermometer, Linear Flow Valve and tool-less dip tube.  The G2 also features a 1.2 height to diameter ratio.


Compare Models, Prices and Availability, Review Continues Below:

Continue reading

Hands On Review: Mark’s Keg and Carboy Washer

cln_img_2973

Updated: November 18, 2024

Hands on Review Mark’s Keg & Carboy Washer

The Mark II Keg and Carboy Washer is designed to help you easily clean and sanitize kegs, carboys and more.


Limited Time Deal!

Mark II Corny Keg & Carboy Washer KEG300

Limited Time Deal via Blowout Sale!

MoreBeer has a massive early holiday sale going on as of this posting. Over 100 products are discounted. Check sale page for selection and availability.

MoreBeer Blowout Sale!

This great tool is included in the mix and on sale for just $84.99.

Keg & Carboy Washer KEG300


Why are deals on Mark’s Keg and Carboy Washer rare?

This is a MAP item at many retail. MAP = Minimum Advertised Price.  It’s an agreement between sellers and manufacturer’s not to sell an item below a certain price.  This gear generally sells for about the same price no matter where you purchase it from and is rarely discounted.


Compare Prices and Check Availability, Review Continues Below:

Continue reading

Kegerator Temperature Probe Placement – To Immerse or Not To Immerse? – three tests to determine optimal placement

Kegerator Temperature Probe Placement

Where Should I Place My Kegerator Temperature Probe?

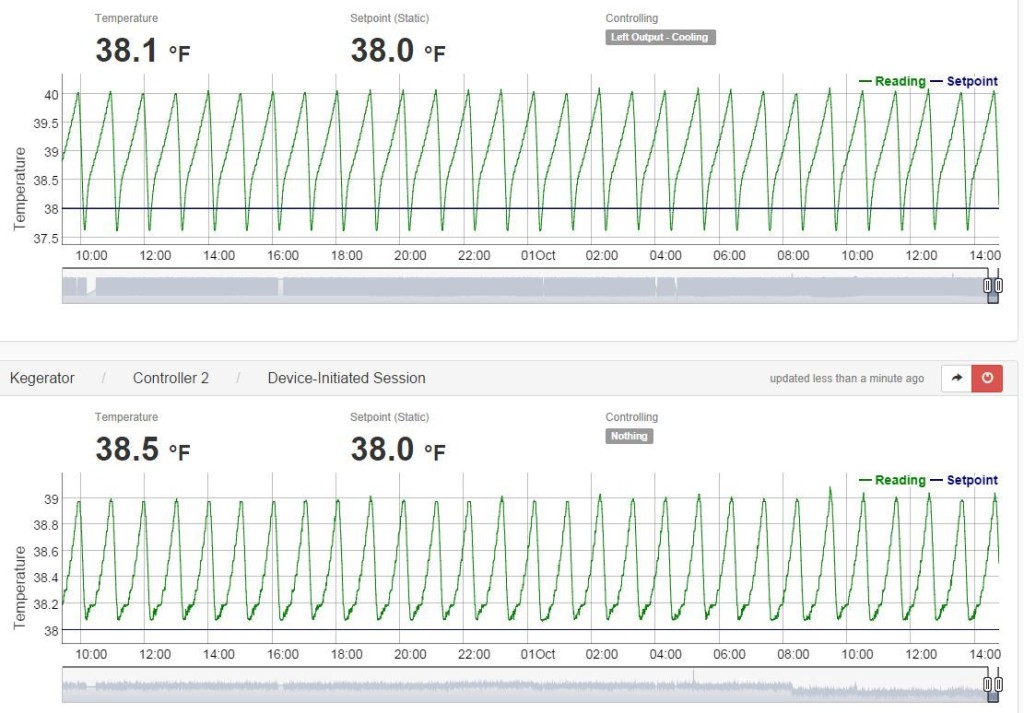
After my test on the effects of a recirculating fan on kegerator temperatures (See: Kegerator Beer Line Temperatures & Reducing Foam with a Recirculating Fan), I decided to test the effects of kegerator temperature probe placement.  I went with three configurations: Immersed vs Ambient Non-Immersed vs… Zip Tied to a Beer Can.  Those tests yielded some interesting findings.


Related – Our Top Draft Resources!

Continue reading