Category Archives: Reviews & Top Posts

Kegerator Beer Line Temperatures & Reducing Foam with a Recirculating Fan

Back in 2014, I had what I would call a reasonably well put together and balanced kegerator.  In spite of that, for years, I had dealt with the dreaded first foamy pint of beer.  After that pint of beer, beer would pour great.  That is until a significant delay between pours – overnight or a few hours.


Related Resources – Foam Control & Kegerator Balancing


Limited Time Deal on the Fan I Use!

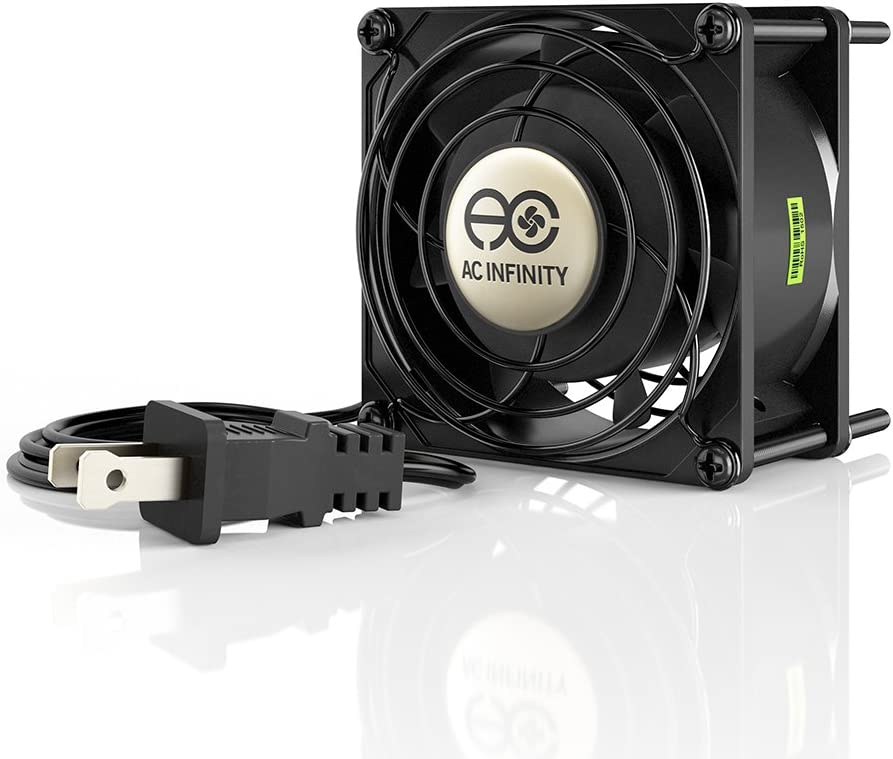
AC Infinity AXIAL 8038, Quiet Muffin Fan, 120V AC 80mm x 38mm Low Speed, UL-Certified for DIY Cooling Ventilation Exhaust Projects

img_purchdateI have this fan and use it in kegerator as a recirculation fan.

What are Other’s Saying?   Search this product’s Amazon reviews for “kegerator” – affiliate link, note that multiple variations of this product may be available, as such a different version may appear at this link

As of this update these are selling for $17.99. Apply the 10% off coupon available on the product page and the price drops to $16.19 at checkout. Shipping is also free to many US addresses with Prime Membership [Try Prime for Free] or a qualifying orderPrices, promotions and availability can change quickly.  Check product page for current info – More About Prices

AC Infinity AXIAL 8038, Quiet Muffin Fan, 120V AC 80mm x 38mm Low Speed, UL-Certified for DIY Cooling Ventilation Exhaust Projects – affiliate link, note that multiple variations of this product may be available, as such a different version may appear at this link


Diagnose Other Issues


A Closer Look at Kegerator Beer Line Temps

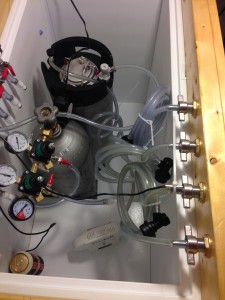
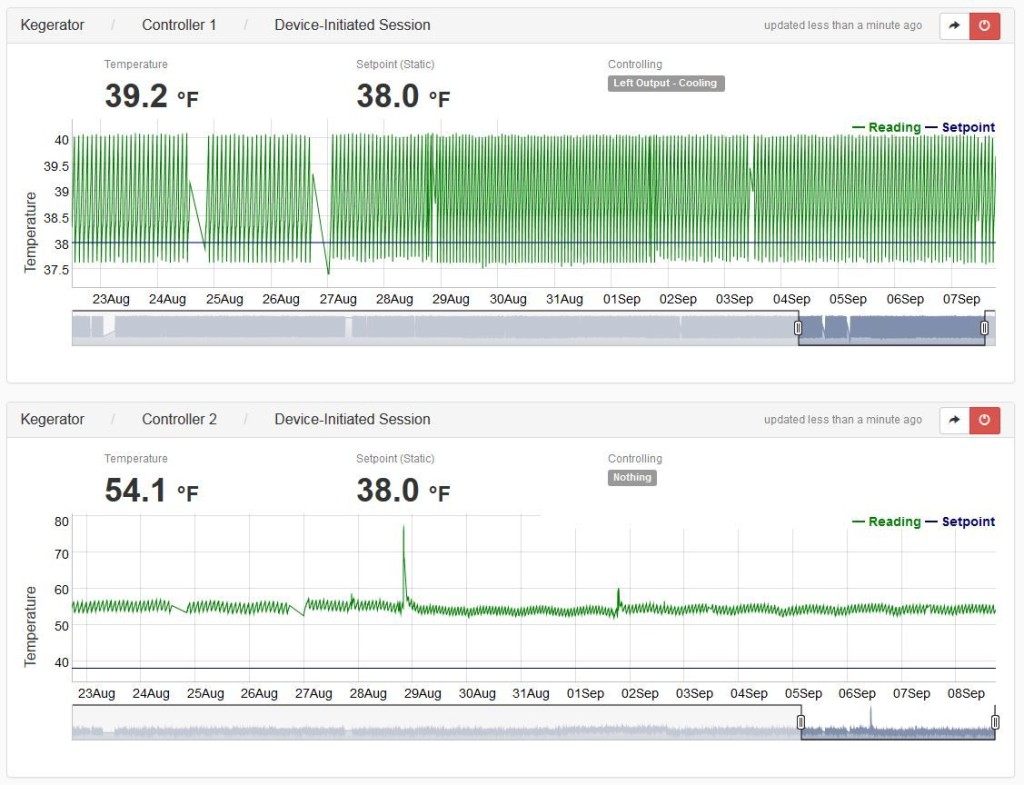
cln_img_5476The setup.  I have two temperature probes in my kegerator.  One is zip-tied to the top of a beverage line.  The other is zip-tied to a can of beer.  That’s how I have kept the probe in my kegerator for a long time with the thinking that the mass of the can of beer will help to stabilize temperature readings and give overall stable and accurate readings.  That can is sitting on the compressor hump of my Kenmore Deep Freeze (8.8 Cu ft Model 16932, out of production).  That puts it about mid keg.

Beer Line Temps – No Recirculation Fan

The cause of the problem is pretty clear.  Heat rises.  That means the top of your kegerator is going to be warmer than the bottom of your kegerator.  That warmer beer foams when it comes out.  The faucet and shank are also warmer.  That warmth adds to the problem.

How much is the temperature variance?  Of course, this will vary from setup to setup and climate to climate.  I was relatively shocked by the temperature difference in my own kegerator.

img_temps

The top reading about mid keg and the bottom reading is the top the top of my beer lines.  These are about 22″ apart.  This graph shows a point in time variance between the two of 14.9 degrees F.   My beer is about the temperature I want it, but the top of my serving line is much warmer.  That difference in temperature causes the first pint to have too much foam.  Pours that happen soon after the first are fine.  The tubing, shank and beer are relatively cool.

Adding a Recirculating Fan to Reduce Beer Foam

Continue reading

Hands On Review: The Brew Bag – Purpose Made BIAB

thebrewbag

The Brew Bag is a high quality purpose designed Brew in a Bag/BIAB bag.

It has four loops for lifting the bag out of your kettle, every seam is reinforced for long life and it is available in a number of sizes for kettles, keggles, coolers and more.  If they don’t carry the size you want, The Brew Bag will custom make it for you.


See current sizes, availability & specs:

brewinabag.com

Coupon!

Coupon code FET8AD1SDR4S takes 10% off your entire purchase.  Promo code via: Brew In a Bag – Bag Material – Does it Matter?

Also: Search The Brew Bag at Amazon, offerings vary

Hands on Review The Brew Bag BIAB Bags

Continue reading

Q & A with Dr Chris White – 27 Questions Answered!

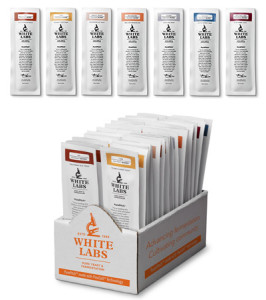
White Labs recently announced new PurePitch yeast packaging for homebrewers.  The new packaging goes hand in hand with a new propagation method White Labs is calling the Flexcell Process.

White Labs Description of Flexcell:
Instead of traditional stainless steel fermenters, the patent-pending FlexCell process allows White Labs to propagate yeast with no exposure to the environment all the way to packaging, ensuring its quality and purity.

More about PurePitch Packaging:

  • Since the yeast is grown and packaged in the same material the new PurePitch packaging is actually a part of the fermentor, and its contents have never been exposed to the environment.
  • PurePitch Packaging is breathable and allows CO2 to escape. Reduced chance of gas build-up.
  • This packaging will maintain the yeast in a more stress-free state.

Look for new PurePitch Packaging on Homebrew Finds – connect with HBF – when it’s released sometime this fall.

As part of the release of PurePitch Packaging, Dr Chris White PhD, President and CEO of White Labs wanted to hear directly from Homebrew Finds Readers.  We asked you for your questions about the new packaging and yeast and fermentation in general back in July.  Questions and answers follow.

Thanks to all who submitted questions and thank you to Dr Chris White!

Look for new PurePitch Packaging on Homebrew Finds when it’s released sometime this fall.

Q 1. When White Labs propagates yeast, what measures are taken to ensure that no mutations take hold?

A.  Our attention for looking for mutations hasn’t changed with the new technology. We built a big back end to our yeast production at the beginning. We have a specialized team that works with freezes – check for mutations, by specialized plating, genetic analysis and performance. We are constantly checking for mutations. In addition we minimize time we have yeast on plates and our propagation is limited to 17 days. These tools and personal that separates us from being a yeast propagator and we maintain these yeast in there integrity is one of our missions.

Q 2.  Gluten-free brewers are mostly restricted to dry yeast strains, because liquid yeasts are shipped in a medium that contains gluten. Is the PurePitch packaging gluten free, or is it still the same as before?

A.  The yeast within the PurePitch packaging is the same as before. We do, however, carry a product called Clarity Ferm, which can help reduce gluten to under 10 ppm in beer.

Q 3.  What are the ideal mash parameters, yeast strains, and fermentation temperatures to accentuate each of the following ester/phenol characters in a hefeweizen: clove, banana, and bubble gum?

A.  Hef yeast strains that we have are selected to maximize these characteristics. Anything that encourages yeast growth will increase those 3 flavors. Pitching less and higher fermentation temperature that encourage growth are 2 examples. Aerating less will also encourage growth – another parameter that can increase esters.

Q 4.  What yeast or blend of yeasts would you recommend to try and recreate keeping at home?

A.  If traditional methods are followed for keeping our WLP775 WL cider yeast is the best choice.

Q 5.  Is it possible to dry yeast at home for storage and later use?

A.  You will get very low viability dry yeast at home, so it’s not recommended. If you did, you would need to check the viability after rehydrating.

Q 6.  Would it be possible to make a Servomyces substitute at home? If so, could you suggest how it could be done?

A.  No, it is not, as it’s a patented process.

Q 7.  The new packaging says it’s breathable so it allows co2 to escape. Even though it’s breathable- I would think if the package is sealed the yeast would be under considerable pressure during reproduction and may have a negative effect on yeast health during its growth. Is that not really a factor or is it accounted for somehow?

A.  During the propagation, the vessel is constructed with blow-off valves to allow all of the pressure to escape while the culture is being oxygenated and growing.

Q 8.  Is the new packaging permeable to oxygen? If so does that negatively affect the shelf life of the product?

A.  We are still conducting trials to test the shelf life, but initial trials indicate the
shelf life may even be prolonged.

Q 9.  As temperature fluctuates there is the chance the package will also take in outside air. Especially for people who get yeast delivered in warm months. The yeast temperature fluctuate from cold to warm and back to cold. Have you done tests to see how much outside air gets in and it’s effect on the yeast?

A.  The film technology is only allowing gas pressure to escape, but not the other way (like a one-way check valve)

Q 10.  You indicate the packaging material is recyclable. What material is it made of as some states have restrictions?

A.  #2 plastic

Q 11.  Will the new packaging have more strain specific information regarding optimum conditions?

A.  Yes, we’ve broken the yeast strains into categories with more specific strain-related recommendations, including Brett/Bacteria.  We grouped them into 6 different strain styles. Within the 6, we have specific information for example, like Lagers. The 6 strain types are differentiated by color on the package. Furthermore we are actively pertaining more information on our strains via our tasting room and brewery to add more information to our yeast descriptions that are found online and printed material.

Q 12.  How is a uniform cell count, or a known cell count, maintained in each unit when the culture is packaged using this new packaging technology?

A.  We’re using automated cell counting technology to validate the consistency of the culture prior to final packaging.

Q 13.  Was there an issue with the old packaging that prompted for the redesign (I understand the improved packaging for retailers to take up significantly less shelf space, but was it a yeast reason or was this a response to increases in vial costs or actual issues with the old storage methods?) Will this keep yeast more viable for longer periods of time?

A.  This was prompted to reduce the amount of transfers yeast makes to be propagated, concentrated, tested and packaged. From our first thoughts of this process, it was driven by the desire to make better yeast. We have always liked the vial, but we didn’t want that to cloud our desire to make better yeast. By utilizing this new technology, we can offer yeast that has never been exposed to the environment. We have seen better viability over time as well, which is due to release of CO2 and from less time and handling to fill packages.

Q 14.  You sell ~100 billion cells per package. These packages include instructions indicating they are directly pitchable into 5 gallons of wort up to ~1.060. However, every brewer of any experience seems to accept as gospel that yeast starters are required for nearly any batch – Jamil Z.’s online calculator claims that 100 billion cells are barely enough for 5 gallons at 1.034, for example. Why, then, has White Labs not marketed a package of 200 or 250 billion cells for homebrew use? This would allow homebrewers to brew beers in the meat of the homebrewing space – say 1.050 – 1.075 – without the trouble of making starters for every batch.

A.  We are actually increasing the number of cells per package to 2.5 to 3 billion cells per ml. And laboratory grown yeast won’t necessarily follow the pitching rate guidelines since they are very healthy. The pitching rate recommendations traditionally refer to re-pitched yeast. Also, you are not getting a lot of growth from a starter unless it is an adequate size.

Q 15.  The number of cells in each pack strains the minimal requirements for a 5 gallon session strength beer (ie. 250,000 cells/ml/P). And that’s given 100% viability, which is almost never likely due to unavoidable transportation and long term storage issues at LHBS. With the new packages will there be options for larger volumes, (e.g. 200e9 cells) to help address these? Minimal costs additions, offset by new pack savings, would definitely drive market share higher.

A.  See answer to #14. With yeast it is similar to beer pricing, if you buy 1 liter of beer it is usually only slightly less than the price of 2 pints, because you have to make twice as much on the manufacturing side.  But we are open to different sizes in the future, it just won’t be as ‘less
expensive’ as people might think. Please keep the feedback on sizes coming to White Labs.

Q 16.  What temperature should I make a yeast starter at? Room temp, warmer or cooler?

A.  Room temperature or warmer (close to 75F or 24C)

Q 17.  How long should I let a yeast starter run on a stir plate? Is there a recommended duration, or some visual indication that the colony is ready?

A.  24-48 hrs. The only visual confirmation you can get would be to count the yeast and examine them under the microscope.

Q 18.  Should I drain the starter wort first? Should I chill the starter to help it settle before doing so?

A.  It is mostly personal preference but if you are decanting the starter wort you should let it settle and chilling it will accelerate that.

Q 19.  What temperature should I pitch at? At target fermentation temperature, or some measure below?

A.  We recommend pitching at 70, then bringing the temp down to fermentation temperature when fermentation begins.

Q 20.  Can I over do it with oxygen in the wort when I pitch my yeast? I have been doing some experiments with extending the time that I run O2 on my wort when I pitch. I have a commercial size O2 tank & regulator and .5 micron stone that I use to oxygenate my 10 gal all grain batches. I noticed that increasing my O2 run improved the start on my ferment and produced better all around results. So, I started extending the time that I ran my o2, just to see what would happen. I expected to see a point where my results started to fall off. This did not seem to happen. I continued to extend my oxygenation up to about 35 minutes at about 1 liter per minute. I do not have the equipment to do cell counts and so my results are fairly subjective, but, it seems to me that at least up to 15 minutes I observed improvements in fermentation. Can I hurt the cells with a 15 minute O2 run and at what point am I just wasting my time. Using the large o2 cylinder, the cost is very minimal and I am not concerned with it. My primary interest is producing better beer. What will make my yeast perform best?

A.  In homebrew set ups, it is very hard to over oxygenate. Once saturation is reached, excess oxygen will not go into solution. So at that point extra oxygen will be wasted. In commercial operations, they sometimes get over oxygenation because they are oxygenating in line, which can create over pressure which allows more oxygen to dissolve into solution.

Q 21.  In your book you mention how important adding oxygen to wort for proper fermentation. Is there a specific amount to add correlated to original gravity? Such as X liters for 5 gallons of 1.040 and Y more for every increase of 5 points?

A.  It is not about flow rate of oxygen, that will be different for every set up and every beer. What you want is 8 to 10 ppm of dissolved oxygen in the wort. The difficult part about knowing that is most people do not have the equipment to measure dissolved oxygen.

Q 22.  Any brewer who’s tasted their wort knows it tastes much more bitter than the beer it is eventually turned into by yeast. To what extent is the pre- and post-fermentation IBU difference dependent on yeast strain? If it does vary by yeast strain, do you think this would be a useful value to include in each yeast’s spec sheet?

A.  Yes, it is affected by different yeast strains. We have been studying this in our brewery/tasting room, and are working on a publication to make this information available to everyone.

Q 23.  Will White Labs be able to produce consistent yeast blends with this new method of packaging?

A.  Yes

Q 24.  Will the work with Yeast Bay migrate over to the new packaging?

A.  Yes

Q 25.  Will the new method of packaging effect cell counts of Bret and Lacto?

A.  No, the cell counts will remain the same

Q 26.  Is it possible to clean up a batch of yeast using water purification drops (the kind used for camping)? What are the chances of killing the yeast or reducing its abilities?

A.  No, the yeast would be killed.

Q 27.  When making high-gravity beer can I viably use distiller’s yeast in the secondary fermentation chamber after the primary yeast has done most of the work to lower the FG a little further?

A.  You can always try it but not all distiller’s yeast are considered high gravity yeast

Related:

This is a Top Post! See: All Top Posts

pinned

This post may contain affiliate links. We may make a commission when you use our links. This will never cost you extra. Thank you for supporting Homebrew Finds!

greatdeals

toppost:qandachriswhite

Hands On Review: German Made Speidel Fermenters

Updated: November 19, 2024

Hands on Review Speidel Fermenters

German Made, Speidel Fermenters are available in a range of sizes 3.2 gallons all the way up to… 132 gallons.  Check out the full lineup including accessories and replacement gaskets.

I’ve owned a 5.3 gallon Speidel fermenter since October of 2011.  I use it for small batch BIAB beers.  I’ve been very impressed with that fermenter.  More recently, I picked up the 7.9 gallon version so that I can ferment full 5 gallon batches with all the same advantages.  This is a hands on review of both fermenters.


Limited Time Deal at Amazon!

Speidel B07K7ZN7F9 30L-7.9G Fermenter, White & Orange

As of this posting Amazon has these are on sale for $74.99. That’s 32% off Amazon’s list price. Shipping is also free to many US addresses. Prices, promotions and availability can change quickly.  Check product page for current info – More About Prices

Speidel B07K7ZN7F9 30L-7.9G Fermenter, White & Orange – affiliate link, note that multiple variations of this product may be available, as such a different version may appear at this link


Compare Prices, Speidel Fermenters, Review Continues Below:


NorCal Accessories for Speidel Fermenters

Since their introduction NorCal Brewing Solutions has introduced a number of accessories to extend and enhance Speidel Fermenters

Continue reading

Hands On Review: Captain Crush, Adjustable Three Roller Grain Mill – Including Mash Tests

Important Update

Initially, I was very happy with this mill, but I did end up having problems with the rollers.  I have tried many adjustments but have a hard time getting the rollers to engage.  For what I paid for it, I feel like it should have lasted much longer.  My Barley Crusher continues to work after years and years and it cost much less.  Others have commented on this review along those same lines. I like a lot of things about this mill, but would love to see them address the quality issues related to the rollers.

This post still has some very interesting crush and mash test results that make a great case for taking control of your brew day by crushing your own grain.


Check Current Pricing and Availability, Review, Crush & Mash Tests Continue Below:

Captain Crush Grain Mill for All Grain Home Brewing – Malt Crusher on Amazon


img_2615

Here is a Hands on Review of Northern Brewer’s Captain Crush, 3 Roller Grain Mill.  It includes thoughts about the mill, photos of the mill in action and a crush/mash trial.


More Mill Reviews!


deals on sacks of malt


The Captain Crush Grain Mill

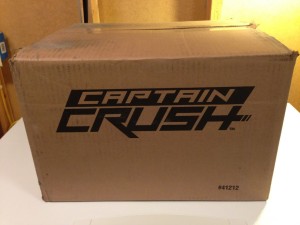
The box.  It’s large.


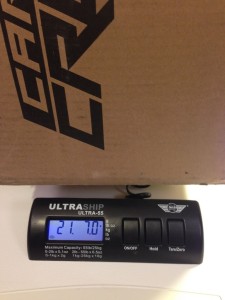
Not only is it large, it’s heavy.  My Ultraship 55 (usually my grain scale – Review) shows a whopping 21 lbs 7 ounces.


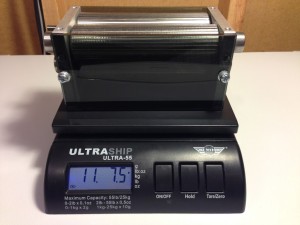
Over half of that weight is the roller mill assembly itself.


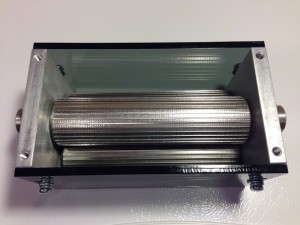
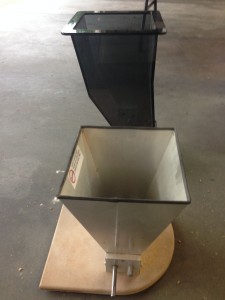
Top of the mill

 
Bottom of the mill


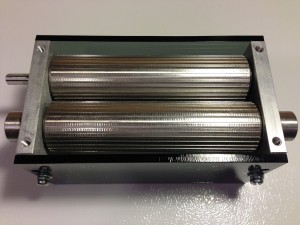
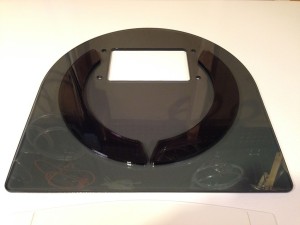
Base.  The circular pieces in the middle are designed to fit nicely on a bucket.


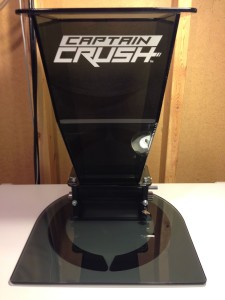
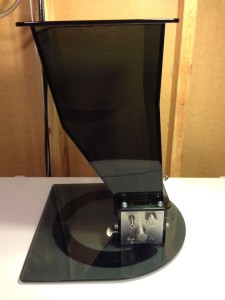
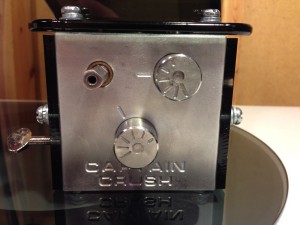
Assembled.  This mill is huge and it looks cool.


Profile view

 
One of the nice things about the Captain Crush are the easy adjustment knobs.  You can change settings quickly and without tools.  The current setting is NB’s recommended “optimal setting”.  Also notice the drill connection shaft toward the top left of the mill body.

 
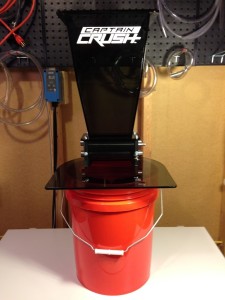
Installed on a bucket.

 
The base fits perfectly inside this 5 gallon bucket.

 
Front view

 img_2682
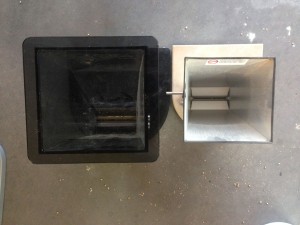
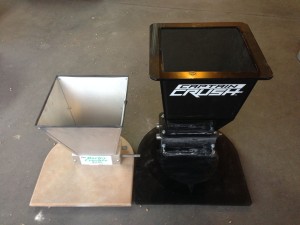
For size comparison side by side vs my Barley Crusher Grain Mill

 img_2693
Profile view compared with the Barley Crusher.  As you can see the Captain Crush Mill is considerably larger.

 img_2677
Top down view vs Barley Crusher

img_2604
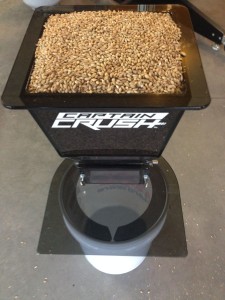
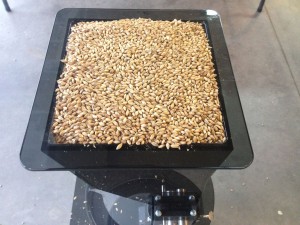
The official size of Captain Crush’s Hopper is 11 lbs.  I’ve found that it can hold at least that much.  This picture shows the vast majority of the malt bill for 1 Hour IPA – continuously hopped IPA.  The malt bill for that is 13 lbs.  The hopper is holding just under 12 lbs… 11 lbs 14 oz.

img_2615
Front View

img_2639
A picture of the crush

Mash Trials:

These are side by side mash tests using the Captain Crush Mill on “optimal” setting vs store crushed grain.  The Rahr 2 Row both milled and unmilled were sourced at a reputable local homebrew shop.  Note that it did not come from Northern Brewer.  To produce as consistent results as possible, I measured everything (water and grain) in grams to the nearest single gram.

Procedure:

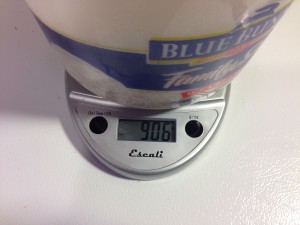
  1. Weigh 906 grams (1.997 lbs) of grain
  2. Weigh 2,715 grams of strike water (.717 gallons)
  3. Heat up strike water to 162 deg F.  Overheat by a degree or so and then stir back down to temperature.  It’s easier to hit a stable temp going down vs hitting it going up.
  4. While strike water is heating pre-heat mash tun with 1/2 gallon of 212 deg F water.
  5. Place grain (inside of bag) in cooler.
  6. Add strike water.
  7. Stir and record temperature.
  8. Mash for 60 minutes.
  9. Drain first runnings.
  10. Grain back in mash tun.
  11. Add 1,884 grams (.497 gallons) of 212 deg F water to the grain and stir.  I normally would not sparge with boiling water.  I used boiling water to take one more variable out of the equation.
  12. Drain second runnings.  Let grain bag sit on strainer for 5 minutes.
  13. Record volume and gravity.

cln_img_9919
Each test used 906 grams (1.997 lbs) of grain

cln_img_0008
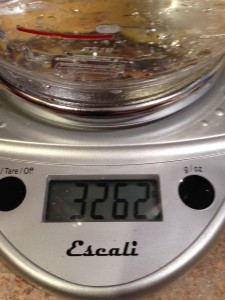
Each Test used 2,715 grams of strike water (.717 gallons).  For some reason I didn’t use the tare feature when I weighed the water.  The pitcher ways 547 grams.  That makes the water 2,715 grams.

81ZONpZSWNL._SL1500_
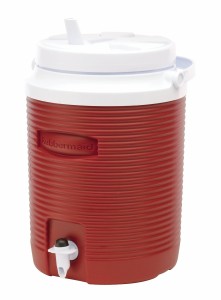
This 2 Gallon Rubbermaid Cooler Served as a Mash Tun.  I used a paint straining bag to contain the grain.  This process worked pretty well.  This would be good equipment and technique to use for small batch all grain brews.  For consistency, I pre-heated the cooler prior to placing grain and strike water into it.

cln_img_9980
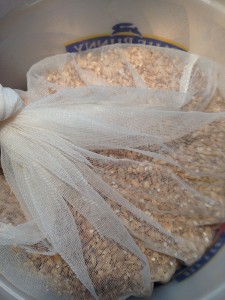
A 5 gallon paint straining bag contained the grain.

cln_img_9859
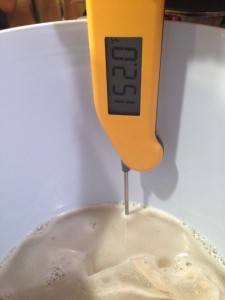
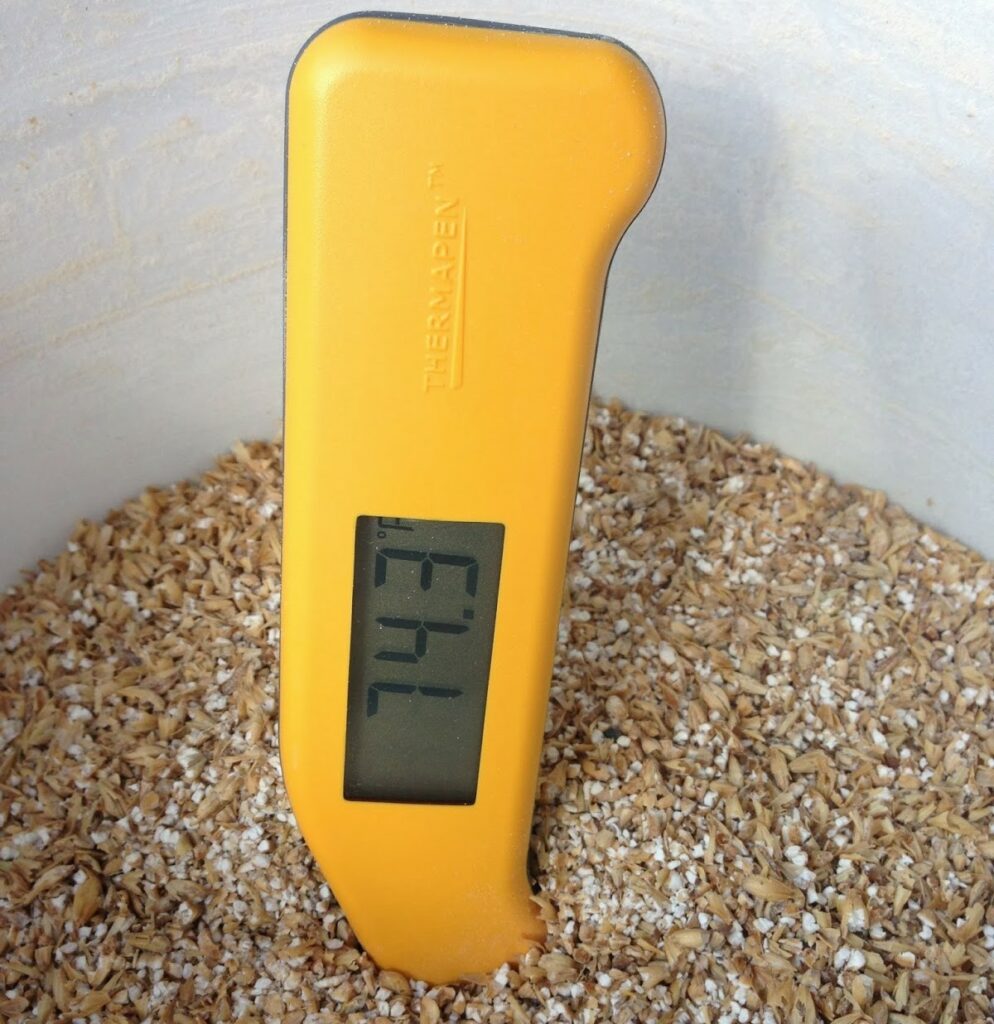
My Thermapen reading mash temperature.  The temperatures of each trial mash were close but not identical.  One read 151.5 deg F, the other read 152 deg F.  I consider that to be within the limits of what I can test and produce in my kitchen.

Results Store Milled:

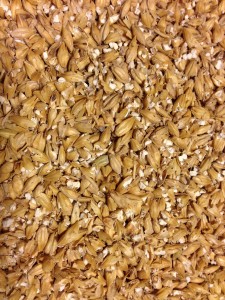
cln_img_9924
Store Milled Grain

img_9983
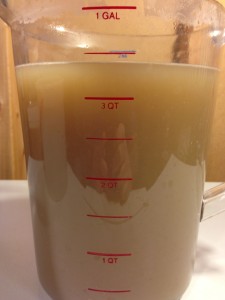
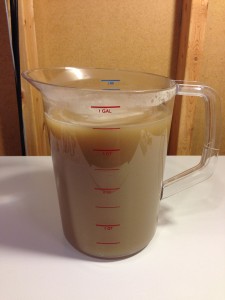
Collected Wort.  With the help of an on-screen ruler, I’m going to estimate this at .859 gallons collected.  That means that .355 gallons were absorbed.  Making the absorption rate for this grain and crush .177 gallons/lb.

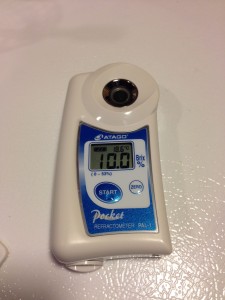
img_0002
My Atago Pal-1 Digital Refractometer reads 10 Brix.  That’s on OG of 1.040.  Rahr 2 Row should provide 37 points per lb.  That means there are a total of 74 points in the two lbs of grain I used.  .859 gallons of 1.040 wort comes out to a total of 34.375 points or an efficiency of 46.4%.  That’s low.  Although, the point of this particular experiment is to compare two grinds, not to measure the efficiency of one technique vs another.

Results Captain Crush Milled:

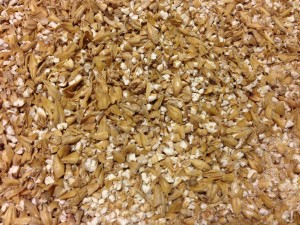
cln_img_9967
Milled Grain

cln_img_0034
Collected Wort.  I’m going to estimate this at .875 gallons collected.  That means that .339 gallons were absorbed.  Making the absorption rate for this grain and crush .170 gallons/lb.

cln_img_0050
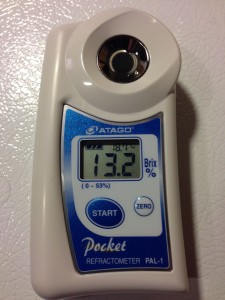
My Atago Pal-1 Digital Refractometer reads 13.2 Brix.  That’s on OG of 1.053.  Rahr 2 Row should provide 37 points per lb.  That means there are a total of 74 points in the two lbs of grain I used.  .875 gallons of 1.053 wort comes out to a total of 46.375 points or an efficiency of 62.6%.  Again, the point of this particular experiment is to compare two grinds, not to measure the effectiveness of a particular set of equipment or technique.


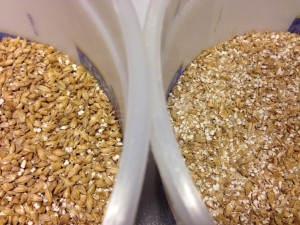
Store Milled Grain (left) vs Captain Crush Mill using “optimal” setting (right). Click to zoom.

Mash Test Conclusion:

  1. The store Milled Grain I used produced an efficiency of 46.4% vs an efficiency of 62.6% when using the “optimal” setting on the Captain Crush.  That’s a comparative improvement of 34.9%.
  2. The Captain Crush’s “optimal setting” produces a great crush.
  3. Grain crush is a big part of efficiency.  Store crushed grain can be on the under crushed side.  Some stores do this to help prevent stuck sparges.  That’s a valid strategy and it may be way you want.
  4. If you are looking for more control over your mash milling your own grain provides you with quite a bit more control.  It also allows you to buy grain in bulk and crush right before brewing.  That preserves freshness and leads to better tasting beer.

Conclusions

Initially, I was very happy with this mill, but I did end up having problems with the rollers.  I have tried many adjustments but have a hard time getting the rollers to engage.  For what I paid for it, I feel like it should have lasted much longer.  My Barley Crusher continues to work after years and years and it cost much less.  Others have commented on this review along those same lines. I like a lot of things about this mill, but would love to see them address the quality issues related to the rollers.

Check Current Pricing and Availability

Captain Crush Grain Mill for All Grain Home Brewing – Malt Crusher on Amazon
More Mill Reviews!

Get a Deal on Bulk Grain

deals on sacks of malt

A Deal on All Grain Kits

Adventures in Homebrewing discounts seasonal homebrew beer recipe kits by 20%.  Selections include both all grain and extract options.

20% Off Seasonal All Grain Kits | 20% Off Seasonal Extract Kits

Grain Storage Options!

Everything All Grain!

Our resource post on all grain is the source for everything all grain!

More Homebrew Finds!

Special Thanks to Monster Brewing Hardware for providing the unit used for evaluation in this review.

pinned

This post may contain affiliate links. We may make a commission when you use our links. This will never cost you extra. Thank you for supporting Homebrew Finds!
greatdeals

adamztop5

Make sure the components you use are compatible and rated for your intended application.  Contact manufacturer with questions about suitability or a specific application.  Always read and follow manufacturer directions. review:captaincrushmill tag:tpr
Juno Choi’s Patagonia IPA Recipe

logo

Juno Choi With a PIle of Hops

One of the homebrews that stood out to me while attending a past Homebrewer’s Conference, homebrewcon in Grand Rapids, Michigan was an IPA that was served by Brewer’s Supply Group (BSG) at their booth at the Conference. It was… delicious.  Roasty, great hop character and easy to drink.  I swung by for two samples and shortly returned… for a third and it was gone.  After the conference, I got a hold of BSG to ask about the beer.  I learned that it was formulated and brewed by Juno Choi.  Juno kindly shared the recipe with me and I’d like to share it with you.  Thank you Juno!

The recipe features 100% Patagonia Malts from Chile.  Those were new to me and I think relatively new to the homebrew market here in the US, because… I had a very difficult time sourcing the grain for this recipe.  After looking around a bit, I contacted Bryan at Great Fermentations.  They already carried Patagonia, just not not all three varieties that this recipe calls for.  Bryan kindly sourced the remaining grains and has stocked them at Great Fermentations.  Thank you Bryan!

On to the recipe…

Fermentables:
10.8 lbs Patagonia Extra Pale Malt
.6 lb Patagonia Caramel 90L
.6 lb Patagonia Caramel 190L

Hops:
60 Minutes – 2 OZ Motueka
10 Minutes – 2 OZ Pacifica
1 Minute – 2 OZ Nelson Sauvin

Mash for 60 Minutes at 152 deg F

Ferment with Safale US-05 at 68 deg F

About The Beer, Estimates:
OG: 1.061 at 70% Efficiency
FG: 1.017
ABV: 5.76%
IBU 73.31
SRM 17.78

Extract:
The all grain recipe features Patagonia Malts from beginning to end.  Extract Patagonia Extra Pale Malt doesn’t exist.  You could still get the same idea by substituting 8 lbs of Liquid Malt Extract for the Extra Pale and steep the caramel malts.  That gets you the same gravity and pretty well everything else, although the SRM does go up to 18.74.  Again, not the exact same beer, but you will get a lot of the great roasty flavors from the Patagonia Caramel Malts and all of the hop character.

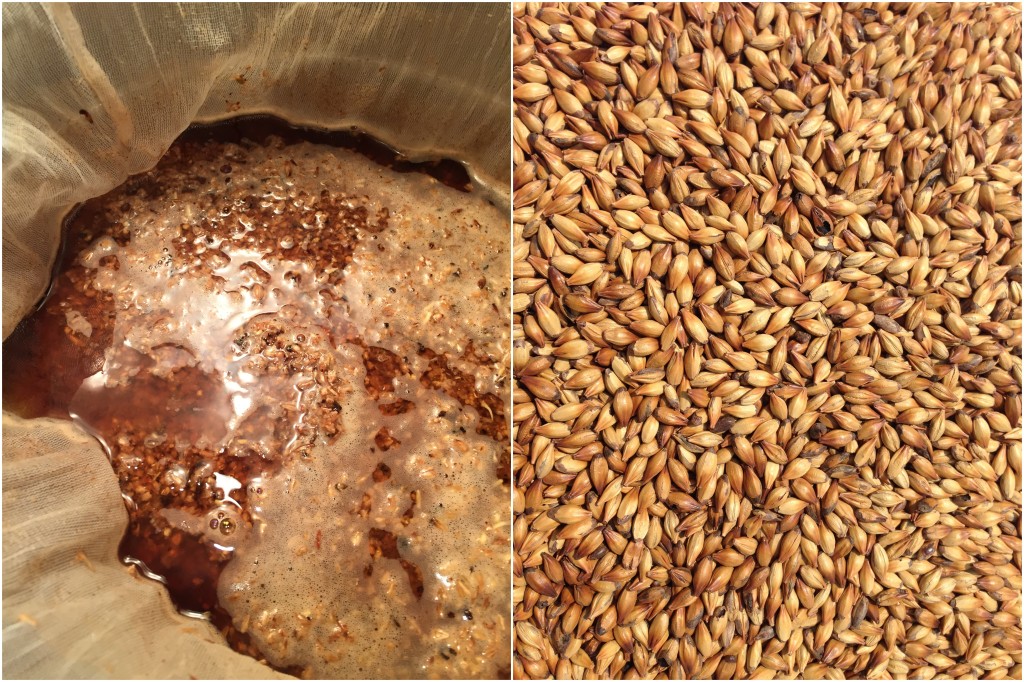
patagoniaipaBeautiful and Delicious! Mash on the left (BIAB) – Close up of the Grain Bill on the right

Related: Expert Q and A – Juno Choi from BSG HandCraft

This is a Top Post! See: All Top Posts

pinned

This post may contain affiliate links. We may make a commission when you use our links. This will never cost you extra. Thank you for supporting Homebrew Finds!

greatdeals

top:junoipa

Balancing Your Kegerator Draft System

I had the pleasure of attending the HomebrewCon held in Grand Rapids, Michigan several years ago.  If you didn’t have the chance to go, or even if you did, the AHA provides seminar recordings for that conference.  In fact they provide recordings going all the way back to 2012’s conference.  This is a member’s only benefit.  If you’re not a member of the AHA, I think you should consider joining.  Access to conference materials is only one of many benefits.  Join nowLooking for a deal?


Limited Time DEAL on Kegging Systems

  • Keg Connection is discounting their entire lineup of keg kit kegging systems by 15%.
  • There are multiple options to choose from. No coupon code is required.
  • HBF Readers Save More! HBF5OFF takes another 5% off.
  • Shipping is a flat fee no matter how much you order to addressed in the contiguous US.

Save on Keg Kits at Keg Connection!  – remember promo code HBF5OFF to get the extra 5% off

Continue reading

Hands On Review: DrinkTanks Growler and Keg Cap

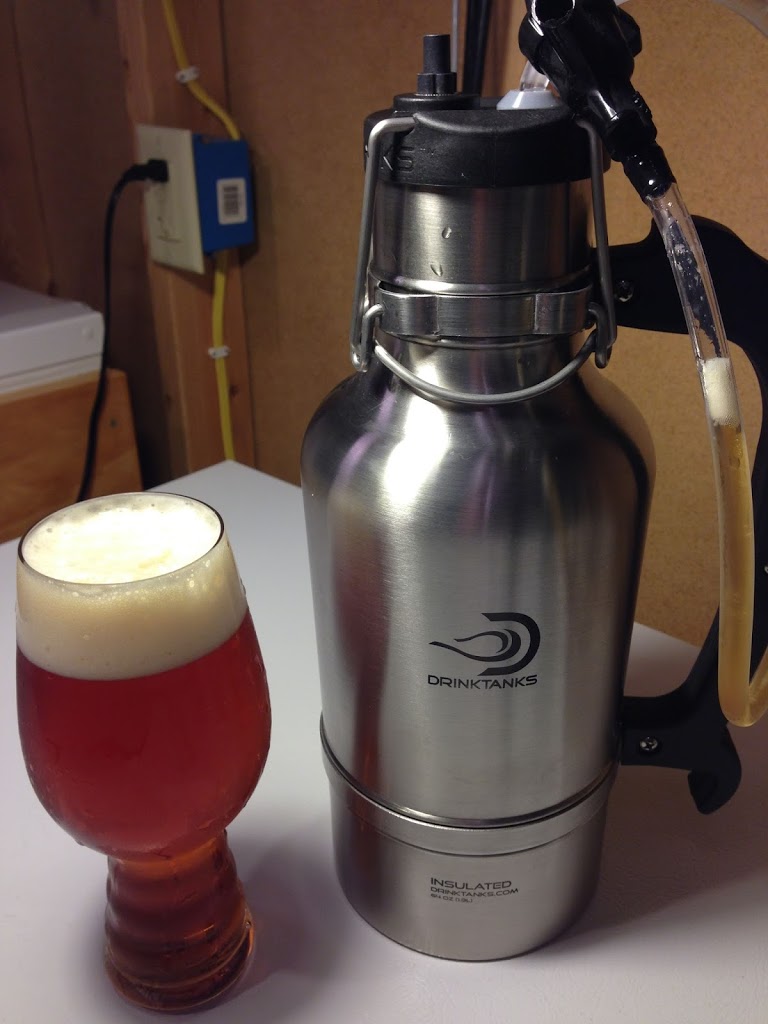
The DrinkTanks Growler is a Stainless, Double Wall, Vacuum Insulated Growler.  It has an optional Keg Cap that converts the growler into a mini draft keg.  This is a look at the 64 oz size, but it’s also available in a larger 128 ounce/1 gallon version.  Additional colors and handle styles are also available.

Continue reading

Hands On Review: ThermoWorks RT600C Super Fast Thermometer – Accuracy and Response Time Tests

I’ve owned and used ThermoWorks’ Super Fast RT600C as a homebrewing thermometer since 2011.  It’s very accurate, has a super fast response time and has a great set of features.  Because of my work on Homebrew Finds, I have a large number of thermometers.  I propose that, considering it’s price point, the RT600C is one of the best thermometers available for homebrewing.


The Thermometer along with the included Pocket Clip.


The RT600C has a good sized probe (4.9″) but only 1/4″ needs to be submerged to get a reading.


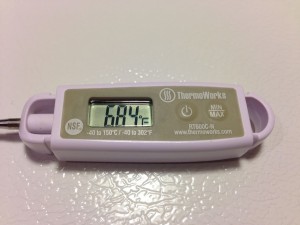
Close up of the face.  You can see the NSF certification along with power and min/max buttons.


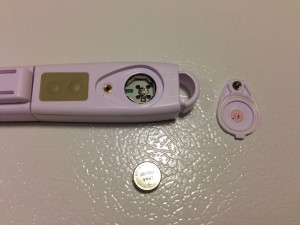
Back of the thermometer disassembled.  The left panel includes both a deg C/deg F mode button and a reset button.


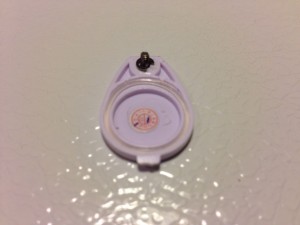
The battery door includes and o-ring


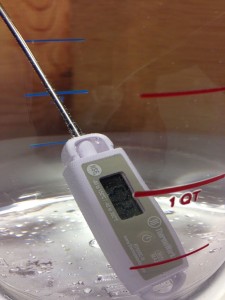
The RT600C is waterproof.  Not just splash proof or “kind of waterproof”, it’s waterproof.  IP65 rated to be exact.  That means you can put this in a dishwasher – up to 190 deg F.  To illustrate I’ve submerged it in my trusty Rubbermaid Commercial Brew Day Pitcher [Review]


Close up of the submerged RT600C

Accuracy:


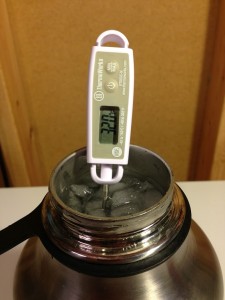
Testing with ice water in my Lifeline Vacuum Insulated Stainless Growler [Review].  The RT600C reads a perfect… 32 deg F.


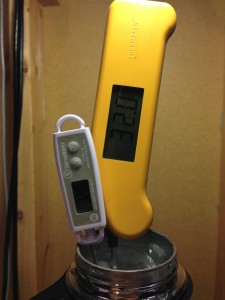
Still 32 deg F, side by side with my ThermoWorks Thermapen [Review]


I’ve experienced different boiling temperature on different days using the same equipment and testing methods.  Boiling temperature is a moving target.  It is based on elevation and atmospheric conditions.  The day of this test, boiling point was a consistent 211.8 deg F as read by my highly accurate Thermapen.


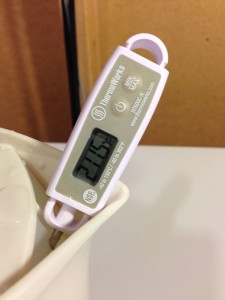
The RT600C reads 211.5 deg F.  It’s reading to .3 deg F low.  Well within it’s stated accuracy of +- .9 deg F.

Response Time:


This video shows a response time test using the RT600C.  I’m counting the start of the test as right when the metal basket hits the water. The probe of the thermometer is submerged at 1 second into the video. It levels out at 139.6 deg F at 7.85 seconds. That’s a response time of 6.85 seconds. For .1 deg F resolution, that’s a great response time. For comparison, I’ve tested the Thermapen and gotten a response time of 5.4 seconds (at 130.4 deg F).  The Thermapen is an amazing thermometer, but it’s also about 5 times the cost.

In Action:


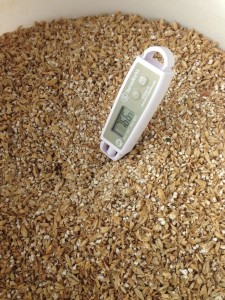
Checking the grain bill temp of More Beer’s Citra Pale Ale.  This recipe features Rahr 2 Row, White Wheat, Carapils, Crystal 15 and of course… Citra.


Checking the mash temp of More Beer’s Citra Pale Ale

Auto Shut Off (now included)…
In the original version of this review I noted that the RT600C does not have an auto off feature.  Not a huge deal if your version (like mine) doesn’t have auto off.  What you can do is… shut it off :).  If you do forget, the batteries are relatively inexpensive.  Update: ThermoWorks has changed the design.  The RT600C now includes and auto-off feature.  If for some reason you wanted a version that has no auto off, that’s found in the RT600B.  That one stays on like the RT600C used to.  Not very helpful for homebrewers.  I think that’s generally used by food service professionals trying to test dishwasher temperatures and such.

Some of the RT600C’s features:

  • Waterproof.  In fact it is dishwasher safe up to 190 degrees F.
  • Has a super fast read time- 5-6 seconds.  IP65 rating.
  • Accuracy to ±0.9°F (±0.5°C)
  • C/°F switchable
  • Only requires 1/4″ of the probe to be submerged to get a reading
  • Has a .1 degree resolution
  • Records Minimum and Maximum Temperatures.  You can use this to monitor serving and fermentation temps.
  • Long Battery Life – up to 5,000 hours of continuous use
  • NSF Certified
  • Tough Commercial Design
  • Manufactured by Thermoworks.  Warranty – The RT600C comes with a one-year coverage on material and workmanship including any failure in the thermometer circuit. Includes online, email and phone access to the ThermoWorks technical service group.

I purchased my RT600C back in October of 2011.  As of this update (September 2015) the same unit continues to be an amazing thermometer.

With years of practical use in homebrewing and beyond, I can recommend the RT600C as a great homebrewing thermometer.  Considering the features, performance and cost, this is arguably one of the best values for your money.

RT600C SUPER-FAST ® POCKET THERMOMETER

Note: This thermometers specifications have changed since it was reviewed. Check product page for current price, specs and availability.

More Homebrew Finds!

pinned

This post may contain affiliate links. We may make a commission when you use our links. This will never cost you extra. Thank you for supporting Homebrew Finds!

greatdeals

Make sure the components you use are compatible and rated for your intended application.  Contact manufacturer with questions about suitability or a specific application.  Always read and follow manufacturer directions. tag:tpr review:rt600c

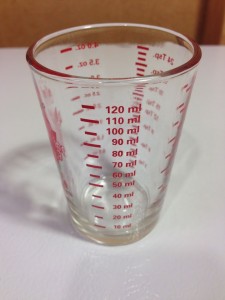
Hands On Review: Gemco 4 Oz Measuring and Tasting Glass

I use several of these puppies around my brewery and more.  I’ve used them for general measuring and as beer taster glasses.  I’ve also used them for espresso shots in coordination with my Rancilio Silvia Espresso Machine.

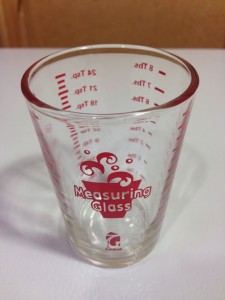
Front/Logo

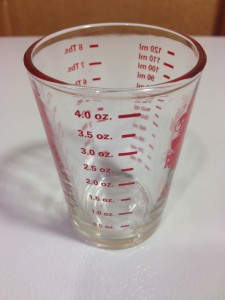
Ounce Measurements

Teaspoon Measurements

Tablespoon Measurements

Milliliter Measurements

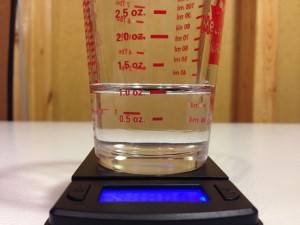
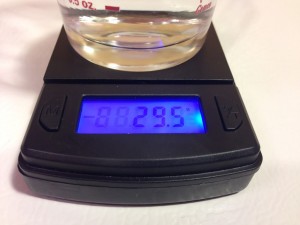
Sometimes these sorts of measuring devices are to be considered… ballpark.  This photo shows 29.5 grams of water.  29.57 grams equals one fluid ounce of water.  Within the limitations of this scale – Fast Weight MS-500-BLK – (1/10th gram)… this measuring glass is right on.

29.5 Grams of Water

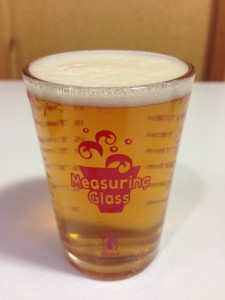
Using this as a taster glass to try some tasty Kiwi IPA

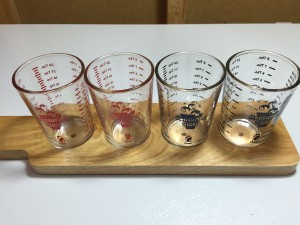
Beer TastersIn a tasting paddle that I have.

One problem that any glass can have is markings washing off.  I haven’t had that problem (for over a year now) and I’ve put these guys through some arguably rough treatment.  As mentioned previously, one of the things I use these for is espresso.  When used for that, these get near boiling liquid poured in them.  The measurement marks still look like new.  I will say that I’ve never put these in my dishwasher.

These are rugged, accurate and versatile measuring glasses.

Fox Run Mini Measuring Glass, 4-Ounce

This post contains affiliate links. We may make a commission when you use our Amazon links. This will never cost you extra. Thank you for supporting Homebrew Finds!

pinned

amazon

Review:GemcoMeasuringGlasses

Last Minute Gift Guide for Homebrewers!

Looking for a last minute gift for a home brewer or craft beer lover (or yourself)?  Check out the Last Minute Gift Section of our Homebrewer’s Gift Guide

Also check out the complete guide – Homebrewer’s and Craft Beer Lovers Gift Guide. Each year we look at everything in homebrewing and pick a handful of items that would make amazing gifts.

homebrewer gift guide

Continue reading

Hands On Review: ThermoWorks ChefAlarm Thermometer and Timer

thermoworks chefalarm review

The ChefAlarm Thermometer and Timer Combo from ThermoWorks has some unique features, including the ability to set both high and low temperature alarms.  Other features include: Constant Minimum and Maximum Temperature Displays, User Calibration, Adjustable Alarm Volume, Backlighting and the unit is Splash Proof.  All of this lends itself to making this thermometer and timer combination an amazing tool for homebrewers.


Check Current Prices, Description and Availability


Hands on Review ChefAlarm + Pro-Series Temperature Probe

Continue reading

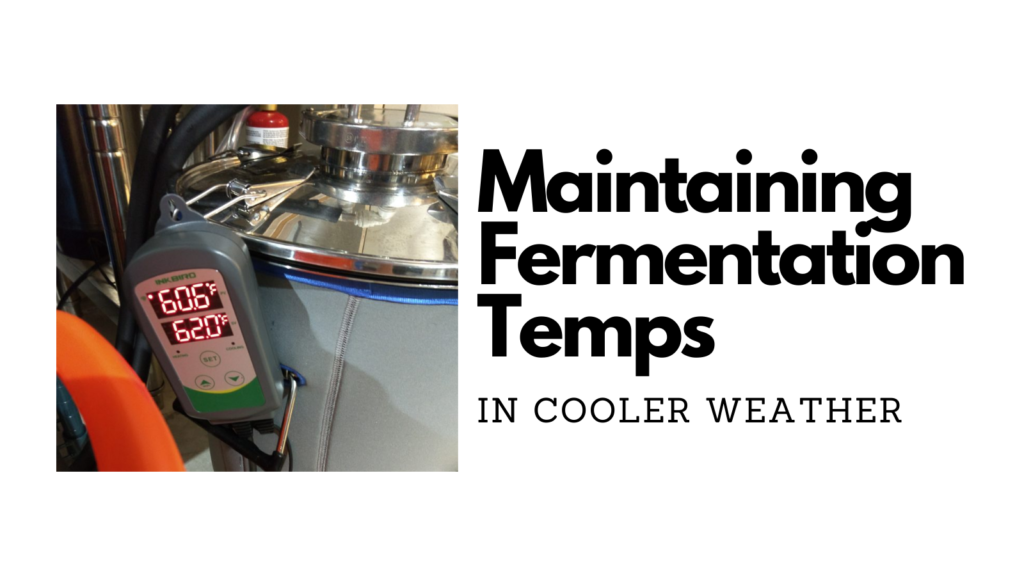
Homebrew Fermentation Heating Sources – Maintaining Fermentation Temps in Colder Weather

cold weather homebrewing

Fermentation temperature has a lot to do with how your finished beer turns out.

As seasons turn, you may need a boost to keep fermentation temperatures up.  Here’s a roundup of some of the available options out there along with some related reviews and resource posts

Continue reading

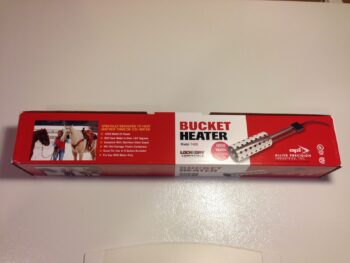
Hands On Review: Allied Precision 742G 1000 Watt Heat Stick with Temp Trial

Updated: July 18, 2024

What do heat sticks do?

Heat sticks help you… heat things.  For homebrewing they are helpful for getting strike and sparge water up to temp and helping to more quickly achieve or maintain a boil.  Depending on the heat stick and batch size, you could potentially use a heat stick as the sole source of heat from beginning to end.

Always use caution when handling hot items and when using water around electricity.

Make sure the components you use are compatible and rated for your intended application.  Contact manufacturer with questions about suitability or a specific application.  Always read and follow manufacturer directions.

Hands on Review: Allied Precision The Premier Line 742G Bucket Water Heater

Front of the box


Check Prices, Review Continues Below:

What are Other’s Saying?   Search this product’s Amazon reviews for “brew” – affiliate link, note that multiple variations of this product may be available, as such a different version may appear at this link

Disclaimer: Always use caution when handling hot items and when using water around electricity.

Make sure the components you use are compatible and rated for your intended application.  Contact manufacturer with questions about suitability or a specific application.  Always read and follow manufacturer directions.

Continue reading

Hands on Review: ThermoWorks 12″ and 24″! Digital Thermometers – RT610B-12 and RT610B-24

ThermoWorks 12″ and 24″ Long Stem Digital Thermometers feature waterproof casings (IP66/67 rating), long heavy duty stainless probes, a min/max feature, hold feature and a deg C/deg F switchable.

Check Current Price and Availability, Review Continues Below


Hands on Review ThermoWorks RT610B-12 and RT610B-24

Continue reading

Hands On Review: Stainless, Vacuum Sealed Double Wall, “Barrel Style” Growler!


If you’ve read Homebrew Finds for long, you’ll know that I’m a big fan of Lifeline’s line of Stainless, Double Wall, Vacuum Insulated Growlers.  The quality, looks and amazing insulation capabilities of this line of containers has made me a fan.

Here’s a Hands On Look at Lifeline’s  “Barrel” Model 7508 Growler.  Spoiler: It’s larger than it’s stated size.

Note: Since this review was published the design of this growler has changed.  Search Lifeline Growler on Amazon for current designs and availability

Continue reading

Brewery Labeling and Organization: Sharpie Markers and China Marker Pencils

Office 4 All Diamond Peel-Off China Markers,Glass, Cellophane, Vinyl,Metal, Skin, Etc..Assorted - Pack of 12 (Color Mix - 2×6 Color)Pictured: Diamond Peel-Off China Markers

I keep a keep a few different writing instruments handy around my home brewery.  In additional to standard pens and pencils for note taking and such I also keep a selection of Sharpies nearby along with China peel off marker pencils.

Continue reading

Five Star PBW Homebrew Cleanser Tips & Tricks!

Updated: 5/15/2024

Part of Our Homebrew Tips and Tricks Series.  Check out the complete list – Homebrewing Tips, Tricks & Shortcuts! This is a Top Post! See: All Top Posts

I love PBW!

Five Star Chemicals PBW – Powder Brewery Wash – is my go-to brewery cleaner. It is a non-hazardous buffered alkaline brewery cleaner and it… works great.

PBW Guidelines and Suggestions

Why shop around?  Using the Spray Bottle Method for Star San means that I use so little Star San that it’s really not even worth price comparing.  Not so with PBW.  This is something that I go through relatively quickly.  Since we use this in bulk, why not save money and buy it in bulk.  Buy things in bulk that you use in bulk.

Continue reading

Hands On Review: ThermoWorks Classic Thermapen

thermapen classic review

Updated: October 26, 2024

Hands on Review ThermoWorks Thermapen Classic

The Thermapen Classic is a… classic. 🙂 Seriously though, it’s well, built, super fast, reliable and does what it’s supposed to well.

Here’s a hands on look at the Thermapen Classic with response time tests accuracy tests and more.


Limited Time DEAL

ThermoWorks has this great thermometer marked down to just $59. No coupon code is needed.  Check product page to see if you can still get in on this.

Valid on Blue, Black, & Red only

Classic Super-Fast® Thermapen®


Related: Thermapen ONEHands on Review


Continue reading