Category Archives: Reviews & Top Posts

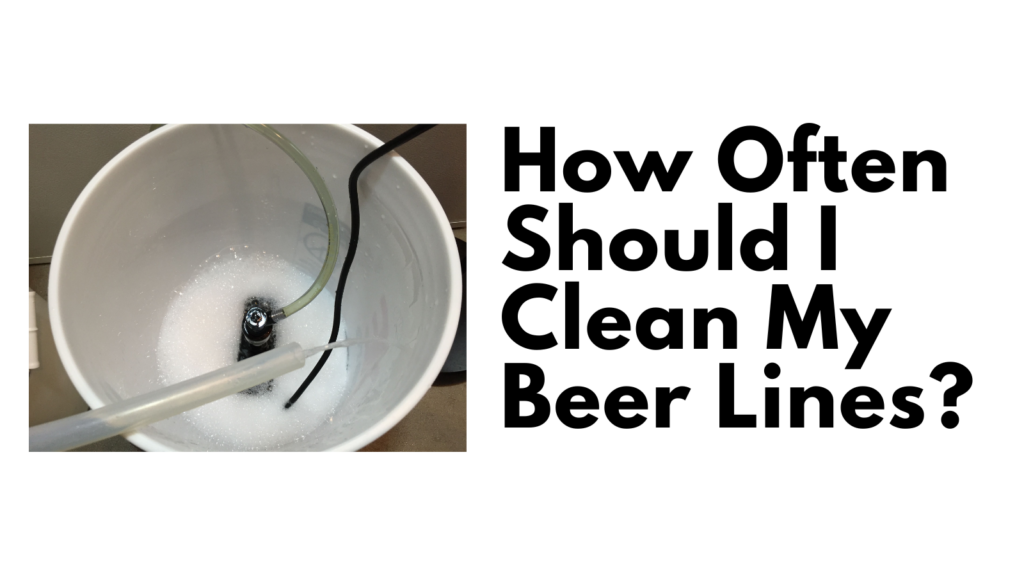
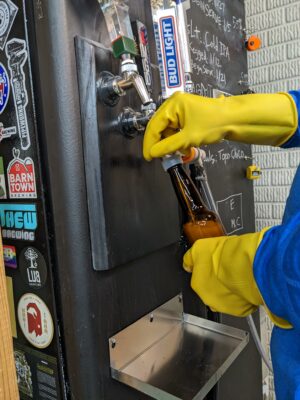
How Often Should I Clean My Kegerator Beer Lines?

Clean kegerator lines are a key part of serving delicious beer. Bacteria and mineral build in lines can cause off flavors, quick loss of head, under-carbonated beer due to rapid co2 loss and lack of legs forming on the inside of your beer glass.

How Often Should I Clean My Beer Lines?

The Draught Quality Beer Manual says… every two weeks.

That recommendation is for a commercial operation.  What about homebrewers?  We serve far fewer beer on our kegerators, but on the other hand, we can have been on tap and in lines 24 hours a day and 7 days a week.  Considering all of this, my recommendation is to clean home kegerator beer lines every 1 to 2 months.

Line Cleaning Options

Our Line Cleaning Builds:

Continue reading

Using a CO2 Detector in Your Kegerator

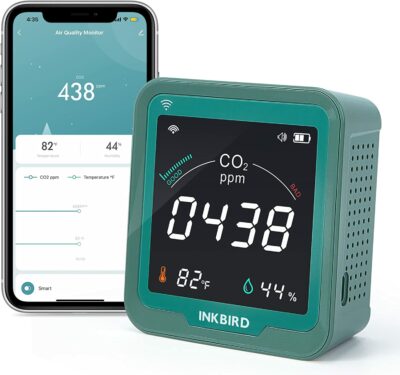
INKBIRD WiFi Indoor Air Quality Monitor, CO2 Detector, Accurate NDIR Sensor, Temperature and Relative Humidity, Indoor CO2 Meter with Data Logger, for Cars, Wine Cellars, Grow Tents, Homes (INK-CO2W).Pictured: INKBIRD WiFi Indoor Air Quality Monitor, CO2 Detecto

Losing a tank of CO2 because of leak is frustrating. It’s a waste of time and money. Adding a CO2 monitor can help warn you of leaks minimizing loss, wasted money, wasted time and frustration.

A CO2 Monitor Alarm in Your Kegerator

Placing a CO2 Monitor with alarm inside of your kegerator can serve as another line of defense to protect against co2 leaks and loss. CO2 should not be building up in your kegerator. A CO2 monitor with alarm can alert you of this condition.

Options with WiFi and a companion app are nice because you can get notifications on your compatible phone.

These are affiliate links. Note that multiple variations of these products may be available, as such a different version may appear at these links

Beyond CO2 Levels…

Some models display additional information that can be helpful information about your kegerator. These vary model to model and can sometime include temperature and humidity.

  • Temperature – monitor your kegerator temperature
  • Humidity – Help judge whether your Eva Dry (or similar) needs recharged for the purpose of handling excess kegerator and fermentation chamber wetness.  See: Damp Kegerator? Fix Kegerator Condensation

Not A Replacement for Checking for Leaks…

A do not consider a CO2 alarm as replacement for thoroughly checking for and addressing leaks. Rather this is another layer that could save you a trip to swap out a CO2 tank.

The Biggest Trouble Spot

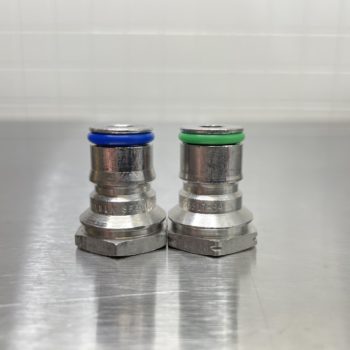
Color coded post o-rings. From our Keg Rebuild Post – Jump To: Replace O-Rings

In my opinion the most difficult spot to check and the cause of many a lost CO2 tanks are… gas post o-rings.

Testing at this point using the “spray bottle method” (spray Star San everywhere and check for bubbles) is impossible or at the very least difficult and messy.  Leaks will only surface here when a gas QD is actually engaged.  The problem is, you can’t easily see that spot when a QD is on.

The problem stated more simply… You need a QD on to see if it’s leaking, but you can’t see it if a QD is on. You can use what I call the pressure gauge method to check for overall leaks. But even using that method you know that you have a leak but it gives no indication where it’s at.

Be quick to replace gas side o-rings… I’m quick to replace gas post (and gas dip tube) o-rings. Beyond slow and no-carbing beers, a bad gas side o-ring can lead to empty tanks. That’s a waste of time and money and it’s frustrating.

These o-rings cost pennies each when you buy them in bulk. Liberally replacing these can save time, money and frustration.

Continue reading

Hands on Review: Kegland Hop Bong!

Updated: October 5, 2024

Thank you to HBF Contributor Aaron Nord for this hands on review!  Aaron is an advanced award winning brewer, a long time reader and a serial tipster!


Limited Time DEAL!

  • William’s Brewing has this on sale for $69.99.
  • Shipping is free or reasonably priced flat rate to addresses in the contiguous US depending on your order size for most items.

Fermzilla 30 Liter All Rounder Fermenter

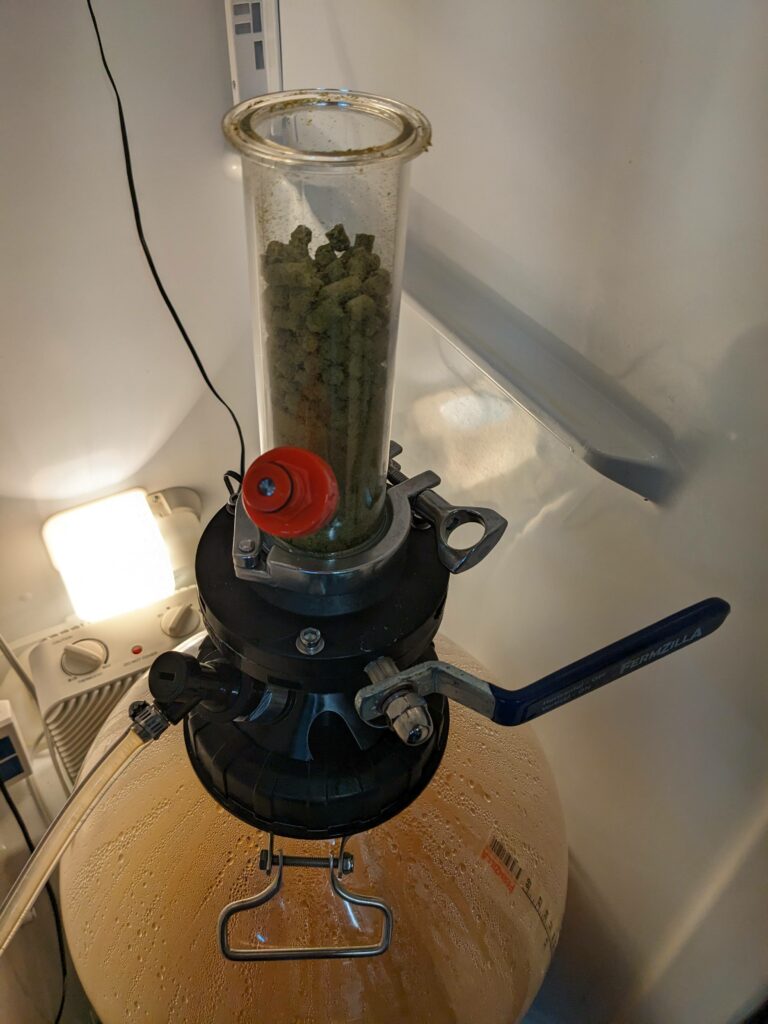
Kegland Hop Bong

Keeping oxygen out of a fermenter after the initial yeast pitch is a goal of most fermentations, with a few exceptions being oxygenating a high gravity batch mid-way through fermentation, barrel-aged ales, or spontaneously fermented ales in open foeders. For a homebrewer who wants to brew a beer outside of those exceptions noted, avoiding oxygen introduction after fermentation has begun is paramount to a quality finished beer, a goal which is sometimes a difficult to attain. Notably, adding dry hops, other flavor components (e.g. wood chips or coffee beans), or clarifying agents (e.g. gelatin fining or Biofine) presents a challenge for most homebrewers if they want to avoid oxygen exposure in the fermenting wort.

There are workarounds and ways for homebrewers to limit oxygen introduction, conceived upon by crafty brewers over the years. Dry hops for example, can be suspended in a muslin bag above the wort by placing a magnet inside the bag and its mating magnet on the outside of the fermenter. In this way, the hops will be in the fermenter at the beginning of fermentation and can be dropped according to the dry hop schedule by simply removing the outside magnet, all without opening the fermenter. Or, to add clarifying agents without cracking the fermenter lid, a brewer can utilize a plastic bottle with a carbonation cap. This method entails adding the liquid substance to a plastic soda bottle and pressurizing the bottle with CO2 via the carbonation cap, purging it, and repeating the process multiple times to ensure the gas inside the bottle is mostly composed of CO2. Then, by using a ball lock jumper, the pressurized bottle can be connected to a fermenter’s ball lock post, if equipped, and the liquid will enter the fermenter, so long as the pressure in the fermenter is less than that of the bottle.

Although these workarounds exist and cut the mustard for my purposes, I was excited when I found out that Kegland was set to release a product that appeared to be a simpler solution all around. In looking into it further I found that it was advertised to have additional uses, aside from the main feature of enabling hop, flavor, or fining additions to the fermenter while limiting oxygen ingress. This highly anticipated product is called the Hop Bong.

I have been a proud owner of a Kegland FermZilla All Rounder fermenterHands on Review – for over two years now and have nothing but good things to say about it. As a manufacturer, Kegland is a homebrewing gear innovator and a leader in the market. They are continuing to come up with novel equipment and tools that span their wide array of product offerings including many for their FermZilla fermenter line. I was excited to see what the Hop Bong could offer as an addition to my All Rounder fermenter.


Kegland Hop Bong Current Price & Availability:

via MoreBeer

via William’s Brewing

Continue reading

Hands on Review: Nukatap Counter Pressure Bottle Filler!

Updated: September 5, 2024

Thank you to HBF Contributor Aaron Nord for this hands on review!  Aaron is an advanced award winning brewer, a long time reader and a serial tipster!

Nukatap Bottle Filler

As with many homebrewers, my experience with the hobby began with making a boxed kit on my stovetop with about 50 bottles of drinkable beer when all was said and done. It was enough to keep me coming back, advancing in skill and acquiring equipment as time went on. I realized quickly that bottling was my least favorite part and was looking forward to ditching the bottles and getting into kegging. This change was one that made a big impact as far as increasing enjoyment of the hobby for me – that and getting out of stovetop brewing and into an electric brewing setup.

Inevitably, I found myself in the situation where I still needed to fill a few bottles from time to time, mainly for competitions. Now that I was kegging all my beer, I wanted an option that wouldn’t interrupt that practice too much. At the time, the most prevalent options for homebrewers were complicated counterpressure systems or the Blichmann Beer Gun. I opted for the latter and used that for several years to successfully bottle my competition beers. It has its pros and cons (discussed more later), and I always kept my ear to the ground on other options.


Check Current Pricing & Availability:

Continue reading

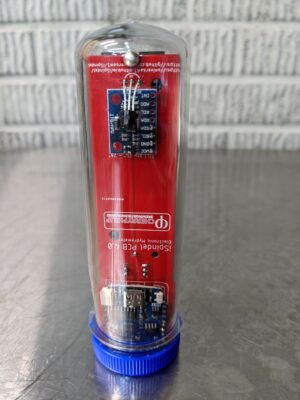
Hands on Review: iSpindel Digital WiFi Hydrometer!

ISPINDLE REVIEW

Thank you to HBF Contributor Aaron Nord for this hands on review!  Aaron is an advanced award winning brewer, a long time reader and a serial tipster!

Updated: October 10, 2024

iSpindel

Having the ability to precisely control fermentation temperatures was the change to my brewing setup I credit with one of the largest improvements in my finished beer quality. Being able to dial in specific temperatures for lagers, perform diacetyl rests for both ales and lagers, and cold crash a finished beer helped me to better control what was happening inside my fermenter. One of the data inputs that informed when to change the fermenter temperature was the gravity of the fermenting wort. At various times through the fermentation, I would test a sample to know where the wort was on its journey to become beer. Taking multiple samples was time consuming and it resulted in a loss, albeit a small loss, of the finished product due to the number of samples I was taking.

Enter the electronic, submersible hydrometer – a tool that can read out not only the gravity of a fermenting liquid, but also its temperature all from inside the fermenter, relieving the need to take numerous samples throughout the fermentation process. In addition, many of these devices could connect to an external source and log the data for the user to read in real-time. The brewer and technologist in me were both excited to see what one of these tools had to offer.


The iSpindel is one of a few offerings to homebrewers today in the category of an electronic, submersible hydrometer which also include the Tilt and Float products (I do have experience with the Tilt, which I will discuss later, but will focus on the iSpindel primarily in this review). All products rely on a sensor that can measure the angle of the device in order to calculate the gravity of the liquid. The iSpindel was born out of a desire to make a more cost-effective version of an electronic tilt measurement-based hydrometer, according to the creator, as the other offerings on the market are typically above the $100 mark.

I purchased my iSpindel on eBay from a seller in Canada for roughly half the price of the other devices available:

https://www.ebay.com/usr/wilbrod45


Prebuilt iSpindel:


RARE Deal on TILT Bluetooth Hydrometer! – $114.75 at Amazon w/Coupon!

Continue reading

The Most Difficult Spot to Check for CO2 Leaks

hard to find keg co2 leak

Updated: 6/26/2024

If you’ve found this article odds are pretty good you’re having trouble tracking down a pesky leaks.


Check for CO2 Leaks

First things first, if you haven’t already used traditional methods to try to track down your leak, check out my resources on the topic.

The Most Difficult Spot to Check for CO2 Leaks…

Continue reading

Where to Find RAPT Pill Digital Hydrometer from Kegland?

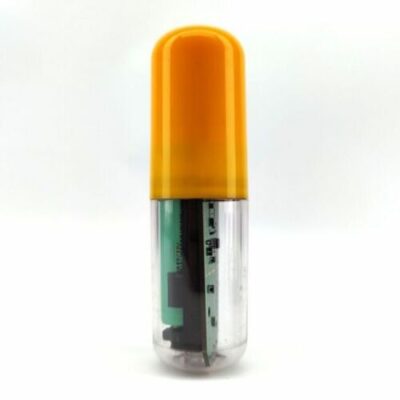
rapt pillThe RAPT Pill allows accurate and precise, true real-time specific gravity and temperature logging and control via wifi/bluetooth integration with the RAPT fermentation chamber (KL15813), RAPT mobile app or RAPT IOT.

The RAPT Pill acts as both a real-time gravity testing hydrometer and thermometer allowing instant gravity and temperature measurements and also logging from inside your fermenter during fermentation.

The RAPT Pill boasts many advantages over other wireless hydrometers and thermometers including tough design, better ergonomics, sanitary design and less susceptible to error as a result of hops, krausen or CO2 bubbles generated from fermentation.

The iSpindel is a DIY Wi-Fi enabled hydrometer.  The project originated in Germany, but an English translation is available.


This integrates directly with RAPT fermentation Chamber and can also work independently via RAPT mobile app or RAPT IOT. 

Finding RAPT Pill:

Availability of RAPT Pill in the US has been scant. eBay has been the only place I’ve been able to find them.

Search eBay for RAPT Pill for additional options

Also…

Continue reading

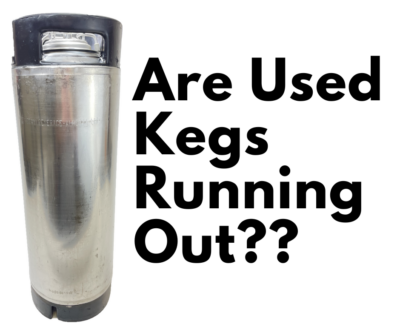
Are Used Kegs Running Out??

Updated: July 31, 2024

The containers we call Ball Lock and Pin Lock Kegs come from the soda industry.  Also called Cornelius Kegs, Corny Kegs and Corney Kegs, they were originally intended to store and distribute soda pre-mix.  The big soda companies decided on different style containers for their pre-mix.  Pepsi landed on the Ball Lock style while Coke uses the Pin Lock style.

Homebrewers have since re-purposed these as homebrew beer kegs.


Limited Time Deal, Save on 2 and 4 Packs at cornykeg,com

cornykeg.com pin lock keg deal

Good used pin locks have been hard to find…  When I started brewing pin locks were cheaper than ball locks, but that has changed. There’s been a real reversal in used keg pricing. Used pin locks have been tough to find in stock, especially at anything close to what I would call a good price. For example, see MoreBeer’s Pin Lock Offering. This is supply related. New pin lock kegs are not coming into the homebrewing market and we’ve finally hit an availability wall.

cornykeg.com has sourced hard to find refurbished pin lock kegs. Prices for these refurbishe kegs start at $42.74 each when you buy a four pack. Get them while you can!

Save another 10%!

For a short time coupon code HBFPACK takes 10% off all 2 and 4 pack keg options at cornykeg.com. Combine this with already great prices and this is the best keg deal going right now!

kegs at cornykeg.com – remember promo code HBFPACK to save on all 2 and 4 packs

This means that pin locks start at just $38.47. Considering the market, this is a STELLAR DEAL!

For some pricing clarity, MoreBeer’s $84.99 offering just completely sold out. MoreBeer’s included free shipping, but that’s still MUCH more expensive than cornkeg’s current deal


This article contains affiliate links. We may make a small percentage if you use our links to make a purchase. You won’t pay more and you’ll be supporting Homebrew Finds and more content like this. Thank you for your support!


Are Used Kegs Running Out?

Continue reading

Craft Cleaning Chart – Contact Times, Dosage, Temperate and More for Star San, PBW and lots more

Updated: November 20, 2024

Resource Posts on PBW and Star San

I have resource posts on Star San and PBW that have loads of information, tips & tricks.

Star San and PBW Tips and Tricks

About Star San

Star San is my homebrew sanitizer of choice.  When mixed properly, it’s food safe and no rinse.  Required contact time is five minutes.  It has worked very well for me for quite some time and I’m convinced that it’s one of the most economical solutions available if you’re using the “Spray Bottle Method” outlined here.


starsanofferings


About PBW

Five Star Chemicals PBW – Powder Brewery Wash – is my go-to brewery cleaner. It is a non-hazardous buffered alkaline brewery cleaner and it… works great.


Five Star’s Craft Cleaning Chart PDF…

Continue reading

Hands on Review: BN-Link Digital Two Stage Temp Controller – Fermentation & Kegerator

This review is by Homebrew Finds Contributor Brad Probert.  Brad is an engineer, expert homebrewer and experienced reviewer.  Grab a link to Brad’s website at the end of this review.

BN-LINK Controller

BN-LINK Is a relatively new company, with its parent company Century Product Inc being founded in early 2014. The specific brand BN-LINK was created in 2019. And throughout all of this time, they’ve focused on the home electronics market with switches and smart controllers of various types. For homebrewing, there are probably some creative things you could do with some of the smart outlets or timers, but the most direct homebrew-use tool is the temperature controller.

The two-stage outlet controller has two outlets, one for your heating element, one for your cooling element/pump. The power rating is up to 1875W, which is a higher rating than even most All-In-One brewing units. The functional temperature range of the controller is from -40F to 176F, so you might be able to use it for heating strike water or for mash control, but it definitely shines for fermentation control. It has adjustable resolution, so you can set your target temperature in either full degree increments or 0.1 degree increments. It comes with a temperature probe with a nearly 6-ft long cable (71 inches). The probe is waterproof, but the controller is not, so make sure you keep distance between your probe and the controller. The display shows you both the current temperature and the target temperature you have set.

Controller and Probe

With two outlets, you plug in both your heating and cooling device at the same time. You set your target temperature and then a Cooling Differential value, which just says how warm above your target temperature before it kicks on the cooling device. Likewise, there’s a Heating Differential value, and you decide how cold you’ll let the probe measure before kicking on the heating device. The controller also has a programmable alarm you can set to alert you if it gets too hot, or too cold. There’s an overload reset switch in case you accidentally send too much current through it- designed to trip the switch instead of burn out the circuit board. And the last bit of functionality is a compressor delay, which sets a minimum amount of time for the compressor to be off before it switches on again, to protect the compressor of your cooling device from switching on & off too frequently and damaging it.


Check Current Prices, Review Continues Below:

Continue reading

Hands on Review: Blichmann Engineering BrewVision Thermometer!

blichmann engineering brewvision review

This review is by Homebrew Finds Contributor Brad Probert.  Brad is an engineer, expert homebrewer and experienced reviewer.  Grab a link to Brad’s website at the end of this review.

Blichmann BrewVision Thermometer

There is a wide array of homebrew gear out there. Most anything you buy has options or comes in various designs. Specific to this review, there are tons of different thermometers. But one of Blichmann’s offerings sets itself apart by coupling some very useful software with its digital thermometer. The BrewVision has been on the market for 5-6 years, but just recently they lowered the price substantially, making it even lower than their analog dial-gauge thermometer.

The BrewVision comes in two configurations based on the length of the temperature probe you need in your particular setup. It has a standard ½” NPT thread to screw into a female NPT fitting, paired with their weldless bulkhead fitting, or coupled with their TC mounting flange. The package contains the probe and the threaded installation collar, and a large sealed transmitter housing that contains 2x AAA batteries, the on/off button, and the Bluetooth transmitting hardware.

The power of the BrewVision lies in the software interface you install on your phone. It doesn’t require the latest smartphone (compatible with even the 2010 iPhone 4, or any Android phones) to run their software. You can run the software with whatever level of sophistication you want. At its simplest, your phone functions as the pressure readout gauge. There is no display on the body of the BrewVision itself, so it requires you to have your Bluetooth smartphone paired and running the Blichmann app. While this might seem like a hassle to some, the benefit is you no longer have to be right next to your thermometer to know the temperature, you just have to be in Bluetooth range. Stay in your comfy chair relaxing while your strike water heats, or dodge the winter weather during your mash while you sit inside with the heat on.


Compare Models, Prices and Availability, Review Continues Below:

Related:

Continue reading

Hands on Review: Kegland Hang Tab Keg Lids – works on ball lock & pin lock kegs

Kegland, based in Australia, produces a broad array of homebrewing gear. fermenters, electric brewing systems, loads of draft stuff (including DuoTight!) and lots more.

It’s obvious these folks are homebrewers at heart, because they’ve come up some really innovative stuff. The other thing they’ve generally done is hit really good price points. There is a balance between cost, features and quality and they seem to be hitting a lot of bullseyes.

This is a hands on look at their unique keg lid with integrated hang tag model KL02868.

Close of up of the lid. Reads… Caution Release Pressure to Remove Lid. Maximum Working Pressure 130 PSI.


Check Current Prices and Availability:

Continue reading

Fun with Carbonation Caps!

Carbonation caps are available in a number of styles and materials from various manufacturers. These are generally designed to thread into standard 1L and 2L PET bottles.

Sourcing a Carbonation Cap

FERRODAY Stainless Steel Carbonation Cap Forced Carbonation PET Bottle Filling 5/16 Barb CO2 Coupling to Carbonate Soda Beer Stainless Steel PET Bottle Carbonation Cap + O-ring + GasketWorks with both liquid and gas (double check current specs to confirm) – Ferroday Stainless Carbonation Cap Counter Pressure Bottle Filling With 5/16″ Barb – Hands on Review

Tee Fittings

These caps along with tee fittings have proven to be very flexible. Here are some application ideas…

PET Bottles as Growlers:

Fill up a 1L or 2L PET bottle with your favorite homebrew.  Put one of these on (purge the headspace by squeezing if you want to) and then pressurize for transport.  This should help to reduce oxygen pickup and maintain carbonation levels.

Continue reading

Hands on Review: Kegland Ball Lock Kegs!

Updated: November 13, 2024

Kegland, based in Australia, produces a broad array of homebrewing gear. fermenters, electric brewing systems, loads of draft stuff (including DuoTight!) and lots more.

It’s obvious these folks are homebrewers at heart, because they’ve come up some really innovative stuff. The other thing they’ve generally done is hit really good price points. There is a balance between cost, features and quality and they seem to be hitting a lot of bullseyes.

This is an in depth hands on look at Kegland’s 5 gallon ball lock keg.

Hands on Review Kegland 5 Gallon Ball Lock Keg

A look at the boxThe other side of the box. This is one of the better looking keg boxes I’ve run across.


Check Current Prices, Models and Availability:


This article contains affiliate links. We may make a small percentage if you use our links to make a purchase. You won’t pay more and you’ll be supporting Homebrew Finds and more content like this. Thank you for your support!


Continue reading

What’s The Difference? Comparing AEB and AMCYL Ball Lock Kegs!

AEB and AMCYL manufacturer ball lock kegs, also called soda pre-mix tanks. Homebrewers use these for beer, cider and seltzer. Coffee shops use them for cold brew, Kombucha makers use them for kombucha and on and on.

A common question I see, or directly hear, is… what’s the difference between AMCYL and AEB?  It’s a great question. Both make new ball lock kegs, both go by abbreviated company names and both start with…. A.  Maybe they’re the same? This write up aims to answer the question and will give you a complete run down of what’s the same and what’s different.


Hands on Reviews of Both:

This post will give an overview of each keg with comparisons. If you want a deep dive into either one, I have in depth hands on reviews of both kegs.

AEB vs AMCYL Kegs, Compared…

Important Note: In this comparison, when two kegs are pictured, AEB kegs will always be on the left an AMCYL kegs will be on the right.

Continue reading

Hands on Review: Blichmann Engineering BoilerMaker G2 Kettle Customization

This review is by Homebrew Finds Contributor Brad Probert.  Brad is an engineer, expert homebrewer and experienced reviewer.  Grab a link to Brad’s website at the end of this review.

Blichmann Engineering BoilerMaker G2 Customized Kettle

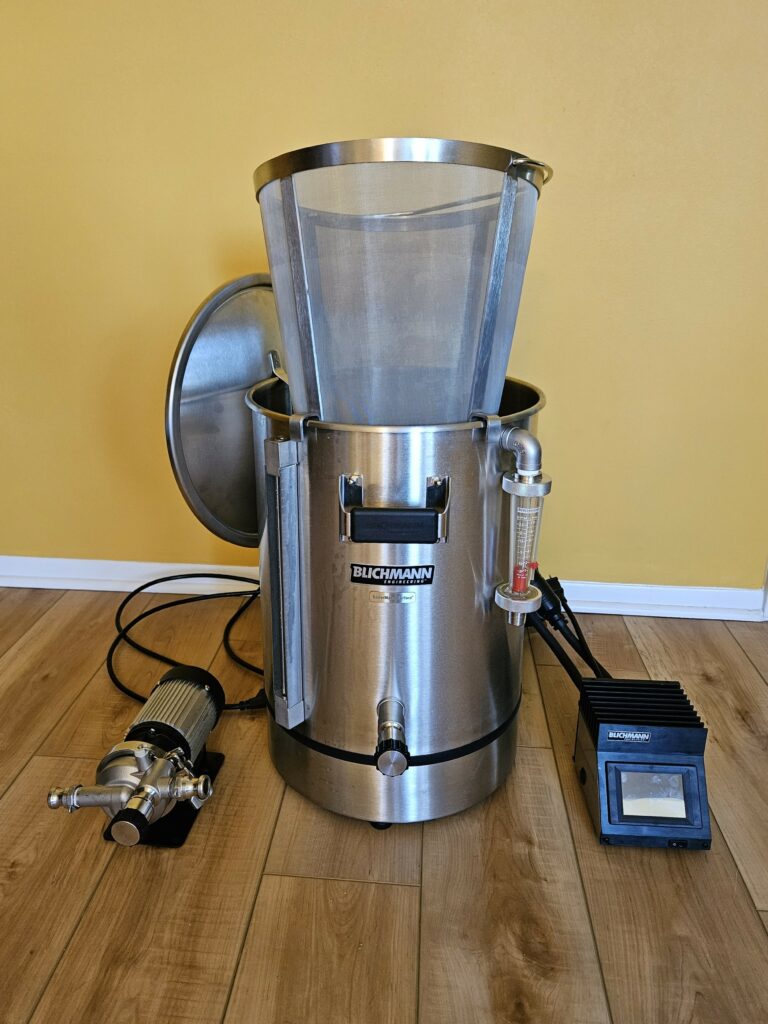
Blichmann has made brew kettles for a long time, but it is only recently they added the ability for you to custom configure the G2 BoilerMaker Kettle to your liking. Although customization can feel like it makes things more complicated than just getting a “standard kettle”, it can also be viewed as making things simpler because you don’t have to invent a complicated workaround because your kettle doesn’t have the features you want. And doing internet searches of all the options out there can leave your head swimming as you try to find exactly what you want. If you find yourself in this scenario, custom kettle configuration is a great thing.

The most obvious customization choice is the kettle size. Blichmann offers choices on the smaller side that some vendors don’t (as small as 7.5 gallons), and they go up on the big size beyond others (as big as 55 gallons). Once you decide on the size of your kettle, you need to decide what type of ports/fittings you want. They give you the option of both the age-old standard of 1/2″ NPT, or the latest preference of Tri-Clamp (or Tri-Clover if you prefer, or simply TC). The 1/2″ NPT is handled via weldless fittings with o-rings.


Blichmann BoilerMaker G2 Kettle

This is built around Blichmann’s G2 Kettle.  See our Hands on Review of the G2

Related: Hands on Review: Blichmann Engineering BoilerMaker G2 Mash Tun


Your customization order is done online through Blichmann’s website. You first pick which style of fittings you want on your kettle- TC or Threaded NPT. The minimum kettle requirement is a port for a drain valve. Everything else is optional. You can add a thermometer port, and you pick the location of it, as well as whether you want an analog or digital thermometer to be kitted for you. You can add the sight glass for volume markings or go without. You also have the option of adding any of these: AutoSparge, HERMS Coil, BoilCoil, Whirlpool port/valve, False Bottom, and HopBlocker. You can make it as complicated or as simple as you want it.

1-inch TC Sight Glass Added to Output


Compare Models, Prices and Availability, Review Continues Below:

Continue reading

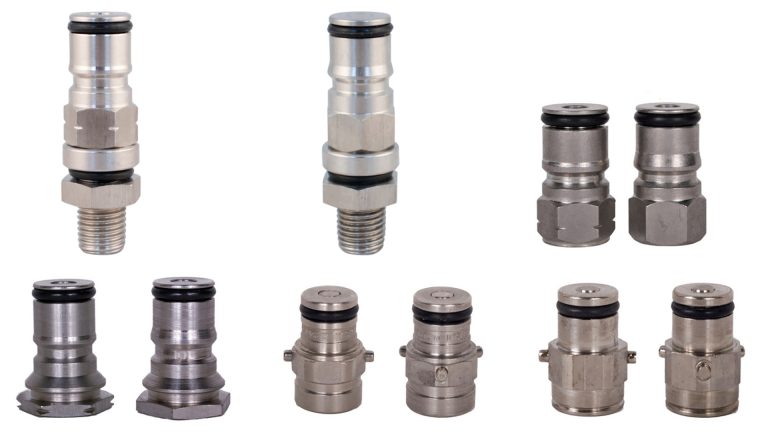
Homebrew Keg Post Thread Size Reference

cln_img_3027It can be tough tracking down the right 

Keg Type Gas Post Size – Thread Liquid Post Size – Thread Product Link

  • Cornelius Spartan 19/32″ – 18 19/32″ – 18
  • Cornelius R (Pin Lock) 19/32″ – 18 (2 Pin) 19/32″ – 18 (3 Pin)
  • Firestone A (Pin Lock) 9/16″ – 18 (2 Pin) 9/16″ – 18 (3 Pin)
  • Firestone R (Pin Lock) 9/16″ – 18 (2 Pin) 9/16″ – 18 (3 Pin)
  • Firestone Challenger 11/16″ – 18 3/4″ – 18
  • Firestone Super Challenger 9/16″ – 18 5/8″ – 18
  • Firestone V Challenger 9/16″ – 18 5/8″ – 18
  • Firestone VI Challenger 9/16″ – 18 5/8″ – 18
  • John Wood 85 11/16″ – 18 3/4″ – 18
  • John Wood RA (Pin Lock) 9/16″ – 18 (2 Pin) 9/16″ – 18 (3 Pin)
  • John Wood RC (Pin Lock) 9/16″ – 18 (2 Pin) 9/16″ – 18 (3 Pin)
  • Super Champion 19/32″ – 18 19/32″ – 18
  • AEB Kegs 19/32” – 18 19/32″ – 18

Thanks to Keg Outlet for this information. They carry many of these options.

Continue reading

Kegerator Draft Line Cleaning Options!

Clean kegerator lines are a key part of serving delicious beer. Bacteria and mineral build in lines can cause off flavors, quick loss of head, under-carbonated beer due to rapid co2 loss and lack of legs forming on the inside of your beer glass.

How Often Should I Clean My Beer Lines?

The Draught Quality Beer Manual says… every two weeks.

That recommendation is for a commercial operation.  What about homebrewers?  We serve far fewer beer on our kegerators, but on the other hand, we can have been on tap and in lines 24 hours a day and 7 days a week.  Considering all of this, my recommendation is to clean home kegerator beer lines every 1 to 2 months.


Limited Time Deal:

Helps you clean multiple lines at the same time…

Valuebrew is offering a pack of two jumpers and 25 replacement o-rings for $32.97. Coupon code JUMP discounts the combo by a whopping 32%.

Double Jumper Special! < note that you must use this link along with coupon code JUMP to get the deal, the standard product will not get you the discount

Valuebrew’s jumper is unique because of the custom color, food grade o-rings and because … it works with both liquid and ball lock jumpers.


Line Cleaning Options

Our Line Cleaning Builds:

Continue reading

Hands on Review: Blichmann Engineering BoilerMaker G2 Mash Tun

This review is by Homebrew Finds Contributor Brad Probert.  Brad is an engineer, expert homebrewer and experienced reviewer.  Grab a link to Brad’s website at the end of this review.

Blichmann Engineering Mash Tun

When selecting a mash tun, there are lots of choices out there. There are all-in-one electric systems, converted Igloo coolers, aluminum stovetop pots, and many different types of stainless steel kettles. If you’re not going down the path of the all-in-one unit, stainless steel is usually the predominant choice. That’s because it is sturdy, easy to clean, has a very broad temperature range, and doesn’t contain questionable stuff that comes with that California Prop 65 warning.


Blichmann BoilerMaker G2 Kettle

This mash tun is built around Blichmann’s G2 Kettle.  See our Hands on Review of the G2


Handles with Cool Grip Comfort Pads

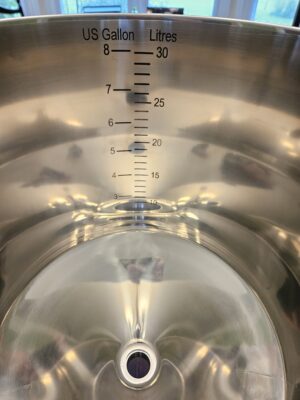
Blichmann’s kettle offering is the BoilerMaker G2. It’s made from 304 Stainless Steel and has a brushed finish. According to Blichmann, although both inside & out have a brushed finish, the inside is a bit smoother to make stuff less likely to cling to it. The kettle has volume markings on it, but instead of etched or stamped markings, it uses a borosilicate sight glass with volume markings on the outside of the kettle. The handles are located at the front and rear of the kettle, so when you’re carrying it, you don’t have the drain valve sticking out in front of you at risk of banging into things or facing the other way and digging into your leg.

Kettle with Temperature Port Offset to Side

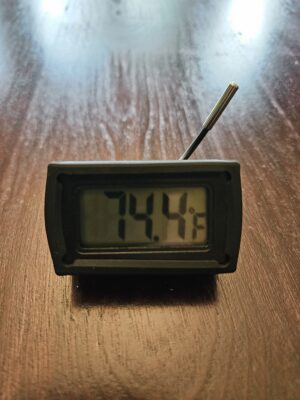
The kettle comes with either welded 1.5” TC ports or weldless ½” NPT Threaded fittings for a drain valve attachment and a thermometer port. For the thermometer port you can get either an analog dial thermometer with an adjustable angle face, or a digital BrewVision. The kettle comes with the Blichmann Linear Flow Valve for the drain, but the TC kettle also has an option for a butterfly valve. The Linear Flow Valve’s exit comes out at a 90-degree angle from the inlet, and you can point it in whatever direction you want to eliminate tight hose bends or having to add an additional 90-degree elbow fitting.

Welded TC Port on OutsideWelded TC Port on Inside


Compare Models, Prices and Availability, Review Continues Below:


The Boilermaker comes with many customization options. If you want it to be an electric boil kettle, you can order it with the Blichmann Boil Coil. You can even take the customization further and select additional ports and add-on additional Blichmann kettle accessories. Beyond the add-on features, you can pick the size- from as small as 7.5 gallons to as big as 55 gallons.

If you plan to use the kettle as a mash tun, the Blichmann Button Louver false bottom is made to fit inside the kettle and connect with the pickup tube that feeds the drain valve. The false bottom sits on the stepped bottom rim in the kettle, and the pickup tube passes through a hole in the false bottom, drawing wort from below it. The false bottom is covered with small 1” circular stampings (where the “button” part of the name comes from) which are slit along the sides (for the “louver” part of the name). With this design, the gaps are on a vertical edge, not on the flat horizontal face. That means you don’t have gallons of water and grain pushing down on your cracked grains, trying to push them through slits or holes like most false bottoms do.

Last on the list of nifty features is the lid. Lids don’t do much on kettles, and generally are pretty boring. Blichmann made their lid do something others don’t. Instead of the normal handle bracket welded on both ends, they left one end open, so it forms a type of hook/hanger. With the cantilevered hanger design, not only can you hook it to the kettle handle, but you can hang it from any side of the kettle, simply by hooking it over the rim.

Hands on Review

I evaluated a 10 Gallon G2 kettle with the Button Louver false bottom, to use as a Mash Lauter Tun in my 2-vessel brewing setup. The 10 Gallon size worked great for 5-gallon batches. The look of the kettle right away stood out as different. The brushed finish made it less shiny than highly polished kettles I’ve used before when pulling it out of the box. However, the brushed finished meant it stayed bright and consistent after several brews. I found the brushed finish inside seemed to require a bit more effort to clean afterwards than my smooth kettles. But if I compared the amount of effort to get my smooth kettles shiny and new looking, the brushed finish was easier to get it back to “like new” finish. So what initially seemed like a downside, was actually a benefit.

The other thing I noticed when pulling it out of the box was its weight. It felt lighter than other kettles. Sometimes there are legit reasons to brag about gauge thickness of your kettle. The beefier it is, generally the more resistant to wear & tear and potential denting. However, when you’re talking about kettles in the region of 5-gallon batches, clean-up usually means lugging them somewhere to clean/rinse them. And when you’re doing that, you appreciate a kettle that isn’t thicker just for bragging rights. The Blichmann kettle seemed robust enough to be considered sturdy, and it seemed a good balance when lugging it around for cleaning.

Hands down the most impressive feature of using the Blichmann BoilerMaker as a mash tun was the Button Louver false bottom. Technically this is an add-on, and not part of the kettle. But if you buy the kettle to use as a mash tun, you of course buy the false bottom. I’ve used different designs of false bottoms in different mash tuns, but none have worked as well as the Button Louver one. I had previously optimized my grain crush on another mash tun to be at a point that I didn’t get a stuck mash, but still had good mash efficiency. I was milling my grain at a 0.033” gap on a 3-roller MM-3 Monster Mill. On my other mash tun this resulted in good mash efficiency, no stuck mashes, and a small amount of grain fragments that made their way into the boil kettle. This same grain crush setup on the Blichmann false bottom gave me the same mash efficiency, no stuck mashes, but I was shocked to see no grain bits in the boil kettle. I thought this was a fluke on my first batch, but I watched it on a total of seven test batches with the same results.

Button Louver Closeup

The one exception to this “grain free” performance happened once during my trials. I found later that what happened was I dislodged the washer on the pickup tube where it goes through the false bottom. The washer is a loose piece that has a tight clearance around the pickup tube and blocks an oversized hole in the false bottom. While stirring the grains during mashing in, I stirred too deeply and scraped this washer up. Grain got under it, and I then had a large hole where grain could get through while recirculating the mash. By the end of my 60-minute mash, the grain was able to set up a decent filter bed, and I only got a few debris in the boil kettle during sparging. But I did have to do some clearing of my recirculation tubing at the start of the mash to get the giant slug of grain out of there. Now I know to not stir so deep as to scrape across that washer.

Linear Flow Valve with TC Ends

Conclusions

The G2 BoilerMaker kettle worked well for me. The lighter weight made it nicer when it came time to cleaning and moving the kettle over to the sink. The brushed finish grew on me after a few batches, as I recognized it kept the kettle looking as good after several brews as it did when I pulled it out of the box. The Button Louver false bottom earned a spot in my unofficial list of “favorite brewing gear” with its stellar performance of keeping grain particles out yet still providing plenty of pass-through liquid slots. With the ability to custom-order the kettles with the types of fittings, number of fittings, and location of fittings, it can be a great tool for many types of use.

Compare Models, Prices and Availability, Review Continues Below:

More Photos

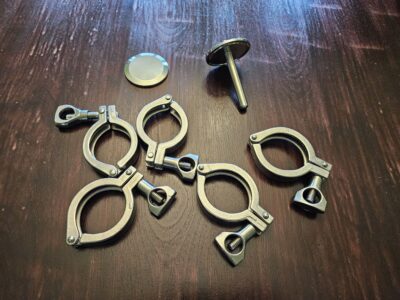
Brushed Finish InteriorPickup Tube with Over-molded GasketTri-Clamp with GasketWasher Accidentally Lifted Allowing Grain to Pass Underneath

More Blichmann Engineering Reviews!

More Homebrew Finds!

Recent Deals!

10 Most Recent Homebrew Resource Posts & How-To’s!

pinned

This post may contain affiliate links. We may make a commission when you use our links. This will never cost you extra. Thank you for supporting Homebrew Finds!

greatdeals

More Tri-Clover/Tri-Clamp!  Tri-Clamp Fittings at Proflow Dynamics

Special Thanks to Blichmann Engineering for providing the unit used for evaluation in this review.

By Brad Probert.  Check out Brad’s website – beersnobby.com

Make sure the components you use are compatible and rated for your intended application.  Contact manufacturer with questions about suitability or a specific application.  Always read and follow manufacturer directions.

Price, promotions and availability can change quickly. Check the product page for current price, description and availability. review:blichmash tag:tpr