Category Archives: Reviews & Top Posts

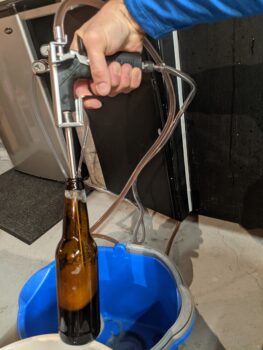
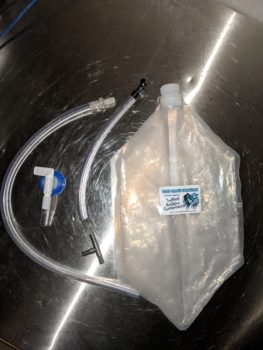
Hands on Review: Blichmann Engineering Beer Gun

Updated: September 23, 2024

Thank you to HBF Contributor Aaron Nord for this hands on review!  Aaron is an advanced award winning brewer, a long time reader and a serial tipster!

Blichmann BeerGun v2

After I quickly realized the benefits of kegging, I was happy to forgo the bottling routine and looked forward to never cleaning, sanitizing, and filling 53 twelve-ounce bottles with caps again. Then I decided I would throw my hat into the ring of homebrew competitions. Back to the bottling world.


Blichmann gear is rarely discounted. Why? This is a MAP item. MAP = Minimum Advertised Price.  It’s an agreement between sellers and manufacturer’s not to sell an item below a certain price.  This gear generally sells for about the same price no matter where you purchase it from and is rarely discounted.


Compare Models, Prices and Availability, Review Continues Below:

Continue reading

Find the Best Deal on Sacks of Malt – Tips, Tricks & Sources

homebrew sack malt deals

Updated: October 23, 2024

Grains by the lb can generally be had for a reasonable price. They also generally qualify for free and flat rate shipping when a retailer offers that. The same is true for sacks of grain.  The real issue comes when you add on shipping.  50 or 55 lbs of grain is… heavy.  Shipping charges can add up.


Malt 6 Packs at MoreBeer = BULK Malt Deal (and free shipping!)

When you purchase 6+ 5lb bags of the same grain MoreBeer will apply a volume discount. You can see this discount on each product page. Here is an example:

Malt Deal at MoreBeer! – choose 6 more 5lb bags of grain to see volume discounts

Get Free Shipping: Shipping is free with a qualifying $59 order to many US addresses

Example… Briess 2 Row drops to $7.65 when you buy 6 or more 5 lbs packs. Buy 10 x 5 lb packs and you’ll have the equivalent of a 50 lb sack of grain. With the discount this will figure to $76.50 AND that will include shipping to many US addresses.

Yes, free shipping works… FREE Shipping DOES Work. I periodically get questions/concerns when I post this workaround, please read… Although bags of grain do not ship under MoreBeer’s free shipping program… this is a loophole of sorts. 5 and 10 lb bags do ship for free. If you use this technique you will receive 5 x 10 lb bags of grain, not a single 50 lb sack.


Limited Time Deal – 38% off Malt at Label Peelers

Label Peelers is discounting their lineup of grain offerings, including malted barley, corn, oats, rye, wheat and more.  Malsters include Briess, Avangard, Dingemans, Muntons and more.  Offerings include base and specialty grains and apply to both bulk 50 and 55 lb bag purchases and smaller 1 and 10 lb offerings.

  • The 38% discount should be reflected on each product page
  • No coupon or discount code is required.
  • Shipping is an additional cost based on your location.  Because of minimum shipping costs, it may make sense to place a larger order.  Additional items may ship for minimal cost.  Example: Shipping (for me) for 1 lb of Citra is $8.93.  2 lbs cost $9.18 to ship.  That second pound costs just 25 cents to ship.  That’s minimum shipping at work.

Label Peelers Grain Sale

Continue reading

Hands on Review: Delta Brewing Systems Fermtank

This review is by Homebrew Finds Contributor Brad Probert.  Brad is an engineer, expert homebrewer and experienced reviewer.  Grab a link to Brad’s website at the end of this review.

Delta Brewing Fermtank

The world of fermentors is fairly expansive. On one end of the spectrum, you have the food grade plastic buckets, and at the other you have stainless conicals up on their stilts. In the middle between these two sits stainless bucket fermentors. They’re more expensive than plastic buckets, to be sure. But they have most of the function and features of the full-sized conicals without the full price tag. Delta Brewing Systems Fermtank is a stainless steel bucket fermentor.
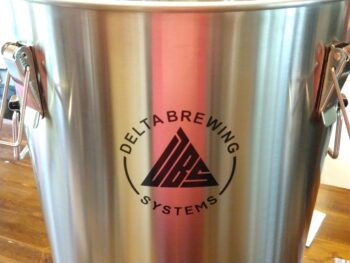
Brushed Stainless Exterior and Lid Clasps


Check Current Price and Availability, Review Continues Below:

Related: Hands on Review: Delta Brewing Systems Fermtank TC


This article contains affiliate links. We may make a small percentage if you use our links to make a purchase. You won’t pay more and you’ll be supporting Homebrew Finds and more content like this. Thank you for your support!


Delta Industries has been in business for 33 years. The main company is an air compressor sales, service, and engineering house. They have worked with various businesses including breweries across the US as well as some overseas, providing clean compressed air and glycol chillers. Delta Brewing Systems is the part of Delta Industries that manages the beer brewing business. They started offering a handful of homebrew products in July of 2019, and have started steadily expanding their portfolio of homebrewing gear throughout 2020.
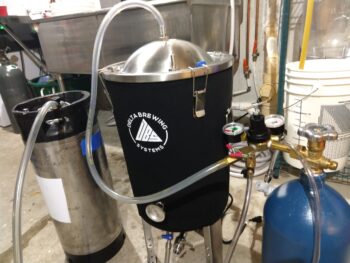
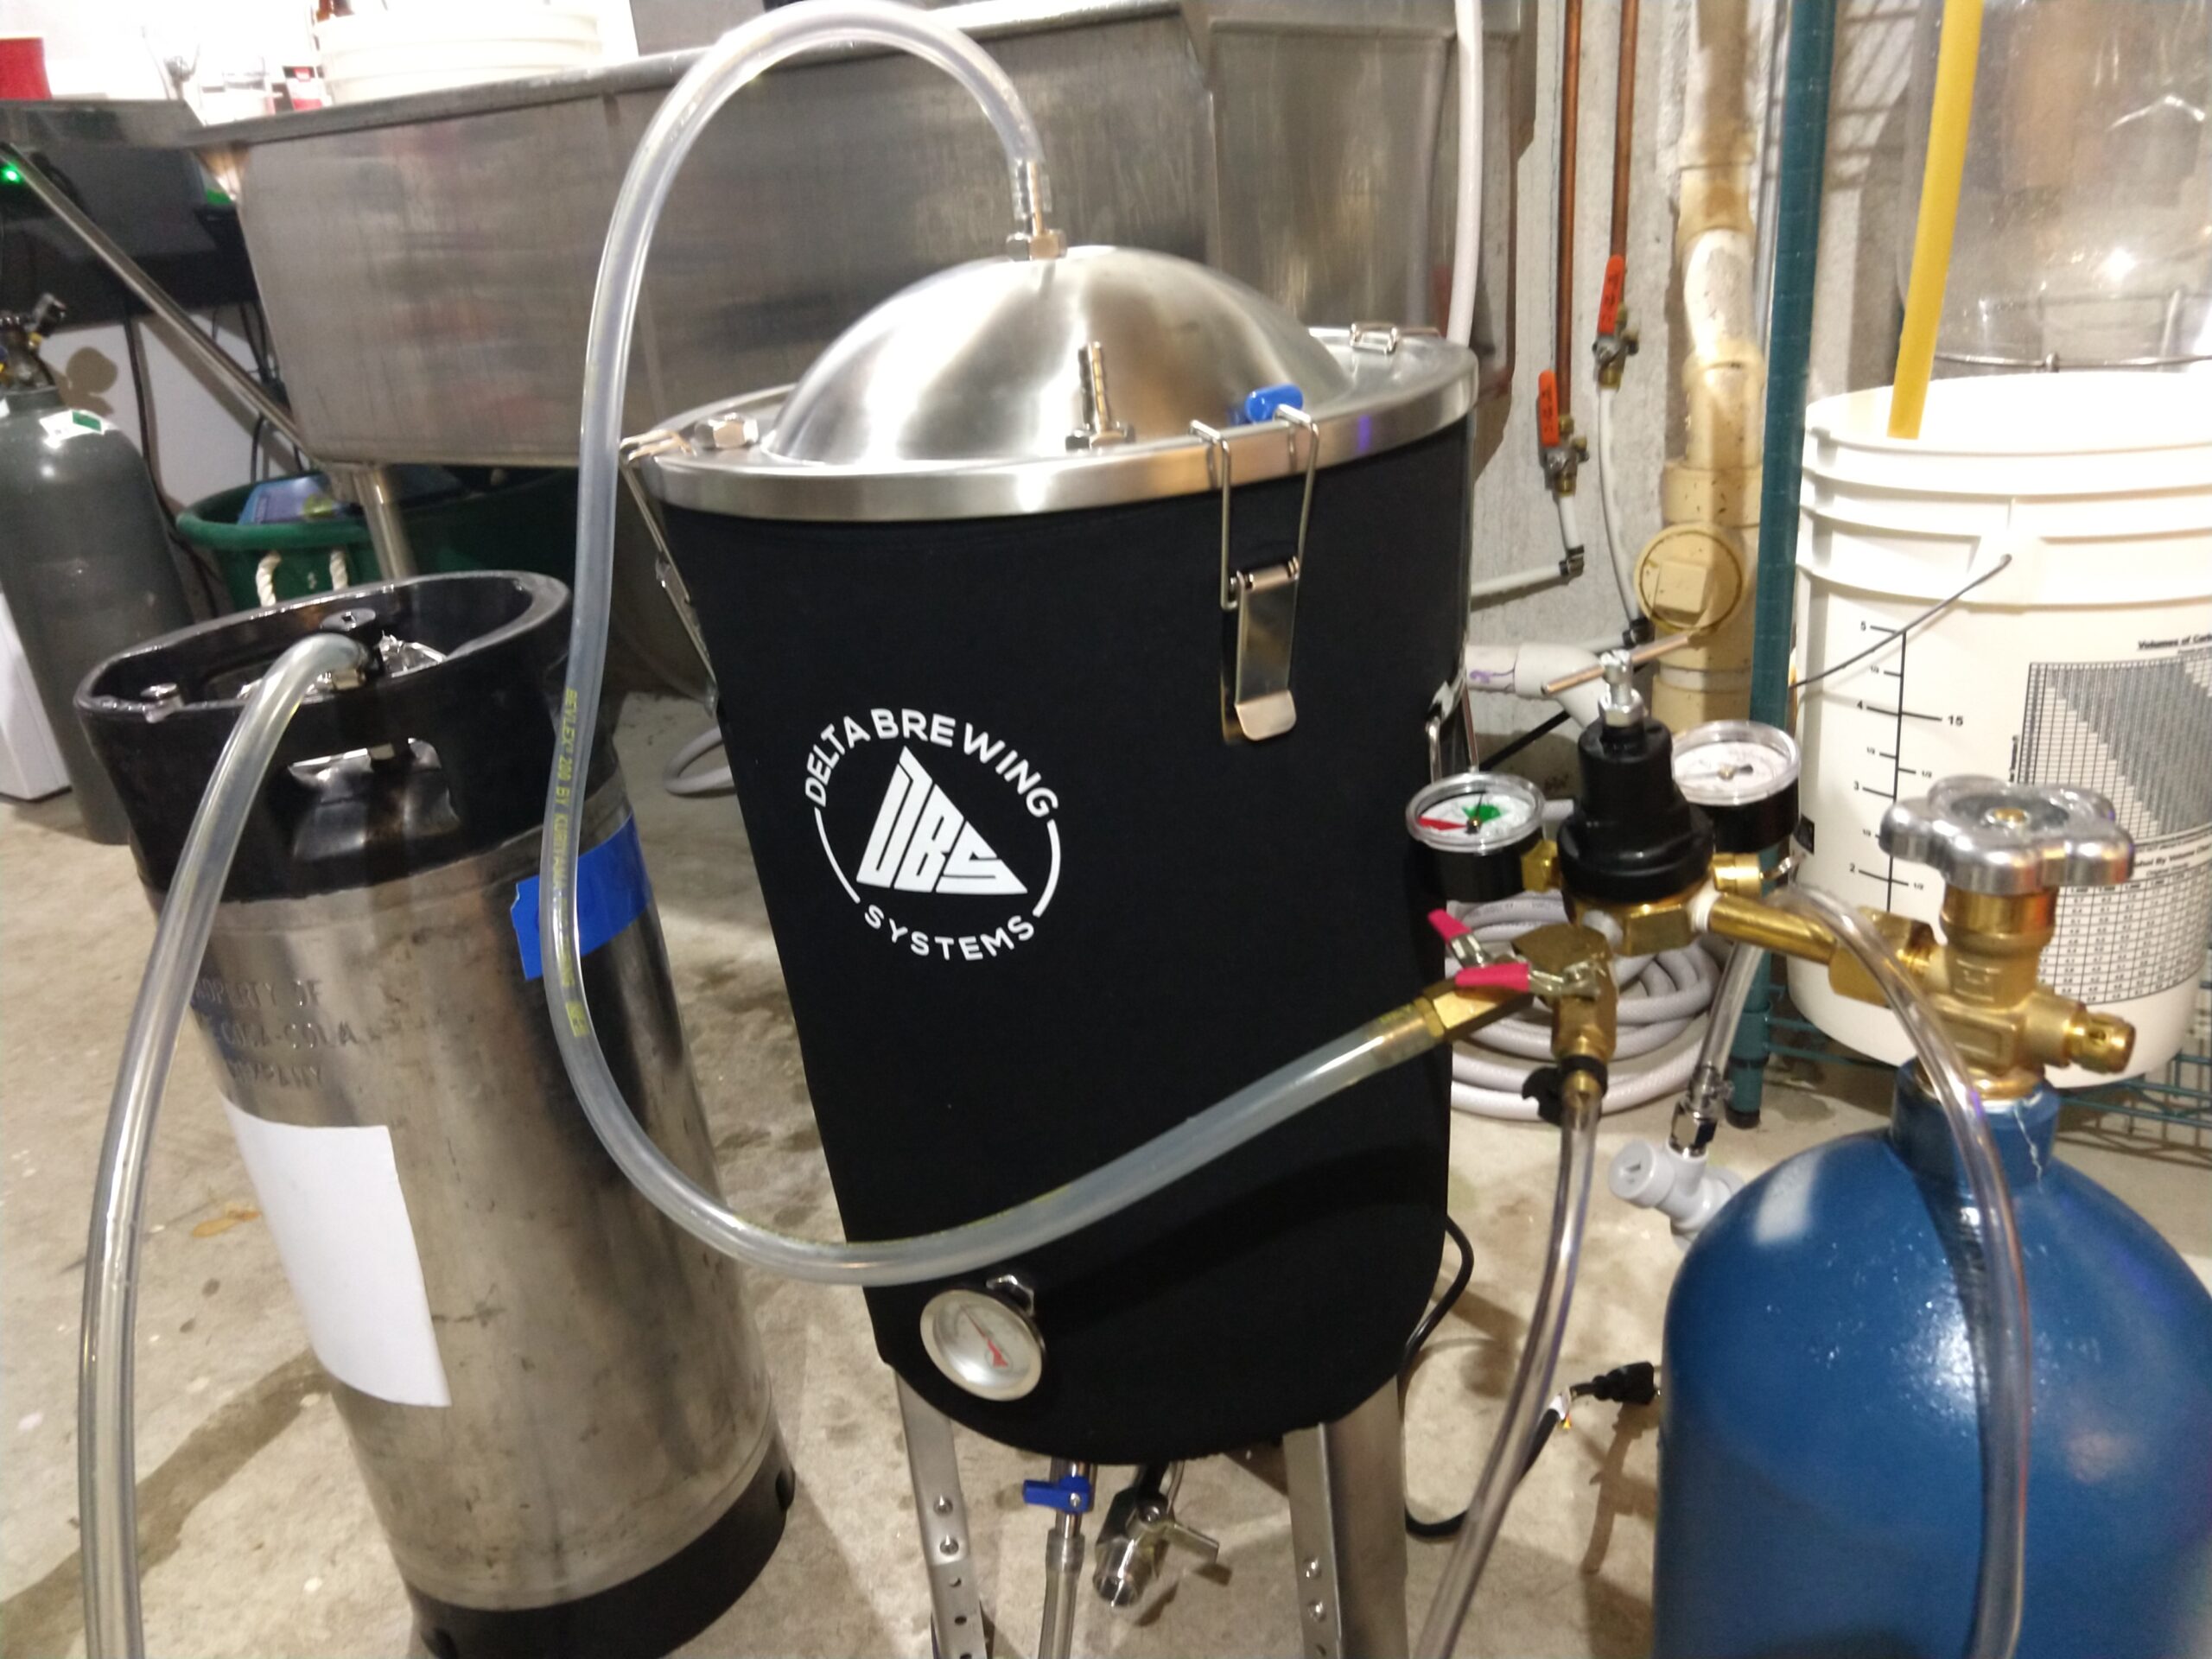
CO2 Pressure Transfer to Keg!

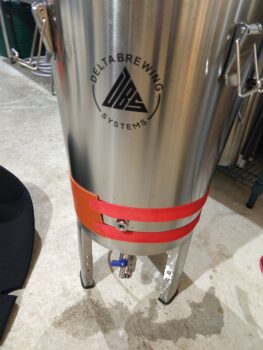
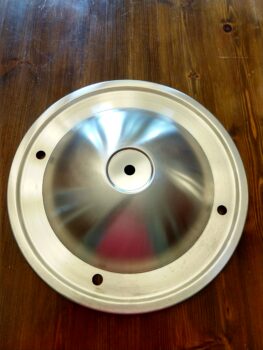
The Fermtank was one of their first homebrew offerings. It is made from 304 Stainless Steel, and is 8 gallons in size. That size allows you to ferment 5.5 – 6 gallon batches while giving plenty of head space for fermentation krausen and dry hop additions without overflowing. There are volume markings stamped in large size in both liters and gallons, starting from 5 gallons and up. It has a domed lid with an engineered seal which allows it to handle up to 4 psi, for fermenting under pressure or doing pressurized CO2 transfers. With the blow-off hose barb sitting at the top of this dome, the fermentor is 27” tall. But it has adjustable height legs with 4 positions, allowing up to an additional 3” of height.
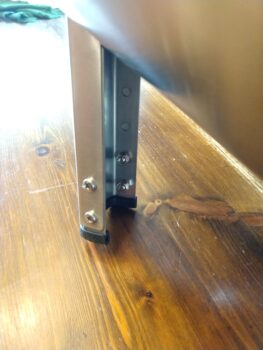


Adjustable Legs on Shortest Setting

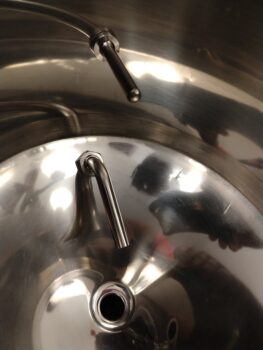
Full-sized conicals in breweries have steeper angles on their cone that allow the harvesting of yeast, or dumping of trub from your fermentation so you can secondary in the same vessel. The angle of the cone on bucket fermentors isn’t steep enough to allow this harvesting or dumping. However, you do get the advantage of the spigot on the fermentor being at the top of the cone. So when you transfer out of your fermentor, you can do this at a level that’s above the fermentation sediment, without leaving behind a lot of beer. The Fermtank’s spigot has an angled pickup tube so it pulls beer from the center of the fermentor, away from any sediment that’s collected on the walls. Although it has a large 3/4″ valve at the very bottom of the cone, its purpose is really for ease of clean-up, rather than the harvesting of yeast.
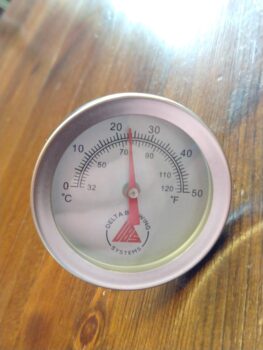
Dial thermometer

The body of the fermentor has a thermowell, and it comes with a dial thermometer that can be inserted to monitor temperature. The thermowell can also be used to install a digital temperature probe for temperature logging or fermentation control. And for robust fermentation temperature control, Delta offers a Fermtank Heating & Chilling Kit. The kit includes an insulated neoprene jacket form-fitted to the Fermtank, with openings for all of the external hardware bits. For heating, it contains an electric heating belt that wraps around the bottom edge above the cone and attaches with Velcro strips.

Neoprene JacketElectric Heating PadHeat Wrap Attached to Fermentor

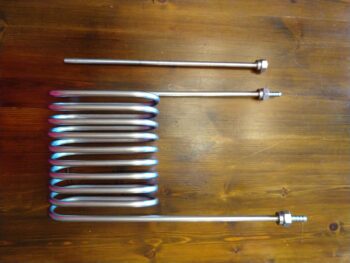
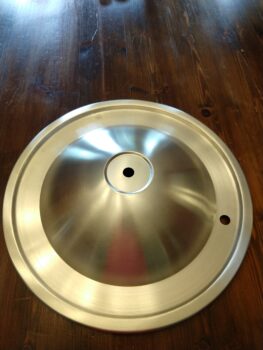
The Heating & Chilling Kit comes Neoprene Insulated Jacket with a lid that has additional holes for some extra hardware. There is a large stainless cooling loop that gets secured through the lid with a tightening nut and O-ring. It has barbed fittings to connect the cooling hoses on the outside while the coils extend down on the inside. There’s also a long thermowell that comes in through the lid and sits down in the beer, keeping some distance from the cooling coils to provide a more average/mixed temperature. The cooling lines attach to a coolant circulation pump, to circulate cooling water from your own source of cold water, or to a glycol chiller if you have one. The control of turning on and off the coolant pump or electric heating belt is done via an Inkbird ITC-308 controller, with its hardwired temperature probe.


adamztop5


Hands on Review

The Fermtank was similar to other stainless bucket fermentors I’d used, but had several unique features I was interested to try out. Overall, the build quality was very good- smooth welds, nice finishes, no sharp edges, and smooth functioning moving parts. The inside of the fermentor was shiny and well-polished. Beyond the bling factor, that actually made clean-up much easier, as fermentation crud came off with notably less effort.
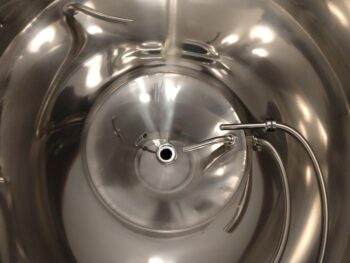
Highly Polished InteriorRacking Arm

The 8 gallon size was nice. Other fermentors go for a 6 or 7 gallon volume, and I get yeast krausen pushing its way out through a blow-off tube on very active fermentations. I fermented a few batches in the Fermtank with high activity yeasts, and only ever had CO2 gas coming out of the blow-off. That extra gallon of space was nice at keeping things clean in my brew basement.
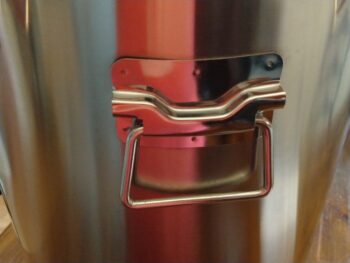
Robust Handles for Empty or Full Fermentor

At first, the little adjustable leg extensions seemed tedious as I used a screwdriver and set of pliers to remove two sets of screws and nuts on each leg, and then reinstall at the fully extended 3” of extra height. However, that small boost meant the transfer spigot was easier to access for wort samples or hooking up my transfer hose. And the lid at a higher height meant less bending over when filling the fermentor or adding dry hops. I wouldn’t say it was a “game changer” or anything revolutionary like that, it just made the overall process a bit nicer.


adstarsan
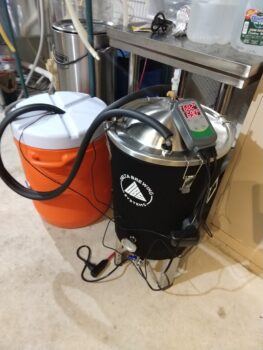

Fermentation with Chilled Water Connected

The Heating & Chilling Kit worked great for keeping temperature controlled during fermentation. The cooling coils arrived slightly compressed, with the loops of tubes close together. I had to stretch it by gently pulling on the coils at either end until it lined up with the holes on opposite sides of the lid. I used a 10-gallon Igloo cooler filled with 4 gallons of water and 5 frozen 2-Liter bottles of ice to put the cooling pump in. With all of the loops and length of the cooling coils, it was super effective at chilling the wort quickly. I actually found I could stop cooling the wort in my brew kettle a few minutes early to save water, and the cooling coils in the fermentor would bring it down to the final yeast pitch temperature easily.

A tip I would pass along is to install the spigot (O-ring on the outside, tightening nut on the inside) before you put the neoprene jacket on. I wasn’t sure if I could properly stretch it over the spigot to get the hole lined up properly, so I tried installing the spigot after the jacket was on. As a result, I didn’t get it tightened properly, and I had a slight amount of beer weep out on one batch. It only amounted to about 2 drops on the floor, but it did get the neoprene jacket dirty. Luckily, this cleaned very easily. I then learned I could install the spigot and its tightening nut first, and stretch the neoprene jacket over it afterwards without any issue.
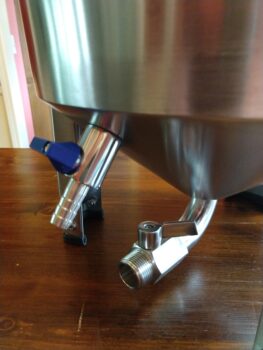
Spigot and Dump Valve

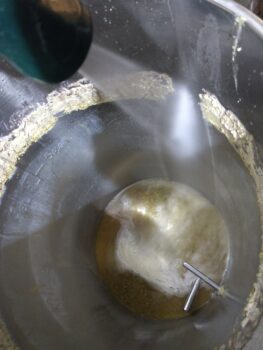
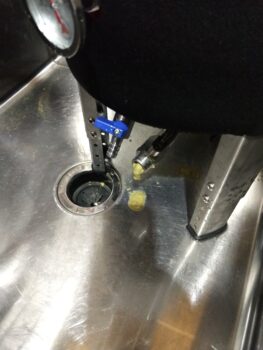
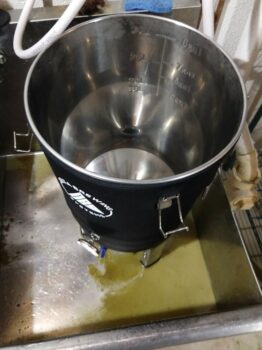
The last unique feature on the Fermtank was the dump valve on the bottom of the fermentor. This helped the Fermtank excel in its list of things that made cleanup easy. Ease of clean-up is not something you get excited about when looking at a product page on a website, but being the one task I’m certain all brewers enjoy least, the benefits to an easy clean-up are widely appreciated. The drain/dump valve at the bottom was great for clean-up. With my other fermentors, my usual process is to dump all the contents in the sink and go through repeated rinse & dump cycles until it gets mostly clean. Then a repeated version of this with cleaning solution. But with the Fermtank, I just set it in the sink and opened the drain valve. I went through all of those processes without having to do any tipping or dumping- it just ran out the open valve. It sounds like a simple benefit, but it was great. The highly-polished inside made all the yeast & hop scum clean off easily and require very little scrubbing to be spotless again. By leaving the drain valve open after cleaning, any remnants of water would simply run out rather than collect in a little pond in the bottom of the fermentor. If you currently ferment in carboys or anything with a smaller lid, you’ll definitely appreciate the wide opening for easy cleaning without requiring any funky angle bent into your scrubbing brush.
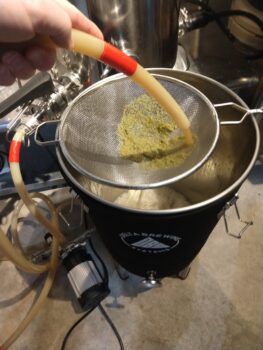
Transfer from Kettle to Fermentor

Conclusions

Overall, the Fermtank delivered the typical benefits of a stainless bucket fermentor, as expected. What was unexpected was how beneficial its unique features were. The ease of cleanup was definitely a factor that stood out over other fermentors. And the heating & chilling kit performed great, and is what I would say is an almost mandatory addition. When you’re ready to upgrade your fermenting system, the Fermtank is well worth the investment.

Check Current Price and Availability:

Related: Hands on Review: Delta Brewing Systems Fermtank TC


More Photos
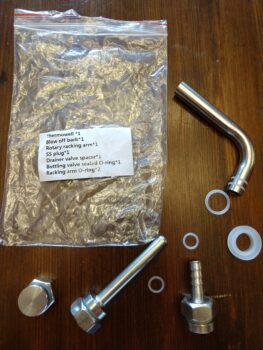
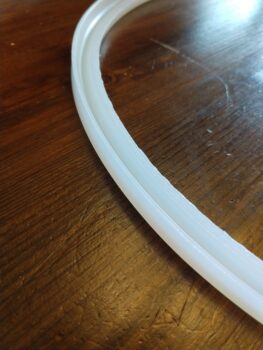
Accessories IncludedChilling Coil and ThermowellDomed Base LidDomed Lid with Extra Holes for CoolingSilicone Lid SealRinsing Off Hop ResidueHop Sludge Being Cleaned OutRinsed Out Fermentor

More Homebrew Finds!

More Fermenter Reviews!

Most Recent Deals

More Fermentation Related!


pinned

This post may contain affiliate links. We may make a commission when you use our links. This will never cost you extra. Thank you for supporting Homebrew Finds!

greatdeals

By Brad Probert.  Check out Brad’s website – beersnobby.com

Special Thanks to Delta Brewing Systems for providing the unit used for evaluation in this review.

Price, promotions and availability can change quickly. Check the product page for current price, description and availability.

Make sure the components you use are compatible and rated for your intended application.  Contact manufacturer with questions about suitability or a specific application.  Always read and follow manufacturer directions. tag:lnksfxd review:dbsfermtank tag:tpr

Rebuilding & Reconditioning Homebrew Kegs!

rebuild homebrew kegs

Updated: October 18, 2024

This post will walk you through rebuilding your homebrew keg, step by step.  From de-labeling to cleaning to replacing warn out parts.


Limited Time Deal on Keg Repair Parts!

valuebrew.com sale

For a short time, Valuebrew is discounting most of their gear including bulk food grade o-rings (i

Valuebrew offers a lineup of food grade keg replacement o-rings in bulk quantities.  Most offerings are silicone or EPDM with one Buna-N option.  Everything they carry is food grade, more info below.  They have some unique offerings like bulk pin lock size post o-rings, replacement universal poppet o-rings, bulk internal QD o-rings and color coded Blue and Green post o-rings

Some of these offerings are detailed in our Keg Rebuild How-To

Save  an EXTRA 15% when you spend $30 or more on select items at Valuebrew.  This stacks on top of existing discounts. Includes…

Use coupon code DST with an order of $30 or more to get the deal


Great Deal on Kegs, Ready to Rebuild!

SCRATCH & DENT PEPSI STYLE BALL LOCK KEG

Scratch and Dent Ball Locks from cornykeg.com

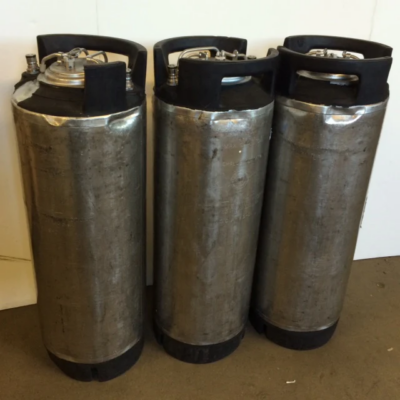
These kegs hold pressure and work fine, but have some more significant dents. They may have a broken handle or loose rubber top or bottom or an excessive amount of labels. These are refurbished ball lock Pepsi Style kegs with all new orings and a manual pull-ring relief valve. Photo shows example kegs, but are priced each.

As of this posting these are on sale for $42.95. Check site for current price & availability.

SCRATCH & DENT PEPSI STYLE BALL LOCK KEG


Limited Time Availability Info… VB’s Universal Poppets are Back in Stock!

universal poppets

Universal Poppets via Valuebrew

More Info

From the product description, check product page for current description, price and availability:

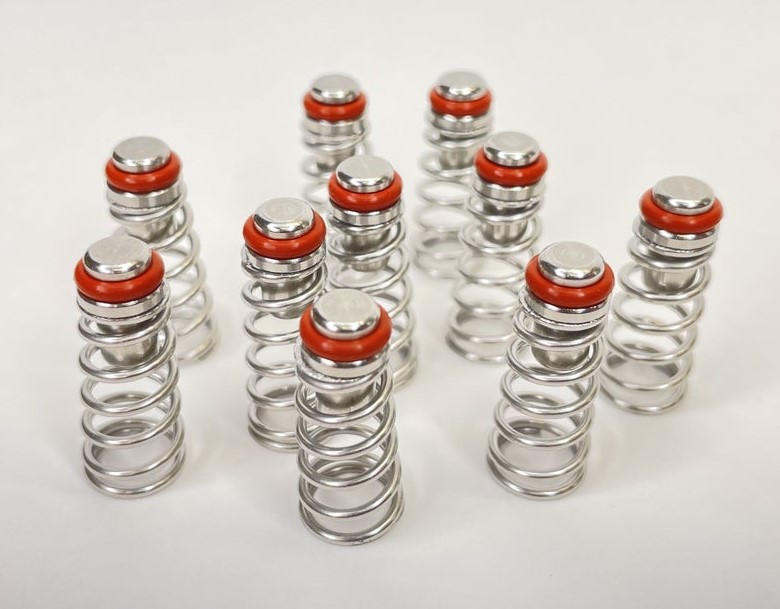
A Valuebrew Exclusive! Stainless Steel Universal Replacement Poppets with our Food Safe Silicone O-Rings.

These work with all standard Ball Lock and Pin Lock homebrew kegs.

Ever wonder what other universal poppet o-rings are made of? Us too, after all this is one of the most high contact o-rings in you draft beer setup. We took matters into our own hands and worked with our suppliers to source a 304 Stainless Steel + Food Grade Silicone option. Stainless steel construction on all the metal parts and premium quality food grade silicone for the o-ring.

Our pledge to you… Let’s face it, the stainless pieces in most universal replacement poppets should last a long, long time. How about the o-rings? Not so much… lost, broken, cracked, off smell. This is where our pledge comes in… we’ll always carry replacement o-rings for these universal poppets. No need to guess what size replacements to buy or completely replace your universal poppets because you don’t have a reliable source for replacements.


I use universal style poppets exclusively when rebuilding kegs. Finding the right OEM specific replacement poppets can be a chore. Beyond finding the right part number, these can be prohibitively expensive. Paying $10 to $14, or more, for an OEM poppet isn’t fun. In fact, if you really had to pay that, it may not even make sense to keep the keg.

I’ve long advocated to tossing OEM o-rings immediately. You don’t know what they’re made of, and you can’t get replacements. Replacing them immediately with a known quality o-ring and known part number before trimming to fit means you’ll be using the right materials and have a source for replacements.

Well… finally there’s an option that comes with quality o-rings made from the right materials out of the box!  Beyond that, Valuebrew has pledged to always carry replacement o-rings, so you’ll always have a source when the time comes for replacements.  Available in 5 and 10 packs with the option to add on a pack of replacement o-rings.

Back in stock!  These have been out of stock for months. We’ll the full story is they came back in stock a few weeks ago, but sold out so quickly that I wasn’t able to get a post up. So, as of this update… they’re back in stock after months of being sold out!  Get them while you can.

Universal Poppets


What Does Reconditioned/Rebuilt Mean?

The short answer is probably… nothing.  I think reconditioned/rebuilt/refurbished are basically synonyms and there is no standard definition for any of these terms.

Here are the different definitions I’ve seen from different retailers via their offerings:

The short answer is probably… nothing.  I think reconditioned/rebuilt/refurbished are basically synonyms and there is no standard definition for any of these terms.

Here are the different definitions I’ve seen from different retailers via their offerings:

  • The keg is untouched, but is in okay shape and holds pressure.  In this case, reconditioned means… the keg works.
  • The keg has had been tested and had faulty parts replaced.  In this case, reconditioned means, we did the minimum to get the keg working.
  • All o-rings have been replaced and any faulty parts have been replaced.  In this case, reconditioned means… reconditioned.
  • All o-rings have been replaced and any faulty parts have been replaced and the keg has been cleaned.  In this case reconditioned means reconditioned and cleaned.

Examples of Keg Conditions from MoreBeer

The takeaway is that it’s important to read descriptions when it comes to reconditioned/rebuilt/refurbished kegs.  The post walks through a complete rebuild process.


Limited Time Keg Deals!

keg deals

kegdeals

Continue reading

Hands on Review: NukaTap Forward Sealing Beer Faucets!

This review is by Homebrew Finds Contributor Brad Probert.  Brad is an engineer, expert homebrewer and experienced reviewer.  Grab a link to Brad’s website at the end of this review.

Updated: October 24, 2024

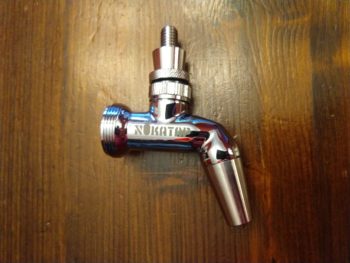
NukaTap Beer Faucet

There are several different beer faucets to choose from when equipping your keezer. The most basic type differentiation is forward sealing versus rear sealing. The rear sealing are the most common type you will find in bars, with a sliding piston visible that comes out through the front of the faucet. Those faucets don’t do well unless you have a continuous flow of beer like is found in a bar. Don’t fool yourself into thinking you pour a lot of beer so the rearward sealing faucets will be fine. They’ll gum up and stick and you’ll be cursing that decision! So the popular homebrew faucets are forward sealing.

The long-time favorite forward sealing faucet for homebrewers was the Perlick brand, but they were expensive. Kegland introduced Intertap – Hands on Review – with a design variation of the forward sealing faucet and a more affordable price. Now Kegland has improved on their Intertap design with the new Nukatap faucet. As everything I’ve tried/researched from Kegland, they take a product and then engineer specific improvements to it- either to make it available at a lower cost or for specific improved homebrew functions.

With the Nukatap, Kegland focused on improving/reducing the propensity of beer to foam while being poured. Beer foaming is simply the act of dissolved CO2 coming out of the beer and then converting to gas at the surface of your beer. Cold beer can hold more CO2 than warm beer, so as carbonated beer warms, it causes CO2 to come out of solution and thus create foam. Similarly, beer under pressure can hold more CO2 than beer that is not under pressure. So as beer goes from the pressurized keg and into your unpressurized glass, this also causes CO2 to come out of solution and create foam.

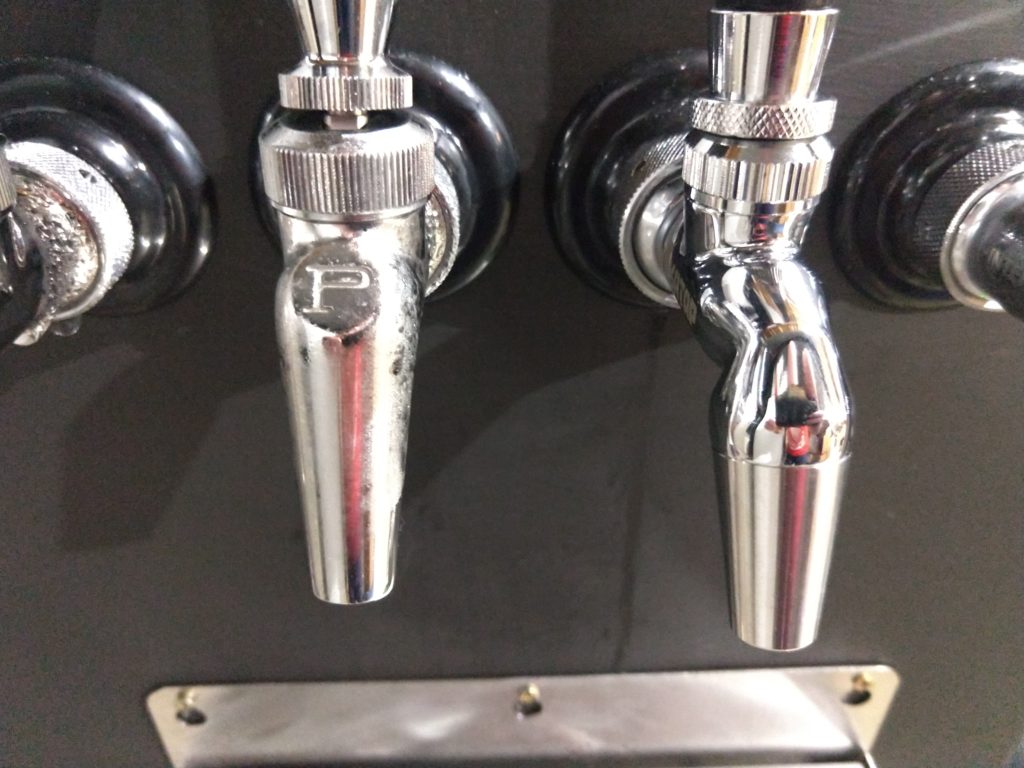
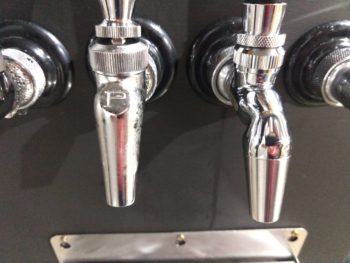
Nukatap on Left, Intertap on RightNukatap on Right, Perlick on Left

The first design action Kegland did for Nukatap was on the sealing mechanism. One big challenge at fighting beer foam is how to get the beer around the sealing mechanism inside the faucet. Perlick faucets use a ball to seal and shut off the flow. As beer passes by the ball, the flow creates a low pressure zone on the backside of the ball, and thus beer goes from high pressure to low inside the faucet, creating an opportunity to foam. Intertap faucets use a football-shaped shuttle inside the faucet. This shape is less prone to the low pressure zone like a sphere has. Nukatap has a variation on the Intertap football shape, and Kegland kept tweaking it to keep the flow calm as it passed around the sealing shuttle inside. The shape ended up looking like an old-school atom bomb, and hence the “Nuke tap” name was born.


Check Current Pricing and Availability, Review Continues Below:

NukaTap Faucets come in three variations. Stainless, Stealth (Matte Black) and Flow Control. All feature stainless steel construction, forward seal design and all the other NukaTap innovations.

I’m also linking to Intertap faucets and accessories where applicable because all Intertap spouts work with NukaTap

Continue reading

Hands on Review: Barley Crusher MaltMill!

This review is by Homebrew Finds Contributor Michael Gom.  Read more about Michael below.

Note that this review covers both the 7 and 15 lb Barley Crusher Grain Mill

Hands on Review: The Barley Crusher

Having brewed all-grain for many years, I’ve spent lots of time refining my processes to try and produce predictable results. Things like brewing software make this much easier and do a great job of helping you calculate all your numbers. We can control how much grain we use and how much water, mash thickness, sparge volume, volumes going into fermenters, pitching rates, the list goes on. One thing I hadn’t been controlling, was my grain crush. When I had a local homebrew shop, the owner had no problem with me asking to double mill the grains to help get as fine a grain crush as possible while still not owning a mill. When he closed his shop, I was forced to start ordering my supplies online. Ordering from multiple different locations, having them mill my grain, it was obvious the variable that was changing was the crush size and I felt I was getting inconsistent results. Recently I purchased an all-in-one electric all grain system (Anvil), my brew days got much easier but my efficiency started to really suffer.


Check Current Prices & Availability, Review Continues Below:

7 lb Barley Crusher Mill

15 lb Barley Crusher Mill

Also: Search Amazon for Barley Crusher Grain Mill – offerings vary

Barley Crusher Motor Kit

Continue reading

Hands on Review: Used Ball Lock Kegs from MoreBeer

Hands on Review: Used Ball Lock Kegs from MoreBeer

MoreBeer’s Ball Lock Kegs Explained

MoreBeer has a bunch of ball lock keg options both new an used.  Most of those are self explanatory, but the used offerings can be a bit confusing.

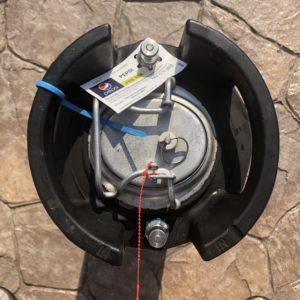
A look at the keg.  It looks quite good.  Dirty, stickers still on it, but overall it’s in really good condition.Top down view


Rebuild It!

The keg offering featured in this review is the same keg featured in our step by step keg rebuilding and reconditioning how-to.


Should I buy a New Keg or a Used Keg?

Used kegs are generally sourced from soda bottlers.  They are built with commercial use in mind and designed to last for many years of rough duty service.

Brand new ball locks may not be made to the same standards.  However… We also don’t generally put our kegs through the same abuse that a soda distributor would.

Not withstanding price.  I think both options are valid.  If you’re up for a little elbow grease and replacing a few parts, used may be the way to go, if you’re more interested in convenience brand new is a good choice.  Practically, at least as of this posting, I think price will cause many to go the used route.

Continue reading

Hands on Review: Brew Hardware Cold Crash Guardian

Thank you to HBF Contributor Aaron Nord for this hands on review!  Aaron is an advanced award winning brewer, a long time reader and a serial tipster!

What is Cold Crashing?

The concept of cold crashing first came across my radar when I was researching the benefits of conical fermenters. The idea of rapidly bringing a fermentation vessel down to near freezing temperatures after fermentation is complete is known in the brewing world as cold crashing. The closer to freezing without freezing the beer the better.


Benefits of Cold Crashing

The reasons that attracted me to the practice are mainly two-fold: to enable nearly full harvest of the yeast and to promote a clearer finished beer. The act of bringing the temperature down promotes the dropping of particulates in the beer, be it yeast, trub, or hop debris, which, in a conical fermenter, settles down into the bottom cone. This can then be dropped out into a sanitized vessel to enable rinsing and reusing of the yeast. Then when the beer is packaged it is done so without a lot of the yeast and other particulate material that may not be desirable in the finished product. This allows for a much brighter beer in the end.

Continue reading

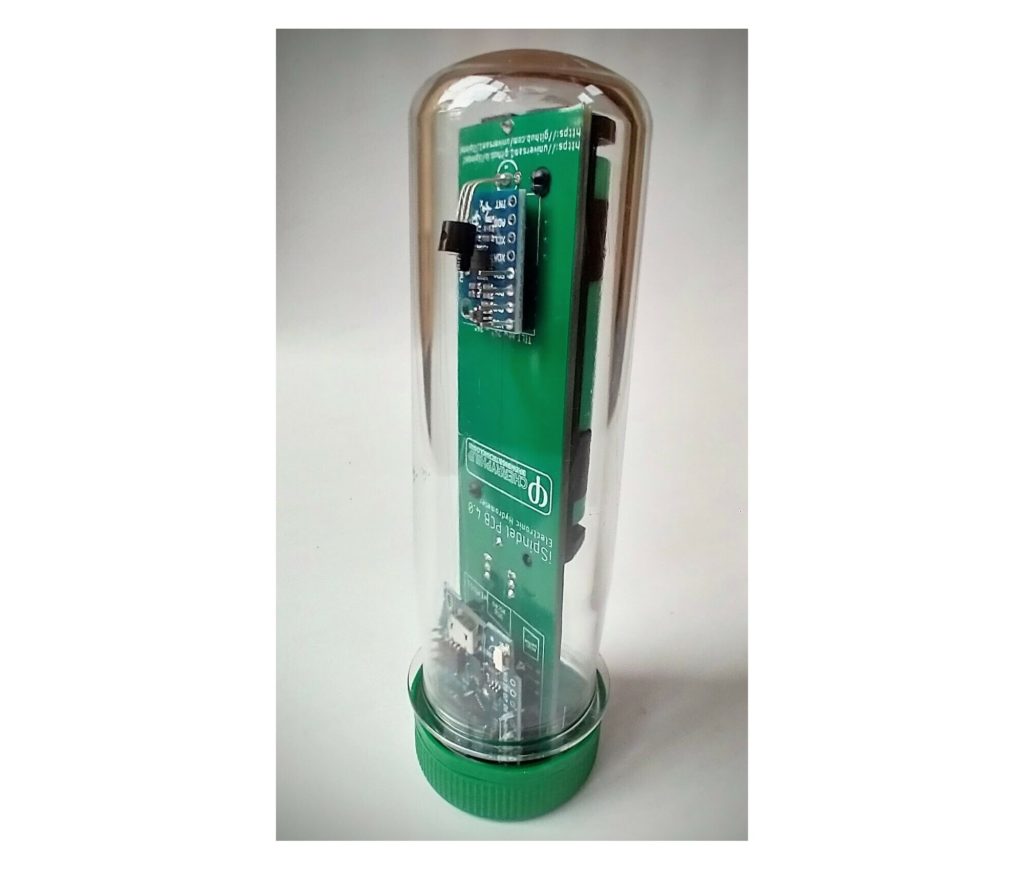
How-To: iSpindel Brew Temperature Control – Using Smart Life, IFTTT and Ubidots!

iSpindel WiFi Hydrometer - Samsung Battery *FREE WORLDWIDE delivery*

Updated: November 6, 2024

Thank to you Neil Catley for this write up!   Neil assembles iSpindel hydrometers and sells them via eBay

The iSpindel is a DIY Wi-Fi enabled hydrometer.  The project originated in Germany, but an English translation is available.  See: iSpindel Documentation

Learn More about iSpindel!

Hands on Review: iSpindel Digital WiFi Hydrometer!

Compare iSpindel to TILT

Our iSpindel Review has some thoughts comparing iSpindel and TILT

RARE Deal on TILT Bluetooth Hydrometer!

iSpindel/RAPT Pill/Tilt

Pre-Built iSpindel

As mentioned previously. the iSpindel is a DIY build.  However, it seems that some people are building these and selling them on eBay.  The pictured iSpindel is one such option.

Related: Search Amazon for “Smart Life Plug”


iSpindel Brew Temperature Control – Using Smart Life, IFTTT and Ubidots

by Neil Catley

Note that these are technical, step by step directions.  Specific steps may change over time.  Make sure the components you use are compatible and rated for your intended application.  Contact manufacturer with questions about suitability or a specific application.  Always read and follow manufacturer directions.

Overview

This guide will help you set-up online tools to enable fermentation temperature control using your iSpindel. I find this one of the main benefits of having the device, especially in the cold UK winters when I have a brew going in the garage

Continue reading

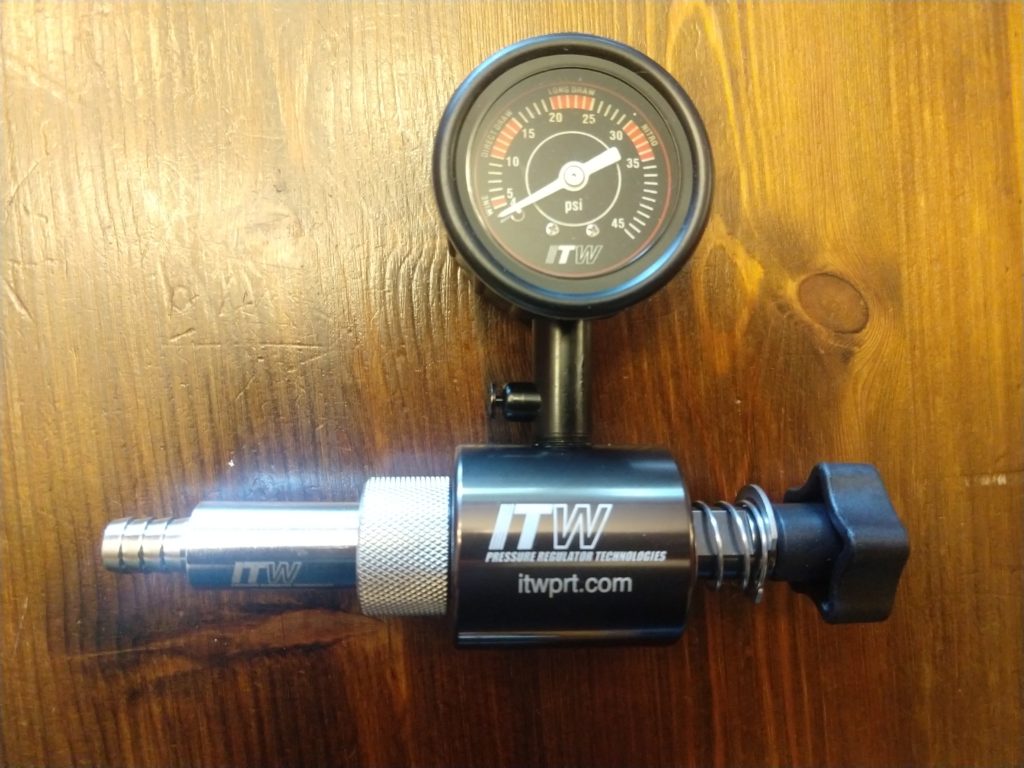
Hands on Review: ITW Gov Reg – Inline Secondary Regulator by ITW Pressure Regulator Technologies

This review is by Homebrew Finds Contributor Brad Probert.  Brad is an engineer, expert homebrewer and experienced reviewer.  Grab a link to Brad’s website at the end of this review.

Keezers are one of the cool inventions homebrewers brought to the world of household appliances. Homemade kegerators and freezers converted to storing and dispensing homebrew allow homebrewers to exercise their creative muscle. Breaking down the function of the homebrew keezer, there are three main categories: 1) Providing CO2 to the beer, 2) Keeping the beer cold, and 3) Serving the beer. For sure, the category of serving the beer is where all the bling comes in, with different style taps and fancy tap handles. But this review is about some gear for the less flashy side- providing CO2 to the beer.


Check Current Pricing, Selection and Availability, Review Continues Below:

Continue reading

Motorizing a Homebrew Grain Mill


Motorizing Your Mill, Purpose Built Solutions

Important: These are the steps that Aaron took to put his build together.  This post does not constitute an endorsement of this process.  It is provided for informational and entertainment purposes only.  Your situation and equipment may by different.  Make sure the components you use are compatible and rated for your intended application.  Contact manufacturer with questions about suitability or a specific application.  Always read and follow manufacturer directions.  Always exercise caution around electricity, moving motors and moving mills.  If you have questions about wiring, contact a licensed electrician.  We recommend a purpose built solution for motorizing your mill.


Related Resources:


Homebrew Grain Mill Reviews!


pinned

This post may contain affiliate links. We may make a commission when you use our links. This will never cost you extra. Thank you for supporting Homebrew Finds!

greatdeals

adamztop5

Homebrew Finds makes no representations as to accuracy, completeness, currentness, suitability, or validity of any information in this article and will not be liable for any errors, or omissions in this information or any losses, injuries, or damages arising from its display or use. All information is provided on an as-is basis. To use Homebrew Finds you must be 21 years or older. toppost:motorizemill tag:tpr

Oxygen Free Transfer and Cold Crash Using a Spunding Valve!

homebrew oxygen free transfer

What is Cold Crashing?

Cold Crashing is chilling your beer after fermentation is complete.  Typically you want to get as close to freezing as possible, without actually freezing your beer.  These cooler temperatures cause break, yeast and trub matter to drop out of your beer.  This increases clarity, helps to hasten the conditioning process and helps you get a cleaner transfer to your serving vessel.

What is a Spunding Valve?

A Spunding Valve allows you to ferment under pressure, naturally and precisely carbonate in the keg, fix over-carbonated beers and more.  See: Build a Spunding Valve for more info.


Related Gear and Resources, Article Continues Below:

Kegland BlowTie v2

Kegland BlowTie v1

Continue reading

iSpindel Digital WiFi Hydrometer! + Pre-Built or DIY iSpindel & Compare w/TILT

iSpindel WiFi Hydrometer - Samsung Battery *FREE WORLDWIDE delivery*

The iSpindel is a DIY Wi-Fi enabled hydrometer.  The project originated in Germany, but an English translation is available.

Build Your Own iSpindel

iSpindel DocumentationArchived Zip File

Pre-Built iSpindel

As mentioned previously. the iSpindel is a DIY build.  However, it seems that some people are building these and selling them on eBay.  The pictured iSpindel is one such option.


This article contains affiliate links. We may make a small percentage if you use our links to make a purchase. You won’t pay more and you’ll be supporting Homebrew Finds and more content like this. Thank you for your support!


Compare iSpindel to TILT

Our iSpindel Review has some thoughts comparing iSpindel and TILT

iSpindel/RAPT Pill/Tilt

TILT Hands on Review!

tilt review

TILT!

Our TILT Deal Page

RARE Deal on TILT Bluetooth Hydrometer!

iSpindel Review!

Hands on Review: iSpindel Digital WiFi Hydrometer!

More Homebrew Finds!

Recent Deals!

10 Most Recent Homebrew Resource Posts & How-To’s!

We are Homebrew Review HQ!  Our 10 Most Recent Reviews


pinned

This post may contain affiliate links. We may make a commission when you use our links. This will never cost you extra. Thank you for supporting Homebrew Finds!

greatdeals

Homebrew Reviews: Fermentation

Price, promotions and availability can change quickly. Check the product page for current price, description and availability. tag:lnksfxd top:spindel tag:tpr

Imperial Yeast Homebrew Strain Guide

Imperial Yeast Homebrew Strain Guide

About Imperial Yeast:

Imperial Yeast was founded in 2014 with a desire to provide brewers of all scales with world class yeast and the best possible customer and technical support.

Imperial Yeast was founded on the ideal that if you are going to do something, do it right. Through our many years experience in liquid yeast and craft brewing we understood that home and pro brewers alike needed access to better yeast, service, and support. We are continuously working to improve our processes, service, and products. Our staff has decades invested in liquid yeast and professional brewing, alongside countless afternoons and evenings spent homebrewing. We are here to provide you with the best yeast, best customer service, and best technical support available.

We are a motley crew of Sci-Fi geeks, cyclists, D&D nerds, gardeners and rock obsessed weirdos united by our passion for the craft beer industry. If you’d like to come see what we’re doing and meet real life yeast farmers, please drop by; we’re proud of what we do and love to show it off.

Continue reading

Food Safe Replacement Keg O-Rings in Bulk

Food Safe Replacement Keg O-Rings

Our resource post on o-ring part #s has been a go-to for years.  Grab the a link to that resource below.

The problem: At one point I had an o-ring manufacturer reach out to me that had found this resource while trying to do some market research.  This manufacturer suggested that many of the products that homebrewer’s use are made out of industrial grade materials that should not be in contact with food & beverage products.  These materials could potentially contain materials that are not meant to be ingested.

Okay, that’s a little concerning.  It was at this point that I added a section to that resource that talked about the issue.  I also started adding disclaimers to posts when I was unsure whether or not materials were food grade.

The next problem: For whatever reason, in my experience, it’s extremely difficult to find offerings that claim to be safe for food contact.  Maybe some of the o-rings that are available are food safe, but very few are actually labeled as such.

But why?  One possible reason… they aren’t food safe.  Beyond that, one industry insider I spoke with said suppliers have a potential problem with fulfillment.  Since many options and materials are available, It’s difficult for some distributors or sellers to guarantee you’re getting a food safe option.

  • Just because an o-ring is marketed for use in a keg doesn’t automatically mean that the materials and production processes used are food safe.
  •  If you think about it from a random supplier or manufacturer’s perspective… they don’t know what you’re putting in your keg, maybe it’s not even food.  The problem that we, as homebrewers, have is is… beer is food and meant for human consumption.
  • You cannot say all o-rings made from [fill in material here] are food safe.  Certain quality standards and processes are required.

The fact is we’re putting beer (food) in our kegs.

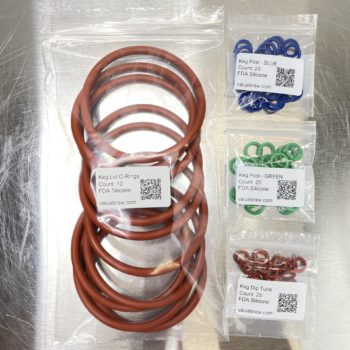
Finally a food safe option!  Valuebrew has a selection of food grade o-rings.  They also have replacement universal poppet o-rings and internal QD o-rings, also food grade.

Bulk pricing!  As of this posting, all options are available in bulk quantities at a steep discount when compared to buying single o-rings.

Food Safe Silicone Keg O-Rings at Valuebrew

For a closer look take a look at our comprehensive step by step keg rebuilt post…

Rebuilding & Reconditioning Homebrew Kegs – Jump To: O-Ring Section

Also: Kegerator Tips & Gear | Keg Repair Part #s | Recent Keg Finds

Our Top Draft Resources!

Check our our Top Draft Related Resources

standarddraft

pinned

This post may contain affiliate links. We may make a commission when you use our links. This will never cost you extra. Thank you for supporting Homebrew Finds!

greatdeals

Make sure the components you use are compatible and rated for your intended application.  Contact manufacturer with questions about suitability or a specific application.  Always read and follow manufacturer directions. tag:lnksfxd  pst:vbfsor toppost:fsko tag:tpr

Hands on Review: Inkbird IHT-1P Digital, Instant Read, Waterproof, Rechargeable Thermometer

Updated: July 25, 2024

This review is by Homebrew Finds Contributor Michael Gom.  Read more about Michael below.


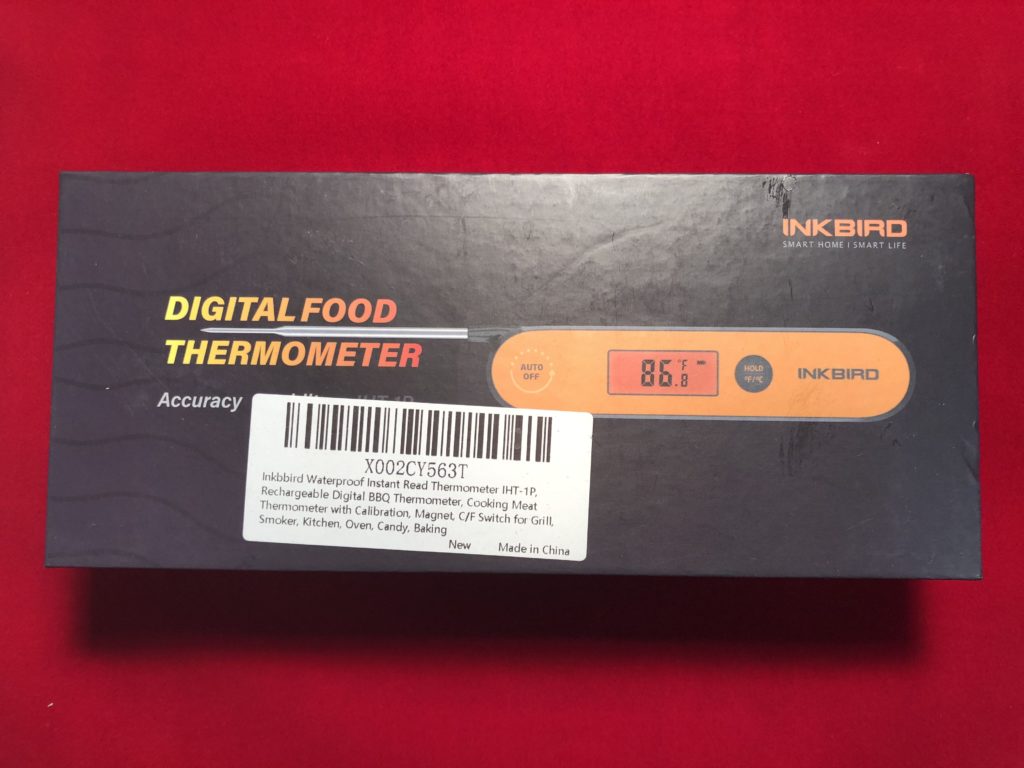
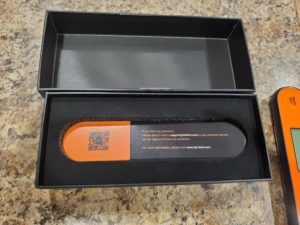
Hands on Review: Inkbird IHT-1P Digital Thermometer

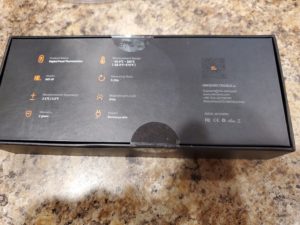
Back of the box
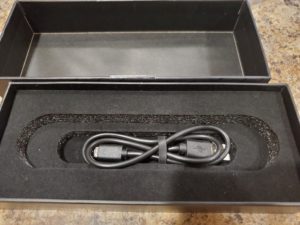
A look at the packagingWhat’s under the thermometerAnd the back side of the card they include calibration instructionsThe included USB charging cable


Check Current Price and Availability:

Inkbird Instant Read Meat Thermometer IHT-1P, Digital Waterproof Rechargeable Instant Read Food Thermometer – affiliate link, note that multiple variations of this product may be available, as such a different version may appear at this link


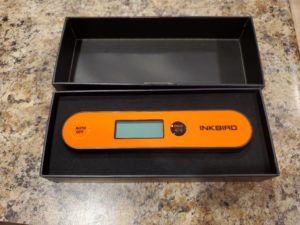
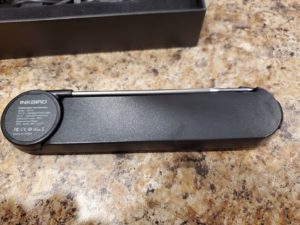
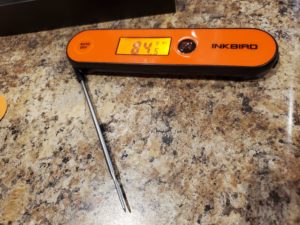
The thermometer itself

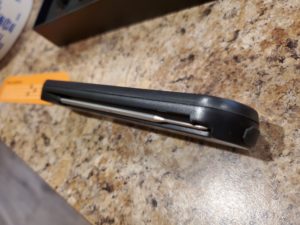
Back sideSide view


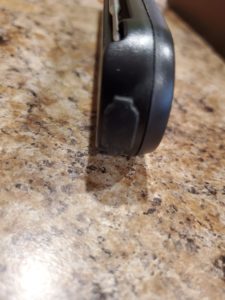
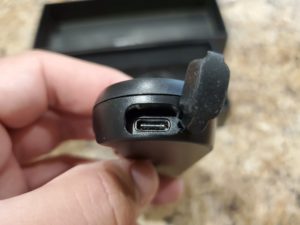
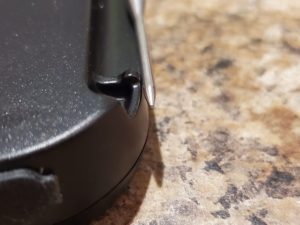
A look at the charging port coverAnd with the cover opened, it is tethered to the thermometer so you don’t lose itAs soon as you open the probe, the screen comes on. Nice back-lit screenThe body of the thermometer has a small “catch” piece to keep the probe in so it doesn’t accidentally open on you if it’s in your pocket.


adyeast


Accuracy Tests and Calibration

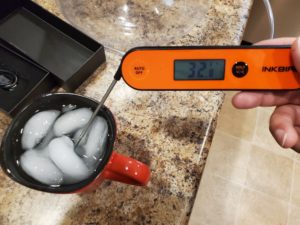
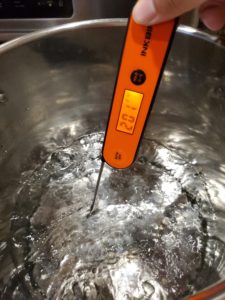
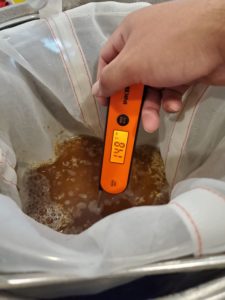
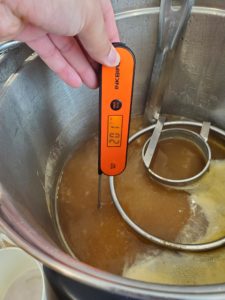
Initial calibration seems accurate from the factoryAt my elevation, water boils at approximately 200.6 degrees F. Boil test looks accurateBrew day! Reading 148F for the mashCompared to 149F setting on my anvil, pretty much on-point! – Related: Hands on Review: Anvil Foundry Brewing SystemAnd again, boiling at around 201F which is accurate for my elevation

Notes on Calibration

A note on calibration, the procedure is different than other thermometers I’ve used. This allows you to change it + or – within 5 degrees F of freezing or boiling, + or – 3 degrees Celciues.

So if you check it in freezing water and it reads 1 degree high (33F) you would close the probe, hold the calibration button while opening it to enter calibration mode, then press the button until +1F displays on the screen. This will tell it that it’s reading 1 degree high and adjust it accordingly. Note that I did not do this as mine was pretty accurate out of the box.

Also the thermometer will display the temperature to the tenths of the degree up until 100, then it will just show the whole number. So you get a more “accurate” or “higher resolution” degree at lower than 100 degrees. As seen in the ice water picture, the temp was 32.8 degrees, but the boil temperature shows 201.


Backlight Operation

The backlight stays on for about 30 seconds, pressing the button again will turn the backlight back on if you need it.

Battery Level Indicator

A nice feature is it shows the battery level. I didn’t capture a picture but while charging it shows a lightning bolt over the battery indicator, the it goes back to the standard battery indicator once fully charged. I haven’t run the battery dead yet so I don’t have a charge time but I think it would only take about an hour to fully charge.

Auto Shut-Off

The thermometer itself will auto-shut off after a few minutes even if the probe is open, pressing the button or closing it/opening it again will wake it back up. Also, if it’s off but it detects a large temperature change, it will wake back up as well. A few times i placed the probe in the wort while the device was off and it woke up and read the temperature.

Response Time

Reading time is fast, it gets an accurate reading within 5 seconds.

Conclusions

Time will tell on the longevity of this unit but so far it has worked for my 2 or 3 brew days I’ve used it without issue. The calibration steps seem a bit weird to me but otherwise it works as intended and i’m glad to not have to deal with those CR2032 batteries that my old thermometer used.

Check Current Price and Availability:

Inkbird Instant Read Meat Thermometer IHT-1P, Digital Waterproof Rechargeable Instant Read Food Thermometer – affiliate link, note that multiple variations of this product may be available, as such a different version may appear at this link

What are Other’s Saying?   Search this product’s Amazon reviews for “brew” – affiliate link, note that multiple variations of this product may be available, as such a different version may appear at this link

Thank you to Michael for this review!

More About the Author:  I’ve been brewing for about 8 years, started out with a 5 gallon extract kit and was hooked. Jumped into all grain after about 5 or 6 batches of extract. Since then I’ve run the gauntlet of partial mashing to building a cooler mash tun to BIAB. I recently switch to an electric all-in-one system and love it, this is my preferred method now due to ease of use and time saving. I have no professional brewing experience. I prefer pale ales and IPA’s mostly. Trying my best to be a good home brewer while also being a good family man for my wife and two kids!

adamztop5

More Homebrew Finds!

Recent Deals!

10 Most Recent Homebrew Resource Posts & How-To’s!

We are Homebrew Review HQ!  Our 10 Most Recent Reviews


pinned

This post may contain affiliate links. We may make a commission when you use our links. This will never cost you extra. Thank you for supporting Homebrew Finds!

greatdeals

Make sure the components you use are compatible and rated for your intended application.  Contact manufacturer with questions about suitability or a specific application.  Always read and follow manufacturer directions. tag:lnksfxd  review:iht1p tag:tpr

Hands on Review: IRIS 5 Quart Storage Boxes for Brewery Storage & Organization

Updated: July 22, 2024

Organizing Your Home Brewery

When I first started home brewing, I sourced several large totes to store and organize my gear and supplies.  I quickly learned that these consumed too much shelf space and were inefficient for the kind of things I wanted to organize.  Beyond that, it was hard to find things.  The sides were not clear and they were big enough that I had to do a lot of searching and digging around.


Check Current Pricing and Availability, Review Continues Below:


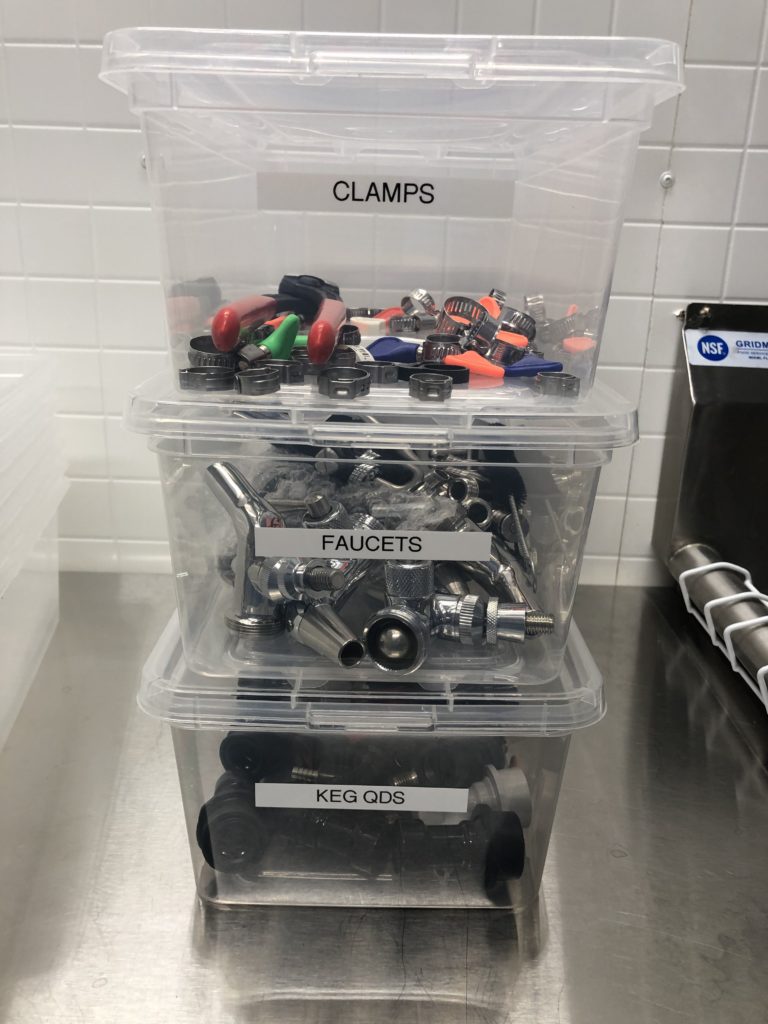
Next I moved to shoe box sized containers with clear walls.  I found these to be much better for organizing my home brewery.  They were small enough that I could use dozens of them, labeling each for easy identification.  They stacked and the lids were easy to get on and off.  I still keep a few larger totes for larger items, but much of my homebrew gear is in shoe box sized containers.

Here’s what I look for in these sorts of containers…

  • Clear – I want to be able to see in the container without opening it up.
  • 5 to 6.5 quarts or so
  • Easy snap on lids – I want lids to go on and come off easily.  For this application, I’m not looking for airtight
  • Stacking.  I want these to stack to save space.
  • Nesting.  When not in use I want to be able to nest these to save space.

Hands on Review IRIS USA, Inc. CNL-5 Storage Boxes for Homebrew Organization

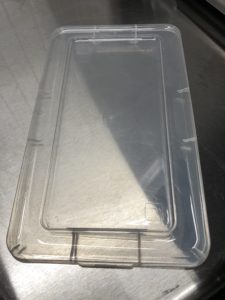
The 20 boxes and lids that I received.  These stack for efficient storage when not in use.A look at the lid, these easily snap on and off.  They are clear, which is an improvement compared the other style that I use.
Continue reading

Hands on Review: Aquatic Life Reverse Osmosis Water Filter System

Why Use a Reverse Osmosis Filter for Homebrewing?

Using RO (Reverse Osmosis) or DI (Deionized) water allows you to start with a clean slate of sorts and build your water profile from the ground up using water salts.  That allows you to take control of an important aspect of your brewing, especially if you’re an all grain brewer and create exactly the water profile you’re looking for.

Water by John Palmer and Colin Kaminski, part of the Brewing Elements Series, is a great read to learn lots more about brewing water and water adjustments


Check Current Price, Review Continues Below

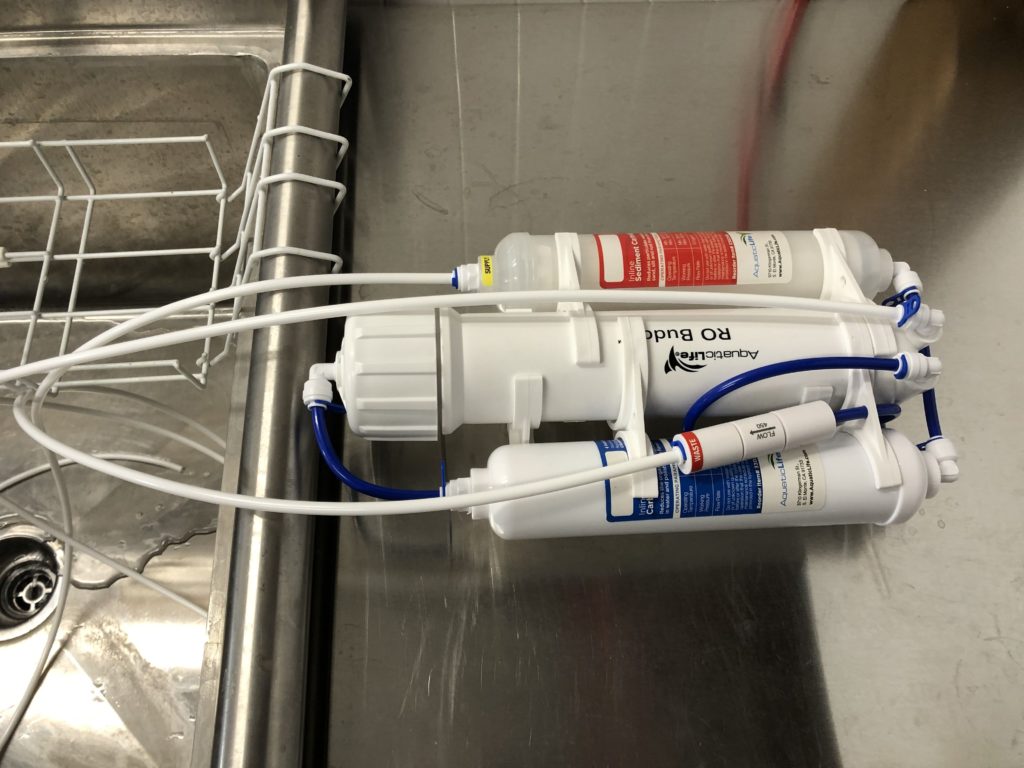
Aquatic Life RO Buddie Reverse Osmosis Systems – affiliate link, note that multiple variations of this product may be available, as such a different version may appear at this link

Continue reading

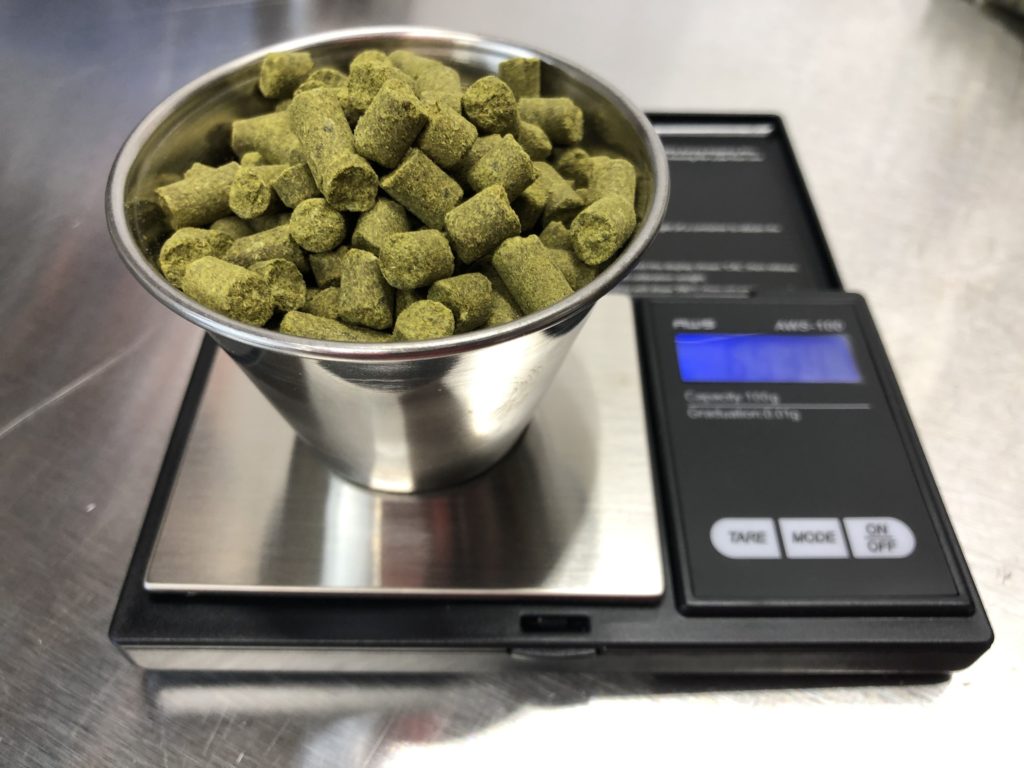
Hands On Review: Winco 4 Ounce Stainless Steel Portion Cups – for Brew Day Measuring & Samples

I’ve long been an advocate of using these sorts of portion cups for homebrew-related tasks.  I’ve kept small (2 to 2.5 ounce) portion cups in my Brew Day Box for years.  See: Hands On Review: Stainless Steel Portion Cups – for Brew Day Measuring & Samples for a review of those.

When I ran across these larger 4 ounce cups at a great price, I picked them up to use around my homebrewery.

These are generally intended for serving condiments and small amounts of food.  Considering their size, materials and efficient design, they are also well suited for use on brew day and around the brewery.


Check Current Price & Availability:

Winco SCP-40, 4-Ounce Stainless Steel Round Ramekin Condiment Sauce Cups, 1 Dozen Pack – affiliate link, note that multiple variations of this product may be available, as such a different version may appear at this link


Keep Reading!

Using a Tire Inflator To Check for Keg Leaks

I see two primary ways to check for keg CO2 leaks

  1.  Soak everything with Star San and look for bubbles
  2. and… the Pressure Gauge Method

I’ve been a big proponent of the Pressure Gauge Method and, to my knowledge, coined the term and made the original case for this technique.  In practice, I use both as they compliment each other.

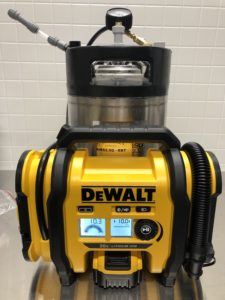
This post outlines a modified version of the Pressure Gauge Method using DeWalt’s DCC020IB Cordless Tire Inflator.  I’m a fan of DeWalt’s 20V Max Lineup of Tools.  Looking around for 20V MAX compatible equipment, I ran into the DCC020IB Cordless Tire Inflator.  Note that this post outlines something I have personally done.  I am not recommending that you do it.  See the end of this post additional disclaimers.

Why the Pressure Gauge Method?

The main benefit of The Pressure Gauge Method is it’s ability to check a certain problem spot.  Secondarily, it’s less messy than the “soak everything with Star San” approach.

A problem spot.  There is one place on the CO2 side that the soak-everything-with-Star-San method doesn’t really work…. the keg’s gas post.  Testing at this point using the spray bottle method is impossible (or at the very least difficult and messy).  Unless your poppet is messed up, leaks will only surface here when a gas QD is actually engaged.  The problem is, you can’t easily see that spot when a QD on.  Stated more simply, you need a QD on to see if it’s leaking, but you can’t see it if a QD is on.

A Quick Look at DeWalt’s DEWALT 20V MAX Cordless Tire Inflator DCC020IB

The left screen shows current pressure the right screen shows set pressure.  The dial allows you to set pressure and start and stop the inflator.A closeup of an installed 20V MAX Lithium Ion Battery.  Helping trim weeds one day and check kegs for leaks the next!

Continue reading