Category Archives: Reviews & Top Posts

Hands on Review: ThermoWorks ProNeedle Thermometer!
This review is by Homebrew Finds Contributor Brad Probert.  Brad is an engineer, expert homebrewer and experienced reviewer.  Grab a link to Brad’s website at the end of this review.

Thermoworks ProNeedle

Beer brewing combines your artsy side (recipe creation) with your nerdy side (brewing process discipline). One thing your nerdy side can’t be without is temperature data. Whether it’s mash temperature or fermentation temperature, a few degrees difference can change your results. And to get repeatable results, you need to control your brewing process so you can hit the same temperatures again next time.

Thermoworks specializes in temperature sensors of all shapes and sizes. They were founded in 1997 and serve multiple industries that require temperature monitoring. Specifically well suited for homebrewing, they have quick-responding and accurate digital thermometers that are waterproof rated.

The ProNeedle has an accuracy of +/- 0.9 degrees F within the temperature band of 14F – 212F. It works at temperatures outside that band, but the accuracy drops off significantly. The digital display reads out in tenths of a degree. The thermometer senses when you rotate it, and the digital readout is able to flip 180 degrees to try to keep it readable. There’s a button you can push to backlight the LED in low light situations. It also has a min/max function, such that when finishing measuring something, you can pull up the maximum temperature read and minimum temperature read by cycling through it with a button push.
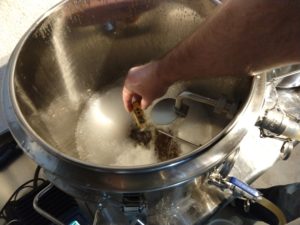
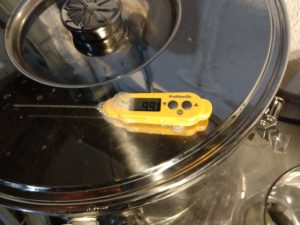
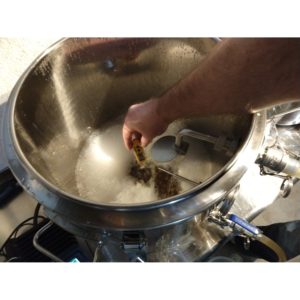
Measuring Mash TemperatureConfirming Mash Temp Using Max Function

You might be concerned about electronics up close to your wort since the things you try to keep dry somehow are the first bits to get splashed. The ProNeedle is certified to IP67 standard (can handle up to 30 minutes submerged to a 39” depth), so you don’t have to worry when it gets splashed, or even if you lose your grip and have to fish it out of the mash tun. The thermometer is designed to fit in your pocket, so it’s about the length of a pen. Half of that length is the electronics body with the buttons and screen, and the other half is the thin stainless probe. The probe is 2.9” long, but only needs to be submerged at least 1/4″ to get a temperature reading. It comes with a plastic cover to protect the probe when not in use (and also to protect you from the pointy end of the narrow probe).

It uses a small CR1632 battery, which is good for 3,000 hours (without backlight) of temperature measurements. If you forget to push the power button to turn it off, it has an auto-off feature that will shut it off after several minutes. Thermoworks stands behind the thermometer with a 5-year warranty, as well.


Get Current Pricing + Related, Review Continues Below

Continue reading

Troubleshooting and Fixing DuoTight Leaks

Updated: 6/9/2024

Kegland’s DuoTight Fittings are designed to work with EVABarrier Double Wall Tubing.  They offer quick, reliable connections, easy implementation, a variety of fitting options and feature amazing versatility.  They’re also, generally speaking, very well priced.  DuoTights are push to connect fittings and require no tubing clamps.

DuoTights are… awesome.  Check out my extensive Hands on Review

I’ve done several pressure tests with DuoTight Fittings and EVABarrier Tubing. Each test has proven the tested components were leak free. Having said that, it’s entirely possible that you’ll have a leak. This happens with any tubing system, that’s why we… check for leaks.

I have a write up for addressing DuoTight Leaks that will walk you through some things to check.

One of the things that I do that really helps is use Valuebrew’s DuoTight Compatible Locking Clips. These snap into the collar of DuoTight Fittings and lock connections in place. This makes the connection more secure and reduces the chances of leakage.

Keep Reading FINDING DUOTIGHT LOCKING CLIPS!

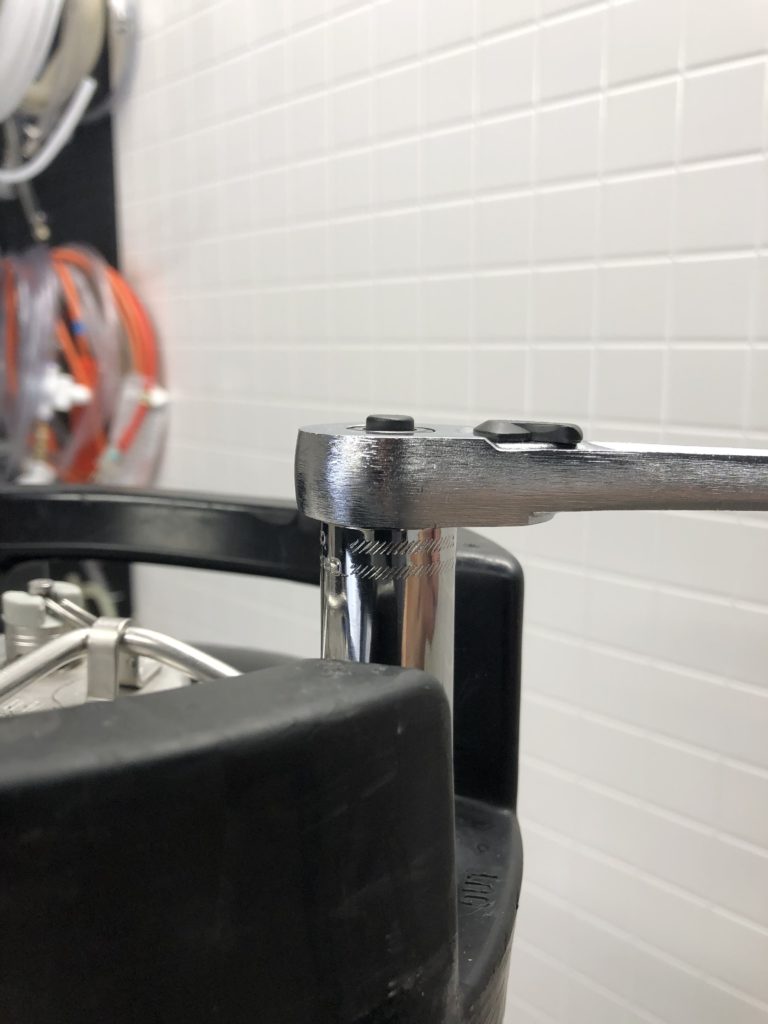
Hands on Review: Craftsman Deep Well Sockets for Ball Lock Keg Posts

What Size Are Ball Lock Keg Posts?

There are two primary post sizes for standard ball lock kegs.  11/16″ and 7/8″.  These can come in both 6 point and 12 point, compatible variations.  I’ve seen two other post sizes. 5/8″ and 9/16″.  I consider those more non-standard.  This post focuses on 11/16″ and 7/8″.

I usually use a wrench when dealing with ball lock keg posts.  I have one wrench that works with both sizes – See: Hands on Review: “Ball Lock Keg Wrench” – 11/16″+7/8″ Ratcheting Wrench – via Apollo Tools Wrench Set – but having a socket is sometimes super handy and sometimes potentially required.

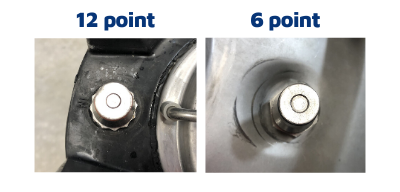
What about 12 Point vs 6 Point Posts?

ball lock post sizes

For the larger 7/8″ posts I’ve seen both 6 point and 12 point styles.  A 12 point socket will work on a 6 point post, but not vice versa.  For the smaller 11/16″ posts I have only seen 6 point.  Not to say that 12 point don’t exist, I just don’t recall seeing any.

This post looks at both sizes to prove what I’m saying here, however, when looking for a 7/8″ socket, I recommend a 12 point design.  That gives you the flexibility to work with both 6 and 12 point style posts.  For the smaller 11/16″ socket, a 6 point design should work.

These Only Work With Ball Lock Kegs, Why?

These sockets will only work with standard Ball Lock Keg Posts.  Pin Lock Kegs require a special socket that has a notch in it to allow the post pin to slip through.

Lots more info… What’s the Difference Between Ball Lock Kegs and Pin Lock Kegs?

If you need a Pin Lock Socket, See: Keg Sockets – Choose Your Sockets – via Keg Connection, choose the Pin Lock Option


Hands on Review Craftsman Sockets for Ball Lock Keg Posts

This post looks at four Craftsman Deep Sockets.  I purchased these at Amazon.  Note that multiple variations of this product may be available, as such a different version may appear when you click on the product link

Canada:

Since the driver that I keep in my brewery area is 3/8″ drive, I also used this adapter

Craftsman Socket Adapter 1/2″ Drive to 3/4″ (04271)

Continue reading

FREE High Resolution Carbonation Chart!

CARBONATION CHARTHigh resolution version below. Thank you to Spike Brewing Equipment for this resource! Check out our extensive lineup of Spike Brewing Equipment Reviews

What is a Carbonation Chart?

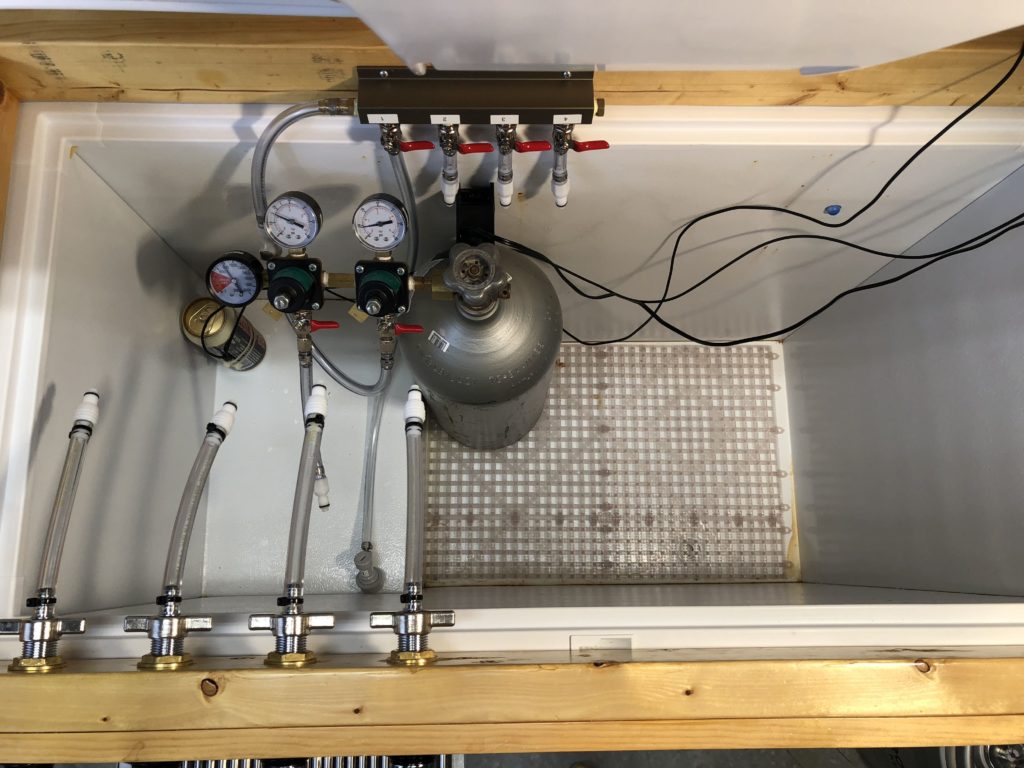
The carbonation level of your beer is a function of your CO2 PSI and your kegerator temperature.  The colder your kegerator, the more CO2 your beer will absorb.  You need to decide two things: How cold do I want my beer to be and what carbonation level do I want to serve it at.

Continue reading

Hands on Review: Valuebrew Swing-Top Lid Adapter for Growlers – Convert Standard Growlers to Swing-Top Growlers!

Updated: 6/26/2024

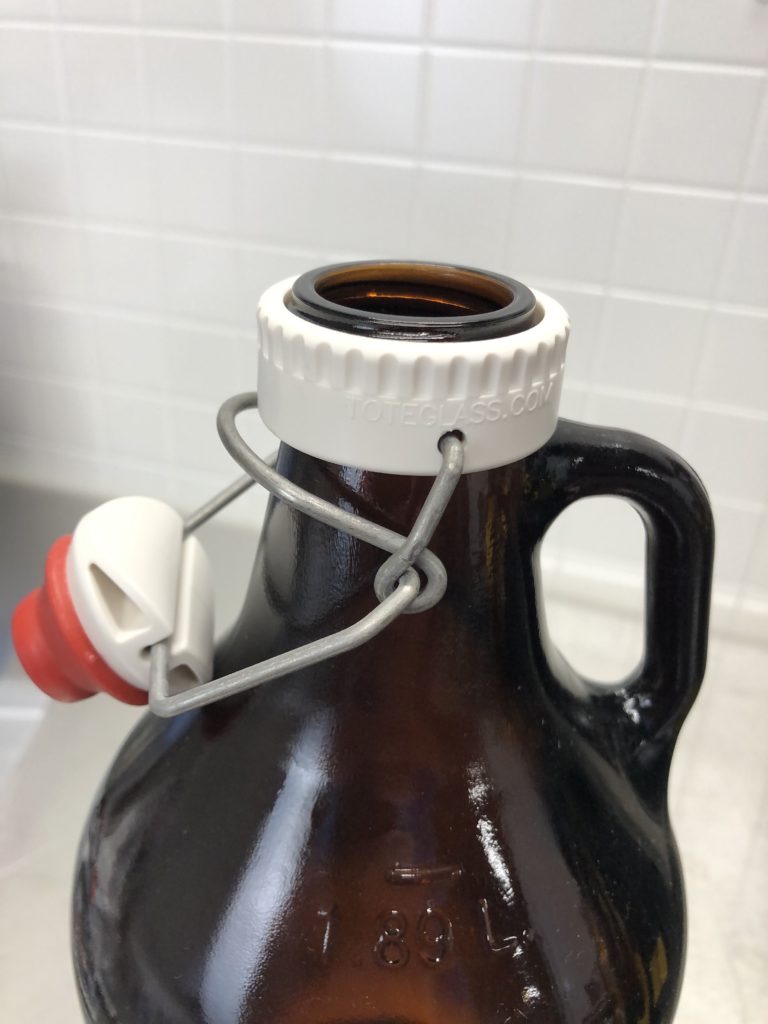
This handy assembly is designed to convert compatible standard screw top growlers to a swing top closure.


Limited Time Deal #1 – Get one FREE

For a limited time Valuebrew is throwing in one of these for free when you place a qualifying order of $50 or more.

Full details – Use coupon code freecap to get the deal!


Limited Time Deal #2 – Free Replacement Gaskets

For a limited time Valuebrew is including 3 free replacement gaskets when you buy 3 or more swing top caps. No coupon code required, Price per cap drops the more you purchase with the 6 cap offering having the lowest price.

Note that you have to use the link below to get the free gaskets, the standard product page doesn’t have the deal.

Swing Top Growler Cap & Adapter + FREE Replacement Gaskets

Standard Product Page: Swing Top Growler Cap & Adapter from Valuebrew


Check Current Price, Review Continues Below


In the package


A note on branding… When this review was first published these swing top caps were ToteGlass brand. They were very popular with HBF readers. They regularly sold out when I posted that they were available. At some point they just stopped coming back in stock.  That lasted for months. That is until Valuebrew started carrying them. According to the product description, they worked with the manufacturer to bring them back!

Continue reading

Hands on Review: Viking Malt Xtra Pale Base Malt

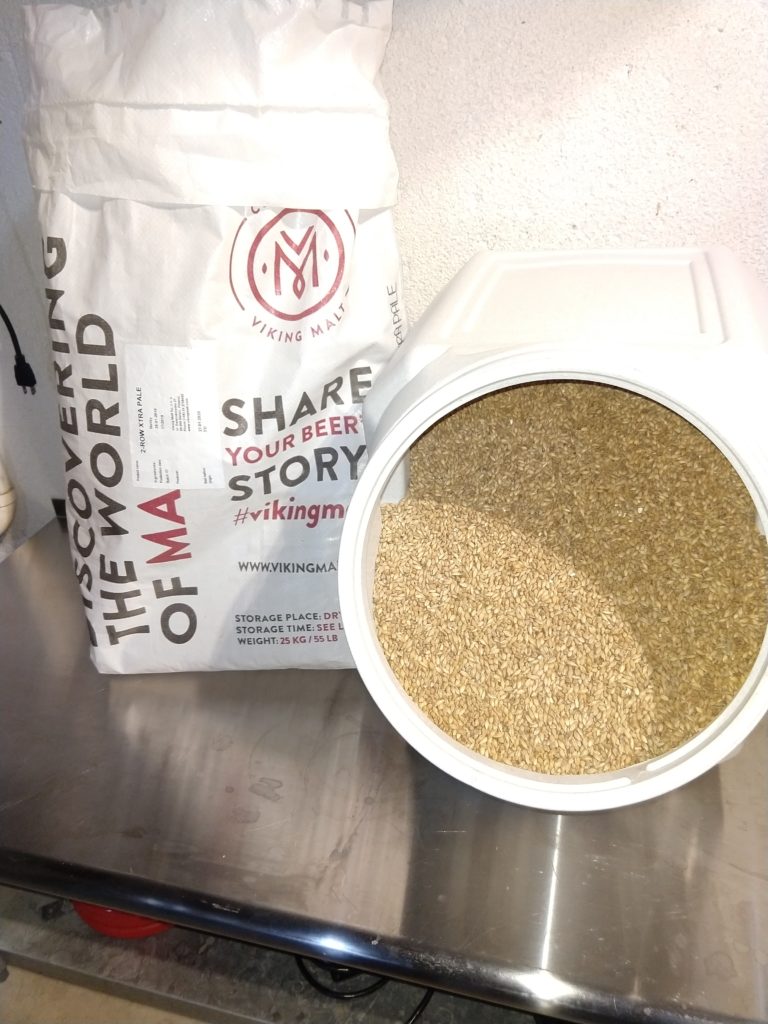
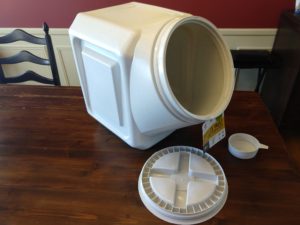
Viking Xtra Pale Malt in a Vittles Vault Container – Hands on Review
This review is by Homebrew Finds Contributor Brad Probert.  Brad is an engineer, expert homebrewer and experienced reviewer.  Grab a link to Brad’s website at the end of this review.

Viking Xtra Pale Malt

When we say “malt”, most of the time we are referring to “malted barley”. The barley is grown and harvested as a grain, and then the malt house does the fancy processing of coaxing that grain to get it ready to sprout, and then heating it to stop that sprouting process. Both of these things (the grain and the processing by the maltster) are what give us the different colors and flavors in our beers. The temperature and length of time the barley is heated is the biggest variable affecting the color of the wort you end up making from it.


More About Viking Malts – Check Prices & Selection, Review Continues Below

Continue reading

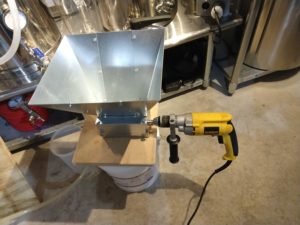
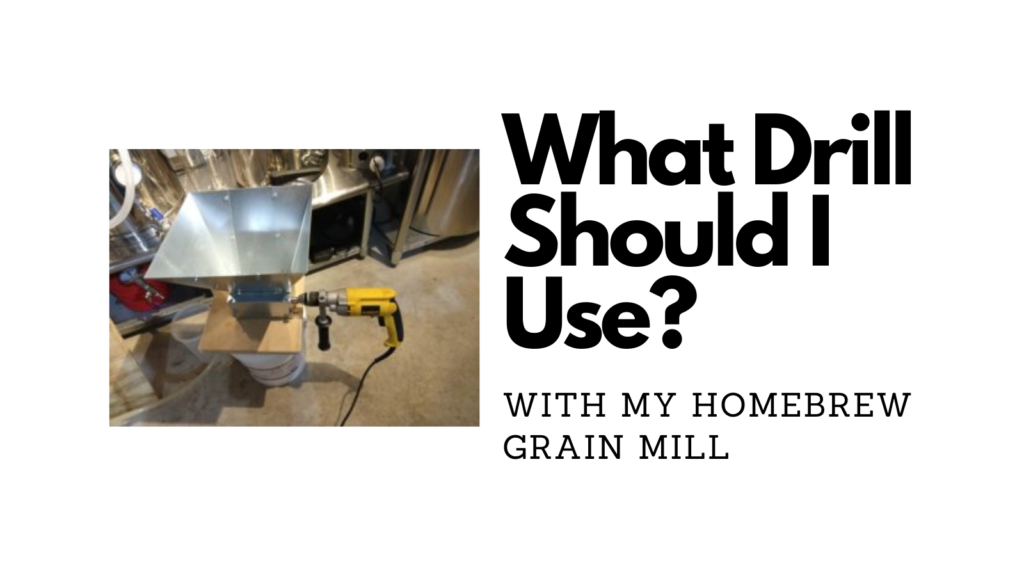
What Drill Should I Use with My Homebrew Grain Mill?

What drill should I use with my homebrew grain mill?

It’s a common question.  I’ve experienced a swing and a miss in this area myself, thinking “This cordless drill has got to work with my mill” and when it arrived, nope, not even close.

This resource shares some feedback that we’ve received from other homebrewers when we asked… What drill do you use with your homebrew grain mill?


Related Resources:


Ground Rules

This is a collection of feedback we’ve received from homebrewers.  Their experience is not a guarantee that you will have the same experience.  Make sure the components you use are compatible and rated for your intended application.  Contact manufacturer with questions about suitability or a specific application.  Always read and follow manufacturer directions.

For some drills, we’ll link a specific product page when we know the exact model.  For others we’ve linked to search results to help you shop around.  Note that multiple variations of some products may be available, that means a different model may show up.  Also tools specs and capabilities can change over the years.

Continue reading

Hands on Review: Anvil Foundry Brewing System!

anvil brewing equipment foundry review

July 7,2024

This review is by Homebrew Finds Contributor Brad Probert.  Brad is an engineer, expert homebrewer and experienced reviewer.  Grab a link to Brad’s website at the end of this review.

Anvil Brewing Equipment Foundry

There are a lot of all-in-one electric brew rigs on the market. The entry to all-grain for most was through a converted cooler 3-vessel system. It was the cheapest way to get into all-grain, and why so many of us came that way. Precision control and/or electric heating convenience came at a premium that you would upgrade to later. Well, those are now relegated to “old timer stories”. At the all-grain entry level price point, you can now get an all-in-one electric unit from Anvil for the price you’d pay for an Igloo cooler kit with a burner and pot. So now those getting into all-grain can start with the precision of digital temperature control, and the weather-proof convenience of an electric heat source.


Compare Models, Prices and Availability, Review Continues Below:

These are affiliate links, note that multiple variations of this product may be available, as such a different version may appear at these links


Comparing Anvil Foundry Versions

The Anvil Foundry comes in two sizes, a 10.5 gallon and a 6.5 gallon. They share most all of the same features, but the 10.5 is targeted at 4-5 gallon batches, and the 6.5 for 2.5 gallon batches. There’s also an accessory you can order for the 10.5 to insert in the mash basket and then go as low as 2 gallon batches. Both of these units come with the option to add on a recirculation kit, which provides a pump and some other hardware bits to allow you to recirculate wort during the mash. Every unit also has a simple switch you can change to run on 120V or 240V. However, the unit comes with a 3-prong 120V plug, so if you do opt for the 240V setting, you have to cut the plug off and attach the appropriate 240V plug type.

Continue reading

Not Just for Bars Anymore… Using Interlocking Bar Mats Around Your Home Brewery!

In spite of not actually having a formal home bar, I’m a big fan of… bar mats.  Generally speaking these are made for food-related uses and  they’re designed to be wet from time to time.  They provide a nice surface to set things on all the while increasing air flow.  That increased air flow helps get and keep things dry.  Better airflow can also help regulate temperature better.

Personally, I’ve used San Jamar’s Versa Mat, but many other similar products are available.  Mine are 12″ x 12″, lock together for use in larger areas and can be trimmed when needed.

On the shelf of my brewing area work table – TRINITY EcoStorage NSF Stainless Steel Table, 48-Inch – Hands on Review – helps things dry.

Continue reading

Hands on Review: Kegland DuoTight Fittings & EVABarrier Tubing!

Updated: October 3, 2024

Kegland’s DuoTight Fittings are designed to work with EVABarrier Double Wall Tubing.  They offer quick, reliable connections, easy implementation, a variety of fitting options and feature amazing versatility.  They’re also, generally speaking, very well priced.  DuoTights are push to connect fittings and require no tubing clamps.


+ Limited Time Deal… FREEBIE (w/qualifying order)…

Wort Whipper Stir Plate

Kegland Wort Whipper Stir Plate via William’s Brewing

More Info

From the product description, check product page for current description, price and availability:

The compact Wort Whipper from KegLand is only 1.1″ thick, and 4.75″ wide. Although this unit says it can stir up to 5 liters, we have tested it and found it is only good for up to 2000ml of wort in a 3000ml Erlemeyer Flask. Still, it is an excellent value for $40.00.

This unit has variable speed, and it is best for yeast growth to set the speed as low as possible so the yeast is suspended without it looking like a tornado. A magnetic stir bar is included, although the pictured 3000ml Erlenmeyer Flask is not included.


  • For a limited time William’s Brewing is throwing in a FREE Wort Whipper when you place an order of $109 or more and use coupon code Q30 at checkout.
  • No need to add the Wort Whipper to your cart, it will be automatically added when you use the coupon with a qualifying order at checkout.
  • Shipping is free or reasonably priced flat rate to addresses in the lower 48 states depending on your order size for most items.

KegLand Wort Whipper Stir Plate – remember promo code Q30 with an order of $109 or more

This means that now is a great time to upgrade to DuoTights!

Kegland DuoTight Fittings & EVABarrier Tubing at William’s Brewing


In This Review:

  • How to Use DuoTight Fittings – No Tools or Clamps Needed!
  • DuoTight and EVABarrier Sizing
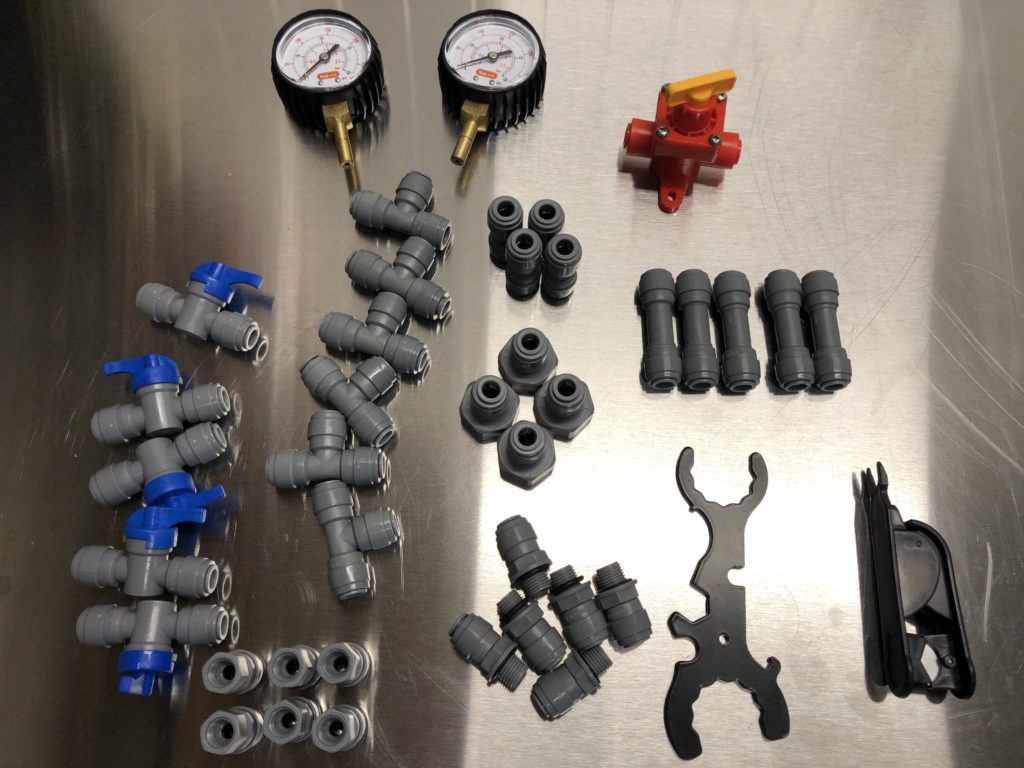
  • A Closer Look at DuoTight Fittings, EVABarrier Tubing and Related Tools
  • DuoTight Compatible Locking Clips
  • More About EVABarrier Double Wall Tubing
  • EVABarrier Tubing Resistance Estimations
  • Beer Line Tidy for EVABarrier Tubing
  • Does EVABarrier Tubing Work with John Guest Fittings?
  • Converting My Kegerator to DuoTights and EVABarrier
  • Tips for skipping ball valves in your DuoTight Setup
  • A Tweak For Super Clean DuoTight Kegerator Installs
  • Build a DuoTight CO2 Gas Manifold
  • Kegland DuoTight Ball Lock QDs
  • Pressure Tests
  • What is the Maximum Pressure for DuoTight Fittings?
  • Nukatap Counter Pressure Bottle Filler
  • DuoTight Inline Secondary Regulators
  • BlowTie Spunding Valves
  • Leaks? Troubleshooting EVABarrier/DuoTight Leaks
  • Conclusions
  • More Interesting and Unique DuoTight Compatible Fittings & Gear

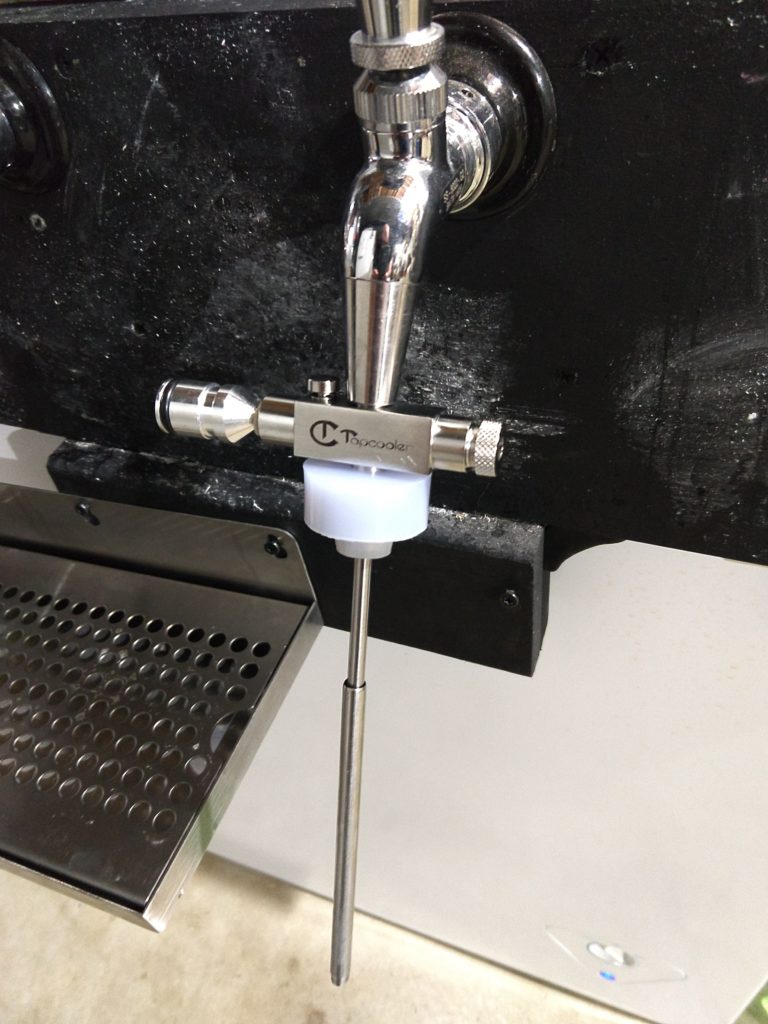
Announcing: DuoTight Conversion for Tapcooler

tapcooler duotight

The Tapcooler can connect directly to your compatible forward sealing faucet (Ultratap, Vent-Matic, Perlick 600 series, Nukatap and Intertap) and allows you to easily counter fill bottles directly from the tap!

Learn More about the Tapcooler!  Hands on Review: Tapcooler Counter Pressure Bottle Filler for Forward Sealing Faucets!

OR Nukatap Counter Pressure Filler

The new fitting for Tapcooler makes a lot of sense of you already own a Tapcooler. If you don’t but are in the market for something similar that includes native DuoTight capabilities consider the Nukatap’s Counter Pressure Bottle Filler


How to Use DuoTight Fittings – No Tools or Clamps Needed!

DuoTights feature a unique double EPDM O-ring design.  Coupling and uncoupling is quick and easy and requires no tools or clamps.

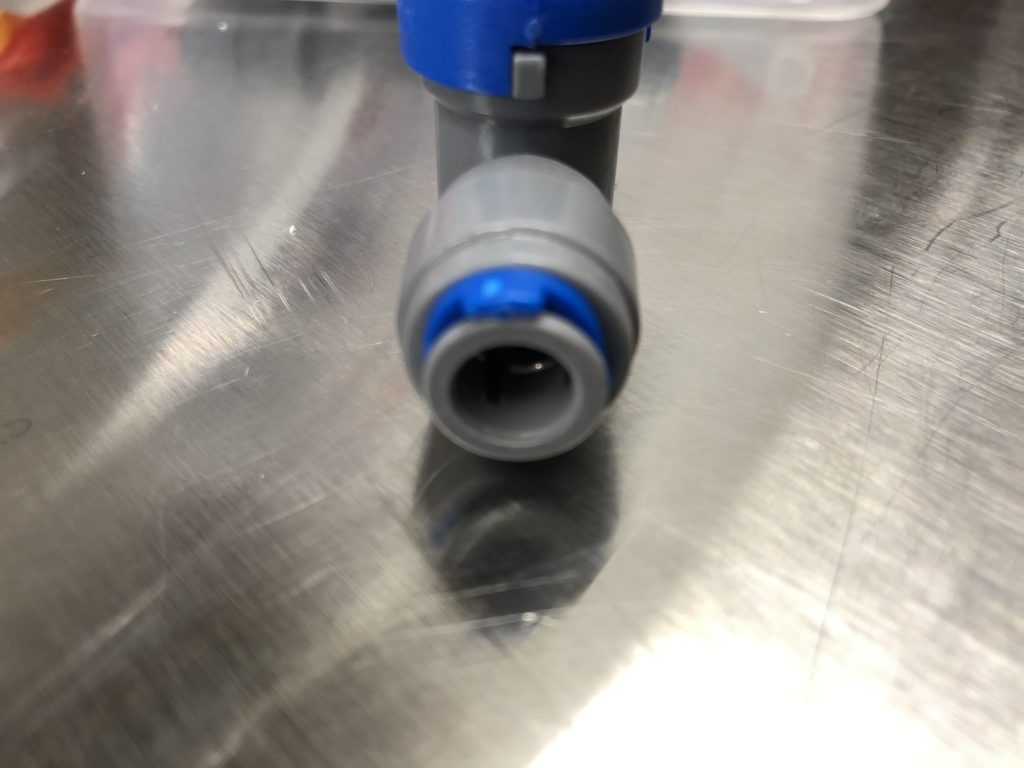
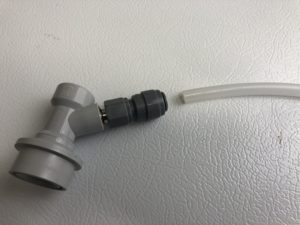
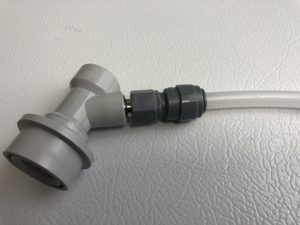
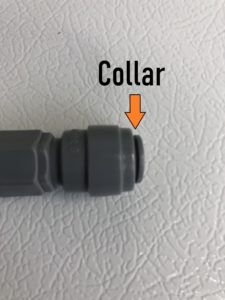
DuoTight Ball Lock QD on Left, Compatible EVABarrier Tubing on RightMaking a pressure capable connection is as easy as pushing the tubing all the way in the fitting and firmly pulling the tubing out.To disengage the connection press the collar toward the fitting body and pull on the tubing.  A couple tools are available to help with this process.  See below for photos and links.



Finding DuoTight Fittings and EVABarrier Tubing, Review Continues Below:

Continue reading

Why Won’t My Beer Carbonate? Fixing Draft Beer Carbonation Problems

It’s a tale as old as time, or maybe not quite as old as time, but still old… your beer has finished fermenting, you excitedly transfer it to a keg and wait patiently.  Well, maybe not so patiently.  Every day or two you draw some beer to see where it’s at… it tastes amazing but it’s not carbonating.  You think you’re just being impatient, but then the days continue to pile up.  You’re getting a little carbonation, but not much.  Is this beer broken?  Or, have the basic principles of fluid dynamics just failed?

First Things First…

You’ve probably already done this, but you need to make sure your system is balanced and that both the temperature and pressure levels are set to correctly

See: Step by Step: Balancing Your Kegerator Draft System

Continue reading

Hands on Review: Vittles Vault Stackable Storage Bins for Homebrew Grain Storage!

Updated: September 5, 2024

This review is by Homebrew Finds Contributor Brad Probert.  Brad is an engineer, expert homebrewer and experienced reviewer.  Grab a link to Brad’s website at the end of this review.

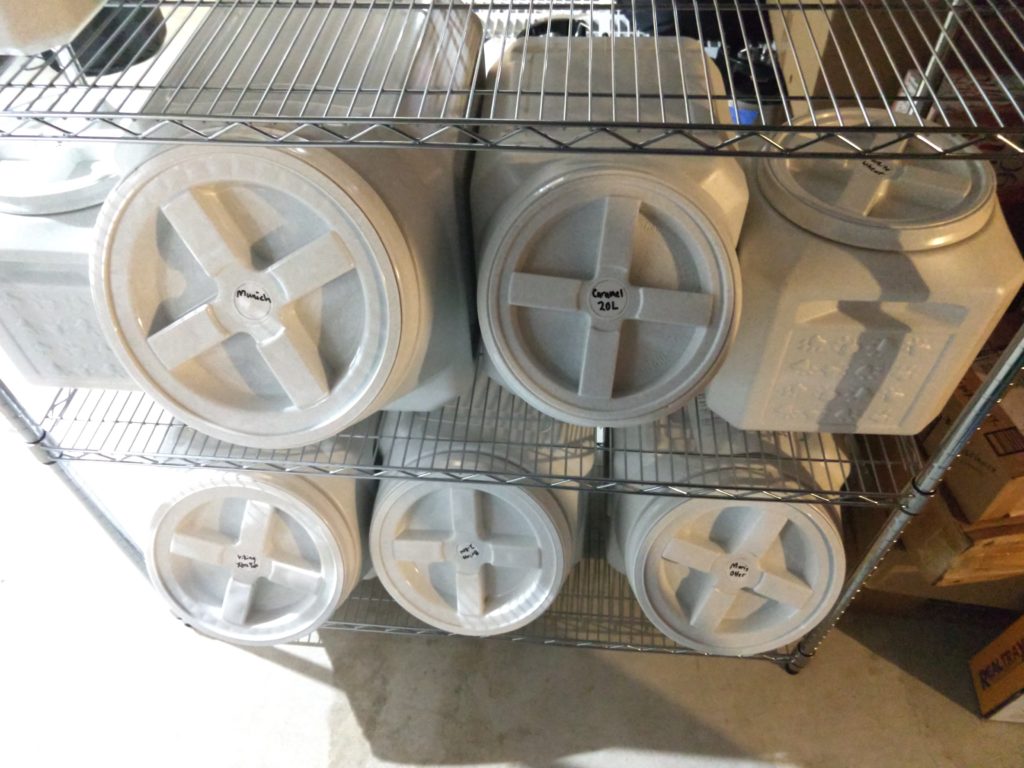
Vittles Vault Storage Bins

Gamma2 as a company is 100% dedicated to their mission of designing and providing pet food containers to animal owners (technically they also care about your dog getting out of the pool, as they make a doggy pool exit ramp). But, that doesn’t mean these “pet food containers” can’t be co-opted for homebrewing. The same characteristics that make them ideal for pet food, also make them ideal for malt storage.

Vittles Vault 60-lb Container

I’ll go through a few storage basics for malt. First, you want to store it uncrushed, so that the husk helps keep the good stuff inside protected from the environment. Cracked grain kernels are more enticing to critters, and opens up the endosperm to fast staling. Beyond that, grain wants to be kept at cooler room temperatures (40 – 60F), dry, away from light, and in an airtight environment. Maltsters range in the max recommended storage time, with most in the 12-18 months range, and some up to 24 months. When you buy grains by the 55-lb sack, most will put a “best by” date on the label, since you don’t know how old it is before you get it. Although you can save money by buying grains in bulk, you need to make sure you have the right throughput to use it up before it stales.

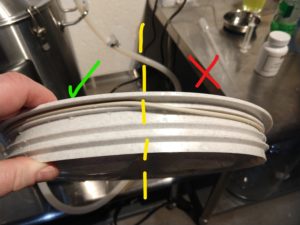
Lid o-ring Out of Groove on Right Side

Gamma2 has a number of different types and sizes of storage containers. All are designed to be airtight, so they keep air from getting in and staling your grains when you’re not scooping it. (Which of course, the same thing can’t be said for that 55-lb sack of grain you’ve got in the corner, with a stretch of duct tape over the hole you cut into it…) The lid design is how they achieve this air-tightness. There’s a compliant o-ring that’s held in a groove on the lid which gets compressed down onto a chamfered face on the body of the container to make the seal. As the threaded lid gets screwed down, the o-ring will get squished to block off the air-leak path past the lid.


Deal on BULK Grain!

When you purchase 6+ 5lb bags of the same grain MoreBeer will apply a volume discount. You can see this discount on each product page. Here is an example:

Malt Deal at MoreBeer! – choose 6 more 5lb bags of grain to see volume discounts

Get Free Shipping: Shipping is free with a qualifying $59 order to many US addresses

Example… Briess 2 Row drops to $7.65 when you buy 6 or more 5 lbs packs. Buy 10 x 5 lb packs and you’ll have the equivalent of a 50 lb sack of grain. With the discount this will figure to $76.50 AND that will include shipping to many US addresses.

Yes, free shipping works… FREE Shipping DOES Work. I periodically get questions/concerns when I post this workaround, please read… Although bags of grain do not ship under MoreBeer’s free shipping program… this is a loophole of sorts. 5 and 10 lb bags do ship for free. If you use this technique you will receive 5 x 10 lb bags of grain, not a single 50 lb sack.


Check Pricing and Available Sizes & Configurations, Review Continues Below

These are affiliate links. Note that multiple variations of these products may be available, as such a different version may appear at these links

Also Mentioned in This Review:

Continue reading

Hands on Review: Chapman Thermobarrel Stainless Steel Mash Tun

This review is by Homebrew Finds Contributor Brad Probert.  Brad is an engineer, expert homebrewer and experienced reviewer.  Grab a link to Brad’s website at the end of this review.
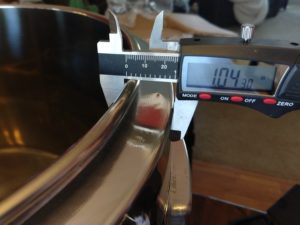
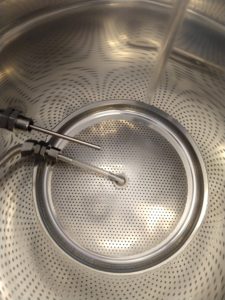
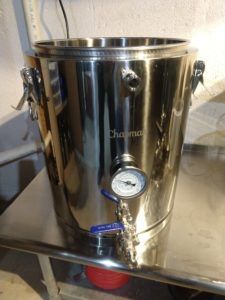
Chapman Thermobarrel

Coolers being used for mash tuns are quite common in the homebrew world. This makes sense because they are some common household gear that can be easily repurposed for homebrew use, and they do a great job doing what you need while mashing- hold temperature steady. Steady mash temperatures gets you on the path to repeatability. And no one likes brewing with an “I don’t know we’ll see if this turns out” approach.

1-inch Thick Insulated Walls

The Chapman Thermobarrel is essentially just like a big Gatorade drink cooler, but instead of the insulation being wrapped in hard plastic, it’s skinned in stainless steel. The stainless skin makes it easy to clean and sanitize, and you don’t have to worry about long-term discoloration or scratches in the plastic. The insulated walls are 1” thick, and the base and lid have just under 1” of insulation or insulating air gap.

The lid is engineered to keep the heat in. The internal stainless sleeve extends up about an inch, and the lid nests over the top of this with a nice thick, compliant silicone seal. With 3 latches around the outer edge of the lid, it pulls it down onto this seal for an airtight fit. Definitely more robust than a plastic spin-on drink cooler lid for cutting off heat-escaping air paths. Also on the outside are two solidly welded steel handles- sturdy enough to move the mash tun around if needed when full of grain/wort.

Bottom of Tun with False Bottom Installed
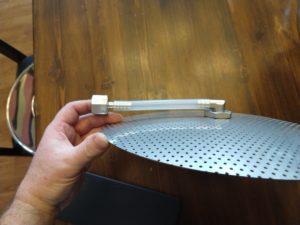
The false bottom in the mash tun is a simple steel circular plate, domed up in the middle. There are rows of small holes across its full area, and in the center there’s a 90-degree elbow fitting held in place by a nut on the bottom side. There’s a barbed end on one end of this elbow, then a short length of high temp hose connects this to a barbed fitting on the ball valve drain. The grain sits on top of this domed plate, and the elbow fitting in the center pulls liquid from underneath the dome, passing it through the tubing and out the ball valve.

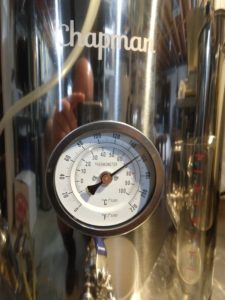
Domed False Bottom- AssembledEasy to Read Thermometer

Halfway up the side of the mash tun, there is a large dial thermometer, with a thermowell that extends in toward the middle of the mash tun. It sits at a level that requires just over 5 gallons of water to submerge it.


Check Pricing, Review Continues Below:

Continue reading

Hands on Review: Monster Mill MM-3 Grain Mill!

Updated: 5/14/2024

This review is by Homebrew Finds Contributor Brad Probert.  Brad is an engineer, expert homebrewer and experienced reviewer.  Grab a link to Brad’s website at the end of this review.

Monster Mill MM-3

I started milling my own grains not too long after I switched to all-grain. At first I thought the idea was laughable to mill my own grains- why buy something and do the work myself, when I could get it done for free at the homebrew shop? But once my process had stabilized a fair amount, I became frustrated by my inability to hit the recipe’s planned OG. On my batches where my gravity was lower than predicted, I found a notable number of fully intact grains in the spent grains from my mash. Aiming for consistency, I wanted to make sure all my grains were always crushed, so I bought a 2-roller grain mill. That worked well, but if I wanted to optimize mash efficiency, I was always dancing on the edge of a stuck mash.


adyeast


The 3-roller mill from Monster Brewing Hardware passes through a first pair of rollers that have a fixed gap. That is machined to be 0.060”, with the intention of doing a minimal crush to soften the inside of the grain without really breaking the husk. After the first pair of rollers, it passes through the gap that you can adjust to your liking. The instructions provided with the mill recommend 0.045” for a medium crush, 0.055” for a coarse crush, and 0.038” for a fine crush. But of course the beauty of having your own mill is you can adjust it as you want, based on what works best for you.

The MM-3 3-roller mill comes with some options. The base rollers are 1144 steel alloy that is durable for long life, but can get some surface rust if used in a non-climate-controlled area, or if you wet mill your grain. For those homebrewers, they offer a stainless steel roller option, which they say has the same durability as the steel alloy base rollers. If you are a manic homebrewer, they offer a 3rd option with their MM-3 Pro series, which has heat treated rollers. These apparently have about 10x the life durability, but the price tag roughly doubles over the base MM-3.

The other option to choose from is the drive shaft size. Standard is a 1/2″ drive, but 3/8” is available as a smaller option. The 3/8” really isn’t recommended since 3/8” drive drills typically don’t have the torque to drive this mill. It can also be hard to find a cordless drill with enough torque to drive it, so Monster Mill recommends a corded drill. If you order the grain hopper from Monster Mill, it comes standard in galvanized 20-gauge steel, or optional stainless steel. Galvanized steel is corrosion resistant, so the only real advantage of stainless for your grain hopper is the “bling effect”.


Limited Time Availability Info:

In late April Monster Brewing Hardware announced an issue with one of their vendors. They are working to replace the vendor, but in the mean time what’s available is… what’s available.

Place your order now to avoid extended delivery delays

Monster Mills and Accessories at Monster Brewing Hardware


Compare Prices & Monster Mill Offerings, Review Continues Below

Continue reading

Hands on Review: Tapcooler Counter Pressure Bottle Filler for Forward Sealing Faucets

July 8, 2024

This review is by Homebrew Finds Contributor Brad Probert.  Brad is an engineer, expert homebrewer and experienced reviewer.  Grab a link to Brad’s website at the end of this review.


Deals on Tapcooler are rare, why? This is a MAP item. MAP = Minimum Advertised Price.  It’s an agreement between sellers and manufacturer’s not to sell an item below a certain price.  This gear generally sells for about the same price no matter where you purchase it from and is rarely discounted.

Rare Deal on Tapcooler…

Deals on Tapcooler are rare, why? This is a MAP item. MAP = Minimum Advertised Price.  It’s an agreement between sellers and manufacturer’s not to sell an item below a certain price.  This gear generally sells for about the same price no matter where you purchase it from and is rarely discounted.

  • Adventures in Homebrewing’s Rewards program typically offers about 5% back. Each qualifying item earns 1 point per dollar. 200 points gets you a $10 discount code.
  • My contact at AIH says this works on EVERYTHING excluding gift cards.
  • Note: In order to earn rewards points, you must log in to your AIH account.
  • See: Rewards Program Complete Details

This is a loophole or sorts that gets you a rare, de facto discount on Tapcooler

Tapcooler Counter Pressure Bottle FillerComplete Lineup Including Accessories


Tapcooler Bottle Filler

Sometimes it’s possible to go in a circle, but still be moving forward. For me, that’s occurred with bottling. Like most, I started homebrewing by bottling everything. But I got tired of peeling labels, washing bottles, and the overall chore of bottling 5 gallons of beer from a bucket with a gravity fed bottle filler. So I switched, and have been kegging ever since. The one drawback is it’s not as easily shared with others. I’ve got a few great pressurized growlers that solve my problem for bringing some along to a party, but I didn’t have a good solution for passing on a couple pints to friends or neighbors.


Check Current Pricing and View Available Accessories, Review Continues Below

Great Fermentations has put together a setup for homebrew-canners…


A small company in Norway (just 2 people), called Tapcooler, has created a product that is specifically designed for homebrewers that keg their beer, but want to be able to share it in bottles. They improved upon a similar design on the market by adding the functionality of CO2 purging to a counterpressure bottle filler. Their product was met with great feedback from homebrewers in Norway, and now they export it globally. You can use it to save the last few pints when a keg is getting low and you need space, want to share beer with a friend, or want to send in beer to a homebrew competition. Their bottle filler is different than your typical beer gun, in that it’s specifically designed to connect to your tap, and it’s also designed to fill with back pressure in the bottle so you don’t lose most of your CO2 when filling.

Continue reading

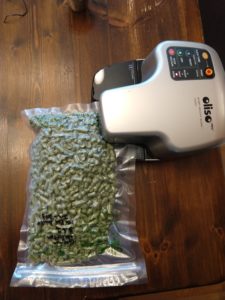
Hands on Review: Oliso Vacuum Sealer – for hop preservation & storage

This review is by Homebrew Finds Contributor Brad Probert.  Brad is an engineer, expert homebrewer and experienced reviewer.  Grab a link to Brad’s website at the end of this review.

Oliso Vacuum Sealer

For years, I would buy 1 oz. bags of hops from my LHBS, and only use a portion of the bag. I would put some tape over the leftovers and throw it in the fridge. When I went to brew again, I couldn’t remember when those hops were stashed there, and I knew they weren’t sealed properly, so I wouldn’t use them. I couldn’t bring myself to throw them away, but I also didn’t want to use such an undefined variable in my recipe. If the beer turned out not as planned, I wouldn’t know if it was because of improperly stored hops, or just a bad recipe. If the beer turned out great, I’d be concerned if I could recreate it next time around.


Compare Pricing & Related, Review Continues Below:

Continue reading

Control Your Kegerator Or Fermentation Chamber With Samsung SmartThings!

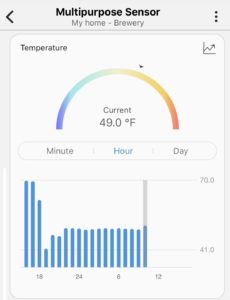
I have Samsung SmartThings installed in my home.  SmartThings requires a central hub.  That hub communicates with other… SmartThings.  Loads of compatible devices using a number of protocols are available from multiple vendors.  Search Amazon for “smartthings” to see what’s out there.  After these things are connected, you can program automations or routines that define how they operate under certain conditions.  All of this is interoperable with other platforms like Google Home and Alexa.

This post is about using SmartThings to control the temperature of your kegerator or fermentation chamber.  To do that, I use three things – A SmartThings Hub, a Multipurpose Sensor and a Kasa Smart Plug.  Labels and photos show both kegerator and fermentation chamber scenarios.  This concept should work for both applications.

The Multipurpose Sensor can do several things including monitor temperatureThe other piece to the puzzle was a smart plug to tum the kegerator/freezer/fridge off and on as needed.  I used a Kasa Smart WiFi Plug by TP-Link.  It worked like a champ.  I used this because it’s what I had, but wouldn’t necessarily recommend this one.  Keep reading for more on that.
Continue reading

Hands on Review: BrewBuilt CoolStix – Fermentation Temp Control Without a Dedicated Refrigerator

This review is by Homebrew Finds Contributor Brad Probert.  Brad is an engineer, expert homebrewer and experienced reviewer.  Grab a link to Brad’s website at the end of this review.

BrewBuilt Coolstix

All yeasts- ale or lager- have a temperature range that produce the most desirable flavor traits. And even within that target range, there are specific characteristics that get coaxed out when you’re at the top versus the bottom of that range. So when you get a recipe dialed in to your liking, being able to ferment at a specific temperature is a big deal. It’s the difference between simply making a good beer, and making the specific beer you want.

There are different ways to control fermentation temperature. There are fermentation chambers that control the temperature in a small-ish refrigerator or cabinet, and then there are ways to control the temperature more directly within the fermentor itself. The BrewBuilt Coolstix is a method to chill your fermenting beer within the fermentor itself. It does this via a stainless steel cooling rod you insert through the lid of your fermentor and down into the fermenting wort. This allows you more flexibility in fermentation space. You can put your fermentor in one place while fermenting and then put it away up on a shelf after.

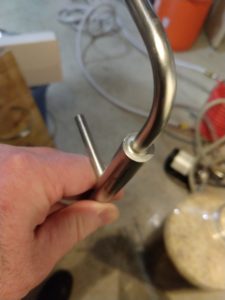
Cooling Rod Weld

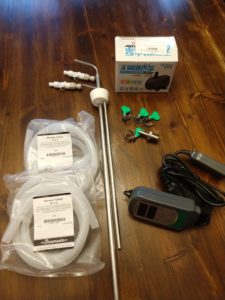
The hollow rod is made of stainless steel, and it has another smaller pipe welded inside of it. A hose connects to one end to let the flow of cooling water in, and then a hose connects to the other, to take cooling water out. The cooling water used is generally a cooler filled with ice water, which you have to provide yourself. As this ice-cold water passes through, it draws heat from the fermenting wort, and then carries it out. The Complete Kit – See: CoolStix Lineup -, sold by MoreBeer, also includes the pump, hoses, connections, and a standard Inkbird ITC-308 controller to get it to work as a system. This leaves you to just provide your own ice water bath.

Inkbird Temp Controller – Hands on Review ITC-308

The connections between hose and cooling rod are slick. They are self-sealing quick disconnects. To connect, you simply push them on and they snap connected. When it comes time to disconnect, you push down on a small metal tab and they pop off, sealing themselves so you don’t leak any cooling water.

Valved Disconnects – Valved Disconnects at MoreBeerConfiguration Diagram


Get Current Pricing, CoolStix at MoreBeer, Review Continues Below

CoolStix setups are available for a wide range of fermenters including Fermonsters, Carboys, Tri-Clamp equipped setups, Speidel Fermenters and more.

BrewBuilt CoolStix Temp Control at MoreBeer

Continue reading