Category Archives: Reviews & Top Posts

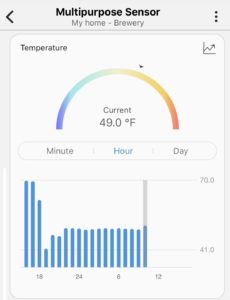
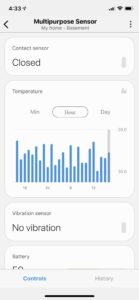
Monitoring Kegerator or Fermentation Temps With Samsung SmartThings

I have Samsung SmartThings installed in my home.  SmartThings requires a central hub.  That hub communicates with other… SmartThings.  Loads of compatible devices using a number of protocols are available from multiple vendors.  Search Amazon for “smartthings” to see what’s out there.  After these things are connected, you can program automations or routines that define how they operate under certain conditions.  All of this is interoperable with other platforms like Google Home and Alexa.

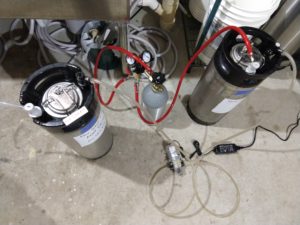
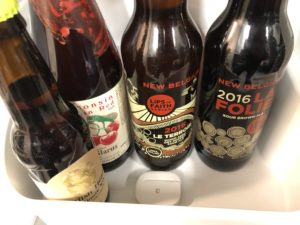
This post is about using SmartThings Multipurpose Sensor to monitor temperatures in your kegerator or fermentation chamber.  Labels and photos show both kegerator and fermentation chamber scenarios.  This concept should work for both applications.

The Multipurpose Sensor can do several things including monitor temperature.  Note that a SmartThings hub and Wi-Fi are also required.

Continue reading

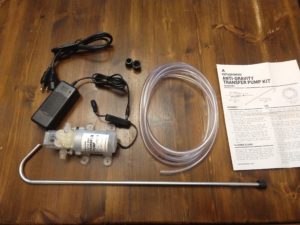
Hands on Review: Northern Brewer Anti-Gravity Transfer Pump

Updated: 5/3/2024

This review is by Homebrew Finds Contributor Brad Probert.  Brad is an engineer, expert homebrewer and experienced reviewer.  Grab a link to Brad’s website at the end of this review.

Northern Brewer Anti-Gravity Transfer Pump

Some homebrew gear has a wide range of use, and some fills a very specific purpose. Those that fill a specific purpose typically become a critical piece in your process that you wonder how you managed before you had it. For me, that was the Anti-Gravity Transfer Pump from Northern Brewer. This pump is specifically intended for use in transferring beer or wort from vessel to vessel during your fermentation and/or kegging processes.

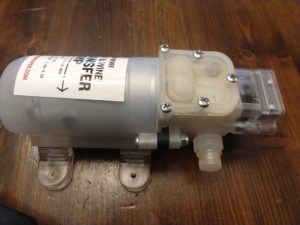
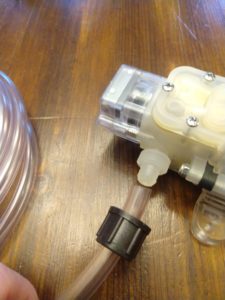
Closeup of Pump Head

The Anti-Gravity pump is a diaphragm pump, which is different than your typical wort pump. Wort pumps are usually an impeller design with a pump head inside with rotating blades that push little bits of fluid along from the inlet to the outlet as they spin. A diaphragm pump has a flexible membrane inside that oscillates back and forth like a trampoline. When the membrane is pushed in one direction, it compresses the fluid and forces it to the outlet. And when the membrane is pulled in the opposite direction, it creates a vacuum in the pump chamber which draws fluid in. A set of check balls ensures flow only goes in one direction.

Hose Connection on Inlet and Outlet


Check Prices and Availability, Review Continues Below:

Continue reading

Re-Purposing Homebrew Equipment in an Emergency

It’s good to be prepared in case of emergency.  You never know when inclement weather, other conditions or what-not will cause problems.  This post is about pointing out ways we can re-purpose our homebrew gear and supplies in the event of an emergency.

  • Kegs – can be used to collect water – thoroughly clean and sanitize prior to use
  • Fermenters – can be used to collect water – thoroughly clean and sanitize prior to use
  • Some already use things like Aqua-Tainers sorts of things to collect brew day water and filtered RO water.  Those, of course, can be used to store emergency water.  Search Amazon for “emergency water container”
  • Propane Burners can be used to sanitize water and heat food.
  • Do not use Propane Indoors for heat unless you’re using a device specifically designed and approved for that use.  Search Amazon for “mr heater indoor propane heater” for some ideas.  Those sorts of heaters can also be handy in colder climates on brew day.  Again… follow directions and manufacturer ratings.
  • First Aid Kit – In my opinion, you should have one or more of these on hand in and around your home brewery.  Search Amazon for “first aid kit”
  • Vacuum Sealers – beyond being awesome at preserving hops, these can be used to preserve shelf stable staples to be used in the event of an emergency.  Amazon Best Sellers in Vacuum Sealers
  • Some beer and wine making ingredients are… food.  Honey, oats, extracts, brewing sugars.
  • Homebrewed Beer and Wine are… calories and liquid.  Not suggesting these are a staple, but they are calories and offer some amount or nutrition.
  • Batteries – you probably have a stock of batteries around your home brewery to run do-dads.  Those can also run flashlights and radios.  Search Amazon for “AmazonBasics Batteries” for some potential deals
  • Buckets can be used for lots of things including water collection and food storage.  If a bucket has scratches, personally, I’d skip using that for drinking water.
  • Coolers.  We’re usually pretty well set up on coolers.  If ice is available, pull that false bottom out and use keep food items cool in case of power loss.
  • Flashlights – one of my first Amazon Finds on Homebrew Finds was a flashlight.  My homebrewery v1 was dark and I used a high powered flashlight to look in kegs to make sure they were clean.  I have a flashlight around my homebrewery to this day.  Those are handy for.. lighting things up.  Search Amazon for “led flashlight”
  • I’ve long been a proponent of fixing things when possible.  Along those lines,
  • I like to keep an assortment of hardware on hand at the ready to help fix and build things around the brewery – some Amazon searches – “screw assortment”, “clamp assortment”, “electrical nut assortment”, “heat shrink assortment”, “hardware assortment kit”.  Having some hardware on hand means you have a better chance to fix things when they break.  That’s handy if things are our of stock or if it’s hard to get to a store.
  • Chest freezers that have been converted to kegerators can be… converted back to deep freezes for food storage.
  • PBW and Star San can be used to clean and sanitize all sorts of things outside of your brewery.  Using Star San in a Spray Bottle helps make it last a long time.

Do you have more ideas for re-purposing homebrew gear?  Submit a Tip and let us know so we can share

For more on emergency preparedness visit ready.gov


pinned

This post may contain affiliate links. We may make a commission when you use our links. This will never cost you extra. Thank you for supporting Homebrew Finds!

greatdeals

adamztop5

Make sure the components you use are compatible and rated for your intended application.  Contact manufacturer with questions about suitability or a specific application.  Always read and follow manufacturer directions.

toppost:emergency tag:tpr rs:0

Hands On Review: Weekend Brewer CO2 Manifold

Why a Manifold?

CO2/Gas Distribution Manfiolds allow you to easily split CO2 lines so that you can use a single tank and regulator for multiple kegs.

What to Look for in a manifold

Some features to look for when shopping for a manifold are individual trunk control, integrated check valves, the right connection type, good build quality and… no leaks!

  • Individual control is really straight forward… a ball valve for each trunk.
  • As far as check valves, those are designed to prevent backflow between lines.  Although these are gas lines we’re talking bout, differences in pressure can cause back-feeding beer to flow into gas lines.  Check valves help to prevent that.
  • Look for a compatible connection type – MFL/Flare or the right size barb fitting.
  • Good general build and material quality
  • And… This may sound obvious, but…. look for something that does not leak.  Leaky manifolds result empty CO2 tanks and those are no fun.

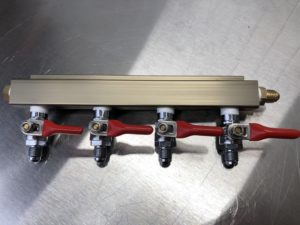
Hands on Review The Weekend Brewer 4-way MFL CO2 Distributor Manifold

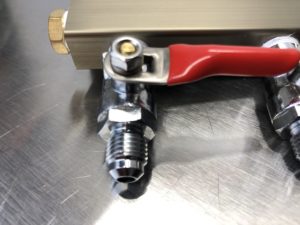
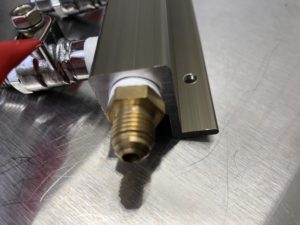
This particular model features four trunks with 1/4″ MFL Fittings along with a 1/4″ MFL inputClose up of the ball valve.  These feature inline check valves to help prevent back flow.  I chose 1/4″ MFL but the weekend brewer has lots of options available, including a build your own option, linked below.A look at the gas inlet.  MFL “in” connections like this seem to be more difficult to come by.  A barbed inlet seems to be more common.


Compare Prices:


Continue reading

Review: MoreBeer’s Lunar Shock Homebrew Recipe Kit

This review is by Homebrew Finds Contributor Brad Probert.  Brad is an engineer, expert homebrewer and experienced reviewer.  Grab a link to Brad’s website at the end of this review.

MoreBeer’s Lunar Shock Homebrew Recipe Kit

Lunar Shock is an American Wheat ale, with orange peel and coriander added. It pays homage to Blue Moon and Shock Top, and that’s where it also draws inspiration for the name. It’s an easy-drinking beer that will appeal to the macro-beer drinkers that come to your party.

Unboxing and Kit Inventory

This comes in an extract version and an all-grain version. The all-grain kit can come with grain either crushed or non-crushed. I opted for un-milled grains, as I like to crush my own to have control of the grain crush.

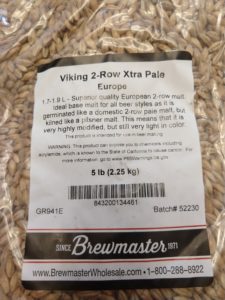
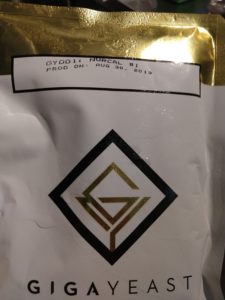
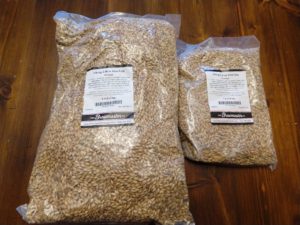
The malts were packaged in pre-measured bags of 5 lb and 1 lb increments, from Viking Malts. Therefore it was easy to cross-reference to the recipe card to confirm I got the right amounts of everything. The hops came in light-proof, thick bags, where the hops were nitrogen flushed before bagging. The recipe kits from MoreBeer don’t come with a specific yeast, instead they give you a list of yeast recommendations from the different yeast vendors they carry (White Labs, Wyeast, Gigayeast, Imperial, and Omega). I hadn’t used Gigayeast before, so I opted for the GY001 – Norcal #1. Gigayeast packages contain 200 billion yeast cells, which they say can be used as a straight pitch without a starter to ferment 5 gallons of wort up to 1.070 gravity (if pitched within 3 months of the date on the pouch). I received it 1.5 months after production date, and brewed at just under 2.5 months after production date, so I skipped the starter. That was a nice time saver. The yeast came inside a foil-lined bubble wrap padded envelope with an ice pack. Things were still cool inside after a FedEx shipment from PA to MI- not cold, but sufficient. In addition to the ingredients, there was a recipe card with basic brewing directions, a cut-out shape to go with the MoreBeer custom tap handle, and a sheet of basic brewing process tips.

Great Western Wheat Malt Viking 2 Row Xtra Pale MaltHallertau Mittelfruh HopsGigaYeast GY001Easy to Follow Recipe Card + Tap Handle Insert: In addition to the ingredients, there was a recipe card with basic brewing directions, a cut-out shape to go with the MoreBeer custom tap handle, and a sheet of basic brewing process tips.


Get Current Pricing, Lunar Shock via MoreBeer, Review Continues Below

Continue reading

Hands on Review: “Ball Lock Keg Wrench” – 11/16″+7/8″ Ratcheting Wrench – via Apollo Tools Wrench Set

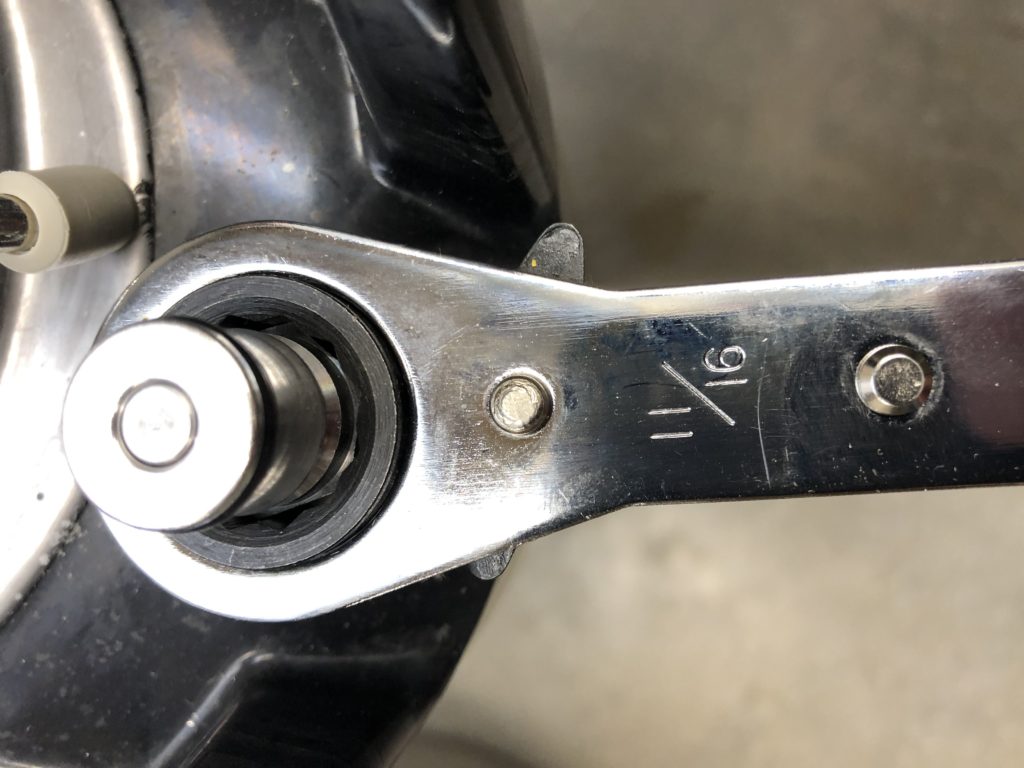
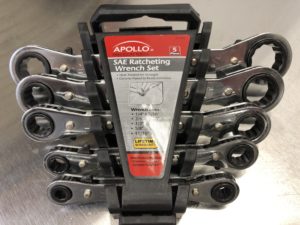
Apollo Tools DT1212 SAE Ratcheting Wrench Set includes 5 wrenches of various sizes.  One of those has an 11/16″ end and a 7/8″ end.  Those happen to be the two common sizes for ball lock posts.

What Size Are Ball Lock Keg Posts?

There are two primary post sizes for standard ball lock kegs.  11/16″ and 7/8″.  These can come in both 6 point and 12 point, compatible variations.  I’ve seen two other post sizes. 5/8″ and 9/16″.  I consider those more non-standard.  The wrench featured here works with what I consider to be the two most common ball lock post sizes 11/16″ and 7/8″.


Related: Hands on Review: Craftsman Deep Well Sockets for Ball Lock Keg Posts


Here’s the full set with packaging/storage case.  The set includes 1/4-Inch by 5/16-Inch, 3/8-Inch by 7/16-Inch, 1/2-Inch by 9/16-Inch, 5/8-Inch by 3/4-Inch and11/16-Inch by 7/8-Inch ratcheting wrenches


Get Current Pricing, Description and Availability, Review Continues Below:

Continue reading

Protect and Monitor Your Beer Fridge With Samsung SmartThings!

I have Samsung SmartThings installed in my home.  SmartThings requires a central hub.  That hub communicates with other… SmartThings.  Loads of compatible devices using a number of protocols are available from multiple vendors.  Search Amazon for “smartthings” to see what’s out there.  After these things are connected, you can program automations or routines that define how they operate under certain conditions.  All of this is interoperable with other platforms like Google Home and Alexa.

This post is about using SmartThings to help protect and monitor your beer fridge.  To do that, I use two things – A SmartThings Hub and a Multipurpose Sensor.

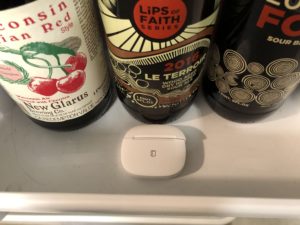
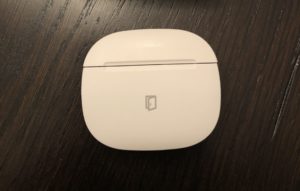
The Multipurpose Sensor can do several things including monitor temperature, monitor the open and close status and sense vibrations.A look at the Multipurpose SensorInitially I had planned to use the open/close sensing feature of this sensor for this project.  However, the space between the body of my beer fridge and the door itself was too large.  Fortunately, this sensor also detects vibration.  That means my setup was as easy as placing this in the door.  Depending on your refrigerator, you may be able to use the open/close sensor.

Monitoring Beer Fridge Access

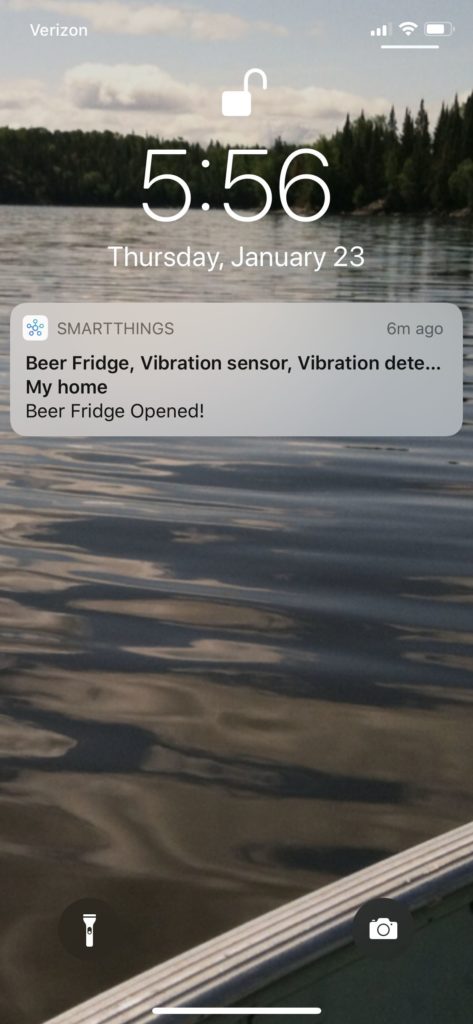
Here you can see an alert that my beer fridge was opened.  Setting that up is as easy as setting up an Automation task in SmartThings to send an alert when vibration is detected.  I found this to be a fairly reliable system although I did get some false positives.  Example, I periodically received notice when the freezer door was opened.  Playing with the sensor location and orientation could help with that.Programming this alert is straightforward.  I Just added an automation that is activated when vibration is detected.  I chose to “send notification to members” which sends a notification to users of the app.  Text message notifications are also an option.

Monitoring Beer Fridge Temperature

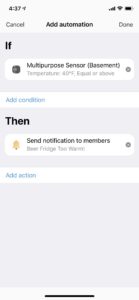
The Multipurpose Sensor also monitors temperatures.  Super handy to make sure your kegerator or keezer is doing it’s job.You can also take action based on temperature.  This screenshot shows an alert I received telling me my beer fridge was too warm.  I set the threshold temp to 10 to trigger this alert as you can see from the notification.  That’s just so I could get a screenshot, of course, you’d want to choose a reasonable temp.

Programming this alert is straightforward.  I Just added an automation that is activated when the Multipurpose Sensor goes above a certain set point.  In this case, 40 degrees.  You could just as easy write another automation to let you know if it gets too cold.  I chose to “send notification to members” which sends a notification to users of the app.  Text message notifications are also an option.

Conclusions

If you’re already using SmartThings, this is a fun and inexpensive application.  It’s easy to set up and gives you some good info.

Part of our “Homebrew Hacks” Series of Posts!  Full Lineup…


Also: Kegerator Tips & Gear | Keg Repair Part #s | Recent Keg Finds

Our Top Draft Resources!

Check our our Top Draft Related Resources

standarddraft

pinned

This post may contain affiliate links. We may make a commission when you use our links. This will never cost you extra. Thank you for supporting Homebrew Finds!

greatdeals

adamztop5

Make sure the components you use are compatible and rated for your intended application.  Contact manufacturer with questions about suitability or a specific application.  Always read and follow manufacturer directions.

toppost:stbeerfridge tag:tpr

Review: MoreBeer’s New School Kicks Hazy Pale Ale Homebrew Recipe Kit

This review is by Homebrew Finds Contributor Brad Probert.  Brad is an engineer, expert homebrewer and experienced reviewer.  Grab a link to Brad’s website at the end of this review.

MoreBeer’s New School Kicks Hazy Pale Ale Kit

New School Kicks is categorized as a Hazy Pale Ale. I don’t know if that’s an official style, but it’s a perfect description to know what’s in store for you. It’s a cousin to the uber-popular Hazy IPA, but less hoppy.

Unboxing and Kit Inventory

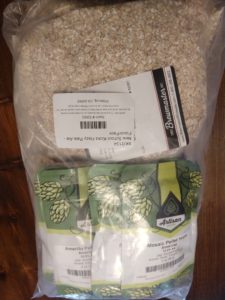
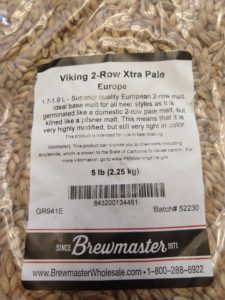
Grain: I opted for un-milled grains, as I like to crush my own to have control of the grain crush. The malts were packaged in pre-measured bags of 5 lb and 1 lb increments, from Viking Malts. Therefore it was easy to cross-reference to the recipe card to confirm I got the right amounts of everything.

Base Malts in 5 lb and 1 lb BagsViking 2-Row Xtra Pale Malt

Hops: The hops came in light-proof, thick bags, where the hops supposedly were nitrogen flushed before bagging.

Hops Packaged by Artisan

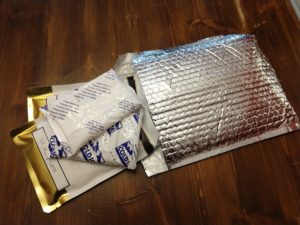
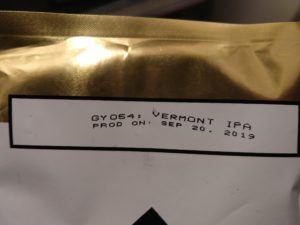
Yeast: The recipe kits from MoreBeer don’t come with a specific yeast, instead they give you a list of yeast recommendations from the different yeast vendors they carry (White Labs, Wyeast, Gigayeast, Imperial, and Omega). I hadn’t used Gigayeast before, so I opted for the GY054 – Gigayeast Vermont IPA. Gigayeast packages contain 200 billion yeast cells, which on the package they say can be used as a straight pitch without a starter to ferment 5 gallons of wort up to 1.070 gravity. So that’s a great time saver. The yeast came inside a foil-lined bubble wrap padded envelope with an ice pack. Things were still cool inside after a FedEx shipment from PA to MI- not cold, but sufficient.

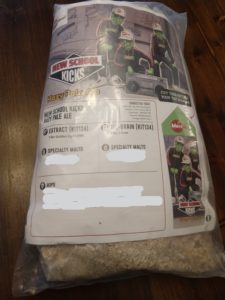
Yeast Packaged in Bubble Envelope With Ice PacksFresh GigaYeast Package- Only 3 Weeks OldRecipe Card and Tap Handle Insert.  Recipe Details Redacted.

Easy to Follow Recipe Card + Tap Handle Insert: In addition to the ingredients, there was a recipe card with basic brewing directions, a cut-out shape to go with the MoreBeer custom tap handle, and a sheet of basic brewing process tips.


Get Current Pricing, New School Kicks via MoreBeer, Review Continues Below

Continue reading

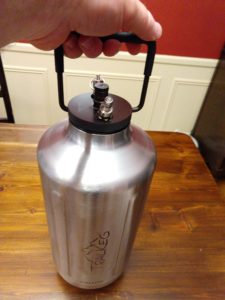
Hands on Review: TrailKeg 1 Gallon Growler, Regulator & Tap

This review is by Homebrew Finds Contributor Brad Probert.  Brad is an engineer, expert homebrewer and experienced reviewer.  Grab a link to Brad’s website at the end of this review.

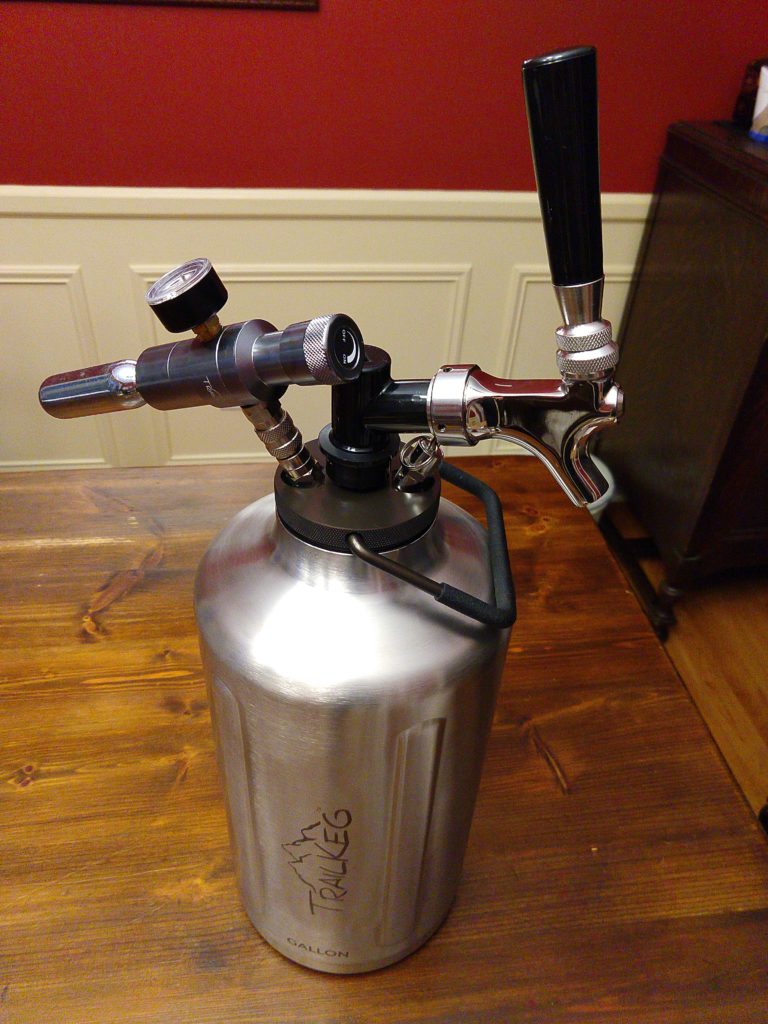
TrailKeg 1 Gallon Pressurized Growler

I abandoned bottling quite a while ago for the same reason so many do- kegging is so much easier. And draft beer is much more rewarding/special than bottles when drinking at home, or hosting a party. Of course taking that beer to a party isn’t as simple as grabbing a few bottles and heading out the door, though. But like every problem in life that presents itself, solutions are found.

At breweries, their solution is the growler. You fill up your half gallon glass jug with your favorite beer, they put a lid on it, and you take it home. But this has limitations. Akin to pouring a glass of beer and then setting it in the fridge to drink later, beer in growlers lose carbonation and go stale tasting after a few days. The solution to this problem is the pressurized growler.

TrailKeg makes pressurized growlers. They come in half gallon and one gallon size. The half gallon is smaller and lighter, but only nets you about 4 beers. That works if you’re taking a beer to share with a friend or offer small tastings at a party. But the full gallon growler with its 8 beers is a much more social size. You’re obviously not going to fuel the whole party with that, but when the host tells you to bring a 6-pack of your favorite beer to share, you get bonus points.

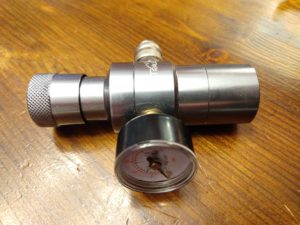
What makes pressurized growlers “pressurized” is the fact that they have ports on them to let you pressurize with small CO2 cartridges. The small 16 gram cartridges contain enough CO2 to keep your beer pressurized and dispense all of your beer. Effectively, they turn your growler into a mini portable keg. The mini CO2 regulator has a tiny pressure gauge, and after you hook it up, you turn a pressure adjustment knob to dial in the serving pressure you want.

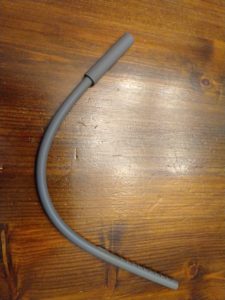
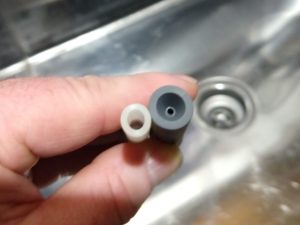
PerfectPour Dip TubePerfectPour Dip Tube Opening Comparison

And speaking of serving pressure, TrailKeg has an optional add-on accessory which was a dip tube with what they call a PerfectPour, which seems to be unique in the industry. It’s a cylindrical length of silicone that slides on over the bottom of their regular dip tube, and has a really small opening in it. With such a small hole, you have to be certain your beer doesn’t have hop bits floating around in it, but the concept solves a common problem on these small pressurized growlers. In the keg you probably carbonate at 10 psi or higher, but if you go over 5 psi in these growlers you get a foamy mess. With the PerfectPour restriction of the small hole, you can dispense out of your growler at the same pressure as you carbonate in your keg. No compromise.

Since your “mini keg” isn’t in your kegerator, it will get warm just sitting on the counter or tabletop. So TrailKeg made their growler insulated, by making it double-walled with an air cavity in between. As you may or may not know, air is an excellent insulator. For it to be effective, you have to trap the air and not let it move around, which is what you get when you hear “double walled insulated”. By trapping the air in between an inside layer (where your beer is) and an outside layer (where the warm air is trying to ruin your beer), you get great insulation. TrailKeg says their design keeps your liquid inside cold for 24 hours.

In transport mode

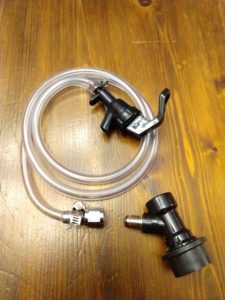
To get the cold beer out of this growler, the same lid that has the CO2 port also has a ball lock disconnect post, just like a Corny keg. This lets you keep it well sealed to avoid accidental spillage when transporting it to your party, and then you just pop on the ball lock fitting and are ready to go. Within the package that comes with the lid, TrailKeg has a cool set-up with a tap directly connected to a ball lock fitting. This completes the mini keg experience with a “kegerator on the go” delivery of your draft beer direct from an actual tap.

Continue reading

Convert Your Chugger or March Pump to Tri-Clamp Fittings

convert chugger march pump to triclamp

Convert Your Chugger or March Homebrew Pump to Tri-Clamp Fittings

Upgrading your Chugger or March Pump to Tri-Clamp style disconnects is as easy as getting the right fittings.

Generally speaking, you’re going to be looking for a tri-clamp to FPT/Female NPT threading. Many pumps have 1/2″ threads and many homebrewers standardize on 1.5″ TC.

Keep Reading, Upgrade Your Pump!

Hands on Review: Weekend Brewer 5L Mini Keg Growler + Ball Lock Lid, Micro Regulator & Tap

This review is by Homebrew Finds Contributor Brad Probert.  Brad is an engineer, expert homebrewer and experienced reviewer.  Grab a link to Brad’s website at the end of this review.

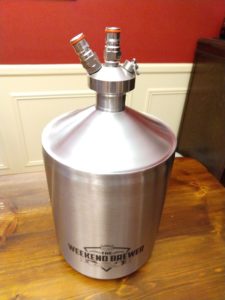
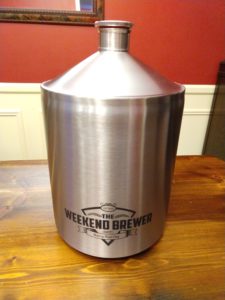
Weekend Brewer 5L Mini Keg Growler

You might wonder what a “Mini Keg Growler” is. The name tells you that it’s for draft beer. The Weekend Brewer obviously came up with that name as an indication of the melding of two functions together. One is the transport of draft beer from point A to point B- Growler. The other is using it to store [small amounts of] beer for dispensing in a draft system- Mini Keg.

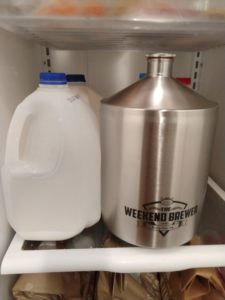
Size comparison vs a 1 gallon milk jug

The 5L Mini Keg Growler is about the size/proportions of a gallon milk jug. It has a small screw-on lid with a silicone seal, for use as a growler. It’s made of stainless steel to make it much more durable than a glass growler. It’s not insulated, which has the drawback of not being able to keep itself cold sitting out on the counter. However, by not having a double wall construction with a barrier of air in between, that means its overall size is smaller and hence much friendlier to sit inside a refrigerator or cooler. To get something in this size in an insulated configuration, you’d have to decrease the amount of beer you could fit in. So they decided that bigger is better. There is a neoprene sleeve you can buy as an add-on if you want to go that route.


Get The Gear, Review Continues Below


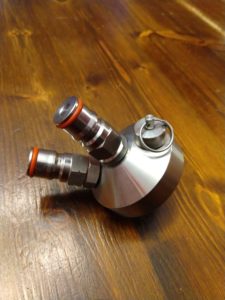
To use as a Mini Keg, they sell lids that have dispensing hardware built into them for putting CO2 in and getting beer out. The most keg-like of these lids is a small stainless steel machined lid that screws in to replace the regular lid, and has two ball lock posts and Pressure Relief Valve. Yes, exactly like your Corny Keg. With the ball lock fittings, you can stick it in your kegerator and hook up your normal gas and liquid lines to use it for small volume brews (5 Liters is just over 1.3 gallons).

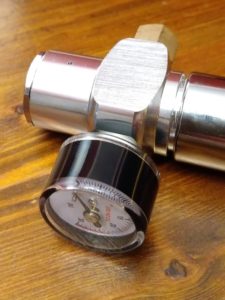
Growler with Ball Lock Lid InstalledMicro CO2 Regulator 30 psi Gauge

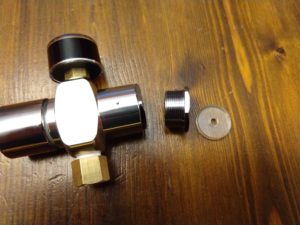
Being smaller than a full-sized homebrew keg, you can more easily take it with you to a party and hook up various mobile options to supply CO2 in and get the beer out. The micro regulator they sell screws onto a threaded gas ball lock disconnect and then you can attach various size CO2 cartridges. It has adapters so it can take 3/8” threaded 16-gram cartridges, or the larger 5/8” threaded 74-gram cartridges. The 16 gram size has plenty of CO2 for dispensing 5L of beer. But it can also be handy to have the flexibility of using the regulator together with a Corny keg if you’ve got bigger plans.

Hands on Review

The growler has a brushed stainless external surface to help it stay looking good and not be prone to smudging and fingerprints, and it looked good. The opening size of the growler seemed a bit on the smaller size when it came to washing it out afterwards and being able to do a good visual inspection inside, but as a trade-off, the smaller size made it much more manageable when using it as a growler and trying to pour beer directly from it into a glass.

The dual ball lock top was excellent. This provides a great amount of flexibility in options for how to get CO2 in, and how to get the beer out. Notably, if you’re going to do a fill/vent cycle a few times with CO2 to reduce Oxygen in the headspace, you can kill a 16 gram cartridge pretty fast (learned through personal past experience). Having the option to just hook this up to my keezer CO2 bottle supply, I was able to work through this and keep the small cartridge CO2 just dedicated to serving beer at the party. And I’m not a 1-gallon batch brewer, but if you were, this dual ball lock lid lends itself to the various different low oxygen closed transfer processes out there.

Picnic Tap and Liquid Ball Lock in Dispense Kit

I did have some issues with air pickup in the dip tube while dispensing. I was running a lower pressure of about 4 psi, but the beers were coming out about 2/3 – 3/4 foam. I tried using different dispensing options like a long run of tubing with a picnic tap, but still had issues. If I ran a very low pressure of 1-2 psi, I could get the foam down to a manageable ~20-25%, with a very patient pour. However, I found I could eliminate the foaming issue by replacing the harder plastic pick-up tubing inside with a softer silicone tubing. The silicone was able to conform more to the fitting on the inside of the lid and make a better seal, preventing it from sucking in air on its way out of the growler. I highly recommend you go this route (I passed this suggestion/finding along to the owners of Weekend Brewer, and they were going to explore this more, as well).

Conclusions

Overall, the Weekend Brewer Mini Keg Growler creates an interesting proposition for those that are looking to get into 1-gallon batch brewing, but want to keep their current kegerator/keezer set-up. And the versatility of the double ball-lock lid provides lots of options to allow you to dual-purpose these kegs and take them with you, as well as use them as low oxygen fermentation or transfer vessels.

Get the Gear:

Also: Kegerator Tips & Gear | Keg Repair Part #s | Recent Keg Finds

Our Top Draft Resources!

Check our our Top Draft Related Resources

standarddraft

More Photos

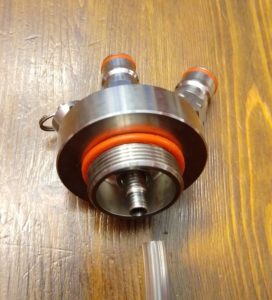
Double Ball Lock Lid- InsideMicro Regulator Customizable Adapter for Different CO2 Cartridges Mini Keg Growler Screw-on Lid with Silicone Seal Ring

More Growler Reviews!

Convert Standard Growlers to Swing Top!

Growler Tips!


Growler Tips & Resources:


Special Thanks to The Weekend Brewer for providing the unit used for evaluation in this review.

By Brad Probert.  Check out Brad’s website – beersnobby.com

pinned

This post may contain affiliate links. We may make a commission when you use our links. This will never cost you extra. Thank you for supporting Homebrew Finds!

greatdeals

review:growler5lwebrewer

Hands on Review: Torpedo 10 Gallon Ball Lock Homebrew Kegs!

Updated: October 3, 2024

Larger 10 and 15 gallon homebrew kegs have been very hard to find… for years.  There have been a couple sources, eBay was a best bet, but that was touch and go at best.  When you could find one, prices were… outrageous.  $300++ for a used 10 gallon keg would not be uncommon.  Again, that’s IF you could find one.

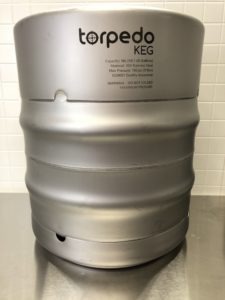
Great news homebrewers…. MoreBeer has introduced 10 and 15 gallon homebrew ball lock kegs via their Torpedo line of kegs and accessories.  These are BRAND NEW kegs that are (hopefully) readily available at a reasonable price.

Why a larger 10 or 15 gallon homebrew keg?

The first and most obvious answer is for large batch brewers.  If you brew 10 or 15 gallon batches, it sure would be nice to have a keg that fits your entire batch.  Even if you don’t brew 10 gallons, you may want to brew a couple 5 gallon batches of the same beer (much like professional brewers do) and keg it in a single keg.

A less obvious answer to the question is… to use as a fermenter.  Kegs are well-built stainless steel vessels that are pressure capable.  You can easily move them around and they are built to be bumped around a bit.  Using a keg opens up some really interesting possibilities…. fermenting under pressure with a Spunding Valve [See: Build a Spunding Valve! – How and Why], naturally carbonating in the fermenter/Krausening (again with the aid of a Spunding Valve), transferring under pressure, oxygen-free (or near oxygen-free) transfers, re-purposing expelled CO2 and more.

A third application is similar to the second… Use as a UniVessel.  Ferment and serve in the same vessel.  Save time and simplify your process.

Limited Time DEAL on Used 15 Gallon Torpedo Kegs!

Torpedo Keg | Ball Lock Keg | Stainless Steel Corny Keg | 15 gal. KEG815

Torpedo Keg | Ball Lock Keg | Stainless Steel Corny Keg | 15 gal.

More Info

From the product description, check product page for current description, price and availability:

This used Torpedo ball lock 15 gallon keg has the same great features and superior quality as its predecessors, and will allow large-scale homebrewers to fit their entire batch into a single keg. These kegs are laser welded by an ISO certified commercial keg manufacturer, so you won’t find any nooks or crannies for contaminants to hide. Made with rolled stainless steel handles that are comfortable to grab. “In” and “Out” are etched near the keg posts for a quick and mistake-free set up when connecting lines in a refrigerator or kegerator. The 15 gallon kegs can be stacked on top of each other with ball lock fittings still attached.
Specifications:

Total Capacity: 15.2 gal.
Max Pressure: 130 psi
PRV Rating: 85 psi
Height: 24.75″
Diameter: 16.05″
Made from 304 Stainless Steel
Shipping Box Dimensions: 25-3/4″ H x 18″ L x 18″ W
Weight: 32.16 lbs
These kegs are used but in excellent condition. I have a good number of these but when they are gone they are gone and tough to find. They have only been rinsed and examined during refurbishing so Corny Keg recommends that you clean and sanitize before use. The kegs pictured are stock photos of new kegs but these used kegs look great and will perform like new or we will take them back.


  • cornykeg,com has a limited number of used 15 gallon Torpedo Ball Locks.
  • These are selling for $175. That’s a bargain for a 15 gallon keg!
  • Quantities are limited, check the product page to see if you can still get in on this.

Used Torpedo 15 Gallon Ball Lock Corny Keg


Check Prices, Review Continues Below

Continue reading

Hands on Review: BrewBuilt Icemaster 100 Glycol Chiller with Stainless Bulkheads

Thanks to HBF Reader Nate for conducting this review.  Nate is a long time HBF Reader, serial tipster and advanced homebrewer

BrewBuilt Icemaster 100 Glycol Chiller

If you’ve really jumped into the hobby of homebrewing you’ve probably struggled with ways to keep your fermenting beer dialed in to your desired fermentation temperature.  All in hopes of making that perfect beer.  If this doesn’t describe you, it probably will in the near future.

The fact is… temperature plays a major role and has a significant impact on the finished beer.  A few degrees either way can make a big difference.  I know for my German Hefeweizen I have on tap using WLP3068 yeast if you ferment at around 62 you don’t get near as much banana in the aroma/flavor as you would if you fermented at 60-72.  Fermentation temperature is important!

From starting out in buckets and keeping them in closets/basement, to swamp coolers, to modifying deep freezers to control fermentation temp, there are all sorts of creative ways to control temperature.

When folks upgrade to conical ferments (best investment ever by the way!), temperature control becomes more complicated.  Do I have room for a fridge to hold my conical?  Should I build a larger collar around my keezer and then lug my large and heavy conical in and out? Do I buy an AC unit and temp controller and build a fermentation chamber? Or maybe another alternative.

With all these questions there are now a few different options on the market for folks who have a little money to spend to really take their game to the next level.


Get the Current Price, Review Continues Below

BrewBuilt® IceMaster 100 | Glycol Chiller | Bulkhead Sets for 5 Fermenters | 2600btu | 110V | 8 Gal. Tank Capacity GLY353 – via MoreBeer


Icemaster 100 vs Kegland G40 vs Ss Brewtech Glycol Chiller

Before I purchased this bad boy, I did a lot of research. I looked at the Kegland G40 through Williams Brewing, but decided against it because of the need to purchase a transformer and the space it takes up.  It also seemed more tuned to cooling beer lines.

I looked at Ss Brewtech Glycol Chiller, but for what I want to control (3-5 conicals). their 1/5hp just wasn’t going to do it and their 3/8hp is another 500 bucks!

I also looked at Penguin and others but, in the end, their costs were all closer to 1k+ which for what I was wanting was out of my price range,

The price and features made my choice clear and I decided on the Icemaster 100.

Hands on Review

So the Glycol Chiller got to my house in a week or less.  The setup was well packed and arrived to me in perfect condition.  No damage, not even a cosmetic issue.  This was something that concerned me based on other reviews I’d read.
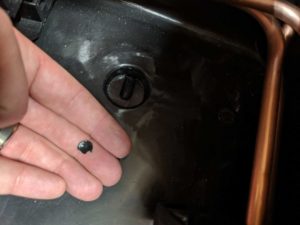
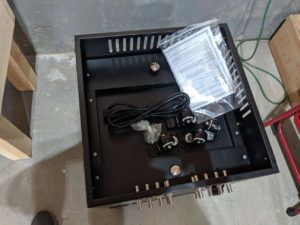
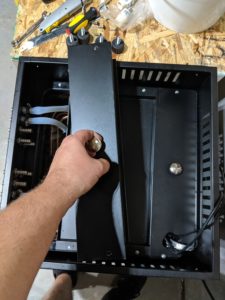
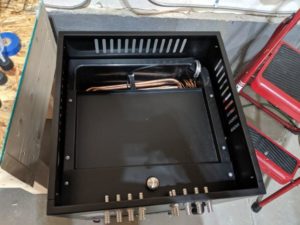
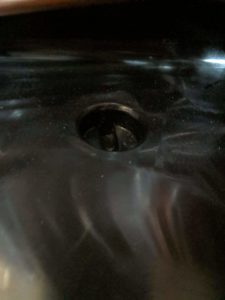
The one thing I will mention is double check and make sure the plastic piece that was drilled out for the drain hole at the very bottom of the tank is removed.  In the picture you can see how mine was still in there.  I think is why some folks have had issues with draining (based on other product reviews). My theory for people struggling with that problem is that this plastic piece wasn’t removed and made it clogged or partially clogged the drain.  I had no leaks or issues after removing the little plastic piece and was able to drain it using the plug in the back.  The overall factory inspections/QA could have been better, now you know this tip.
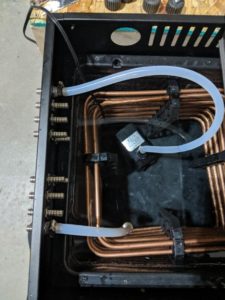
Next up, getting pumps and tubing ready. You need a piece of tubing to connect to the inside of the 3/8″ stainless steel bulkhead,  That tubing connects to your pump in the bottom of the water pan. You will need 3/8″ ID tubing for this part of the process so make sure you have the lengths you want/need.
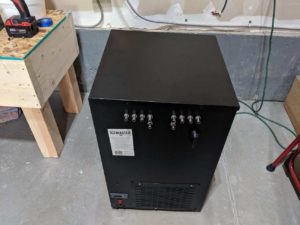
Next you connect lines outside the chiller and take those up to your coils on your conical. I used the left side for my outputs, and the right side for my returns.  Then, of course, on the inside of the bulkhead you need tubing to take the liquid back into the tank.  This completes the circuit.

MoreBeer has a good description of the connections required, per fermenter…


In order to hook up the Icemaster to your fermenter or tank’s cooling system, you will need 4 lengths of tubing. All tubing connections should be secured with hose clamps.

Length 1: Submersible pump outlet to inner barb of 1st bulkhead
Length 2: Outer barb of 1st bulkhead to cooling system inlet
Length 3: Cooling system outlet to outer barb of 2nd bulkhead
Length 4: Inner barb of 2nd bulkhead to Icemaster resevoir (should drain freely, no connection necessary)


A couple things worth noting….

  1. You’ll need one pump per fermenter.
  2. The Icemaster 100 Glycol Chiller has a number of applications and compatibility with a variety of systems. Coolstix, Ss Brewtech Fermetners, Spike Conicals, Grainfather, Speidel and more.  Check the product page for a complete list.

As far as pumps go, MoreBeer has a number of options.  You can also source your own pump.  If you do that I would recommend a pump that has a strong output and height ability. The bigger the better.

It’s Quiet!  One item I was really surprised by is the sound. This thing is so quiet! I have it in my garage and if I’m out there tinkering around, I don’t even hear it really running.

Caveats and Things to Consider

Condensation: You will want to consider condensation on your fermenter.  As the chiller cools it will create condensation.  A pool of water on your floor isn’t fun.  An insulation sleeve can help.  There are some ready made options out there, you can also make your own.

Displays in Celsius:  Not a huge deal, but I wish the controls were in Fahrenheit.

Conclusions

So far, this sucker has been quite impressive to me.  I can dial in fermentation temps for my conicals and cold crash as necessary.

Get the Gear

BrewBuilt® IceMaster 100 | Glycol Chiller | Bulkhead Sets for 5 Fermenters | 2600btu | 110V | 8 Gal. Tank Capacity GLY353 – via MoreBeer

Documents: Icemaster 1000 setup and user guide

More Photos
Details and Specifications

From the product description, check product page for current description, price and availability:

The Icemaster is designed to cool fermentations in small vessels. It can be used with any vessel that has a glycol jacket or submersed cooling coil/rod. For each vessel you want to cool you will need to buy one of our BrewBuilt™ Chilling Pump Kits. Each tank is able to be separately temperature controlled. Each Glycol Pump Kit includes a submersible pump that is placed in the cool bath of this chiller along with a digital controller. The digital controller includes a thermal probe that should be inserted into a thermal well in your vessel or can be taped to the outside of the vessel if you don’t have a thermal well. The digital controller then measures the temperature of your tank and turns the submersible pump on or off to cool to your desired set temperature. Up to four tanks can be controlled separately with one Icemaster and four BrewBuilt™ Chilling Pump Kit (GLY355).

Compatibility
The Icemaster can be used with any fermenter that has a built in cooling jacket, added Coolstix, or a submersed cooling coil. It works well as the cooling source for the following sytems and fermenters.

  • Coolstix – Coolstix can be added to a wide range of carboys, fermenters, and tanks and the Icemaster works really well in combination. Each Coostix Complete Kit comes with a pump kit and controller.
  • Ss Brewtech Fermenters and Brites with optional FTS Temperature Control Systems – Because FTS systems include a pump and controller you will not need to buy a separate Glycol Pump Kit.
  • Spike Conical with Optional Cooling Package – Because the optional Spike cooling system includes a pump and controller you will not need to buy a separate Glycol Pump Kit.
    Speidel Tanks with Optional Cooling Jackets – You will need one Glycol Pump Kit for each tank.
  • Grainfather Fermenters – Grainfather fermenters have standard cooling jackets. You will need one Glycol Pump Kit for each fermenter
  • Blichmann Fermenators with Optional Cooling Coil – You will need one Glycol Pump Kit for each Fermenator.

Capacity
It is always difficult to determine exactly how many tanks can be chilled at one time as it depends on what is happening in each tank, if the tank is insulated, and what the ambient temperature is. Cold crashing always requires the most energy and requires tank insulation. We have experimented with capacities and can provide this general guide based on a 75 degree ambient and neoprene insulation. Neoprene a modest amount of insulation so you would obtain better results using Armaflex or a higher R rated insulation. If only controlling fermentation temps the capacity would be higher. Four BrewBuilt™ Chilling Pump Kit (GLY355) is the maximum that will fit in the Icemaster. We are working on smaller glycol pump kits, where the pumps have smaller footprints, so the Icemaster right now has the capacity to use 5 pumps through the bulkhead fittings.

Cold Crashing capacity at 75F with neoprene insulation (double for fermentation temperature control):

2 – 1BBL (31 Gallon) Tank with neo
3 to 4 – 1/2BBL (15-20 Gallon) Tanks
4+ – 10-14 Gallon Tanks
4+ – 5-7 Gallon Tanks

Set Up
In order to hook up the Icemaster to your fermenter or tank’s cooling system, you will need 4 lengths of tubing. All tubing connections should be secured with hose clamps.

  • Length 1: Submersible pump outlet to inner barb of 1st bulkhead
  • Length 2: Outer barb of 1st bulkhead to cooling system inlet
  • Length 3: Cooling system outlet to outer barb of 2nd bulkhead
  • Length 4: Inner barb of 2nd bulkhead to Icemaster resevoir (should drain freely, no connection necessary)

Specifications:

  • Tank Capacity: 30L/8 Gal. Water Capacity
  • Compressor: 3/8 HP
  • Cooling Capacity: 950 Watt/3200btu/.26 tons
  • Refrigerant: r134a
  • Voltage: 110V (3.6 amps)
  • Dimensions: 410mm x 410mm x 660mm
  • Includes 10 stainless bulkheads with 3/8″ OD barbs
  • Wheels included


More MoreBeer Reviews+Related:

morebeer.com reviews

More Homebrew Finds!

pinned

This post may contain affiliate links. We may make a commission when you use our links. This will never cost you extra. Thank you for supporting Homebrew Finds!

greatdeals

review:icemaster tag:tpr

Hands on Review: Blichmann BrewCommander Controller!

This review is by Homebrew Finds Contributor Brad Probert.  Brad is an engineer, expert homebrewer and experienced reviewer.  Grab a link to Brad’s website at the end of this review.

Blichmann BrewCommander Controller

Controllers for an electric brew rig are surprisingly expensive. They seem to have such a simplistic job- control temperature and/or modulate output power. But of course that job is the heart of an electric brew system. It’s what allows you to have a more stress-free brew day because you can set the temperature and then go do something else. It’s what enables you to brew inside with electric and not have to battle the weather, or have to drag equipment from a storage space inside to a brew area outside. So I guess even though they do a job that’s easy to describe, the value they provide to the brew day is pretty significant. And thus justify their price tag with that.

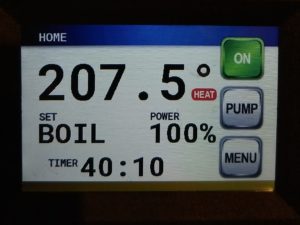
As electric brewing continues to grow in popularity, more controller options become available. Blichmann has had a controller out on the market for a while, but they were long overdue for an upgrade. The BrewCommander, however, is more than simply an upgrade, as it leapfrogged itself with more features and came out with a lower price. From a features standpoint, it distinguishes itself from other stand-alone controllers with features like an LCD touchscreen and delayed start timer that previously was only available with built-in controllers on all-in-one electric brew systems. The BrewCommander comes in a version to control your gas-fired rig, but my review will focus on their electric controllers.


Compare Models, Prices and Availability, Review Continues Below:


Continue reading

Hands on Review: Blichmann Engineering Riptide Brewing Pump Upgrade Kit – Upgrade Your March or Chugger Pump

July 7, 2024

This review is by Homebrew Finds Reader Benji S.  Benji has been brewing for 10 years.  His favorite style is Festbier.  He’s an all grain brewer and member of WIZA (Whidbey Island Zymurgy Association).  Check him out on Instagram at neon_hop

Tell anyone that you spend hours cleaning as part of a hobby, and you’ll probably get a few odd looks. Unfortunately this is our reality as Homebrewers. Planning, prepping, cleaning, and waiting take up large percentages of any given batch. We often chase new ingredients, techniques, equipment, and short cuts in an effort to reduce the time we spend on these areas. Sometimes introducing new equipment into your process can make some parts of these tasks easier, while introducing new steps to others.

Pumps help move around lots of liquid in a short amount of time, reducing the need to lift heavy kettles or pots. They also introduce some additional planning needed for connecting vessels in a loop of hosing and cleaning after use. This has essentially been the summary experience I’ve had with my Chugger X-Dry [Hands on Review]. In the never ending quest for reducing the time and effort needed to use it, I looked at what changes I could make to my setup to make using it even simpler.

Blichmann Engineering is well known for high quality and well designed equipment targeted at Homebrewers. It should be no surprise then that their Riptide pump is a fairly feature packed model compared to others on the market. Particularly their TC clamp attached pump head with built in flow control and priming valve. In recognition of their audience, Blichmann also produces an upgrade kit that offers these same features to anyone with a Chugger or March pump.

Upgrading my Chugger X-Dry with their kit seems like a perfect way to take a good pump and make it even better, hopefully shaving some steps off of the prep and cleaning process in the meantime.


Criteria

My original criteria when looking for a pump were largely satisfied by the Chugger X-Dry, but there were a couple of criteria that were lacking, namely:

  • Head assembly should be fairly easy to take apart to aid in cleaning]
  • Flow control valve for use when sparging
  • Easy and intuitive to prime and get started

As the Riptide conversion kit is meant to solve many of these things, it made a natural candidate for trying out an upgrade to see if I could improve the usability experience. Additionally, my experience with the X-Dry suggested it was fairly easy to get into a state where it was cavitating. My hope was that the purge valve would help alleviate, or solve, this issue.


Compare Models, Prices and Availability, Review Continues Below:

Note that links could potentially show Riptide Pump, Riptide Upgrade and related Riptide parts and equipment


Continue reading

Hands on Review: Brewfather App! – Recipe Formulation, Calculators & Brew Day Tools

Updated: November 20, 2024

This review is by Homebrew Finds Contributor Brad Probert.  Brad is an engineer, expert homebrewer and experienced reviewer.  Grab a link to Brad’s website at the end of this review.

Limited Time Deal… Black Friday Sale!

brewfather black friday sale

  • Brewfather very rarely does discounts.  As of this posting, for a short time, Brewfather is offering a whopping 25% off premium when you use coupon code SAVE25
  •  This ties the best deal we’ve ever seen on Brewfather.
  • Redeamable only on the webapp, will not work on smart phone apps.
  • Check Brewfather to see if you can still get in on this.
  • Are you a TILT Owner? – Brewfather directly Integrates with TILT and more.

25% Off Brewfather! – remember promo code SAVE25


Brewfather App

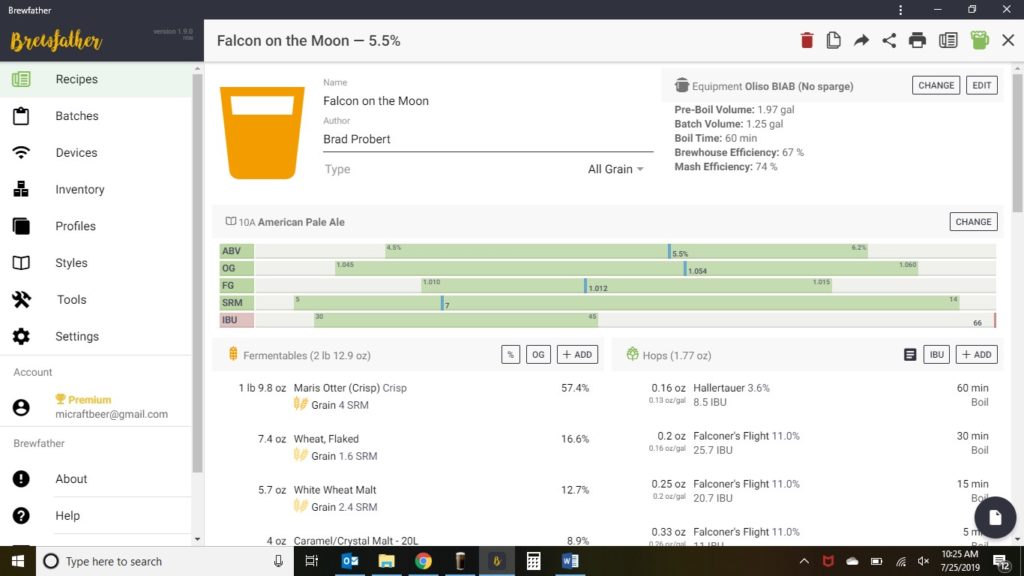
Depending on your brewing personality, you might take notes on paper, do no recipe calculations at all, or use brewing software. I started using BeerSmith when I moved to all-grain brewing, since there were more variables to control when making a recipe and more process steps to keep track of. I’ve been using BeerSmith 2 for the past 5 years, and that’s established my baseline expectations of brewing software. That’s the perspective used when I evaluated the Brewfather software.


Give it a Try!

Brewfather offers a free full feature trial.  After the trial period, you’ll still have access via a limited, non-expiring account

Our 10 Most Recent Reviews | Great Deals – Our Last 50 Finds


Continue reading

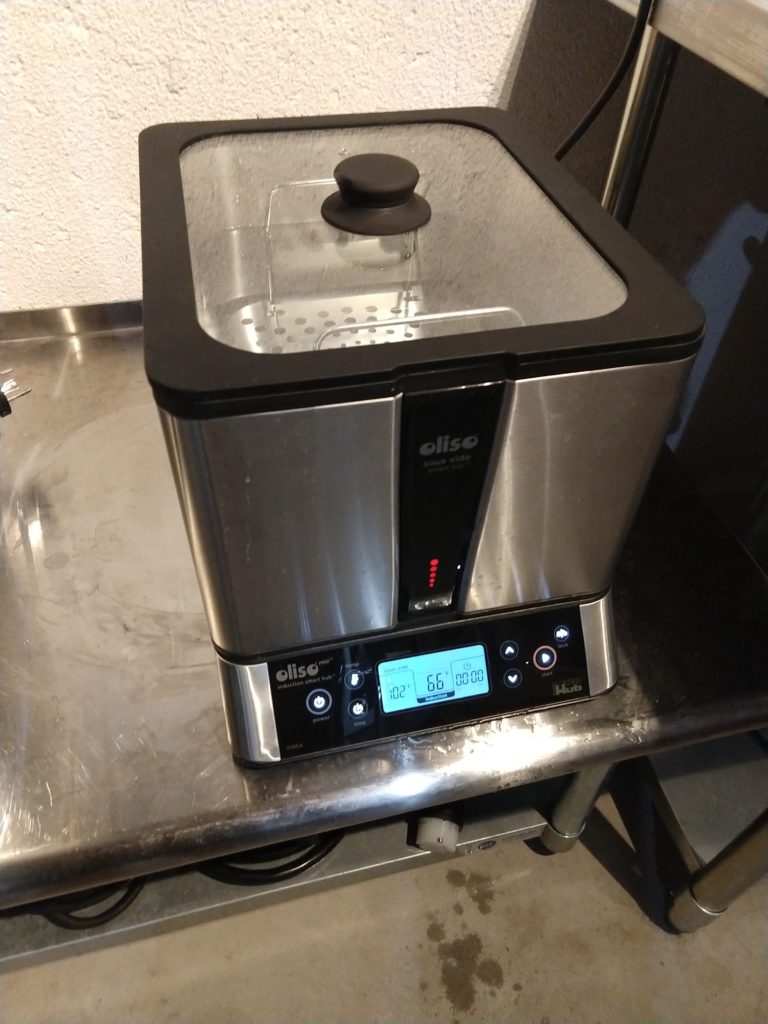
Hands on Review: Oliso SmartHub for Small Batch Brewing

This review is by Homebrew Finds Contributor Brad Probert.  Brad is an engineer, expert homebrewer and experienced reviewer.  Grab a link to Brad’s website at the end of this review.
Oliso SmartHub for Small Batch Brewing

If you don’t know what a sous vide machine is, that’s forgivable. I’ve only met one person that’s used one. He raved about it so much that I had to investigate it. “Sous vide” is French for “under vacuum”. In sous vide cooking, you vacuum seal your steak (or whatever kind of food) in a bag, then place it in a pot of water that’s controlled to a specific temperature. The sealed bag keeps the meat from getting wet in the cooking water, and lets all the juices stay inside and not dry out. Depending on the “doneness” you want, you set the temperature of the water, throw your pouch in and then it cooks to the exact level you want.

Now getting us back to homebrewing, Oliso has a sous vide cooker that has features that support homebrewing. They combined the temperature control features of a traditional sous vide machine with the high power capability of an induction cooktop. The induction cooktop functions as the base of the machine, and when you set the SmartHub top on it, electrical contacts are made that change the induction top over to a temperature control machine. The tub has a built-in sensor that it uses to monitor the temperature of the liquid and adjust the power level accordingly.


Check Current Price, Specs and Availability:

Oliso SmartTop and SmartHub Induction Cooktop Sous Vide Cooking System, 11 Quart Capacity affiliate link, note that multiple variations of this product may be available, as such a different version may appear at this link


Related Resources and Reviews

Continue reading

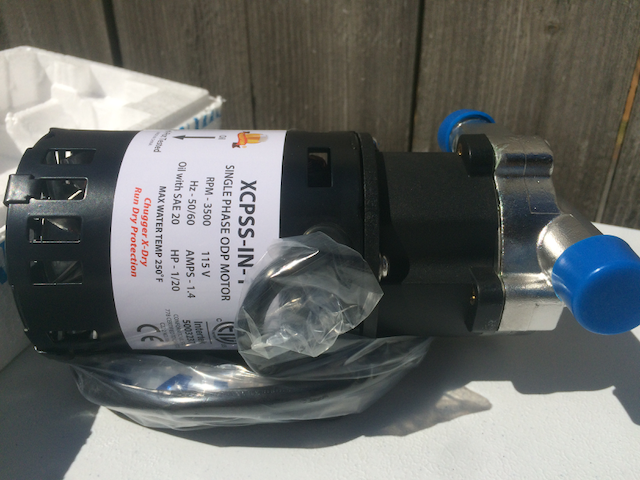
Hands on Review: Chugger Pumps X-Dry Series Homebrew Pump!

Update: July 19, 2024

This review is by Homebrew Finds Reader Benji S.  Benji has been brewing for 10 years.  His favorite style is Festbier.  He’s an all grain brewer and member of WIZA (Whidbey Island Zymurgy Association).  Check him out on Instagram at neon_hop

Making beer is all-together extremely fun, rewarding, messy, and labor intensive. Want an example? Look no further than the need to transfer large volumes of liquid, at varying temperatures, between and through multiple containers. Mashing, sparging, boiling, racking, and cleaning all require gallons of liquid transfer. Liquid is both heavy and resistant to being easily moved around en masse. Introducing new equipment into your brew day can often mean finding new and interesting ways you now have to fight against both of these obstacles. Having recently acquired a Spike CF5 conical, I’ve found myself in this exact position, often wondering “How do I even fill and clean this thing effectively?”. In terms of equipment, adding a Brewing pump to the equation has become the de facto ways to help answer these questions.

My Homebrew Pump Selection Criteria

I’ve been brewing for well over a decade, but using a pump in the process is new to me. Approaching a new piece of equipment requires some evaluation of what you want it to do, what expectations you have for how it will work, and what your budget will be to balance against. The feature set I arrived on during my search largely came down to this:
Stainless Steel head to reduce the chance for plastic pieces from rubbing of the propeller
Head assembly should be fairly easy to take apart to aid in cleaning

  • 1/2” NPT connections on the ports, as I already had 1/2” connectors to convert them to quick disconnects
  • At least 3” of cord length as the power outlets tend to be a bit far away where I typically brew
  • Needs to be 115v
  • Price range of $100-150
  • Targeted Uses (in order of importance): CIP cleaning of my conical, transferring from the kettle to the conical, fly sparging

Compare Prices, Review Continues Below

This seller on eBay can have good deals on Chugger pumps. Price and availability vary.

Continue reading

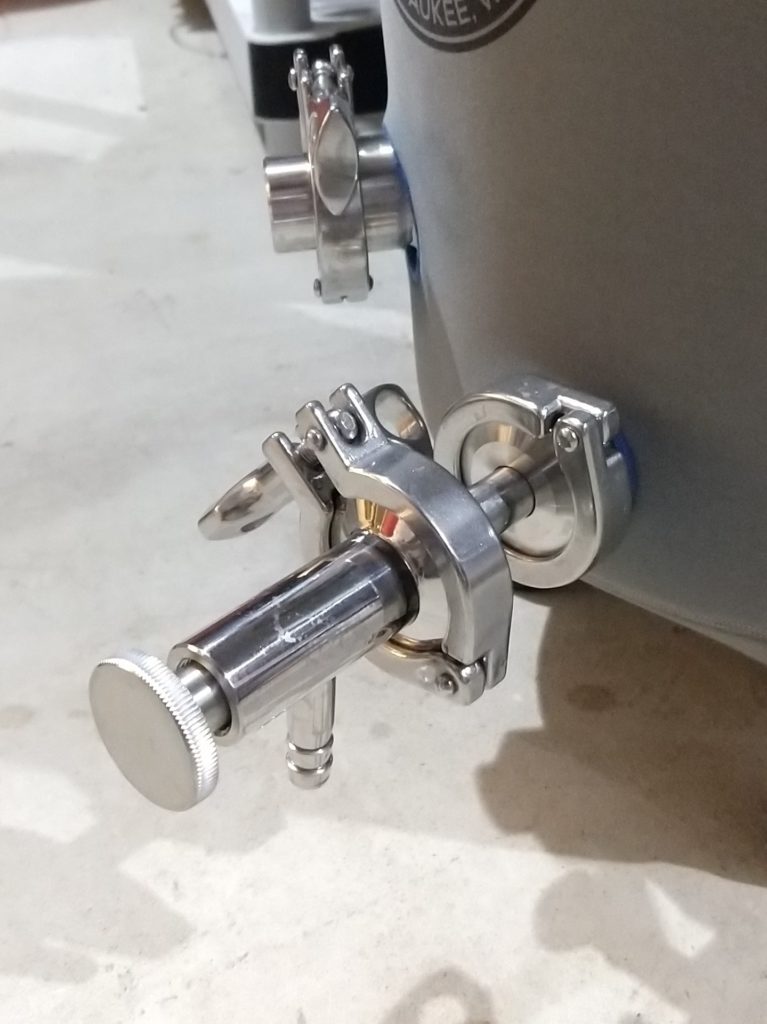
Hands on Review: Brewers Hardware Tri-Clover Sample Valve

This review is by Homebrew Finds Contributor Brad Probert.  Brad is an engineer, expert homebrewer and experienced reviewer.  Grab a link to Brad’s website at the end of this review.

Brewers Hardware TC Sample Port

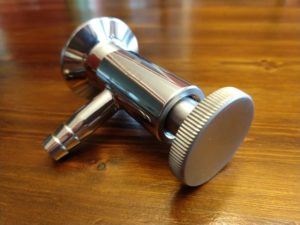
There are different types of valves, suited for different purposes. On a fermentor, it is useful to have a valve that has the ability to pull small samples for gravity readings or taste samples, but also able to flow well when it comes time for transfer to a keg. The sample port valve provides fine adjustment to flow rate, allowing you to vary between a slow trickle for pulling a sample or a higher flow rate for gravity transfer to fill a keg.

Valve Handle with 2 O-rings and Silicone Seat

The sample port valve has a fine pitch thread to allow for small adjustments to the opening of the valve. With the Brewers Hardware sample port valve, you can feel while turning the knob that the threads and the stem of the valve are machined to tolerances for a precise fit and without slop or wobble. The valve stem has 2 O-rings to keep beer from sneaking out or air sneaking in. And the tip of the valve has a silicone bumper that gets compressed onto a seat for a secure fit to prevent leaks when closed. Silicone is non-porous, making it easy to clean and not harbor stow-aways from one ferment to another. And its elasticity allows it to conform to the valve shape for a good seal, yet spring back so it can be used over and over again to seal and unseal.

The overall quality of the valve from Brewers Hardware was top-notch. The surfaces were smooth-polished stainless steel, and the ridges on the adjustment knob were cleanly machined for grip with no sharp edges. Turning the adjustment knob, it felt precise with no slop or wobble, with a tight seal. It’s difficult to give justice to the fit & finish of the part with just words or a couple pictures, but it really stands out.


Continue reading

Three Ways to Convert a Keg Into a Fermenter

The containers we call Ball Lock and Pin Lock Kegs come from the soda industry.  Also called Cornelius Kegs, Corny Kegs and Corney Kegs, they were originally intended to store and distribute soda pre-mix.  The big soda companies decided on different style containers for their pre-mix.  Pepsi landed on the Ball Lock style while Coke uses the Pin Lock style.

Homebrewers have since re-purposed these as homebrew beer kegs. It makes sense. These high quality stainless steel beverages that are meant for years of commercial food use. They’re also tough, can be had for cheap and are easy to move around.  Related: Five Benefits of Using Corny Kegs As Fermenters

What if someone said there was a pressure capable, heavy duty stainless steel fermenter that could be had for 50 bucks or so?


Great news…. kegs make great fermenters! Same high quality, stainless steel construction, toughness and easy portability, but this time used for fermentation.

Converting Kegs Into Fermenters, 3 Options

One issue needs to be addressed to convert kegs into fermenters… handling CO2 produced by fermentation. Kegs are generally designed to be airtight. Fermentation requires that we allow excess CO2 to escape.  I can think of three options…

  1. A blow-off tube. Remove the gas post or gas post poppet and get use tight fitting tubing to route CO2 to a container of sanitizer.
  2. Use a converted lid to add a stopper and airlock
  3. Use a Spunding Valve

FIVE Reasons to Ferment in Kegs!…

Keg Deals

keg deals

kegdeals

Continue reading