Category Archives: Featured Reviews

Hands on Review: Avid Armor CHAMBER Vacuum Sealer – seals mylar bags!
Why would you want a Vacuum Sealer for homebrewing?

Vacuum sealers are indispensable for storing hops.  You can save money by getting in on bulk hop buys – See: Recent Hop Finds. Use your vacuum sealer to break these up and to preserve freshness.  You can also store specialty grains in vacuum bags.  Other uses include: storing base grains, partial dry yeast packs and storing and preserving other beer ingredients.

What’s a Chamber Vacuum Sealer?

A FoodSaver (or similar) is a standard home suction type vacuum sealer that relies on special bags. We generally call them… vacuum sealer bags. These bags are embossed or textured to create channels on the inside of the bag. Those channels allow a FoodSaver to draw out air and create a vacuum all while the machine is clamped down. When this process is done a heat strip seals the bag locking in the vacuum state.

A chamber style vacuum sealer does not rely on channeled bags. It evacuates the entire chamber and seals the bag. When this is done, prior to pressure equalization the bag does not look like it’s vacuum sealed at all. When pressure equalizes the bag immediately collapses and whammo, it’s sealed.

What are the Advantages of Chamber Vacuum Sealers?

  • Generally speaking, these remove more oxygen than FoodSaver machines.
  • Vacuum sealing wet or moist items is much easier. Since the entire chamber is evacuated, these aren’t prone to drawing out liquid like FoodSaver machines.
  • Bag cost. The special bags required by FoodSaver are more complex to produce and can lead to higher costs. Smooth sided vacuum bags can be had for less. If you’re re-using Mylar bags your bag cost essentially goes to 0.
  • One of the biggest benefits, to me, is being able to seal Mylar bags. Mylar bags have smooth sides and do not work with FoodSaver and similar. The lack of channels foils the process.

Why Mylar

Generally speaking Mylar bags consist of three layers. Two Mylar layers that laminate a center aluminum foil layer. This combination provides strength, flexibility and durability along with an extremely low Oxygen Transmission Rate (OTR). These bags also block potentially damaging light. Combine this with vacuum sealing and you’ve got an outstanding way to store food & more.

For homebrewer’s… Vacuum sealed Mylar bags are an excellent  way to store hops and other oxygen sensitive materials.  As a testament to this, many hop distributors distribute hops in Mylar bags.  Sometimes those are vacuum sealed and sometimes they are nitrogen flushed.

Re-using packaging can be a big money saver. You’ll see in my review below that I re-use hop bags. Those cost me $0 and are an excellent vehicle for storing hops

I have a post on some techniques that I developed to seal Mylar bags with traditional vacuum sealers. That’s one of the most popular posts on Homebrew Finds, I’m guessing that many people that find that post are not homebrewers, but are interested in this because of the prohibitive costs of Mylar capable machines.


A note to non-brewers: Based on the popularity of our Mylar sealing post, it’s entirely possible that you don’t homebrew. If that’s you, most of the trials in this review focus on sealing hops. If you don’t brew A: Why not? Connect with Us and start! or B: Picture… other things instead of hops 🙂


In the past, chamber vacuum sealers have been very expensive. When I published my post on sealing Mylar bags back in 2011, they cost thousands of dollars. They were generally intended for commercial use and had price tags to match.

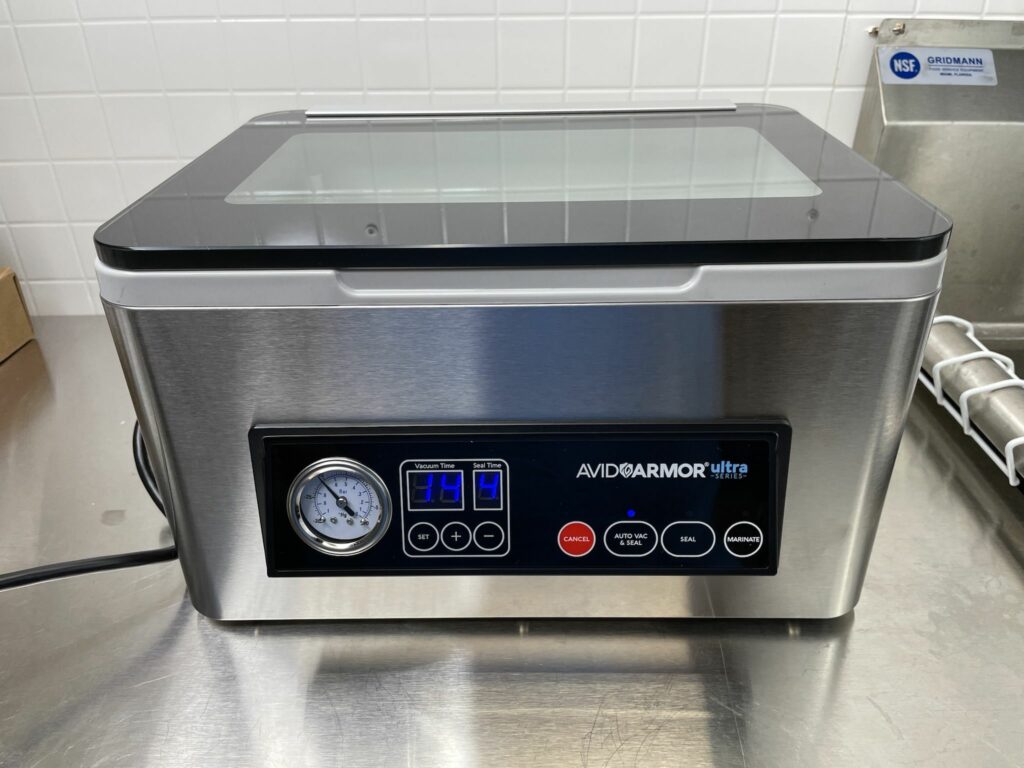
I’m happy to say some much more economical options have become available. Here’s a hands on look at Avid Armor’s USV20 Chamber Vacuum Sealer.

Hands on Review Avid Armor USV20 Chamber Vacuum Sealer
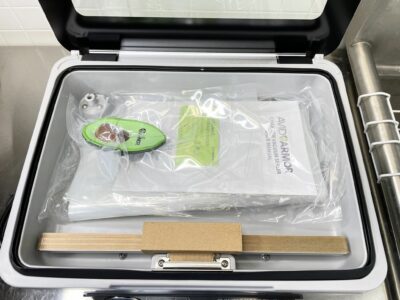
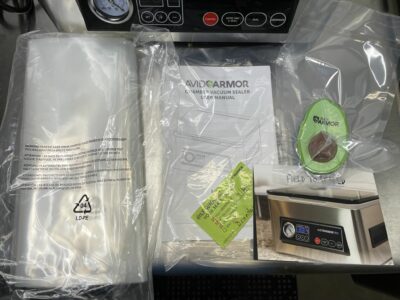
The USV20 fresh out of the boxA look inside. It came with manuals, vacuum sealer bags, a quick start guide and a vac sealed toy avocado.A look at the contents

Check Current Price & Availability, Review Continues Below:

Note that multiple variations of this product may be available, as such a different version may appear at these links

Continue reading

Hands on Review: Valuebrew Stainless Steel Ball Lock Jumpers – Works with Liquid AND Gas

Updated: 5/3/2024

Hands on Review Stainless Steel Ball Lock Jumpers from Valuebrew

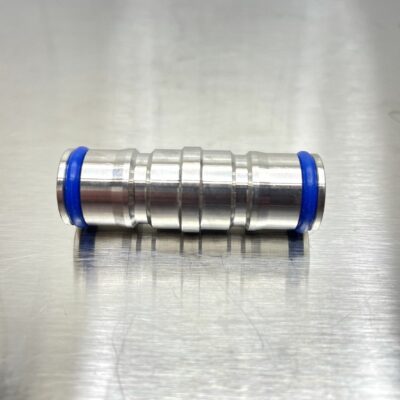
This ball lock jumper features stainless steel construction and food grade silicone post o-rings.  It allows you to connect two keg lines together via ball lock keg QDs. This is handy for at least a few uses, the most popular one probably being cleaning multiple kegerator lines at the same time.


Limited Time Deal, Review Continues Below:

Valuebrew is offering a pack of two jumpers and 25 replacement o-rings for $32.97. Coupon code JUMP discounts the combo by a whopping 32%.

Double Jumper Special! < note that you must use this link along with coupon code JUMP to get the deal, the standard product will not get you the discount

Valuebrew’s jumper is unique because of the custom color, food grade o-rings and because … it works with both liquid and ball lock jumpers.


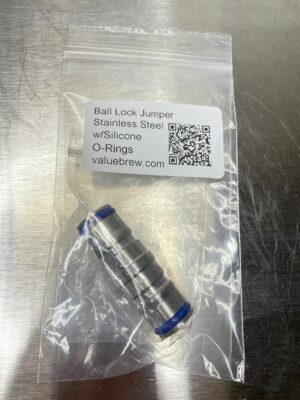
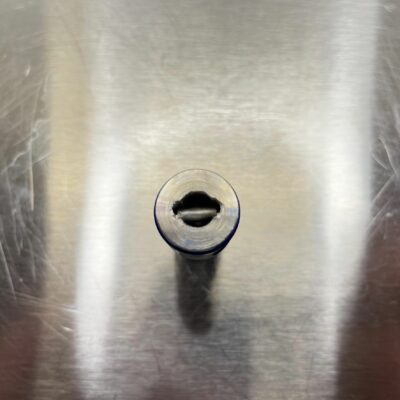
In the package. As of this posting, this comes in singles with the option to add a second on for a reduced cost. Check the product page to see if that’s still available.A look at the jumper. It has a nice heft to it and feels generally well builtA look down the jumper. You’ll notice a stainless steel bar. This jumper doesn’t have traditional poppets. Instead these bars take their place enabling connected ball lock QDs to open when connected. This is actually a really good feature because it means the jumper is open to the air when unused and can be clean, dried and sanitized.
Alternate Uses

Drain Keg Lines

The other thing this design allows you to do is connect just one QD to open up a line to drain. Let’s say you wanted to clear the liquid from a kegerator line. Attach this to let air in, elevate the QD/jumper and open the faucet. No need to remove or disassemble the QD.

Flush Keg Lines and Transfer Tubing with CO2

Place this on a gas QD and attach to another gas QD (gas QD to gas QD) to flush gas lines. Attach to a liquid QD (gas QD to liquid QD) to flush serving lines

Flush Buckets, Compatible Fermenters and Kegs with CO2

Place this on a gas QD to open it up to assist with flushing compatible containers with CO2

Keep Reading the Review

Hands on Review: Kegland Ball Lock Cleaning Kit and Party Pump

Updated: September 26, 2024

Kegland Draft Line Cleaning Pump

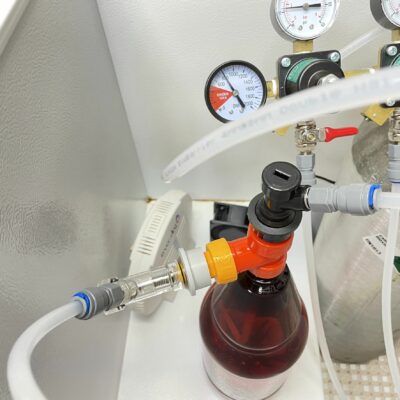
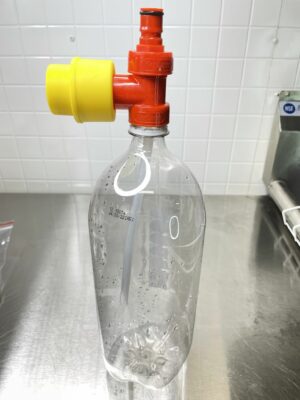
Kegland’s Draft Line Cleaning Pump is a single hand operated pump that attaches to a tee. The tee takes a hand pump and ball lock carbonation cap which connects to a dip tube. This hardware has some alternate uses that this review will also explore.

In true Kegland style this setup is innovative, packed with some surprising features and well priced. Here’s a hands on look.


Limited Time DEAL!

William’s has launched a fall clearance sale that discounts a large selection of items by up 60%. No coupon or promo code is required.  Check William’s for current selection and availability.

Fall Clearance at William’s Brewing


This is currently available via via William’s Brewing and MoreBeer – the offerings are slightly different. See the breakdown of different options and separate components toward the end of this review.

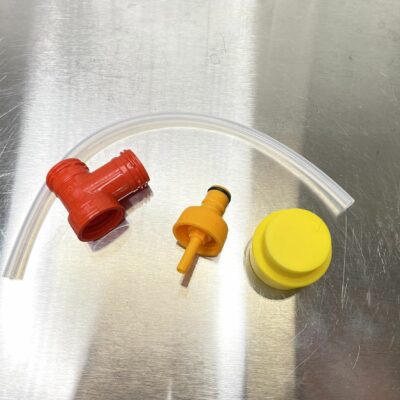
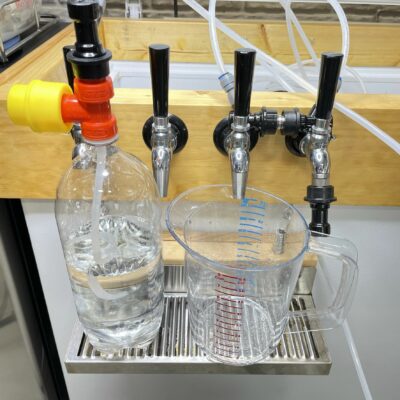
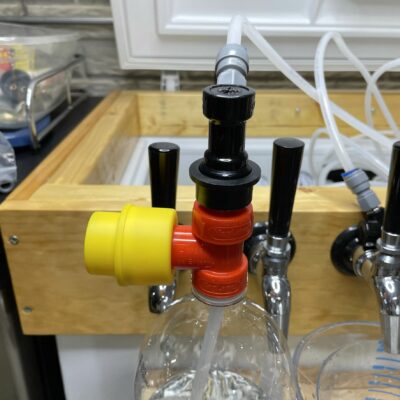
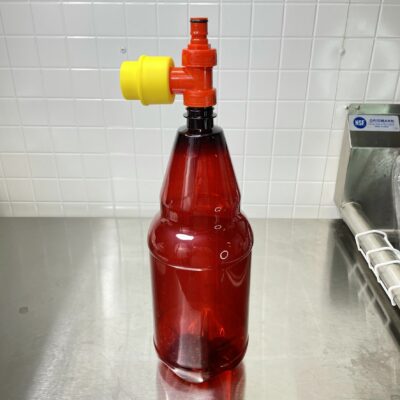
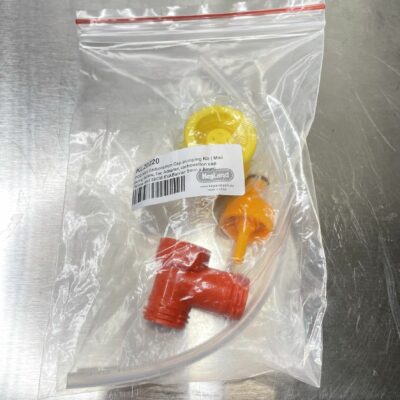
Bag o’ stuffThis is what you get with the basic pump. Tee, carbonation cap, pump and dip tube.I installed this on a 2L bottle. You’ll notice the carbonation cap has changed colors. I used one I already had (Kegland brand, just a different color), because I already has a dip tube trimmed to size and installed from a recent update to My Simple Draft Line Flushing Build.I decided to try and clean two draft lines with this pump to really test it. Here’s the key piece of hardware to clean two ball lock lines at the same time. It’s a Ball Lock Jumper from Valuebrew. There are only a couple similar offerings out there, to my knowledge. This one is unique because it uses their custom color, food grade post o-rings AND… it works with both liquid and ball lock jumpers.Here it is installed. This is connecting two 10′ EVABarrier tubing runs.Complete test setup
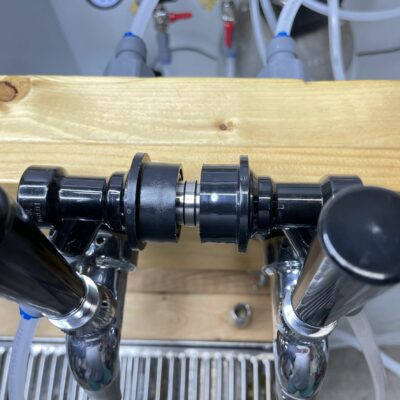
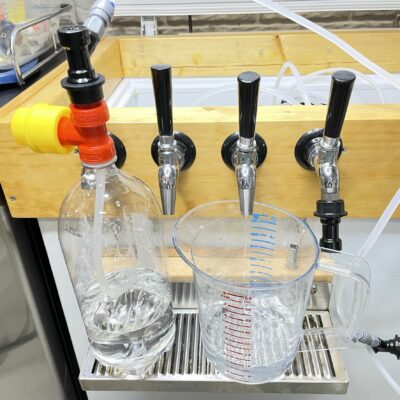
The plumbing for my test is as follows

  • Kegland Ball Lock Cleaning Pump (on left) >
  • Ball Lock Line Jumper – 2 ball lock QDs with a short length of EVABarrier tubing >
  • Intertap ball lock spout on right faucet >
  • 10′ EVABarrier tubing with ball lock QD >
  • Ball Lock Jumper Fitting >
  • 10′ EVABarrier tubing with ball lock QD >
  • Intertap faucet (second from right) >
  • 2 Quart collection pitcher

Ball Lock QD Installed on the pump assemblyIt’s a little difficult to see but… it works. With some pumping, I got a slow steady stream of liquid. Keep in mind this is cleaning two 10′ lines at the same time.William’s Brewing has a package that gets you the pump + a large 2.5 liter growler and BLC. They also sell the standalone pump kit.  I actually purchased everything separately because I wanted a full case of these growlers.
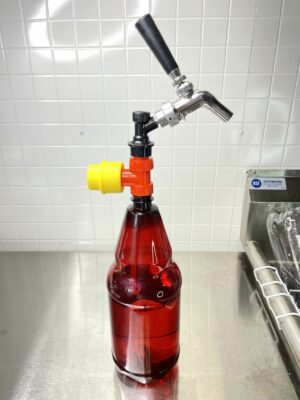
Use it for.. Portable Serving!

Add on a ball lock faucet and you’ve got a portable serving keg without paying for expensive CO2 cartridges.  Before you email me/comment/etc… yes this will cause oxidation, I would not suggest this as a long term solution. Only for the occasion that you and your friends will be able to drink an entire growler in an evening.  Oxidation won’t have enough time to become a factor. Use another solution for longer term applications.
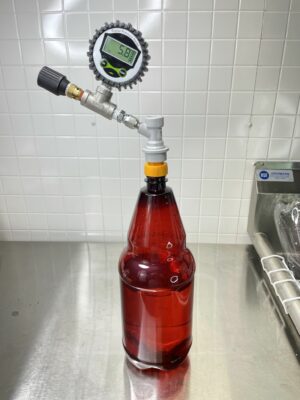
Use it for… Mini Pressure Fermenter

Remove the tee, add a 2.5L PET Bottle and a Spunding Valve to convert this into a pressure capable mini fermenter. You could potentially do 2 liter batches. Not ideal, but a great way to play around with pressure fermentation at an unbeatable price. See: Fermenting Under Pressure for more on the topic.

Convert it to a Mini-Keg For Your Kegerator!

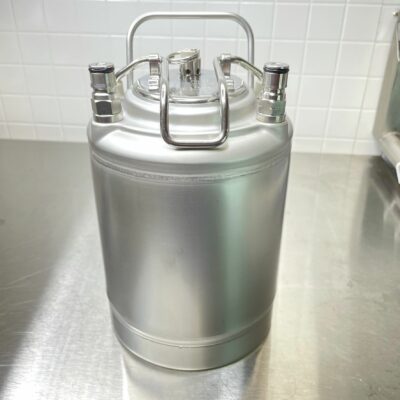
Replace the pump with another carbonation cap, use a 2.5 liter bottle and… you have a 2.5 liter keg you can use in your kegerator!

Conclusions

This collection of economical hardware is extremely versatile. As far as a cleaning pump goes, it works well, but, I prefer my own draft line flushing build. That’s very similar but replaces pumping with a quick shot of CO2. That’s less work. Having said that, you get a lot of equipment and capability with this setup. If you’re looking to build my flushing assembly, I suggest buying the Kegland cleaning setup and another carbonation cap. That gives you a ton of flexibility.  Line cleaner, mini fermenter, party pump and ball lock mini keg.  Overall, this is another win for Kegland, innovative, packed with features and well priced.

via William’s Brewing

via MoreBeer

via Valuebrew

Related Resources!

Build a Simple Draft Line Flushing Setup

Keg Deals!

keg deals
kegdeals

Build a Recirculating Draft Line Cleaner

Rebuild Your Kegs!

More Kegland Gear Reviews!

More Homebrew Finds!

pinned

This post may contain affiliate links. We may make a commission when you use our links. This will never cost you extra. Thank you for supporting Homebrew Finds!

greatdeals

Price, promotions and availability can change quickly. Check the product page for current price, description and availability.

Make sure the components you use are compatible and rated for your intended application.  Contact manufacturer with questions about suitability or a specific application.  Always read and follow manufacturer directions. tag:lnksfxd review:kldlcp tag:tpr

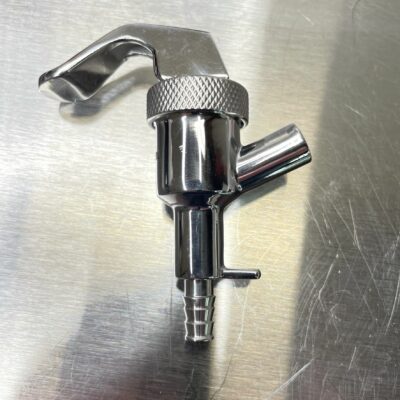
Hands on Review: Torpedo Hand Held Stainless Steel Picnic Faucet!

Updated: 5/3/2024

Torpedo Stainless Steel Picnic Tap!

If there’s been one constant in homebrewing over the years that I’ve been a homebrewer, it’s been… the cobra/picnic tap. 🙂  These things have not changed in years. They’re basic and generally cheap. There have been a few newer options, but the picnic tap itself has received no love.


Enter… The Torpedo Handheld Stainless Steel Faucet!  Finally a stainless steel option!  Here’s a hands on look.

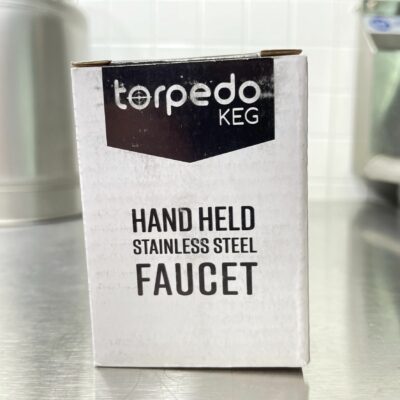
The box. This is a “hand held” stainless steel faucet. It could also be called a stainless steel picnic faucet or stainless steel cobra faucet. It’s manufactured under MoreBeer’s Torpedo Brand. Of course, Torpedo manufactures kegs – Hands on Review –  but Torpedo brand kegs are not a requirement to use this faucet. It faucet works with any homebrew keg. One side of the faucet. It features a 1/4″ OD outlet barb that will work with 1/4″ or 3/16″ ID draft tubing.
Continue reading

Hands on Review: Growler Sized Ball Lock Keg by Kegland!

Updated: October 18, 2024

Kegland Ball Lock Growler Keg!

I like growlers. I just like them. I have a lot of different designs ranging from basic glass and PET growlers to featured-filled mini kegs, vacuum insulated models, ceramic growlers and more.

As a growler-enthusiast… I have to say I’ve been waiting this thing to be made. Kegland’s KL20893 is a growler sized ball lock keg.

Because it’s a ball lock keg, it works with most existing ball lock keg parts and accessories.


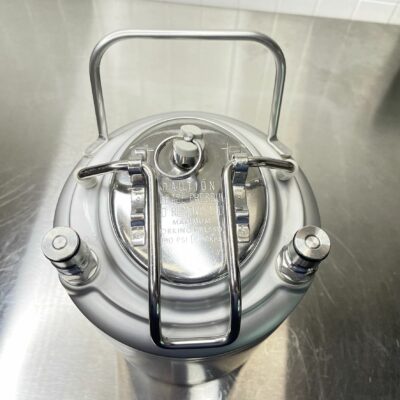
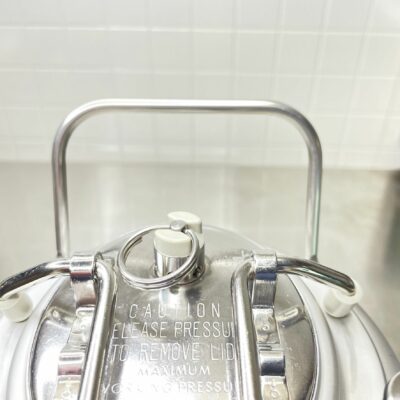
A look at the top. This has a nice easy to hold strap handle. As you can see it sports a standard size keg lid.  To my knowledge this is the smallest available ball lock keg.A closer look at the handle and lid. This lid (like most ball lock style lids) is equipped with a manual PRV.  Generally speaking… Both Ball Lock and Pin Lock style lids are the same dimension and are interchangeable.  You can use a Ball Lock Lid on a Pin Lock Keg and vice versa.  A big difference are the PRV (pressure relief valve) functions between the two styles.  Both have automatic safety PRV valves.  That is, if the pressure gets too high, both will automatically vent for safety reasons.  The difference is in manual PRV functionality.  Ball Lock Keg lids have a pull ring that allows you to manually vent the keg as you’d like.  You may want to do that for the purpose of removing the keg lid or to vent excess pressure in an attempt to get down to a lower pressure. See: my post comparing ball lock and pin lock kegs – Jump Section on Lids – All that to say… Manual PRV = good.

Check Current Price, Specs & Availability, Review Continues Below:

Also (not Kegland branded): Semfeil Brew 64 oz Keg 1/2 Gallon Keg Corny Keg Ball Lock Keg Soda keg 2L Small Keg Single Metal Handle 304 Stainless Steel Beer Mini Keg for Home Brew

Continue reading

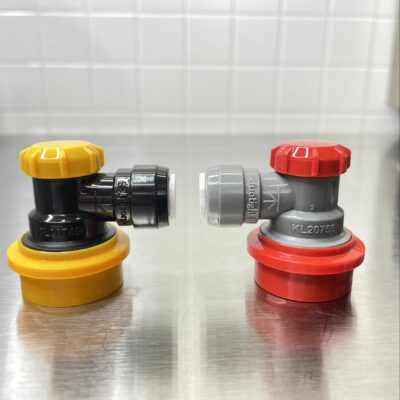
Hands on Review: Kegland DuoTight Ball Lock QDs!

Updated: November 27, 2024

Kegland’s DuoTight Fittings are designed to work with EVABarrier Double Wall Tubing.  They offer quick, reliable connections, easy implementation, a variety of fitting options and feature amazing versatility.  They’re also, generally speaking, very well priced.  DuoTights are push to connect fittings and require no tubing clamps.

DuoTights are… awesome.  Check out my extensive Hands on Review

When DuoTights first came out, the solution for connecting kegs to EVABarrier was using an MFL QD + DuoTight Flare fitting. That works just fine and is still the only option available to pin lock keg users.

Ball Lock keg users now have a native DuoTight option. Here’s a hands on look!


Limited Time Deal… MoreBeer Black Friday Sale!

MoreBeer is running daily category Black Friday Discounts. Today it’s a whopping 25% off DuoTight accessories and fittings. As far as I can recall this is easily the biggest discount I’ve seen on DuoTights!

Black Friday Daily Discount

Complete Selection: DuoTights at MoreBeer


Check Current Price & Availability, Review Continues Below:

MoreBeer

William’s Brewing

Related: DuoTight Keg Faucet

Amazon

Keg Connection

Continue reading

Hands on Review: Milwaukee MW600 Dissolved Oxygen Meter

This review is by Homebrew Finds Contributor Brad Probert.  Brad is an engineer, expert homebrewer and experienced reviewer.  Grab a link to Brad’s website at the end of this review.

Brewing is a mix of art and science. When you get it just right, the results are incredibly rewarding. For us nerds out there, sometimes the science can be its own reward, even if it doesn’t lead to better beer. The homebrewing world has LoDo brewers that are interested in reducing oxygen pick up at every stage of the brewing process. And hoppy beer lovers devote a lot of effort trying to reduce oxygen pickup to stave off the evils of hop oxidation. So this is a point where the science can help you make the better beer you want. A Dissolved Oxygen (DO) meter is a tool you can use to experiment and learn more.

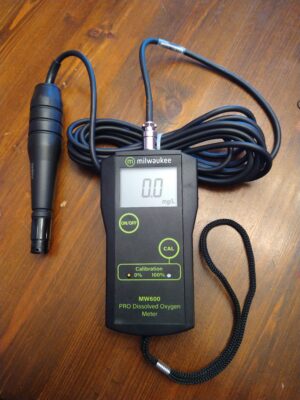
Milwaukee Instruments makes a wide variety of digital measuring instruments to measure all manner of things in liquids. Those of relevance to the brewing world include digital refractometers, pH meters, and dissolved oxygen meters. Their MW600 Dissolved Oxygen Meter is the subject of this review. This meter functions using the polarographic method. It passes a small current through the liquid it is submerged in, and the amount of Oxygen present affects the sensor reading as the current flows through it.

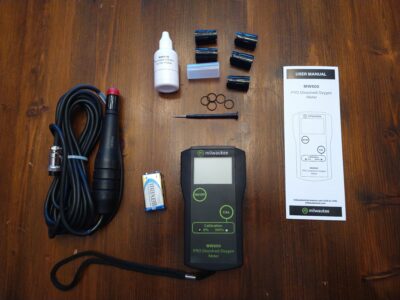
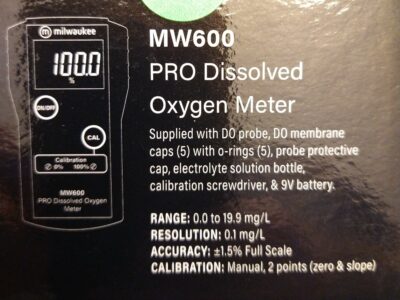
Contents of KitDescription of Box Contents


Check Current Price, Availability & Specifications, Review Continues Below:

Related: Hands on Review: Milwaukee MA871 Digital Refractometer

Continue reading

Hands on Review: Kegland 2.5 Liter Growlers

Updated: September 22, 2024

Kegland 2.5 Liter PET Growlers

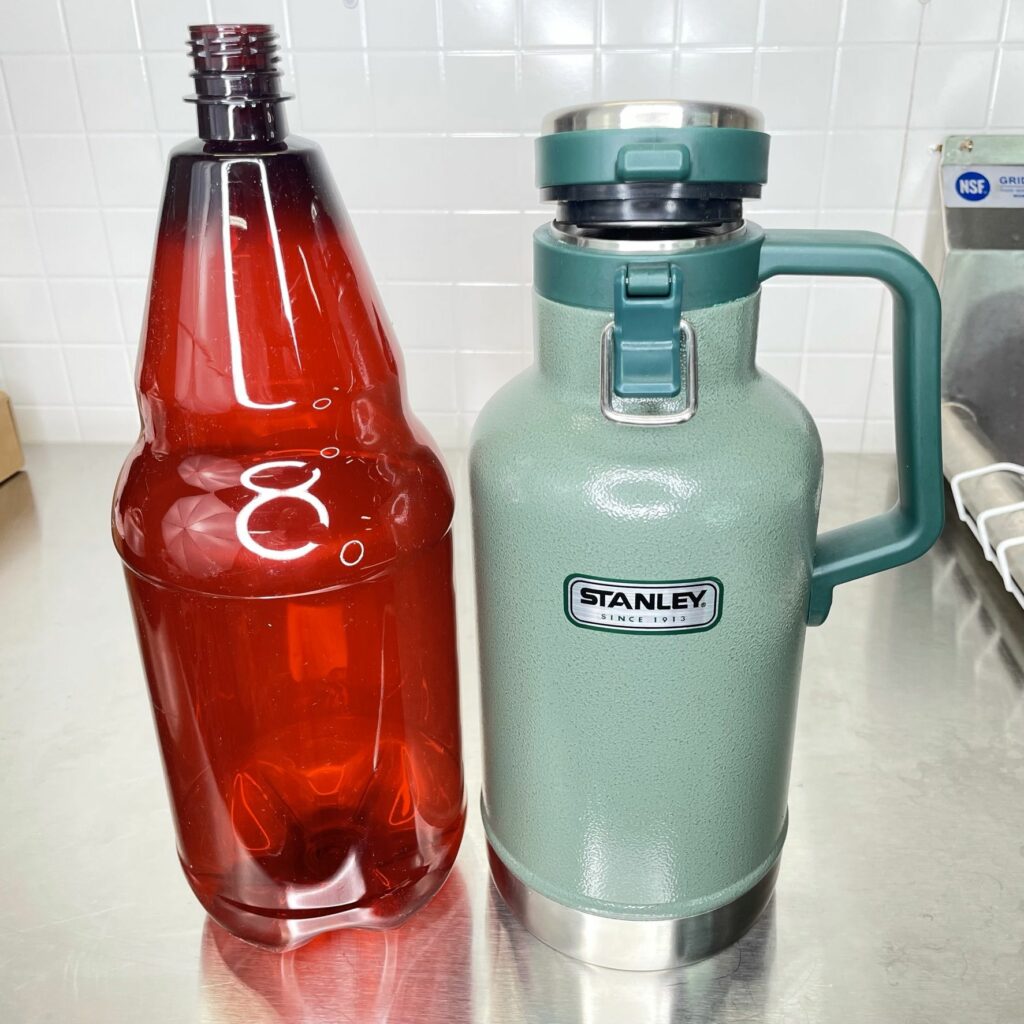
Kegland’s 2 Liter PET growlers offer increased capacity (84 ounces verses a more typical 64 ounces), they have a great pressure rating, use standard soda style caps and a generally very economical.  Here’s a hands on look.

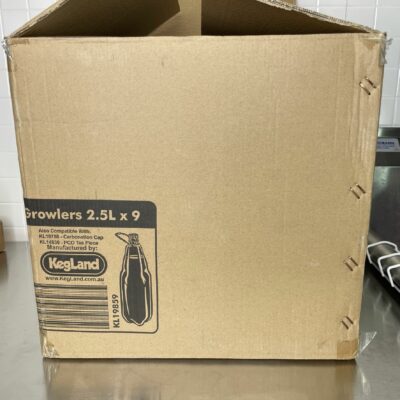
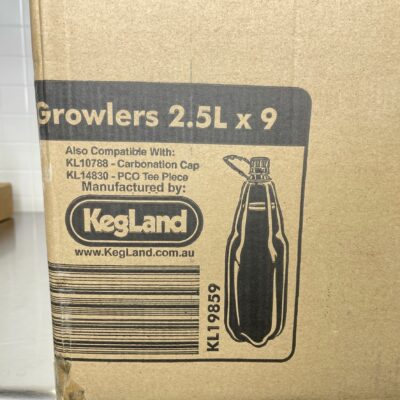
A look at the box. When I purchased mine from William’s Brewing they came in packs of 9. This is a pretty good size box, but still shipped for free because I live in the contiguous US and placed a large enough order.Close-up of the box. Part number KL19859, Compatible with KL10788 – Carbonation Cap and KL14830 – PCO Tee Piece. Manufactured by Kegland.

Check Current Pricing & Availability, Review Continues Below:

Keep Reading the Review!

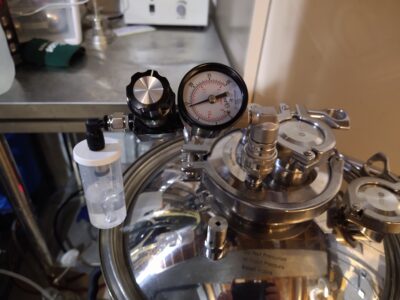
Hands on Review: SPUNDit Spunding Valve

This review is by Homebrew Finds Contributor Brad Probert.  Brad is an engineer, expert homebrewer and experienced reviewer.  Grab a link to Brad’s website at the end of this review.


Why a Spunding Valve?

There are loads of homebrew related applications for a Spunding valve ranging from pressurized ferementation to naturally carbonating to fixing over carbonated beers and lots more.  Check out our resource post on the subject.  It’s arguably the go-to resource on the Internet on the subject


SPUNDit 2.0 Spunding Valve

Spunding valves are probably one of the most boring pieces of homebrew kit. They perform a very simple function of mechanically regulating air/gas pressure. They can be used in various ways around the home brewery to do some cool stuff when it comes to fermentation, or when dealing with kegging. The SPUNDit does all the work of a regular spunding valve but does it in a swanky package.

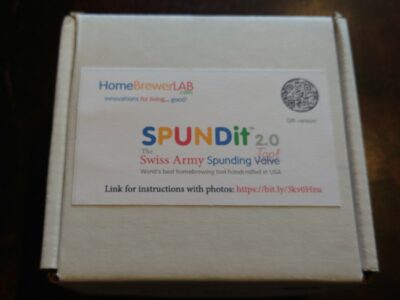
SPUNDit In the Box


Check Current Price & Availability, Review Continues Below:

SPUNDit 2.0 Spunding Valve – via eBay


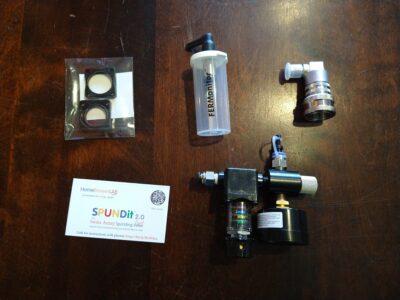
Full Content of Kit

There are two parts to any spunding valve- an adjustment knob connected to a mechanical valve, and a pressure gauge that measures the pressure it’s regulating. The SPUNDit is a diaphragm valve type of spunding, which has better operation than a poppet type. The diaphragm valve has a larger surface area for the regulation pressure to act upon and has better pressure regulation control because its opening & closing pressures have less hysteresis. The SPUNDit has a long travel spring and fine pitch thread on the adjustment knob, allowing you to make very minute changes in the regulation pressure.

Keep Reading The Review!

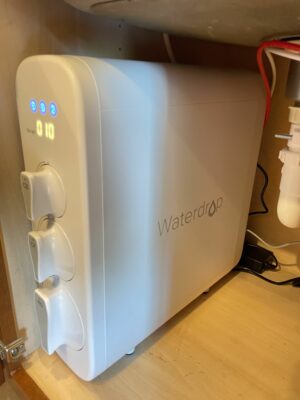
Hands on Review: Waterdrop Tankless RO Reverse Osmosis Water Filtration System

waterdrop tankless filter review

Why Use a Reverse Osmosis Filter for Homebrewing?

Using RO (Reverse Osmosis) or DI (Deionized) water allows you to start with a clean slate of sorts and build your water profile from the ground up using water salts.  That allows you to take control of an important aspect of your brewing, especially if you’re an all grain brewer and create exactly the water profile you’re looking for.

Water by John Palmer and Colin Kaminski, part of the Brewing Elements Series, is a great read to learn lots more about brewing water and water adjustments

A note to non-homebrewers: From the popularity of this review, I’m guessing a good number of you are not homebrewers. This review still applies to you. Just disregard any specific references to homebrewing or… hey, why don’t you start homebrewing? 🙂

Hands on Review Waterdrop Tankless Reverse Osmosis Filter

The Waterdrop WD-G3-W is a three filter, seven stage tankless reverse osmosis filter. It is intended for under-counter installation and comes with a LED light indicating faucet. It’s rated for 400 gallons per day and is NSF 58 certified.

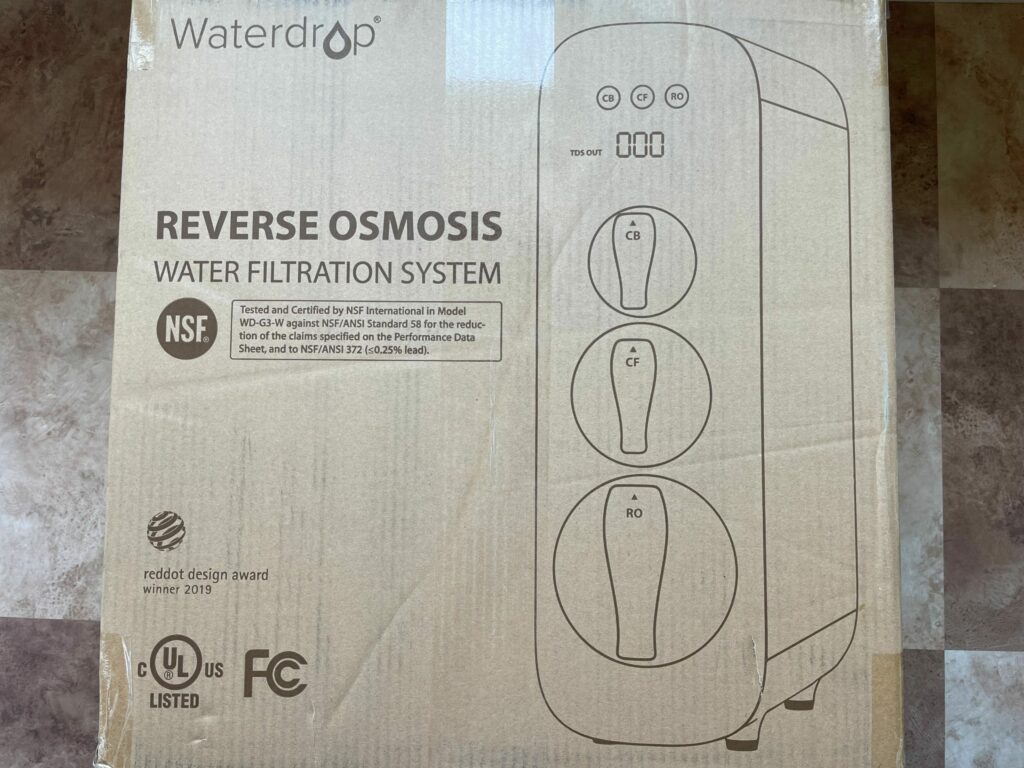
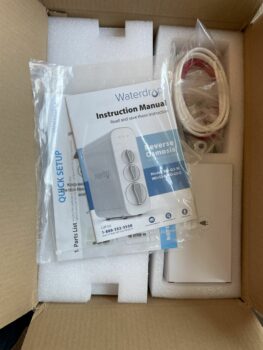
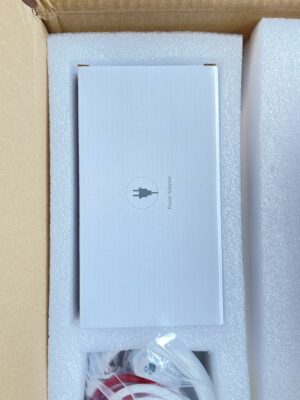
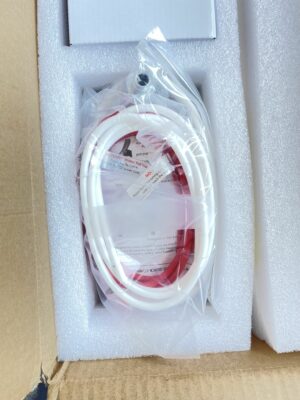
The box the Waterdrop system came in. The box is quite large.A look at the contentsThe AC Power Adapter. This unit requires power. I believe that’s related to the tankless aspect of this filter’s design. My assumption is that It has a pressure pump that drives water through the filtration system to deliver a reasonable on-demand performance. The advanced filter tracking features and built in TDS sensor also require power.Required tubing and fittings

Check Current Price, Availability & Specifications, Review Continues Below:

Note that multiple variations of these products may be available, as such a different version may appear via these links

Continue reading

Hands on Review: Anvil Crucible Stainless Conical Fermentor!

anvil brewing equipment crucible conical review

This review is by Homebrew Finds Contributor Brad Probert.  Brad is an engineer, expert homebrewer and experienced reviewer.  Grab a link to Brad’s website at the end of this review.

Anvil Crucible Stainless Conical Fermentor

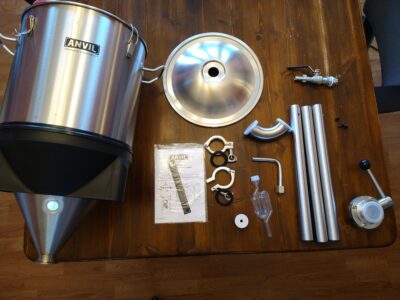
Complete Fermentor Box Contents

In the world of brewing, stainless steel reigns supreme. And in the world of fermentors, conicals top the “most desired” list of many homebrewers. So of course, combining these two things explains why stainless conicals are such a desired commodity in the homebrewing world. Blichmann was one of the first to offer homebrewers a stainless conical fermentor, back in 2004. But recently they introduced a more budget-friendly model, in their Anvil line, called the Crucible. The Crucible does not have the same feature set as Blichmann’s Fermenator, as the Anvil Crucible is not pressure capable. But it does take advantage of the true “conical fermentor” shape.

Fermenter vs Fermentor?

(Note: Some use the word “fermenter”, and some use “fermentor”. Although “fermenter” is the common use word, someone once explained that grammatically speaking, “fermentor” was more accurate. So now I can’t help myself. Sorry.)


Compare Models, Prices and Availability, Review Continues Below:


Continue Reading Review!

Hands on Review: BrewBuilt Uni Conical Fermenters!

This review is by Homebrew Finds Contributor Brad Probert.  Brad is an engineer, expert homebrewer and experienced reviewer.  Grab a link to Brad’s website at the end of this review.

Updated: 7/23/2024

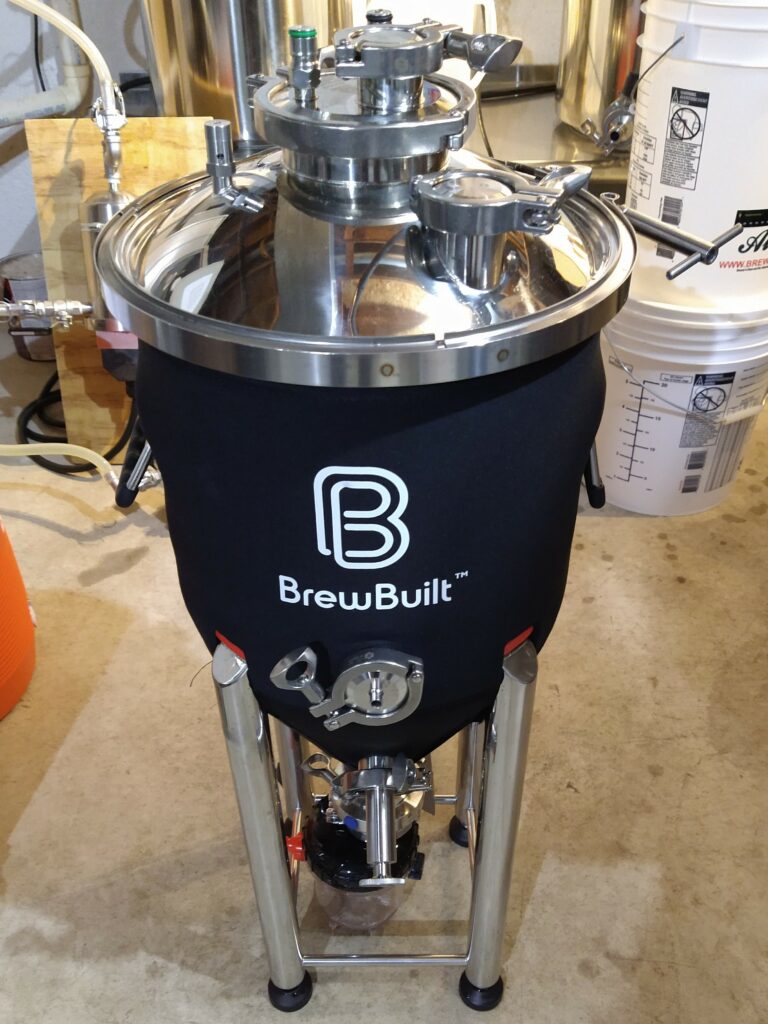
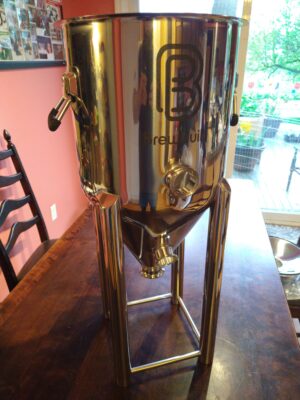
BrewBuild Uni+ Conical Fermentor

Fermentors are like the cars of the brewing world. There is a wide range of prices, appearances, and features. And just like cars, the most basic model (plastic bucket with a lid) will get the job done. But the basic model has limitations, and you soon find yourself eyeballing the next step up the fermentor food chain to either get one that’s flashier (stainless) or one that has more features (pressure fermentation capable). Of course, the ultimate is one that’s both shiny and has more features (stainless pressure-capable conical).

Fermentor Before Any Assembly

BrewBuilt is a division of MoreBeer that creates homebrew gear. They make a variety of products, and recently launched a series of stainless pressure-capable conical fermentors they call the X1 Uni. The X1 comes with a lot of different accessories for added features, depending on what you want. You can buy the add-ons piecemeal, or they come bundled into different hardware kits. There is the base X1 Uni, the X1 Uni+ that bundles some add-ons and temperature capabilities, and the X1 Uni Pro that also includes a heat pad, Peltier cooler, and a temperature controller.

Limited Time Deal!

Limited Time Deal!

MoreBeer has a limited time Summer Sale going on. The x2 Uni is included in the mix!

BrewBuilt® X2 Uni Conical Fermenter


Check Current Price, Models & Availability, Review Continues Below:

Continue reading

Hands on Review: Anvil Crucible Cooling System

This review is by Homebrew Finds Contributor Brad Probert.  Brad is an engineer, expert homebrewer and experienced reviewer.  Grab a link to Brad’s website at the end of this review.

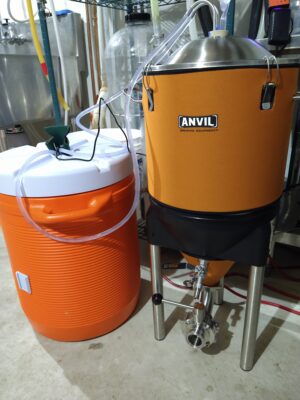
Anvil Crucible Cooling System

The Anvil Crucible is a new stainless steel fermentor on the market. It has the 60-degree angled cone which makes it long and narrow as it tapers down. This angle makes it steep enough that as yeast and particulate drop out of suspension in your fermenting beer, it hits the cone wall and slides down to the bottom point. This long cone makes the fermentor taller overall. The 7 gallon Anvil Crucible measures 30.5” from the bottom to the top of the lid (plus an additional 6.25” for airlock and stopper). In contrast, the Anvil Stainless Bucket Fermentor is only 19.5” tall (plus the 6.25” for airlock). Both of them have the same 16.5” width from handle to handle. So while you can stuff the Bucket Fermentor in a dorm-sized fermentation fridge, not so for the Crucible. However, Anvil has an optional Cooling System for the Crucible you can buy to add on cooling capability.

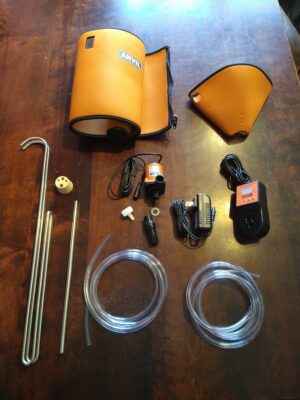
Cooling System Full Kit

The Crucible cooling system replaces the standard one-hole stopper (just for the airlock) with a multi-hole stopper that has holes for inlet and outlet spots for the stainless cooling tubing, another hole for the stainless thermowell, and lastly a hole for an airlock. The cooling tubing is fairly narrow, but it makes up for its small diameter with lots of extra length as it runs up and down inside, providing extra surface area for cooling. To attach to the metal cooling tubes, the kit includes two 5-foot lengths of vinyl tubing, which provide a clamp-free tight fit to the inlet and outlet tubing portions.


Compare Models, Prices and Availability, Review Continues Below:

Buy Anvil Crucible Conicals

Related… Hands on Review: Anvil Crucible Stainless Conical Fermentor!


Continue Reading This Review

Hands on Review: Kegland Stainless Steel Counterflow Chiller

kegland chiller review

This review is by Homebrew Finds Contributor Brad Probert.  Brad is an engineer, expert homebrewer and experienced reviewer.  Grab a link to Brad’s website at the end of this review.

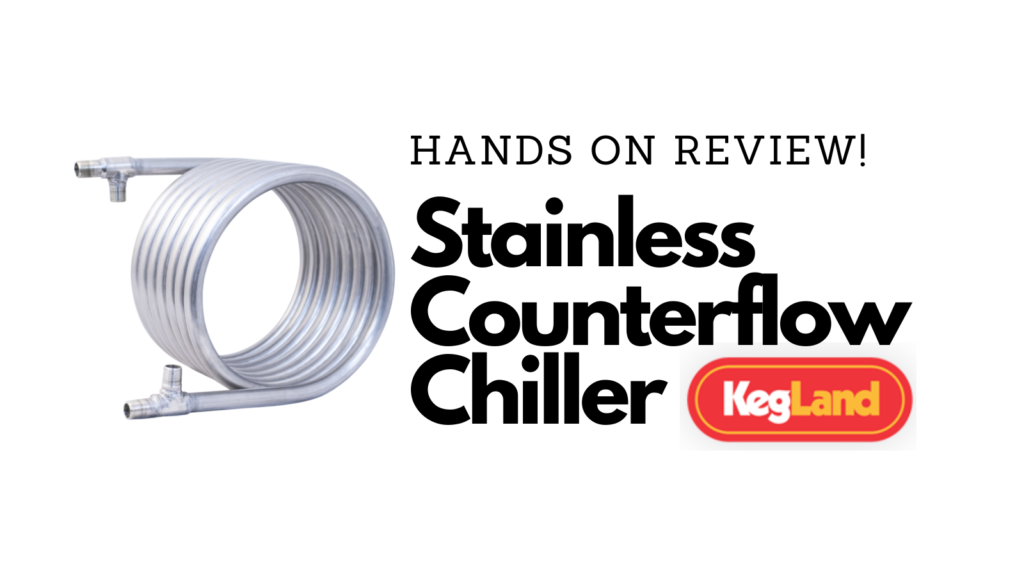
Kegland Stainless Counterflow Chiller

In the past, I did some trials on the different types of wort chillers, and ended up with a counterflow chiller as the best solution for me. Of course, it depends on what you are prioritizing as a feature. Plate chillers are the fastest, but after I had a clogging incident, I had no confidence I could ever get it 100% clean again. Immersion chillers (even fancy ones) were slower, but most notably, they required me to continually bob them up and down in order to really be effective. The counterflow chiller is fast, and the relatively large passageways mean you don’t have to worry about debris clogging them up.


Check Current Price & Availability, Review Continues Below:


Here’s how a Counter Flow Chiller (CFC) works. You wort flows inside a smaller diameter tube, which sits inside a larger diameter tube that’s filled with your cooling water. Heat gets drawn out of the wort through the conductive walls of the inner tube (made of heat-conductive metal like copper or stainless steel). To keep the package size compact, these very long lengths of tubing get coiled up on top of each other like a snake. And there are 4 connections- wort in, wort out, cooling water in, cooling water out.

Continue reading

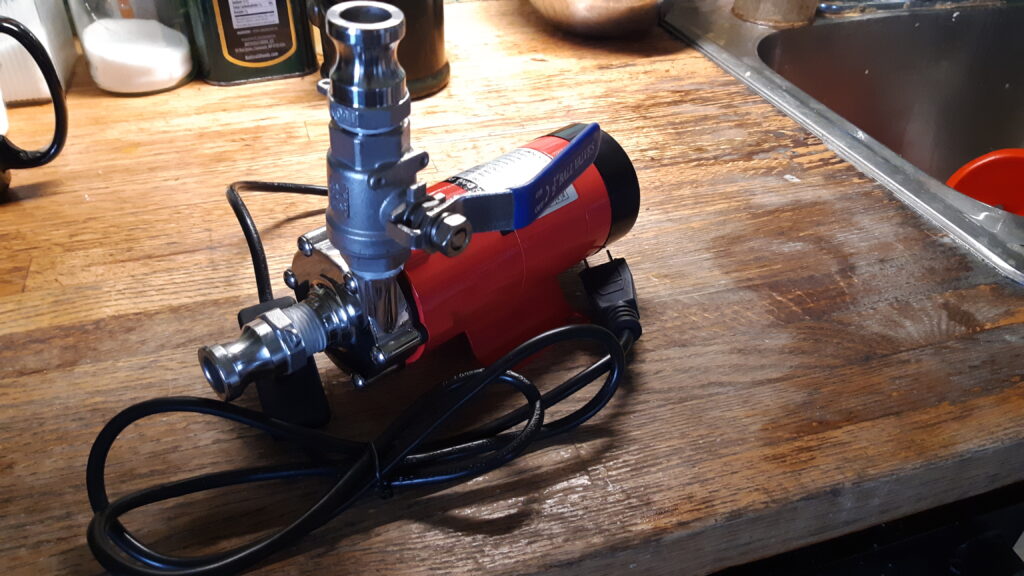
Hands on Review: Pumpzilla Brewing Pump

This review is by Homebrew Finds Contributor Tom Brennan.  Read more about Tom and grab a link to his website and YouTube channel below.

Hands on Review Pumpzilla Brewing Pump

One of the best investments I made years ago was adding a pump to my homebrew arsenal. Pumps move hot water to your mash tun and makes vorlaufing easy. They circulate wort to make chilling faster and it moves your brew into a fermentor. For me, it helped saved me from back aches the day after I brewed because I would have to lift a very heavy mash tun in my gravity setup.

Now there is a cost effective option, the Pumpzilla. It has some flaws, but they far outweigh the advantages from not having a pump.

Pumpzilla Specifications and Features

  • Stainless Steel head
  • Can be set on a flat surface by itself without tipping over
  • Quiet Operation
  • Center inlet design makes it easy to prime this pump as the head is easily flooded with wort
  • Inlet and outlet fittings are 1/2 in. male NPT so they will work with any of your standard homebrew fittings
  • Water resistant (not proof!) casing
  • 5 ft. Cord
  • On/Off Switch
  • Max Flow – 5 Gal / 19L per minute
  • Max Lift – 11 ft
  • Heat Rating: 100C (212F)
  • Voltage – 120v 60Hz
  • Current – 0.75A

Hands on Review

After opening the Pumpzilla packaging the first thing I noticed was how well it was built. The pump itself was dense and felt really rugged. The stainless steel head is always a plus over some plastic headed pumps you see at the same price point. An additional feature was a rocker switch on the wiring. In the absence of that one would either have to physically plug and unplug a pump to turn it on and off or attach it to a power strip with an on/off switch. The rocker switch has a very small hash mark to indicate “on”.


Check Current Price & Availability, Review Continues Below:

PUMPZILLA BREWING PUMP WITH STAINLESS STEEL HEAD via Great Fermentations


Continue reading

Hands on Review: Kegco 1 Gallon Ball Lock Kegs

Why Smaller Kegs?

Smaller kegs are good for small space kegging, splitting batches (easily try a variation of your larger batch), small batch brewers and for easily serving on the go.  Since this is smaller than most small kegs (usually 2.5 to 3 gallons), you could also use it to push cleaning and sanitizing solution without wasting a lot of CO2 pressurizing head space.


Related: AEB Keg Hands on Review!

Hands on Review: AEB Italian Made Ball Lock Kegs!


I bought this particular keg up because of it’s small size. It’s essentially a large growler. Because it’s ball lock, all the existing gear I have is compatible.

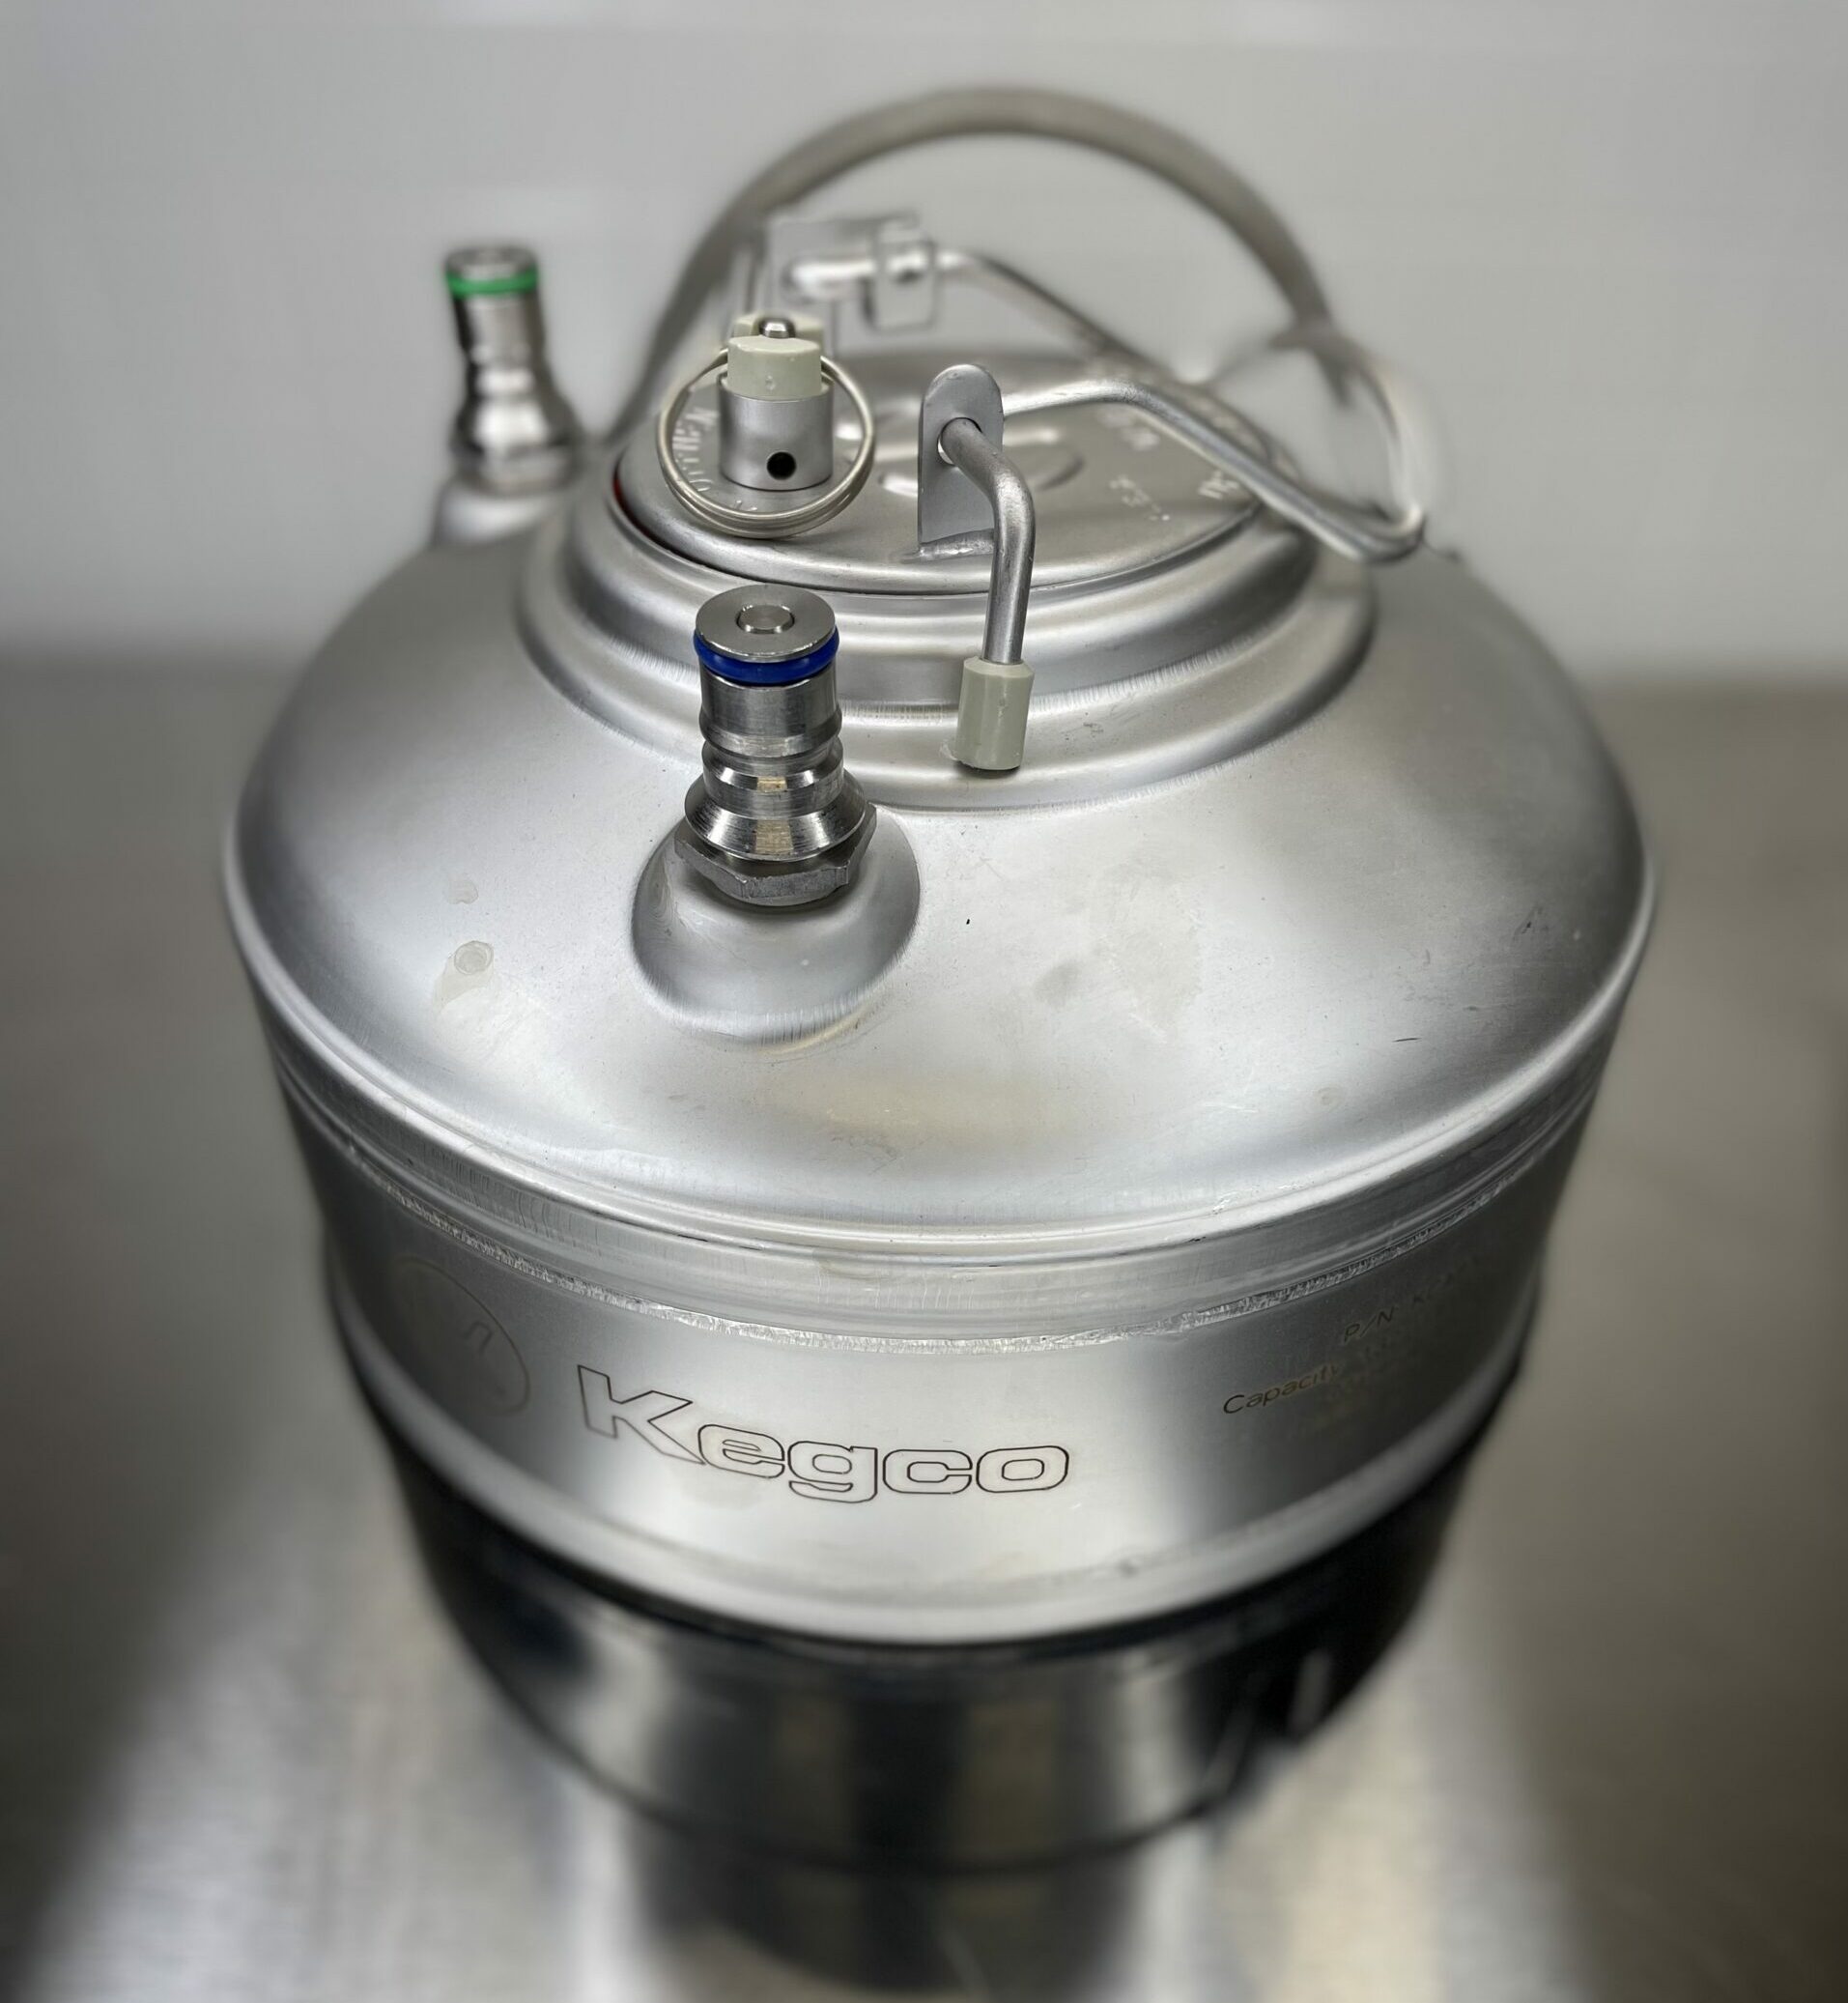
Hands on Review 1 Gallon Kegco Ball Lock Keg

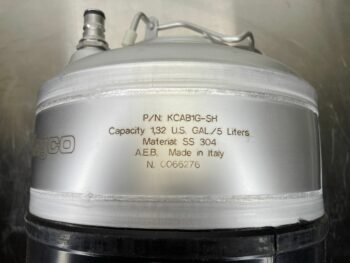
A look at the kegDetails are stamped on the side. P/N KCAB1G-SH, Capacity 1.32 US Gallons/5 Liters. Material SS 304. This is a unique size. 2.5 and 3 gallon kegs have been around for quite some time, I’ve even seen 1.75 gallon kegs. 1 gallon kegs are uncommon.


Check Current Price & Availability, Review Continues Below:


Continue reading

Hands on Review: Inkbird IHT-1S Digital, Instant Read, Waterproof, Rechargeable Thermometer

This review is by Homebrew Finds Contributor Michael Gom.  Read more about Michael below.

Hands on Review: Inkbird Digital Food Thermometer IHT-1S

This is a rechargeable, advertised as Waterproof IP67 and has an advertised response time of ~2 – 3 seconds.

Unboxing

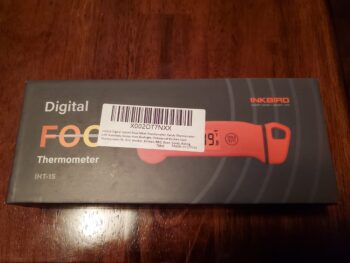
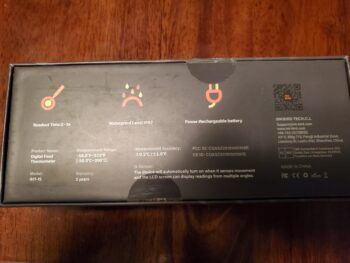
FrontBackFollowing the same quality as the previous model I reviewed (IHT-1P), Inkbird packages their thermometer very well. Foam-fitted and compact.


Check Current Price and Availability, Review Continues Below:

Inkbird Meat Thermometer IHT-1S, Instant Read Meat Thermometer Waterproof Digital Cooking Thermometer, Food Candy Thermometer for Kitchen, Food Cooking, Grill, BBQ, Smoker, Home Brewing, Coffee – affiliate link, note that multiple variations of this product may be available, as such a different version may appear at this link

Continue reading

Hands on Review: KOMOS Rubicon Draft Jockey Box!

komos jockey box review

This review is by Homebrew Finds Contributor Brad Probert.  Brad is an engineer, expert homebrewer and experienced reviewer.  Grab a link to Brad’s website at the end of this review.

Komos Rubicon Draft Box

There is a lot of equipment out there for making draft homebrew mobile. Like different tools in a toolbox, each one is designed for a given situation. A draft box or jockey box is ideal for a group/party situation where you’ll be serving your beer away from your home. Or maybe it’s still at your home, but you’re serving your beer at a party in your backyard and don’t want to have a constant flow of people in & out of your house to refill their cups. A jockey box is made from a regular picnic cooler and has standard shanks/taps mounted through the wall, and a length of beer line inside sitting on ice to keep beer cold as it heads to the faucets.

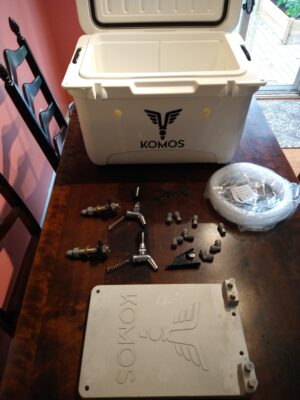
Complete Contents

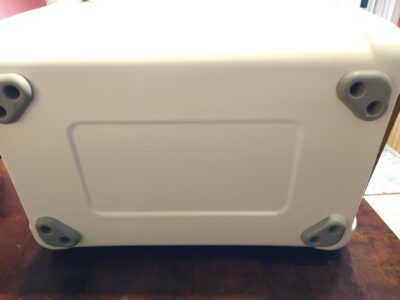
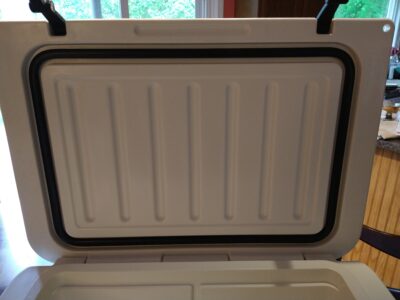
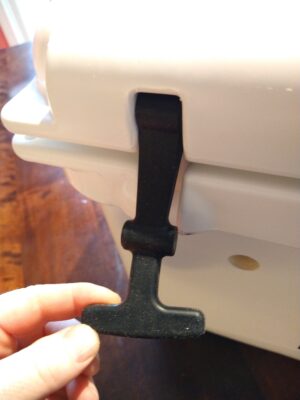
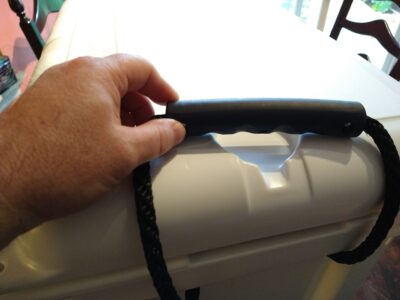
The first building block of a jockey box is the cooler you install the hardware in. The Komos Rubicon Draft Box uses a heavy-duty roto molded cooler as its base. It has a tough 2.5 mm thick skin, and in-between is filled with high density foam to provide insulation. With most coolers, you get all your heat transfer through a plastic-to-plastic fit with the lid. But the Komos has a thick, engineered seal, and uses two stretchy rubber latches to keep it compressed down tight. Rounding out its features, it has rope handles with molded grips, and 4 broad durable rubber feet on the bottom to prevent it from sliding around or scratching the surface it sits on.

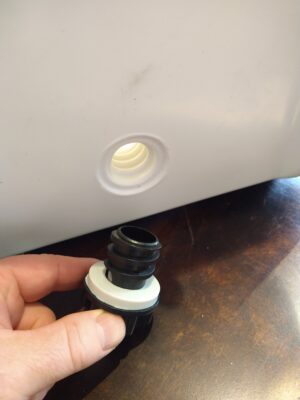
Anti-Skid Feet on Bottom of CoolerLid SealThreaded Drain Plug with SealStretchy Rubber Latches to Hold Cover ClosedRope Handles and Grips


Check Prices, Models & Availability

Continue reading

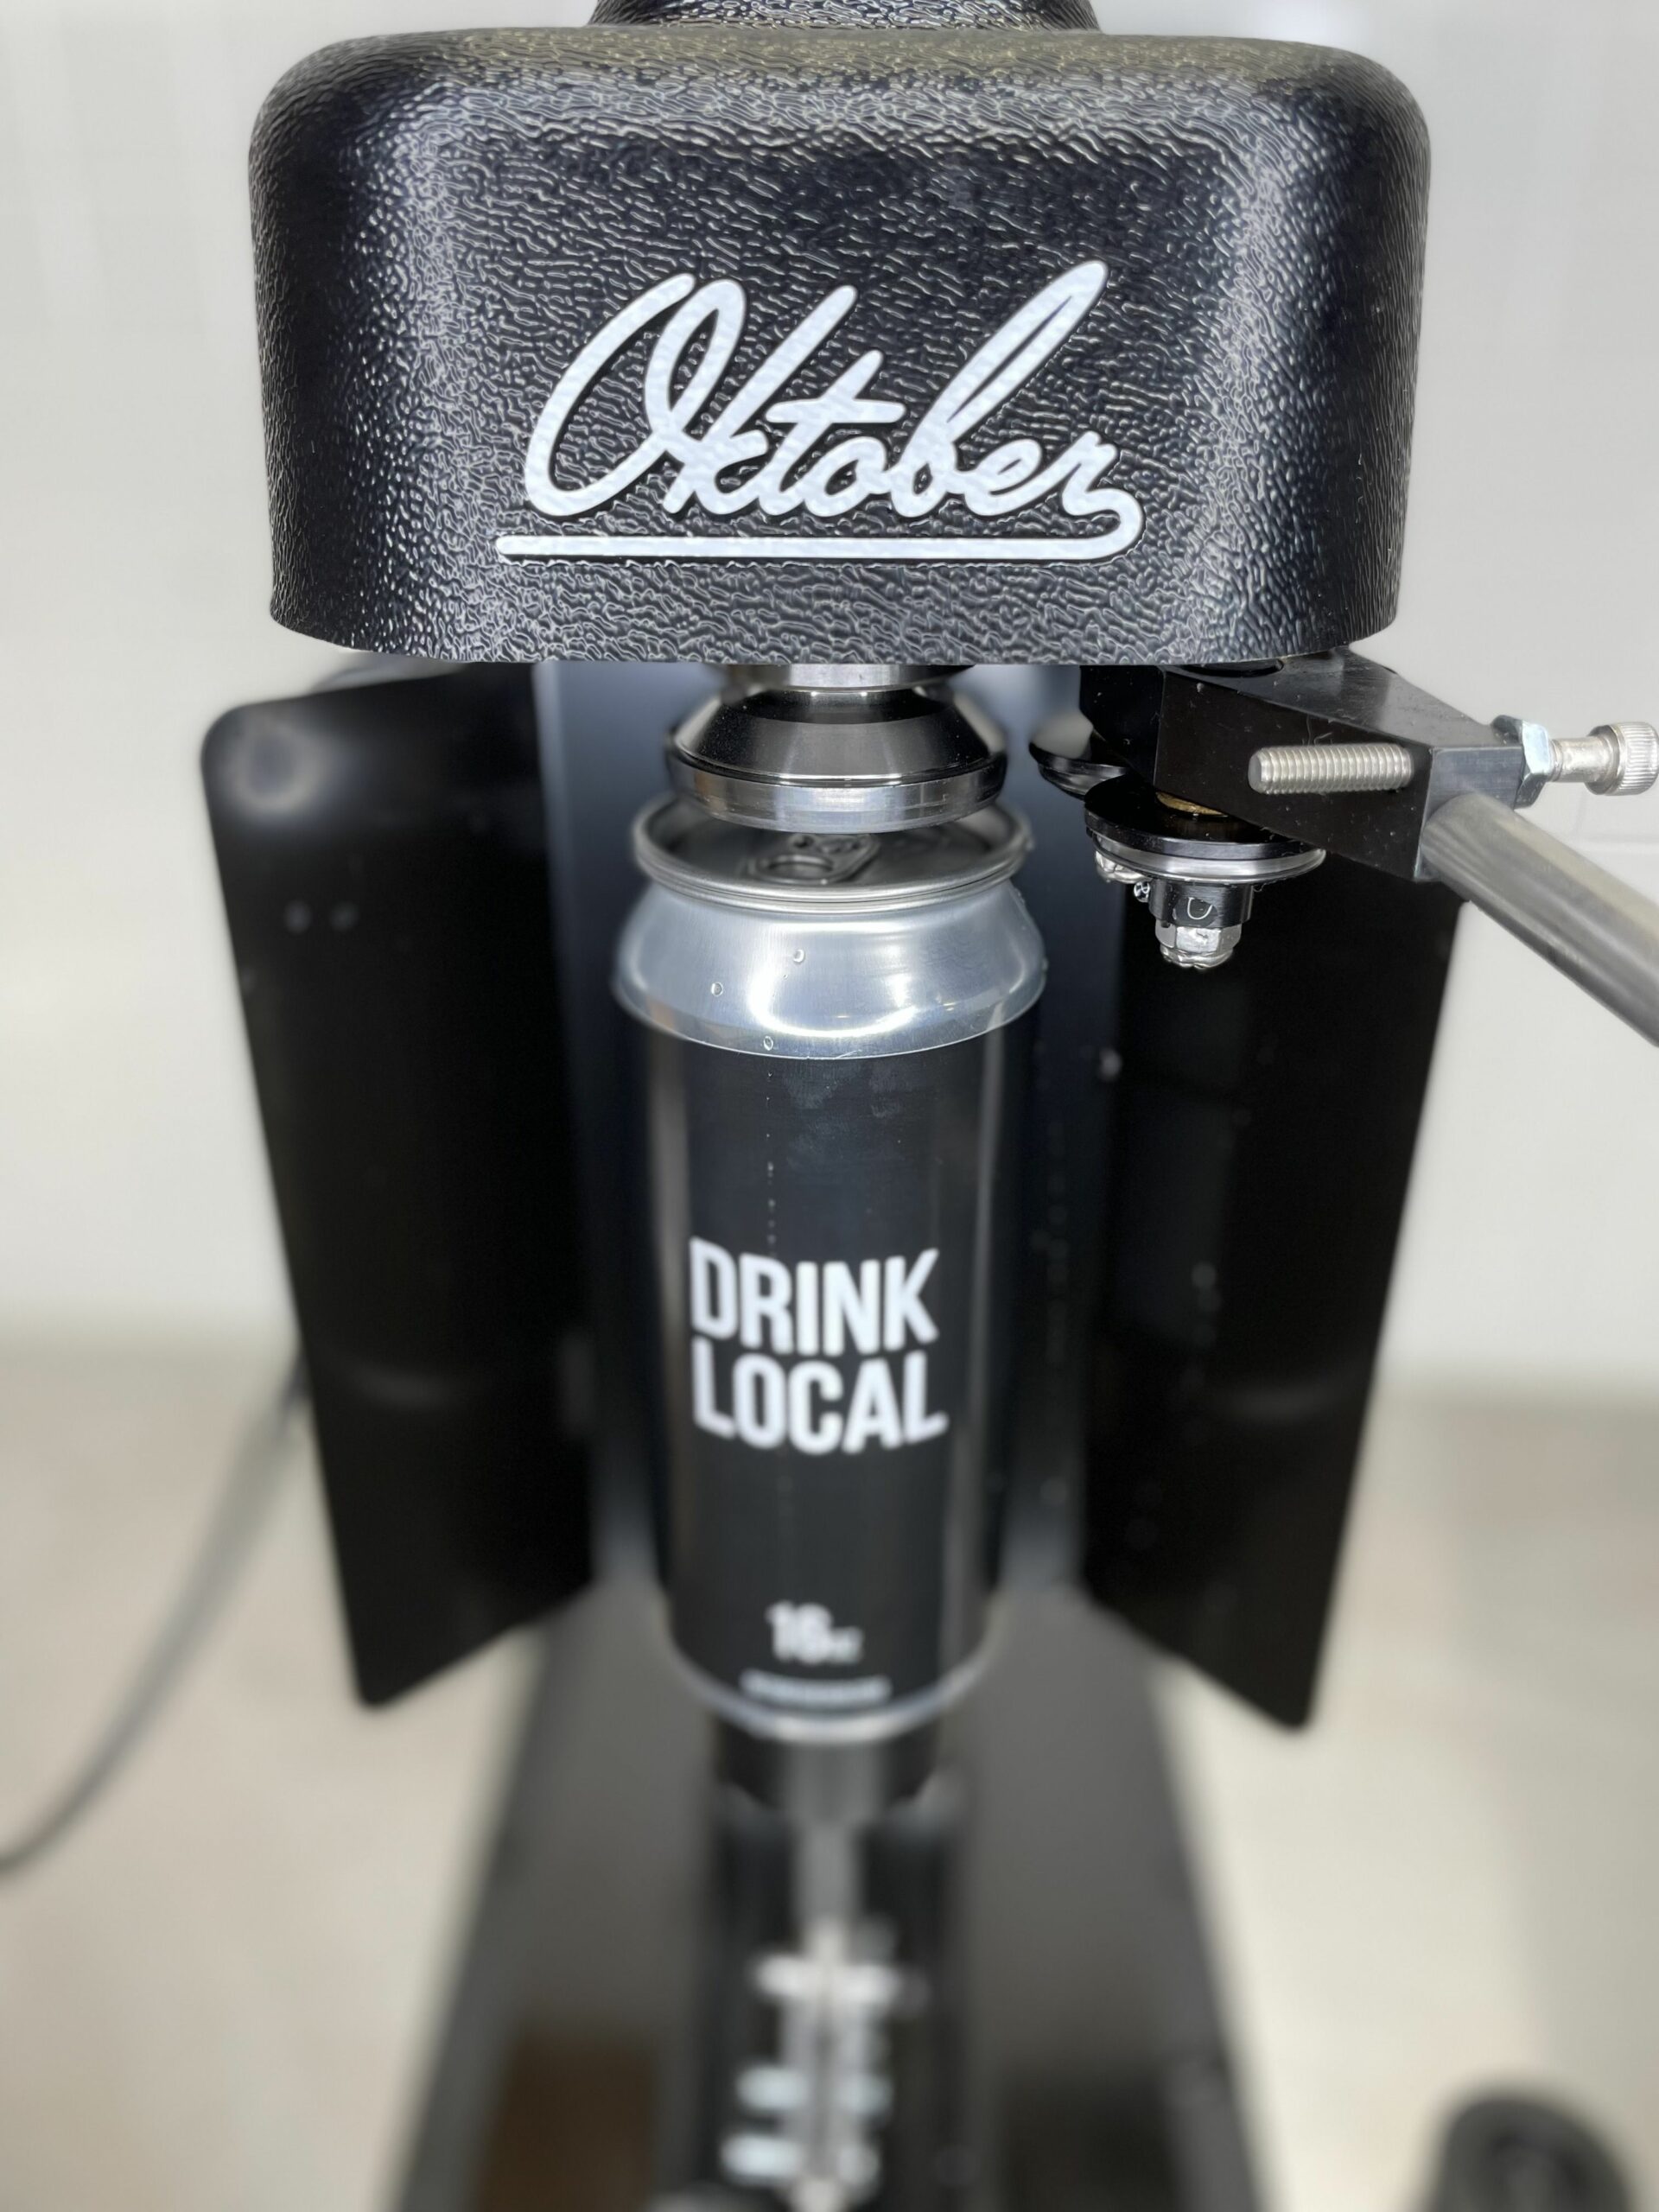
Hands on Review: Oktober Design SL1 Can Seamer – Can Your Homebrew!

July 8, 2024

Oktober Design was started in 2014 by a group of engineers and beer lovers. They make high quality, well thought out and affordable Crowler and Can seamers.  Their target has been brew pubs and smaller commercial brewers. With the introduction of the SL1 they’ve finally made a machine designed specifically for homebrewers.

Before Oktober Designs and similar started making countertop can seamers, canning beer was out of reach and unrealistic for homebrewers and even some smaller brew pub operations.  I looked into canning early in my homebrewing career. Around that time a manufacturer released an “affordable” system that was in the $10k, range. That was considered affordable at the time. I’m happy to say that times have changed.


Related: Can Your Homebrew for LESS, Check out Cannular:

Deals on Cannular are rare. MoreBeer periodically offers a discount


Limited Time DEAL!

An Outstanding Deal on Cannular!

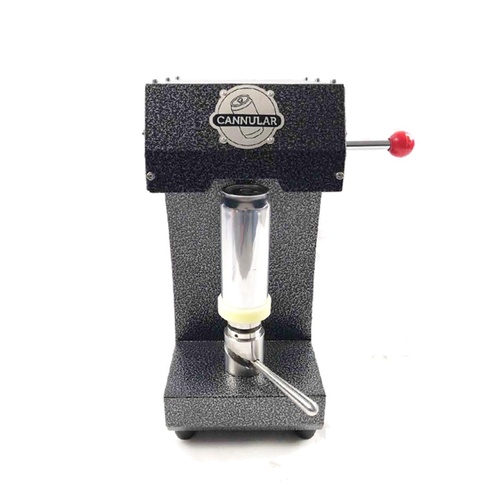
Cannular Bench Top Can Seamer CAN100

Cannular Bench Top Can Seamer via MoreBeer

More Info

From the product description, check product page for current description, price and availability:

The Cannular is a manual can seamer that is easy to use, reliable and beautifully simple.

Whether you’re a brewery looking to offer canned beer to go or a homebrewer wanting to keep your creations fresh and fully protected from light, the Cannular is the answer. This bench top unit is one of the most compact and easy to use can seamers you’ll find. The Cannular only requires one person to operate, and each can takes roughly 5 seconds to seam. With a two-person team, one filling and one seaming, the Cannular becomes a suitable option for nano breweries doing small canning production runs.

Operation:
The beauty of the Cannular lies in how truly simple it is to operate. With only three points of operation, it only takes a few minutes to familiarize yourself with the machine. The seaming process is as follows:

Place lid atop the can and place the can on the platform
Turn the platform lever clockwise to raise the can to the seamer
Press the button to turn the machine on and begin spinning the can
Push the seaming lever away from you and hold for 1-2 seconds
Pull the seaming lever towards yourself and hold for 1-2 seconds
Press the button to turn off the machine and stop spinning the can
Turn the platform lever counterclockwise to lower the can
That’s all there is to it!

Construction:
The Cannular was designed to be compact, durable, and safe to operate in a wet environment. The platform assembly is made from 304 grade stainless steel, so no matter how messy your canning gets, there’s no need to worry about rusting or degradation. The body of the unit is made from hammered sheet metal and bolted together with stainless steel screws. Rubber feet help keep the unit from slipping and sliding while in use. Additionally, the Cannular features built-in brackets near the feet so you have the option to mount the machine to your counter or benchtop. The Cannular runs off of 24v DC power via the Anderson socket located on the back. This lower voltage was chosen specifically to make the unit as safe to use in a wet environment as possible.

Power:
As noted above, the Cannular comes with a 24v DC Anderson socket located on the back of the unit. It does not, however, include a cord and plug. When purchasing the unit, you’ll have the option of pairing it with either a power supply with 110v plug, or with a 6 ft. long cord with Anderson plug and alligator clips. The power supply is straight forward, and allows you to plug the unit into a standard 110v power socket. The alligator clips give you the option to power the unit from a battery, and can even be used with an 18v cordless power drill battery. This is certainly the most affordable option for powering the Cannular, and we’ve found that upwards of 200 cans can be seamed on a single battery charge.

Why Cans?
So why can when you can bottle? There’s no doubt that canning has become a more and more popular format for packaging beer among craft breweries over the last several years, and with good reason. Aluminum cans aren’t just more environmentally friendly than bottles, since cans require less energy to transport and recycle, they’re also much better at protecting the quality of the beer. Whereas bottles allow in light, which leads to skunking, aluminum cans offer 100% protection from UV and other wavelengths of light that are harmful to beer. There’s still great debate surrounding whether cans or bottles are better at keeping beer fresh, but if done correctly, cans are theoretically the superior option. When a crown cap is crimped onto a bottle, the lining of the cap can form an imperfect seal on the bottle, allowing small amounts of oxygen in, as well as small amounts of CO2 out. Over time this can result in oxidation of the beer and lost carbonation. Seamed cans, on the other hand, form a much better seal that can prevent these issues. Of course, it’s important to make sure that the can is purged of oxygen before being filled, and that the can lid is sealed atop foam to eliminate oxygen from the headspace. Aside from all the “sciency stuff”, cans are just plain safer. Take your beer backpacking, camping, or poolside and rest assured that broken glass won’t ruin your day!

Specifications:
Power: 250W
Rated Speed: 3300 RPM
Gearbox Ratio: 9.8 : 1
Power Plug: Anderson Type 40A
Can Height: 45-170mm (1.8 – 6.7 inches)*
Can Diameter: 35-75mm (1.4 – 2.9 inches)*
Dimensions: 14″ L x 9″ W x 19.5″ H
Weight: 40 lbs


  • MoreBeer has Cannular on sale for $399.99. That’s a $150 savings.
  • For some pricing clarity, I’ve seen USED units sell for more than this.
  • This is a rare deal because the regular version of the Cannular is under a MAP agreement.  That means that it, generally speaking, cannot be discounted.  I don’t know if this is a one-off thing or if the reverse roller version will be an ongoing offering.
  • Get Free Shipping: Shipping is also free to most US addresses with a qualifying $59 order.  This includes bulky cases of new cans.
  • Learn More! Hands on Review: Kegland Cannular Bench Top Can Seamer – Homebrew Canner

Cannular Bench Top Can Seamer CAN100


Why Can?

Cans block all light and oxygen transfer. That’s not true of bottles. They also play well at the park, beach and pool. Glass bottles are made from breakable glass that can… break. 🙂 Canning is also… cool. We’ve been able to pretty easily do everything that commercial brewers have been able to do – Conicals, Control Panels, Fermenting Under Pressure and More – for quite some time. Canning, until recently, was a hold out.


This article contains affiliate links. We may make a small percentage if you use our links to make a purchase. You won’t pay more and you’ll be supporting Homebrew Finds and more content like this. Thank you for your support!


Even with new equipment like the SL1 becoming available, canning is more expensive than bottling. You can save used bottles for free and use a $10 capper. This means that doing things as cheap as possible cannot be a driving factor when considering a can seamer.

Continue reading

Hands on Review: Torpedo Ball Lock Kegs from MoreBeer

Updated: November 16, 2024

This review is by Homebrew Finds Contributor Brad Probert.  Brad is an engineer, expert homebrewer and experienced reviewer.  Grab a link to Brad’s website at the end of this review.

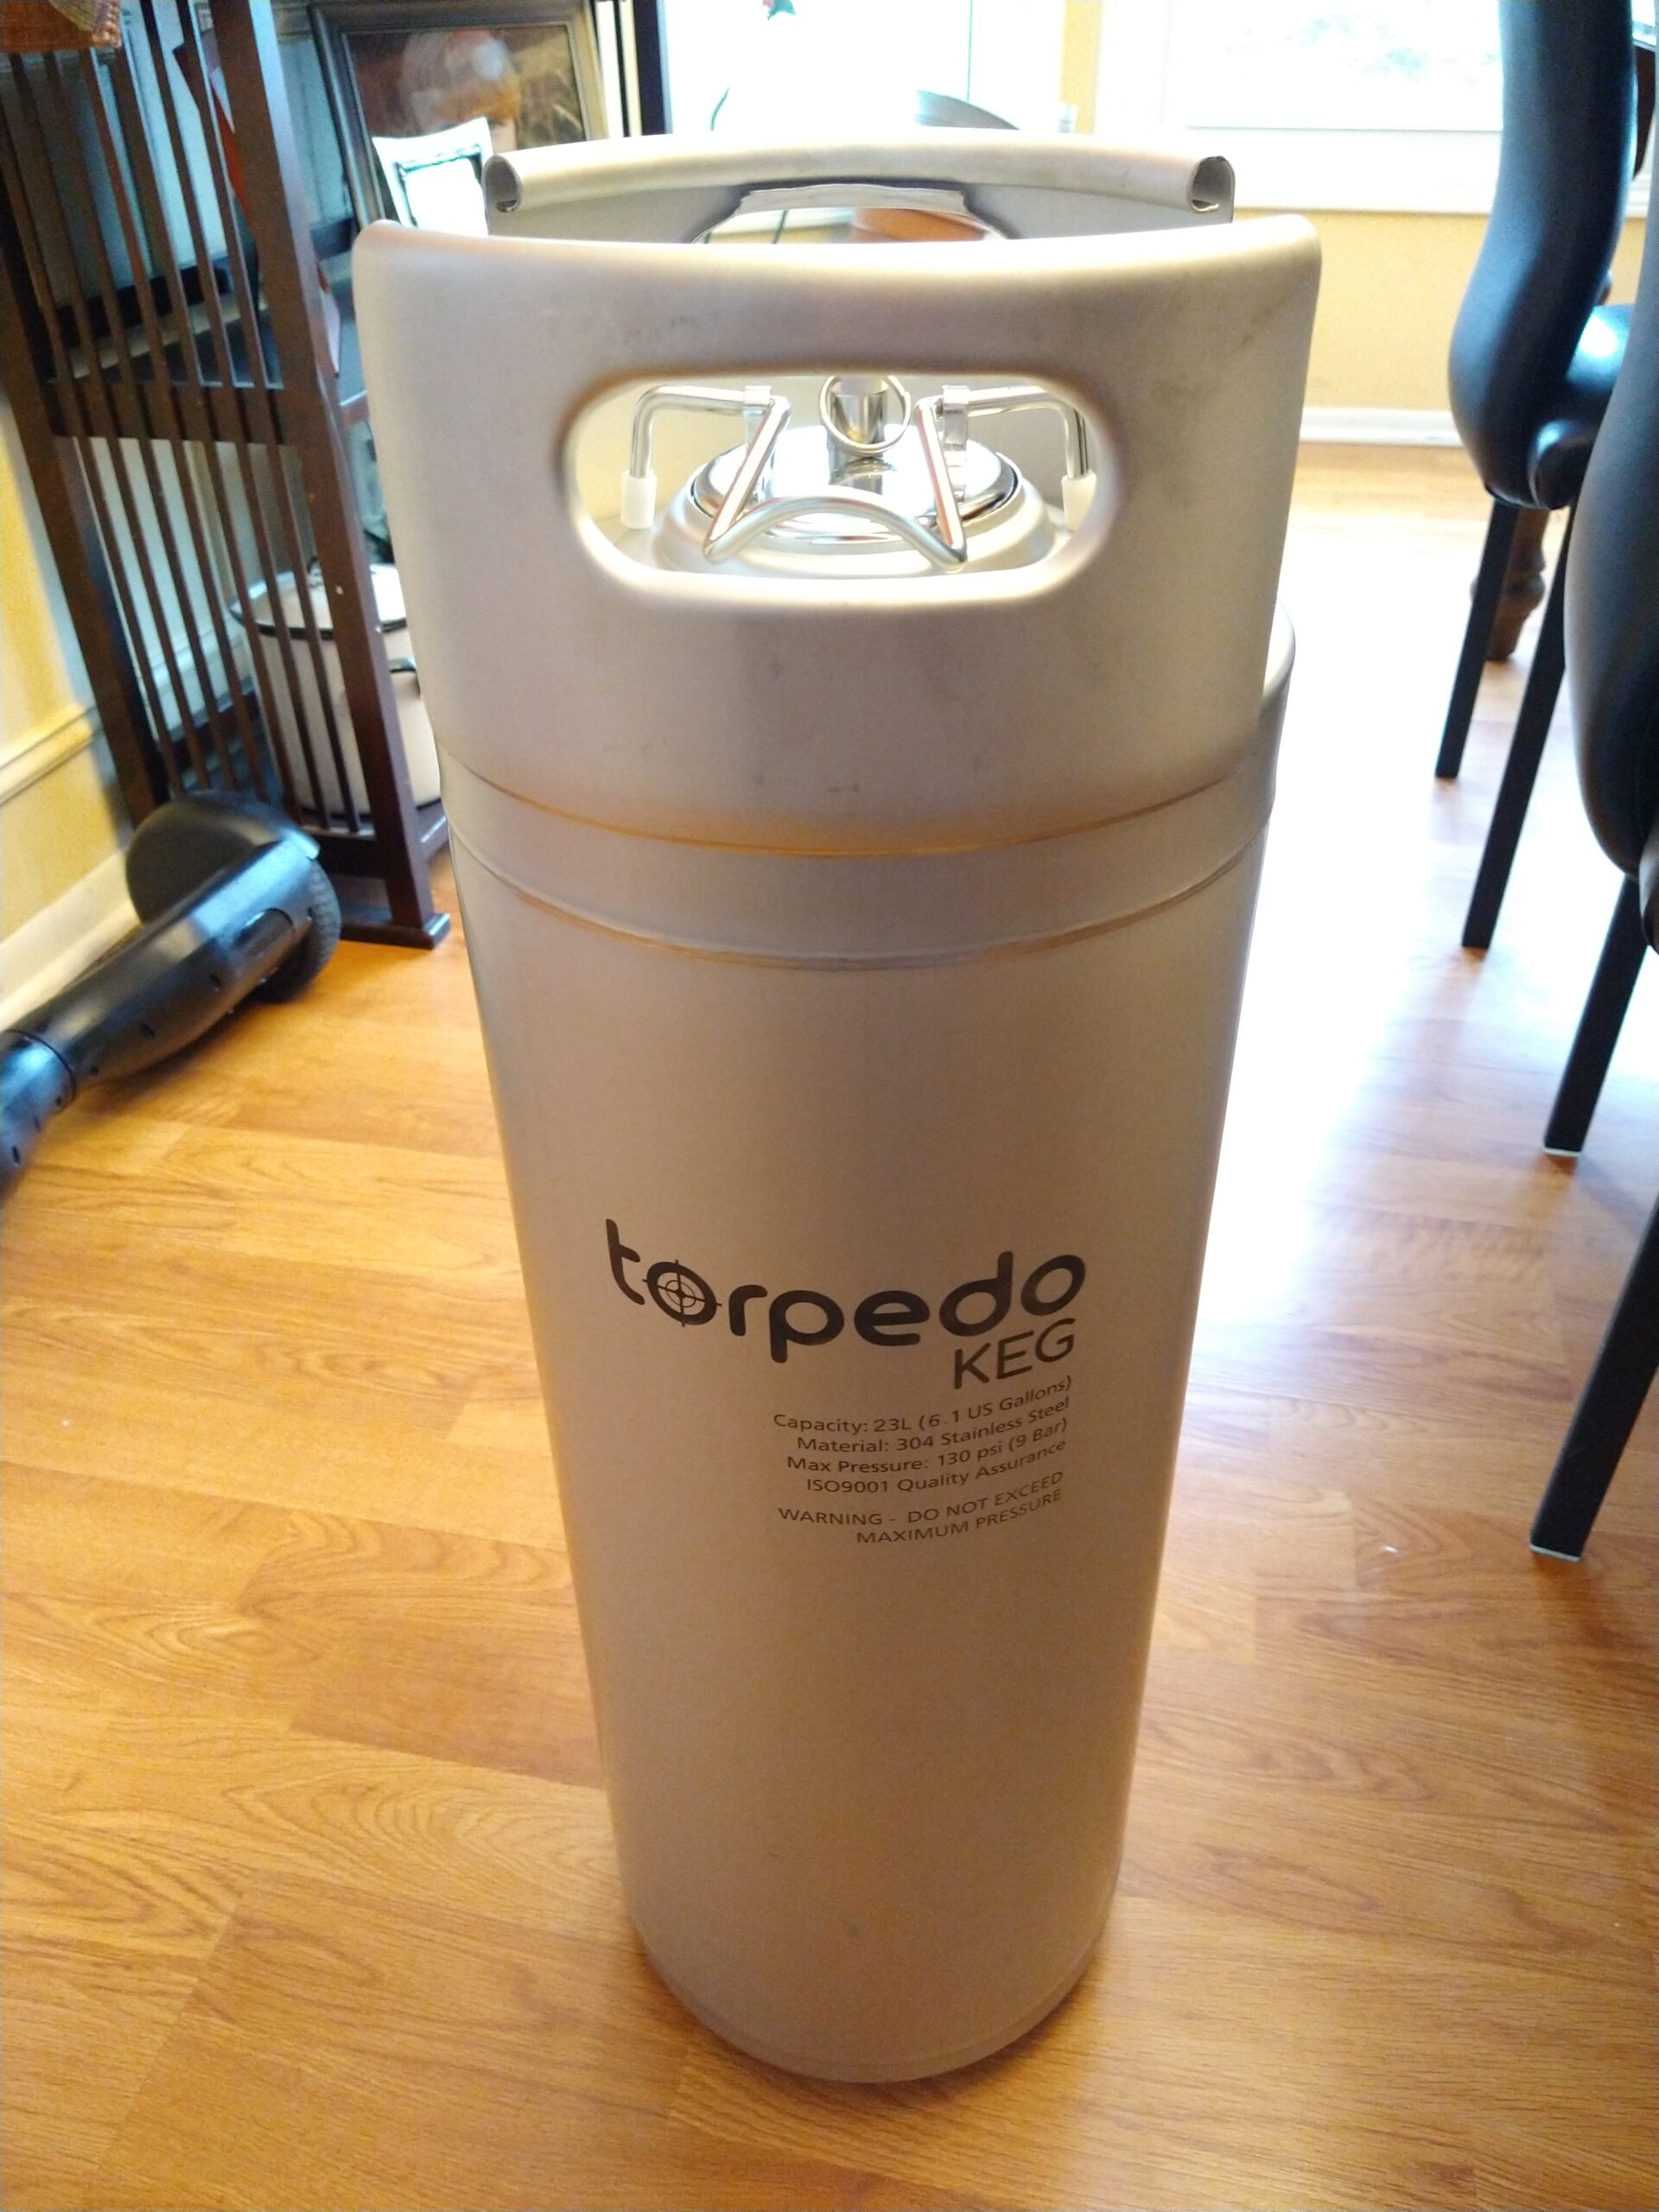
MoreBeer 6-Gallon Torpedo Keg

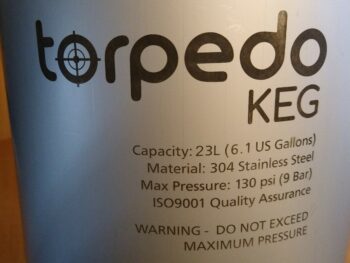
Keg Label

Sometimes ideas come along that seem so obvious in hindsight. Every fermentor I have is 7+ gallons. I like that because it gives me plenty of headroom for krausen from active fermentation. It also allows me to brew a bigger batch in the event I have a lot of dry hopping. But with the bigger fermentors, I will frequently have leftover beer after transferring to the keg. Not a lot, and not always, but it just feels wrong to leave that beer behind. So the 6-gallon keg is a logical fit for me.


Limited Time Deal!

MoreBeer has a massive early holiday sale going on as of this posting. Over 100 products are discounted. Check sale page for selection and availability.

MoreBeer Blowout Sale!

Select Torpedo Kegs are included in the mix!


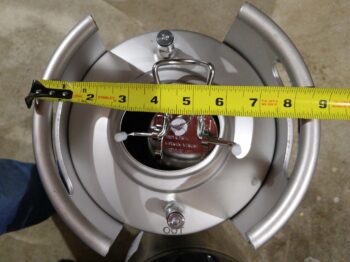
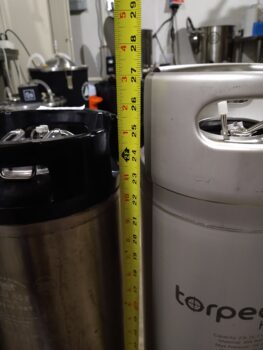
Keg DiameterKeg Height Measurement

Torpedo Keg is a brand name of a series of ball lock kegs. They use the same size lid and follow the same standard of ball lock posts. But unlike Corny kegs that have rubber bottoms and tops, Torpedo kegs are made completely of stainless steel. The top/handle portion of the keg is taller, specifically to let you stack kegs on top of each other while still having gas and beer lines connected to the keg. There is also a Slimline version which has a slightly narrower diameter in exchange for a taller height. The 6-Gallon torpedo keg has a 9.125” diameter, and is 27.25” tall. In comparison, the standard ball lock Corny keg has an 8.375” diameter and 24.75” height. Although comparing these heights on paper can be deceiving since the Torpedo keg’s tall handles cover the height of attached ball lock fittings as well (additional 1.5” measured with my DuoTight fittings).

Check Prices, Models & Availability

Continue reading