Category Archives: Reviews

Hands on Review: Blichmann BrewCommander Controller!

This review is by Homebrew Finds Contributor Brad Probert.  Brad is an engineer, expert homebrewer and experienced reviewer.  Grab a link to Brad’s website at the end of this review.

Blichmann BrewCommander Controller

Controllers for an electric brew rig are surprisingly expensive. They seem to have such a simplistic job- control temperature and/or modulate output power. But of course that job is the heart of an electric brew system. It’s what allows you to have a more stress-free brew day because you can set the temperature and then go do something else. It’s what enables you to brew inside with electric and not have to battle the weather, or have to drag equipment from a storage space inside to a brew area outside. So I guess even though they do a job that’s easy to describe, the value they provide to the brew day is pretty significant. And thus justify their price tag with that.

As electric brewing continues to grow in popularity, more controller options become available. Blichmann has had a controller out on the market for a while, but they were long overdue for an upgrade. The BrewCommander, however, is more than simply an upgrade, as it leapfrogged itself with more features and came out with a lower price. From a features standpoint, it distinguishes itself from other stand-alone controllers with features like an LCD touchscreen and delayed start timer that previously was only available with built-in controllers on all-in-one electric brew systems. The BrewCommander comes in a version to control your gas-fired rig, but my review will focus on their electric controllers.


Compare Models, Prices and Availability, Review Continues Below:


Continue reading

Hands on Review: Blichmann Engineering Riptide Brewing Pump Upgrade Kit – Upgrade Your March or Chugger Pump

July 7, 2024

This review is by Homebrew Finds Reader Benji S.  Benji has been brewing for 10 years.  His favorite style is Festbier.  He’s an all grain brewer and member of WIZA (Whidbey Island Zymurgy Association).  Check him out on Instagram at neon_hop

Tell anyone that you spend hours cleaning as part of a hobby, and you’ll probably get a few odd looks. Unfortunately this is our reality as Homebrewers. Planning, prepping, cleaning, and waiting take up large percentages of any given batch. We often chase new ingredients, techniques, equipment, and short cuts in an effort to reduce the time we spend on these areas. Sometimes introducing new equipment into your process can make some parts of these tasks easier, while introducing new steps to others.

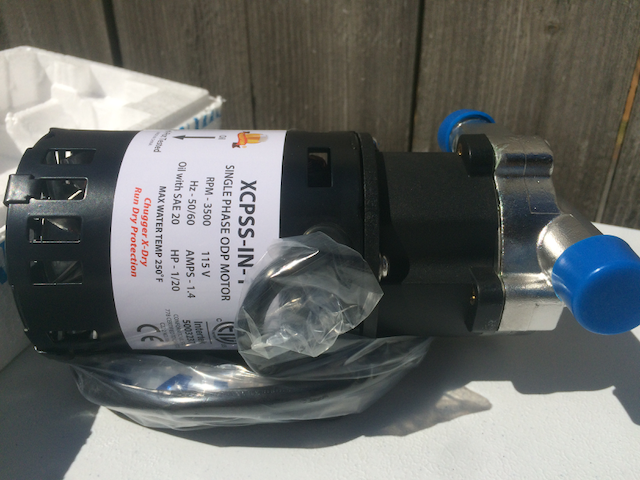
Pumps help move around lots of liquid in a short amount of time, reducing the need to lift heavy kettles or pots. They also introduce some additional planning needed for connecting vessels in a loop of hosing and cleaning after use. This has essentially been the summary experience I’ve had with my Chugger X-Dry [Hands on Review]. In the never ending quest for reducing the time and effort needed to use it, I looked at what changes I could make to my setup to make using it even simpler.

Blichmann Engineering is well known for high quality and well designed equipment targeted at Homebrewers. It should be no surprise then that their Riptide pump is a fairly feature packed model compared to others on the market. Particularly their TC clamp attached pump head with built in flow control and priming valve. In recognition of their audience, Blichmann also produces an upgrade kit that offers these same features to anyone with a Chugger or March pump.

Upgrading my Chugger X-Dry with their kit seems like a perfect way to take a good pump and make it even better, hopefully shaving some steps off of the prep and cleaning process in the meantime.


Criteria

My original criteria when looking for a pump were largely satisfied by the Chugger X-Dry, but there were a couple of criteria that were lacking, namely:

  • Head assembly should be fairly easy to take apart to aid in cleaning]
  • Flow control valve for use when sparging
  • Easy and intuitive to prime and get started

As the Riptide conversion kit is meant to solve many of these things, it made a natural candidate for trying out an upgrade to see if I could improve the usability experience. Additionally, my experience with the X-Dry suggested it was fairly easy to get into a state where it was cavitating. My hope was that the purge valve would help alleviate, or solve, this issue.


Compare Models, Prices and Availability, Review Continues Below:

Note that links could potentially show Riptide Pump, Riptide Upgrade and related Riptide parts and equipment


Continue reading

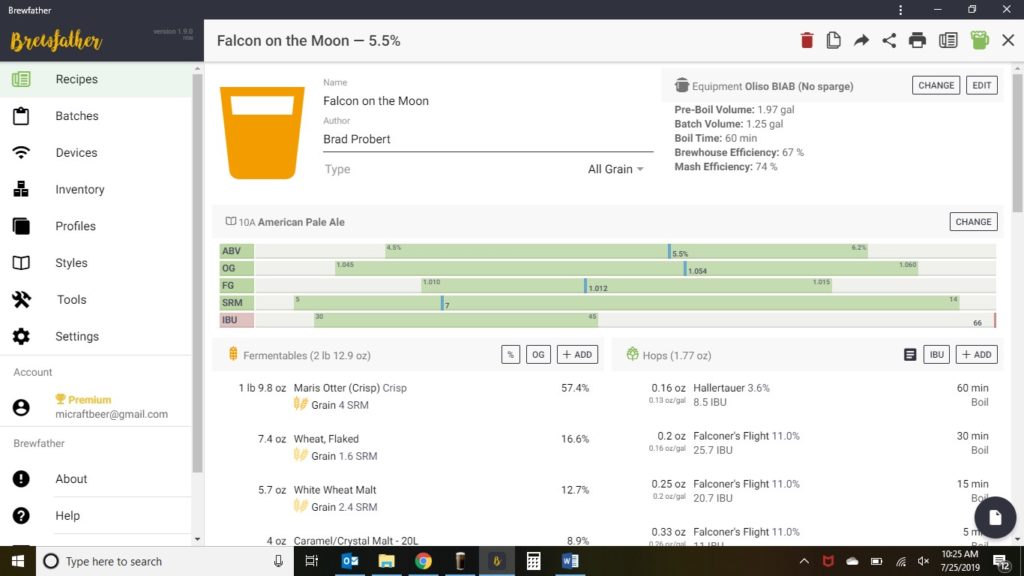
Hands on Review: Brewfather App! – Recipe Formulation, Calculators & Brew Day Tools

Updated: November 20, 2024

This review is by Homebrew Finds Contributor Brad Probert.  Brad is an engineer, expert homebrewer and experienced reviewer.  Grab a link to Brad’s website at the end of this review.


Limited Time Deal… Black Friday Sale!

brewfather black friday sale

  • Brewfather very rarely does discounts.  As of this posting, for a short time, Brewfather is offering a whopping 25% off premium when you use coupon code SAVE25
  •  This ties the best deal we’ve ever seen on Brewfather.
  • Redeamable only on the webapp, will not work on smart phone apps.
  • Check Brewfather to see if you can still get in on this.
  • Are you a TILT Owner? – Brewfather directly Integrates with TILT and more.

25% Off Brewfather! – remember promo code SAVE25


Brewfather App

Depending on your brewing personality, you might take notes on paper, do no recipe calculations at all, or use brewing software. I started using BeerSmith when I moved to all-grain brewing, since there were more variables to control when making a recipe and more process steps to keep track of. I’ve been using BeerSmith 2 for the past 5 years, and that’s established my baseline expectations of brewing software. That’s the perspective used when I evaluated the Brewfather software.


Give it a Try!

Brewfather offers a free full feature trial.  After the trial period, you’ll still have access via a limited, non-expiring account

Our 10 Most Recent Reviews | Great Deals – Our Last 50 Finds


Continue reading

Hands on Review: Oliso SmartHub for Small Batch Brewing

This review is by Homebrew Finds Contributor Brad Probert.  Brad is an engineer, expert homebrewer and experienced reviewer.  Grab a link to Brad’s website at the end of this review.

Oliso SmartHub for Small Batch Brewing

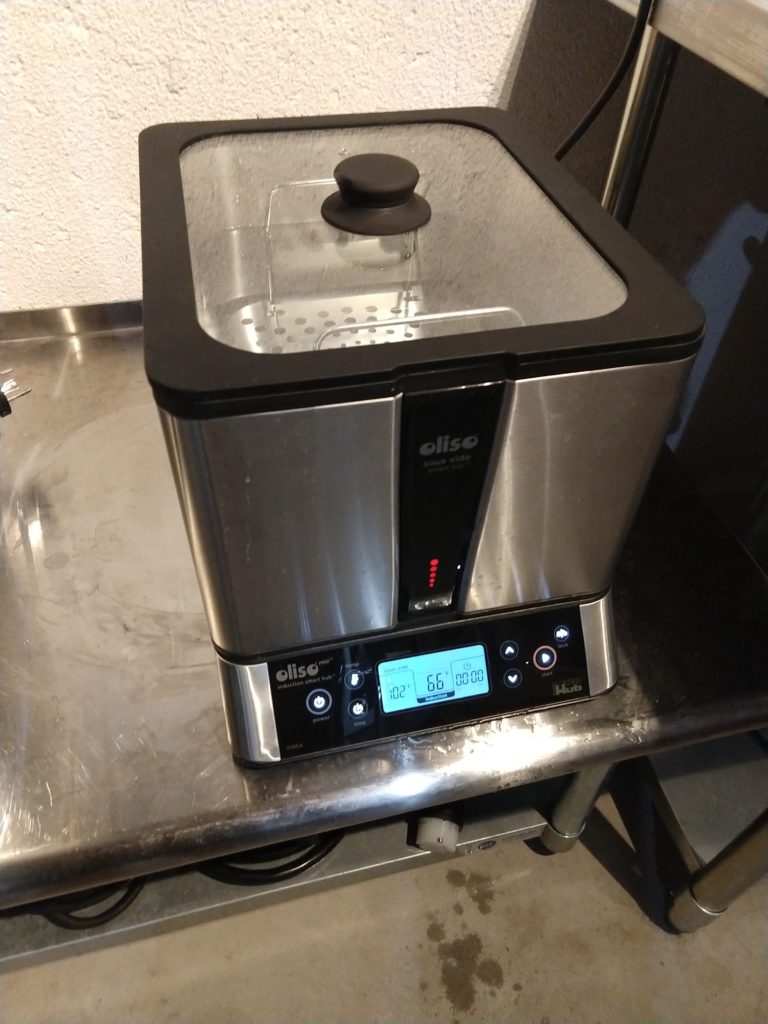
If you don’t know what a sous vide machine is, that’s forgivable. I’ve only met one person that’s used one. He raved about it so much that I had to investigate it. “Sous vide” is French for “under vacuum”. In sous vide cooking, you vacuum seal your steak (or whatever kind of food) in a bag, then place it in a pot of water that’s controlled to a specific temperature. The sealed bag keeps the meat from getting wet in the cooking water, and lets all the juices stay inside and not dry out. Depending on the “doneness” you want, you set the temperature of the water, throw your pouch in and then it cooks to the exact level you want.

Now getting us back to homebrewing, Oliso has a sous vide cooker that has features that support homebrewing. They combined the temperature control features of a traditional sous vide machine with the high power capability of an induction cooktop. The induction cooktop functions as the base of the machine, and when you set the SmartHub top on it, electrical contacts are made that change the induction top over to a temperature control machine. The tub has a built-in sensor that it uses to monitor the temperature of the liquid and adjust the power level accordingly.


Check Current Price, Specs and Availability:

Oliso SmartTop and SmartHub Induction Cooktop Sous Vide Cooking System, 11 Quart Capacity affiliate link, note that multiple variations of this product may be available, as such a different version may appear at this link


Related Resources and Reviews

Continue reading

Hands on Review: Chugger Pumps X-Dry Series Homebrew Pump!

Update: July 19, 2024

This review is by Homebrew Finds Reader Benji S.  Benji has been brewing for 10 years.  His favorite style is Festbier.  He’s an all grain brewer and member of WIZA (Whidbey Island Zymurgy Association).  Check him out on Instagram at neon_hop

Making beer is all-together extremely fun, rewarding, messy, and labor intensive. Want an example? Look no further than the need to transfer large volumes of liquid, at varying temperatures, between and through multiple containers. Mashing, sparging, boiling, racking, and cleaning all require gallons of liquid transfer. Liquid is both heavy and resistant to being easily moved around en masse. Introducing new equipment into your brew day can often mean finding new and interesting ways you now have to fight against both of these obstacles. Having recently acquired a Spike CF5 conical, I’ve found myself in this exact position, often wondering “How do I even fill and clean this thing effectively?”. In terms of equipment, adding a Brewing pump to the equation has become the de facto ways to help answer these questions.

My Homebrew Pump Selection Criteria

I’ve been brewing for well over a decade, but using a pump in the process is new to me. Approaching a new piece of equipment requires some evaluation of what you want it to do, what expectations you have for how it will work, and what your budget will be to balance against. The feature set I arrived on during my search largely came down to this:
Stainless Steel head to reduce the chance for plastic pieces from rubbing of the propeller
Head assembly should be fairly easy to take apart to aid in cleaning

  • 1/2” NPT connections on the ports, as I already had 1/2” connectors to convert them to quick disconnects
  • At least 3” of cord length as the power outlets tend to be a bit far away where I typically brew
  • Needs to be 115v
  • Price range of $100-150
  • Targeted Uses (in order of importance): CIP cleaning of my conical, transferring from the kettle to the conical, fly sparging

Compare Prices, Review Continues Below

This seller on eBay can have good deals on Chugger pumps. Price and availability vary.

Continue reading

Hands on Review: Brewers Hardware Tri-Clover Sample Valve

This review is by Homebrew Finds Contributor Brad Probert.  Brad is an engineer, expert homebrewer and experienced reviewer.  Grab a link to Brad’s website at the end of this review.

Brewers Hardware TC Sample Port

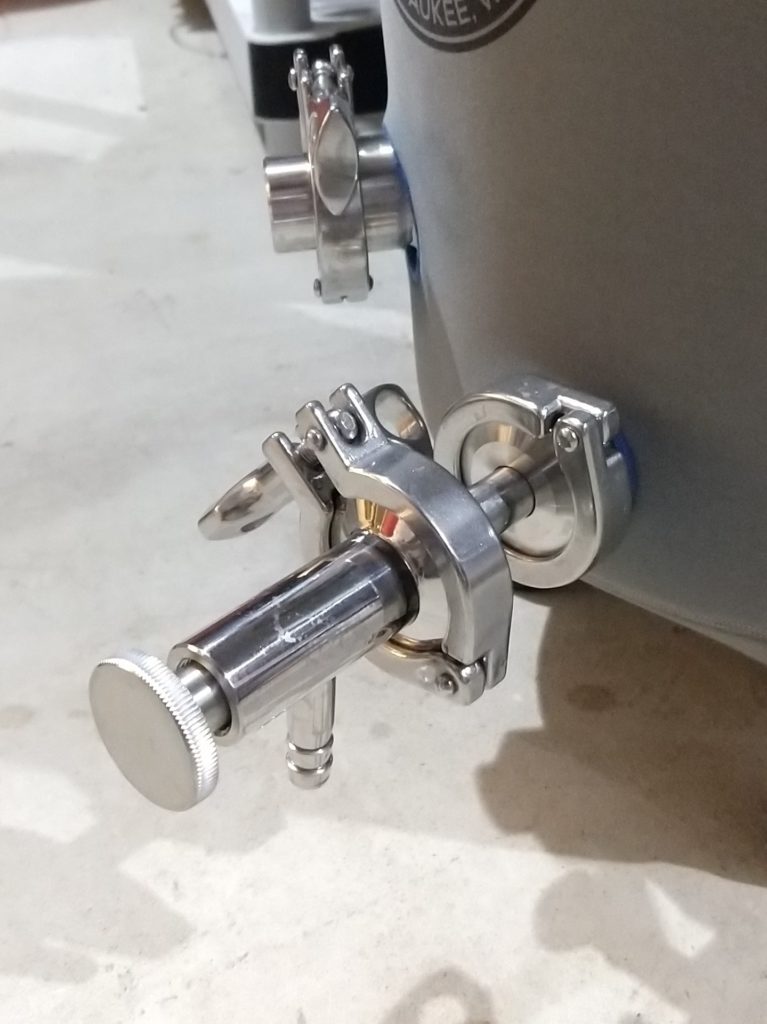
There are different types of valves, suited for different purposes. On a fermentor, it is useful to have a valve that has the ability to pull small samples for gravity readings or taste samples, but also able to flow well when it comes time for transfer to a keg. The sample port valve provides fine adjustment to flow rate, allowing you to vary between a slow trickle for pulling a sample or a higher flow rate for gravity transfer to fill a keg.

Valve Handle with 2 O-rings and Silicone Seat

The sample port valve has a fine pitch thread to allow for small adjustments to the opening of the valve. With the Brewers Hardware sample port valve, you can feel while turning the knob that the threads and the stem of the valve are machined to tolerances for a precise fit and without slop or wobble. The valve stem has 2 O-rings to keep beer from sneaking out or air sneaking in. And the tip of the valve has a silicone bumper that gets compressed onto a seat for a secure fit to prevent leaks when closed. Silicone is non-porous, making it easy to clean and not harbor stow-aways from one ferment to another. And its elasticity allows it to conform to the valve shape for a good seal, yet spring back so it can be used over and over again to seal and unseal.

The overall quality of the valve from Brewers Hardware was top-notch. The surfaces were smooth-polished stainless steel, and the ridges on the adjustment knob were cleanly machined for grip with no sharp edges. Turning the adjustment knob, it felt precise with no slop or wobble, with a tight seal. It’s difficult to give justice to the fit & finish of the part with just words or a couple pictures, but it really stands out.


Continue reading

Hands on Review: Spike Conical Fermenters

spike conical review

This review is by Homebrew Finds Reader Benji S.  Benji has been brewing for 10 years.  His favorite style is Festbier.  He’s an all grain brewer and member of WIZA (Whidbey Island Zymurgy Association).  Check him out on Instagram at neon_hop

After well over a year of evaluating, I splurged recently and got a Spike Conical (the CF5). I’ve seen quite a few others going through this debate period, so I wanted to provide a hot take to help others in their own decision making process. So far I’ve assembled and prepped it for my first brews, but haven’t actually used it yet. Most of the points here will be about equipment quality/features rather than practice.

For context; I added on the temp control bundle with heater, leg extensions, casters, extended bracing shelf, and a few other nice to haves. So some of these will cover things that aren’t part of the “core” conical package.


Compare Prices, Review Continues Below


Related, Save on Refurbished Conicals at MoreBeer

  • MoreBeer periodically makes a limited number of refurbished conicals available.
  • This is a great chance to get a deal.
  • Shipping is also free (for most sizes) to addresses in the contiguous US.
  • Limited quantities are available, check link below if you can still get in on this deal.

Refurbished Conicals at MoreBeer

Continue reading

Hands on Review: Kegtron Smart Keg Monitor

This review is by Homebrew Finds Contributor Brad Probert.  Brad is an engineer, expert homebrewer and experienced reviewer.  Grab a link to Brad’s website at the end of this review.

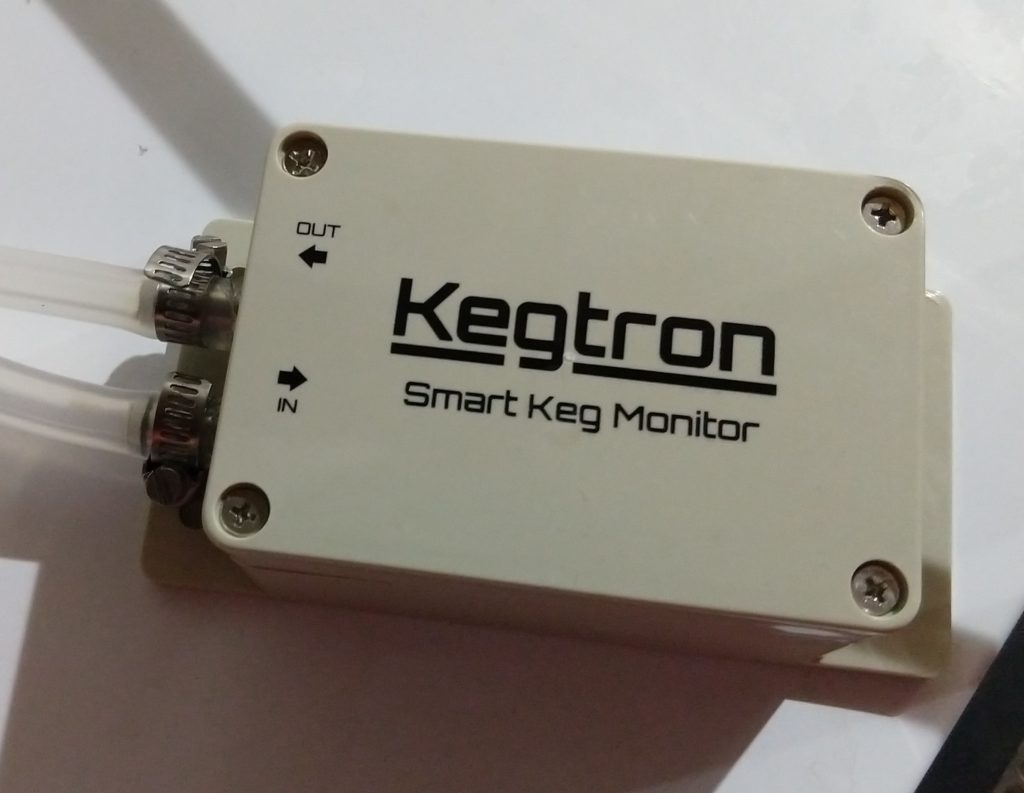
Kegtron Smart Keg Monitor

Let’s face it, some homebrew gear is purely a luxury item. You’ll hear people ask, “Yeah, but how does that make your beer better?” Sometimes you can rationalize your flashy gear because it allows your brew process to be more repeatable, or take less time. Kegtron doesn’t make your beer taste better, it doesn’t improve your brew process, and it doesn’t make your brew day faster. But it’s something more than just brewery bling.

When I first saw the Kegtron keg monitor, it seemed just like a silly way to part homebrewers from their money. It looked cool, but it definitely didn’t seem like something I’d get excited about. And then I tried it.

Kegtron sells 2 models. One for a single tap, one for a dual. The measurement is done by some fancy digital flow meters inside the housing of the unit. There is a circuit board that keeps track of how much beer goes through the flow meters and stores that data on the board. It also has a Bluetooth transmitter that broadcasts this information to an app on your phone/tablet that you’ve paired through the app.

Since the flow meters just keep track of how much beer goes past them, you have to enter into the app how much beer you start with. You hook up your keg, tell it how many gallons are in it, and it tracks from there, deducting beers each time it measures 12 ounces has gone by. It’s customizable, so if you want to count beers by the pint (U.S. or Imperial) instead of 12 oz. bottle, you can do that. The display on the app tells you how many “drinks” are left in the keg. And since you also input to the app what size your keg is (2.5 gallon, 5 gallon, 1/2 barrel, etc.), along with telling you how many beers are left, it has a colorful graphic to show what percentage of your keg is left.

In the app, you can name each of your beers, so if you have more than one Kegtron tap being monitored, they all show up on your screen and you can keep track of each beer with its own space on your display. Since the data is stored on the Kegtron unit itself, and it uses Bluetooth to communicate to your app, if you leave the house and get out of Bluetooth range, you don’t see your beer lists. So it’s intended to be a display at home next to your kegerator, or on your phone so you can direct your underlings to run downstairs and fetch you what you want from the comfort of your couch.


Check Current Prices & Availability:

When comparing prices, consider total price at checkout


Hands on Review

Kegtron provided me a single-tap unit to try out and review at home. I saw it on display at Homebrew Con in Portland, displaying a club’s list of taps and their various stages of keg emptiness. I wasn’t sure that in a less busy setting it would provide the same value. What I found was it got me excited about what I had on tap (like I needed help). It was cool watching it accurately count down the drinks with each glass filled. I have a 4-tap keezer, and I found myself gravitating to whatever I had on the tap with the Kegtron just because it was fun. After a couple weeks I found myself wanting it on all of my taps. It was just so cool, and suddenly seemingly useful to know exactly how much beer was left in each tap. I was a convert.

Continue reading

Hands on Review: Kegland BlowTie Spunding Valve!

BlowTie v2 w/Gauge that has been updated to digital, see below for walk through of that process.

Updated: 5/15/2024

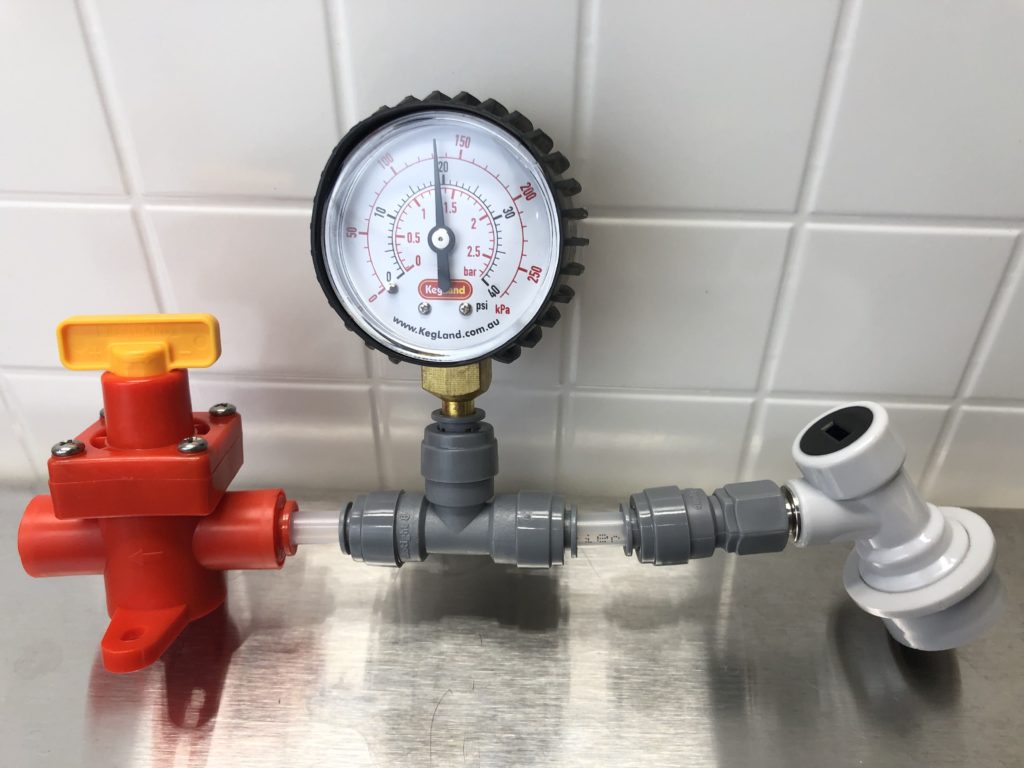
A Spunding Valve allows you to maintain a set pressure. If pressure in the vessel exceeds the set point, it is expelled. It generally consists of an adjustable PRV valve, a tee, a gauge and a way to connect to your keg.

Why a Spunding Valve?

There are loads of homebrew related applications for a Spunding valve ranging from pressurized fermentation to naturally carbonating to fixing over carbonated beers and lots more.  Check out our resource post on the subject.  It’s arguably the go-to resource on the Internet on the subject

BowTie v1 Assembly

BlowTie v1 & v2!

This review covers both the original v1 Kegland v1 BlowTie & v2. Both are DuoTight compatible. The biggest difference is v2 has an integrated gauge, where v1 required an add-on gauge.

Kegland BlowTie v2

Kegland BlowTie v1

BlowTie v1 assembly that has been updated to digital, see below for walk through of that process.

But first, more about DuoTight!

Kegland’s DuoTight Fittings are designed to work with EVABarrier Double Wall Tubing.  They offer quick, reliable connections, easy implementation, a variety of fitting options and feature amazing versatility.  They’re also, generally speaking, very well priced.  DuoTights are push to connect fittings and require no tubing clamps.

Check out my extensive Hands on Review

Check out the end of this review for a list of all of my DuoTight related reviews and resource posts.


Buy DuoTight


Hands on Review Kegland BlowTie Spunding Valve v1

The BlowTie Spunding Valve assembly consists of the BlowTie, a DuoTight Tee Fitting, a DuoTight to flare fitting, a DuoTight pressure gauge and two small pieces of EVABarrier Tubing.

The BlowTie is the heart of this build.  It has DuoTight Push to Connect connections on both side as well as an adjustment knob to set pressure.  Related: DuoTight Hands on Review. Continue reading

Hands on Review: Brewers Hardware Tri-Clover Sight Glasses

This review is by Homebrew Finds Contributor Brad Probert.  Brad is an engineer, expert homebrewer and experienced reviewer.  Grab a link to Brad’s website at the end of this review.

Brewers Hardware TC Sight Glasses

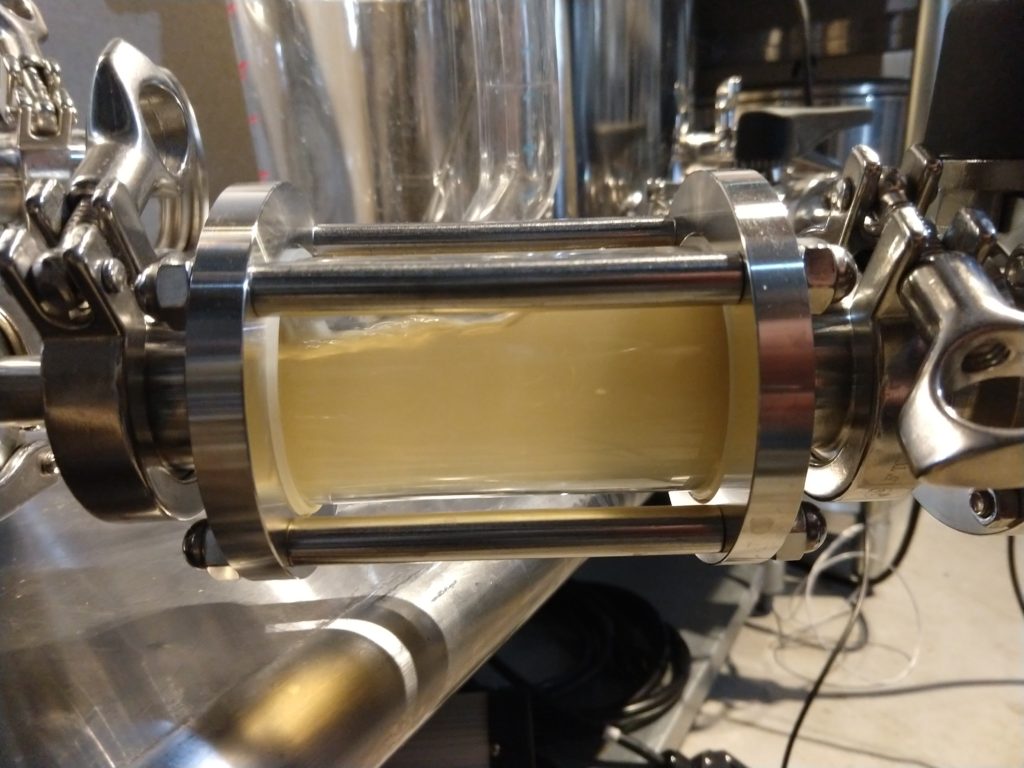
A large sight glass on a brew rig set-up can legitimately be classified as a luxury. There are various ways to assess your wort clarity during your brew session. During recirculation of the mash, or during vourlaf, you want to know when your wort is running clear and free of grain debris. Connect a sight glass into your recirculation loop and you can easily see the wort clarity without having to look for grain bits in a recirculation spray. It’s just right there in plain view.

Sight Glass showing cloudy wort during recirculationSight Glass showing clear wort during recirculation

Continue reading

Hands on Review: Brewers Hardware Quick Clean Take-Apart Ball Valves

This review is by Homebrew Finds Contributor Brad Probert.  Brad is an engineer, expert homebrewer and experienced reviewer.  Grab a link to Brad’s website at the end of this review.

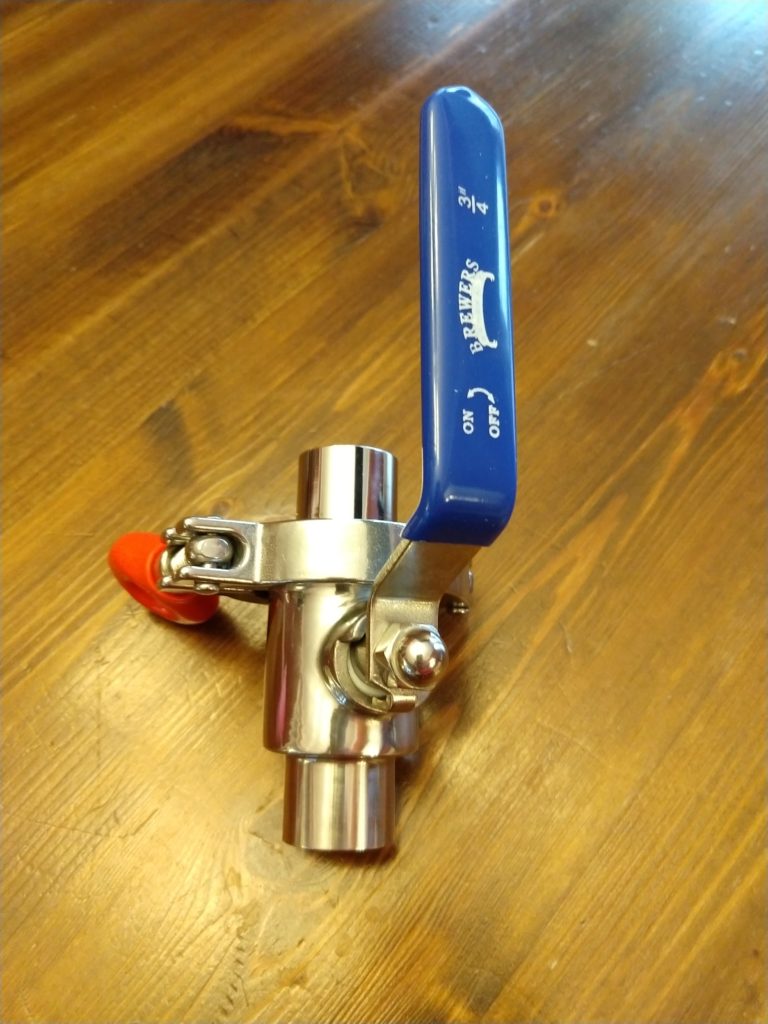
Brewers Hardware Take-Apart Ball Valve

Up until now, I’ve known of two types of ball valves- 2-piece and 3-piece. The key difference between them being that the 3-piece can be disassembled for full cleaning. When I first started buying gear, I figured I’d go for the 3-piece because the idea of being able to take it apart and clean it sounded like something I should probably do. After seeing the complications of needing to use 2 wrenches at a time, while holding the body of the valve stable, I quickly concluded my 3-piece valves would never experience the joy of a ‘deep cleaning’.

Continue reading

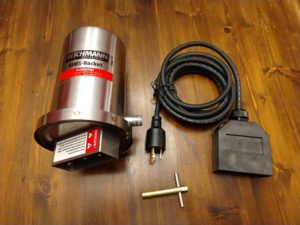
Hands on Review: Blichmann Engineering RIMS Rocket

This review is by Homebrew Finds Contributor Brad Probert.  Brad is an engineer, expert homebrewer and experienced reviewer.  Grab a link to Brad’s website at the end of this review.

Blichmann RIMS Rocket

I heard the term ‘RIMS’ long before I really knew what it was. The decoded acronym ‘Recirculating Infusion Mash System’ didn’t help much, either. In hindsight, the acronym has all the info in it to describe what it is. It’s a system to control mash temperature by adding heat to your recirculating wort. You use a pump to draw wort out of your mash tun, push it past a heating element, and then return that heated wort back to your main mash tun. Connected to a controller, a temperature sensor monitors the temperature of your recirculating wort and turns your heat source on or off based on the measured temperature, as compared to your target temperature. And since this heating element is outside of your mash tun, a RIMS can be used whether your mash tun is a plastic cooler or a steel pot.

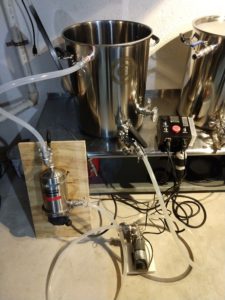
Connected to a RIMS Controller and Mash Tun

Blichmann offers two levels of RIMS. The first is a 120V system that has a 2000-Watt heating element, and the other is a 240V system with a 3500-Watt heating element. The 120V system is designed for up to 10 gallon batches, and the 240V system is up to 20 gallons. To get an idea of the heating potential, Blichmann provides a formula on their website to calculate the heating potential.

°F/minute = 0.0068*(Wattage/gallons of wort).

So with 6 gallons of wort in your mash tun, the 2000W/120V system can heat at about 2.3 degrees/minute. The 3500W/240V system on the same 6 gallons can heat it 4 degrees/minute.

The heating element sits inside a stainless steel canister that holds about 0.75 gallons of wort. With the heating element’s large corkscrew design, it has a lot of surface area to transfer heat to your wort without scorching. There are 1/2″ NPT fittings on the inlet and outlet of the canister. On the outlet you need a Y-fitting so you can install a temperature sensor to monitor the temperature of the wort as it exits the RIMS Rocket.

The heating element connects through Blichmann’s custom heating element connection. The large, robust connection ensures a solid electrical connection and grounding to the housing for safety. You disconnect your cable to make cleaning and storage easier, so you don’t have to drag the cord around like a tail. And although not waterproof to dunk in a bucket of water, it has a good-sized splash shield to protect the connection from the splashes that come with the wet sport of brewing.

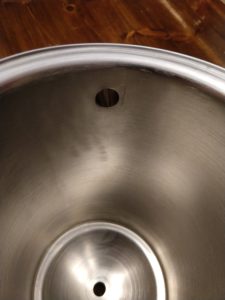
Smooth Machined Inside of Housing

The inside of the housing is machined and designed to be free of crevices or cracks. This is important since mash recirculation is practically guaranteed to have some level of grain particles passing through that you don’t want to get stuck. The heating element built into the base seals to the main cone of the housing with a large O-ring. And it is held together and tightened with a circular band clamp with a threaded nut/bolt combination. This clamp makes for fairly easy disassembly to clean inside as often as you’d like.


Compare Models, Prices and Availability, Review Continues Below:


Continue reading

Hands on Review: Anvil Bucket Fermentor Cooling System

This review is by Homebrew Finds Contributor Brad Probert.  Brad is an engineer, expert homebrewer and experienced reviewer.  Grab a link to Brad’s website at the end of this review.

Anvil Bucket Fermentor Cooling System

Blichmann created the Anvil line of equipment to provide good gear at an affordable price. Across the line-up, you can find great quality stuff that’s notably cheaper than other high-end brew gear. By making it more affordable, it allows more homebrewers to step up their equipment. I reviewed their 7.5 gallon stainless bucket fermentor a little over a year ago. It was a great product, but it wasn’t compatible with my existing fermentation temperature control systems. So I was excited to see they came out with a custom system. And as per their formula, it was upper tier brewing capability at an attainable price.


Compare Models, Prices and Availability, Review Continues Below:


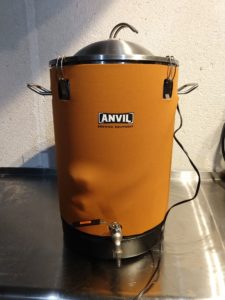
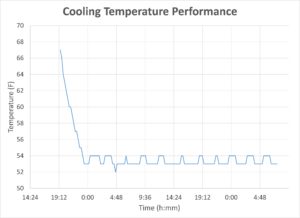
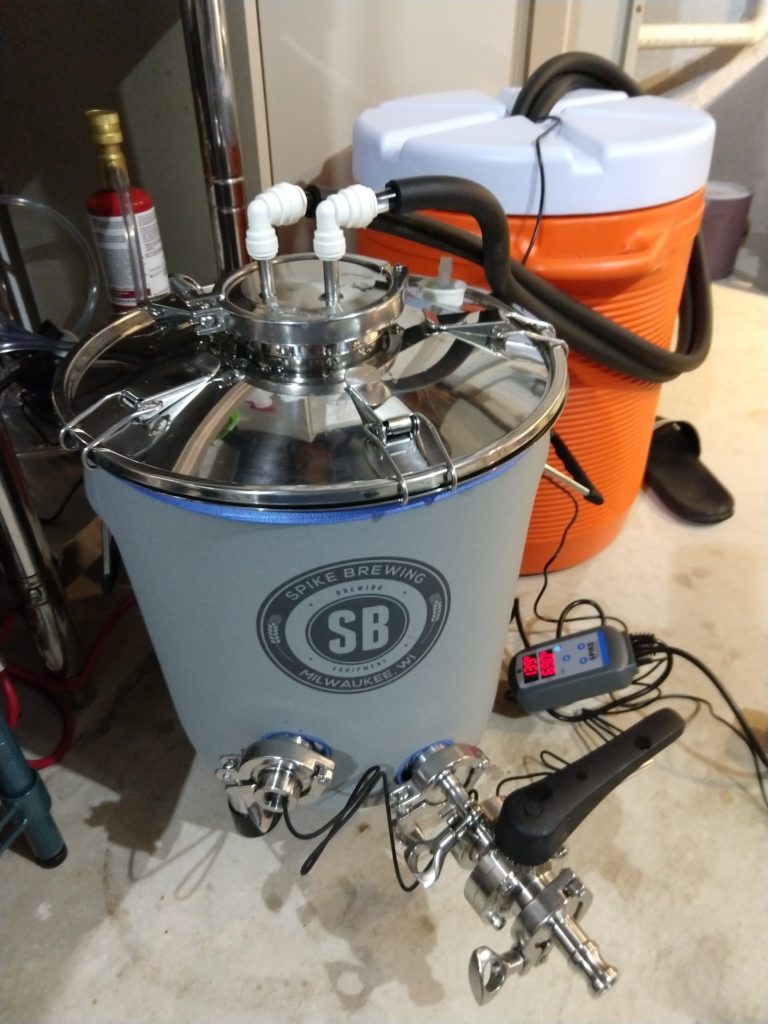
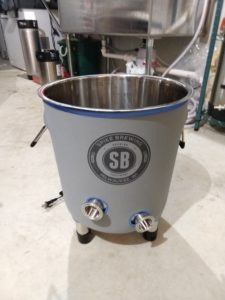
The system is targeted to those looking to control their temperatures in the 50-55F temperature zone where lager yeast provides its cleanest flavors. It comes with a neoprene insulating jacket to insulate the walls of the bucket, a cooling coil & thermowell mated to a special stopper, a submersible pump and cooling lines to circulate your cooling water, and a digital controller. The neoprene jacket is custom-made for the Anvil fermentor, with cut-outs for the handles, the lid clamps, and the spigot.

Plot of Cooling System Performance

Continue reading

Hands on Review: Spike TC100 Temperature Control System

This review is by Homebrew Finds Contributor Brad Probert.  Brad is an engineer, expert homebrewer and experienced reviewer.  Grab a link to Brad’s website at the end of this review.

Spike TC100 Temperature Control System

Controlling the temperature during fermentation is key to getting the right flavor profile out of your yeast. Sure, you can still make good beer without it, but you’ll be limited. It’s like walking vs. driving a car. Sure, you can get some cool places just by walking. But when you increase your mobility, you can explore more places that were out of reach when you were only walking. Getting back to fermentation, if you’ve got a cool basement and a heat wrap + controller, you can get control of ale fermentation. Add to that a cold water source and a method to circulate that water within your beer, and now you can also get control of lager fermentation, too.

Flex Fermentor [Hands on Review] with Neoprene Jacket


Compare Prices, Review Continues Below


Continue reading

Hands on Review: Brew-Control Electric Mash Tun/RIMS (Recirculating Infusion Mash System) Tube Controller

This review is by Homebrew Finds Contributor Brad Probert.  Brad is an engineer, expert homebrewer and experienced reviewer.  Grab a link to Brad’s website at the end of this review.

Brew-Control 120V Controller

Electric brewing systems are great. I’ve been a convert for a few years, loving the ability to control temperature precisely/easily during mashes, and the “set it and forget it” aspect that helps support multi-tasking with other household duties while brewing. Of course the thing that makes this all possible is the brew controller. It does all the hard work in the background so you don’t have to think about it.


Get the Gear, Review Continues Below


Tom Hargrave of Brew-Control has been brewing since 1977, and designing and building electric brew controllers since 2012. He openly admits that it took about 3 years and a dozen design iterations until they were producing a quality product. They now offer several different controllers, depending on how you’ll use it. There are boil controllers, which have a simple adjustment dial to adjust output power from 0-100% and on/off pump control. Mash controllers that have a PID controller where you set a target temperature and the PID adjusts the output to match your target temperature. BIAB Controllers that combine both the boil controller function and mash controller into one unit. And other combinations of controllers that add in control of more pumps and more heating elements.

Continue reading

Hands on Review: Spike Brewing Flex Fermentor

spike brewing flex fermenter review

This review is by Homebrew Finds Contributor Brad Probert.  Brad is an engineer, expert homebrewer and experienced reviewer.  Grab a link to Brad’s website at the end of this review.

Spike Flex Stainless Fermentor

Hands on Review: Spike Brewing Equipment Flex Fermentor

Stainless steel is highly valued in homebrewing because of its durability and ease of cleaning. When used in fermentors, this ease of cleaning means you don’t spend as much time scrubbing yeast crust and dry hop debris off the walls of your vessel when done fermenting. And since your beer spends so much time in contact with the surface of your fermentor, it’s easy for aromas to leech in over time to plastic fermentors. Glass of course doesn’t have this problem, but it does have the problem of shattering if you drop it.


Compare Prices, Review Continues Below


Spike is well-known for their heavy duty stainless kettles and free-standing conical fermentors. With all that stainless laying around in their shop, it’s no surprise that they’re now entering the category of “stainless bucket fermentors”. These bucket fermentors are smaller in size than the long-legged conical fermentors. What’s surprising to me is the price difference between the stainless bucket fermentors and taller conical fermentors. Even with the same holding capacity, you’re paying a few hundred dollars extra just to get a conical fermentor up on stilts. The stainless buckets offer essentially the same features, they just require you to crouch down- which to me, is an acceptable compromise.

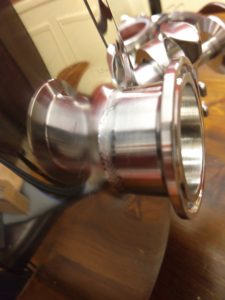
Weld Flange from the Outside
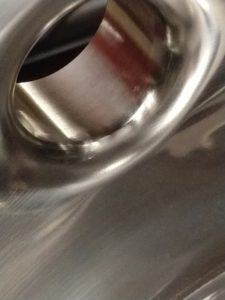
TC Flange Seamless Surface in Contact with Beer

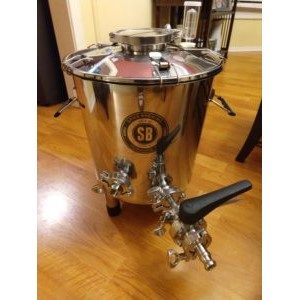
Spike’s new Flex fermentor is a bucket fermentor (crouching required) that has a 7.5 gallon volume, and has a 45-degree angle cone on the bottom. Utilizing the same 1.5” TC flanges that they’ve mastered the welding with their Spike+ kettles, you can interchange pieces from the Spike accessory catalog for a thermowell and a draining valve. It comes with a rack arm when time to drain that can be rotated by loosening the 1.5” TC clamp slightly and turning it. That feature is designed for those that want to take advantage of avoiding the fallen yeast that has collected in the 45-degree cone, but want to rotate the arm while draining to try to get as much viable beer out of it as possible. And the racking arm has a simple but ingenious bump welded onto it so you know which direction the pickup tube is pointing while you’re trying to rotate it from the outside .

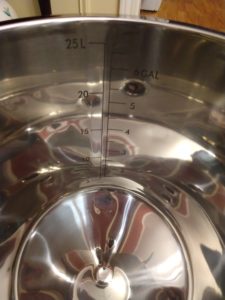
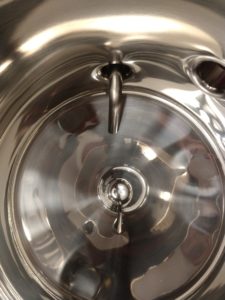
Polished Interior with Etched Volume MarkPickup Tube Rotated Down into Cone

The fermentor walls are ultra-polished. While this has a super-glam aspect that’s sure to dazzle your friends, it serves a practical purpose as well. The polishing process eliminates any kind of surface roughness, which makes it even easier to clean. The inside of the vessel contains electrically etched black volume markings every 0.5 gallons, the same as they have on their kettles. The base is supported by 3 sturdy legs with rubber caps on them to keep it from sliding around on floors (or scratching your floor).

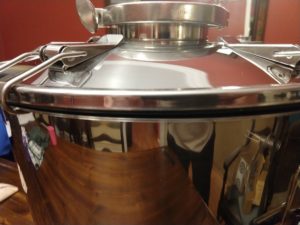
Lid Clamped on with Seal Visible

The lid looks like something from a 1920s diving helmet. In the middle of the lid, there’s a giant 4” TC port that holds a polished clear hard plastic window so you can easily see what’s going on inside your fermentor without having to open the lid. The base Flex model has a hole for a rubber stopper and airlock, and 5 latches that hook over the edge of the lid and onto a flange on the base. This base latch and seal set-up is capable of holding 2 psi of internal pressure. The Flex+ model uses a band clamp that goes around the circumference of the lid and tightens down with a screw/nut feature. And the hole for the bung/airlock is replaced by another 1.5” TC port. This ups the pressure holding capability of the unit to 15 psi.

With its short & stout size, the Flex can fit in shorter areas, but it is pretty wide. From the bottom to the top of a 3-piece airlock, it stands 22” tall. The widest diameter, with the stackup of the racking arm and a Spike butterfly valve with a camlock fitting at the end of it, is 21” across. If those dimensions don’t work for your fermentation chamber, Spike also has a version of its TC-100 temperature control system available that makes use of some common components from their unitank conicals and a form-fitted neoprene jacket sized to the Flex dimensions.

Continue reading

Hands on Review: Spike Brewing Equipment Spike+ Kettle

This review is by Homebrew Finds Contributor Brad Probert.  Brad is an engineer, expert homebrewer and experienced reviewer.  Grab a link to Brad’s website at the end of this review.

Spike+ Kettle + Mash Tun Conversion

Spike kettles come in sizes from 10 gallons all the way up to 50 gallons. The 10, 15, and 20 gallon kettles all share a common trait of 1.2 mm thick walls and a 5 mm thick base. The 30 and 50 gallon units up those numbers to 1.5 mm walls and a 6 mm base. Spike is quick to point out that these are the thickest kettle walls on the market. At first that might not seem like something that matters, it just seems like something that makes them heavy to lift and move around. But if you accidentally bang it into a doorway or a table you’re thankful for sturdy kettle walls that keep it looking new rather than beat up.


Compare Prices, Review Continues Below


Continue reading

Hands on Review: Spike Brewing Equipment Custom Kettles

This review is by Homebrew Finds Contributor Brad Probert.  Brad is an engineer, expert homebrewer and experienced reviewer.  Grab a link to Brad’s website at the end of this review.

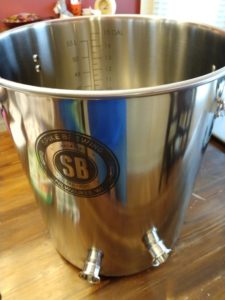
Spike+ Custom Boil Kettle

Have you ever stood and looked at a friend’s brew rig and thought, “That’s genius! I should do that”? Or stood and looked at your own brew rig and thought, “If I could only have another port there, that would solve my problem with _______”? After using different systems, I found myself with a list of features I loved, and had an idea of the ideal set-up for me. But these ideas never went anywhere because I didn’t have the right skills to build it myself.

Spike offers a solution to this problem, with their Custom Kettle service. And they do it at a competitive pricing to DIY, but with professional quality (not knocking your welding skills- they’re great…). When designing a custom kettle, 1/2″ threaded ports are added at $30 a pop and Tri-Clamp (TC) ports are $50 each. Compare this price to $25 for a weldless TC fitting + $20 for a carbide bit hole saw. And with that weldless fitting you don’t have the smooth sanitary weld surface that’s easy to clean and keep free of beer-souring bacteria. Not to mention the heart stress induced by drilling a hole into the side of your stainless kettle, hoping you’re not going to let the drill slip!


Compare Prices, Review Continues Below:


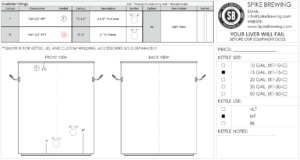
To make a custom kettle, you can either have your own specific design in mind, or you can have a general idea and work with their engineer to detail it. By doing this, you have the benefit of working with someone that has the experience of having built a lot of custom kettles to help guide you through the process.
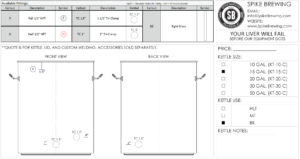
Custom Boil Kettle Drawing

Once the drawing for your kettles is determined, your project is transferred to the person that will coordinate the build of your kettle and help you with any accessories you want to add to your order. Once the kettle is built, they box it up with your accessories and ship it out together.

Spike features two types of kettles, differentiated by the types of weld ports. They have traditional 1/2″ NPT threaded ports (full or half thread), and also 1.5” or 2” TC ports. They’ll even mix and match if you want with some of the fittings NPT and some TC on the same kettle.


Hands on Review

This trial started with the creation process. I had a solid idea of what I wanted. I needed a boil kettle to use with an electrical element to heat strike water, use as a RIMS device for mash step temperatures, and for the boil. I knew most of what I wanted, but was undecided on a couple aspects. So through a series of back and forth questions and answers, I was able to hone in on how I wanted it configured.

The engineer working with me to finalize the kettle port layout was responsive and we exchanged emails daily for a few days until it was settled and I had agreed to the kettle drawings. When I was handed off to the Customer Service contact, she was equally as responsive, and we exchanged a few emails a couple times a day until we had the full order detailed. Five days later I got an email with the FedEx tracking number as it was all being shipped to me. I was amazed at how fast the whole process went.

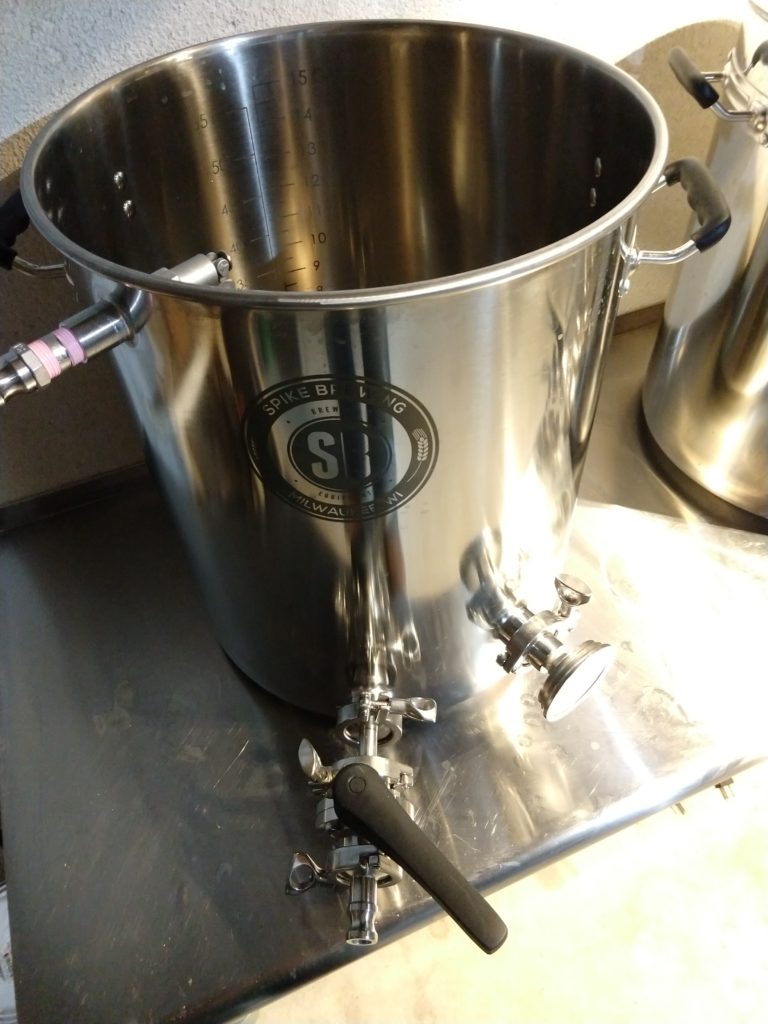
The 15-gallon Boil Kettle configuration had three 1.5” TC flange ports and one 1/2″ NPT port. I had a TC fitting down low (2” up from the bottom) for the outlet drain, and another TC fitting also at 2” up from the bottom for my electric heating element. This required about 3 gallons of wort to completely cover the heating element. At 4” up, I had a TC fitting for a temperature probe. This required just over 4 gallons of wort to keep it submerged. The 1/2″ threaded fitting was up high on the kettle, 1.5” down from the top flange. To this I fitted a whirlpool recirculation tube from NorCal Brewing Solutions.

The kettle quality was top-notch. Heavy gauge steel walls were straight and true, and the extra-thick bottom helped provide a solid base to keep things stable. The purpose of the thick base is to make it induction heat compatible or help more evenly distribute the heat from a gas burner flame, but it also helped make the pot feel secure sitting on a brew table full of hot wort. The finish on the outside was a bit shinier to look more impressive when showing off to your friends, and the inside was a bit more brushed so the inevitable markings of multiple batches of boiling wort isn’t as noticeable. Both sides cleaned up really easily with hot water and a scrubbing sponge. I only had to use cleaning products prior to its virgin voyage to ensure all the machining oils were cleaned off.

The weld quality was superb. The NPT port was clean and without any porosity or crevices to make cleaning difficult. The TC flanges were beautiful. The way they were integrated into the walls of the kettle almost looked they were formed/pushed out of the side wall of the kettle rather than welded on. I really can’t overstate how flawless these were.

Kettle with PIckup Tube, Recirc Tube, 2,250 Watt Element and Temp Probe
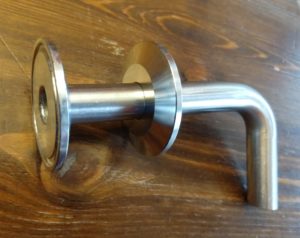
Shorty Pickup Tube

The accessories were all of good quality and reasonably priced. There were two accessories that stood out for me. The first was the short pickup tube to connect to the TC fitting down low on the kettle. This dropped down low to almost touch the bottom of the kettle to ensure the maximum amount of fluid to be extracted. With a slight angular cut on the tube, it built a natural blocking barrier to any trub in the center, and then sloped upwards to ensure it didn’t create a flow restriction problem.
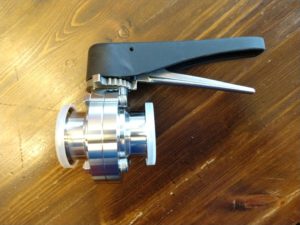
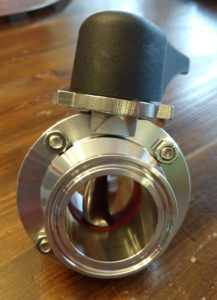
Spike Brewing Butterfly Valve

The other accessory that was impressive was the butterfly valve. The price was a bit intimidating, about twice the price of a decent 3-piece ball lock valve. But I was impressed. The heft and quality of this beast was impressive. Being a much more open design than a ball valve, it certainly was easier to clean and know you got everything out. The handle used to open the valve contained a locking mechanism so you could open it to a fixed position and the mechanism kept it locked in position so the flow going through didn’t cause the valve to float or try to close.

All of the TC fittings worked easily and sealed to a fully leak-proof condition with no fiddling required and nothing more than hand torqueing of the clamps- no tools required. The black painted/etched volume markings at every 0.5 gallons were very clear and easy to read while filling the kettle, and I liked how they went down as low as 2 gallons.

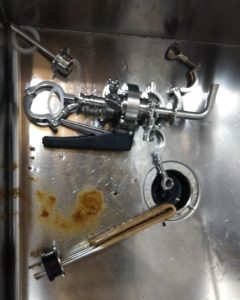
The main selling point of the TC fittings is ease of cleaning. I was curious to try this out because I’m not one to be obsessive about cleaning, so I figured I could give it a good critical review. I’ll shortcut to the ending and tell you that even a non-cleanfreak found these to be great. I especially loved the ability to pop the electric heating element out and easily clean it. I scalded the element a couple times so I was thankful at how easy it was to pop this out. The smoothness of the weld on the TC fittings also made cleaning easy without requiring brushes to clean inside threaded fitting grooves.

Conclusions

So overall, this custom kettle service is kind of a hidden gem. The kettles themselves are very high quality, and Spike makes creating your own custom build super-easy and relatively affordable. I was skeptical of the benefits of TC ports before, but now am a firm believer in how they make cleaning so much easier. If you’re in the market for a new kettle and have some ideas of what you might do a little differently, Spike Custom Kettles might be able to hook you up.

Compare Prices, Review Continues Below:

More Reviews!

More Spike Brewing Equipment Reviews

Spike Brewing Equipment Reviews

More Homebrew Finds!

Shop Around… More Kettle Reviews!

Homebrew Reviews: Kettles

More Photos
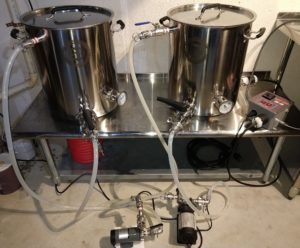
Spike Two Vessel SetupOpen Butterfly ValveSpike Custom Mash Tun DrawingTC Ports Make for Easy Cleaning!

pinned

This post may contain affiliate links. We may make a commission when you use our links. This will never cost you extra. Thank you for supporting Homebrew Finds!

greatdeals

Special Thanks to Spike Brewing Equipment for for providing the unit used for evaluation in this review.

By Brad Probert.  Check out Brad’s website – beersnobby.com

review:spikecustkettle tag:tpr

Hands on Review: Anvil Brewing Equipment Forge Propane Burner

This review is by Homebrew Finds Contributor Tom Brennan.  Read more about Tom and grab a link to his website and YouTube channel below.

Anvil Brewing Equipment Forge Burner

When I was looking for a new burner I stumbled upon this utilitarian looking burner it was for me, with the BTU’s (72,000/hr) to back it up. This looked strong, rugged, and simply made. And at first glance, the Anvil Forge Burner had it all for me.


Compare Models, Prices and Availability, Review Continues Below:


Continue reading

Hands on Review: Blichmann Engineering AutoSparge

blichmann autosparge review

This review is by Homebrew Finds Contributor Brad Probert.  Brad is an engineer, expert homebrewer and experienced reviewer.  Grab a link to Brad’s website at the end of this review.
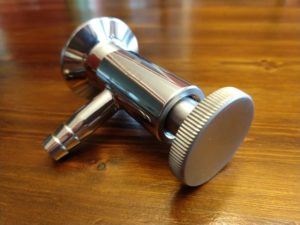
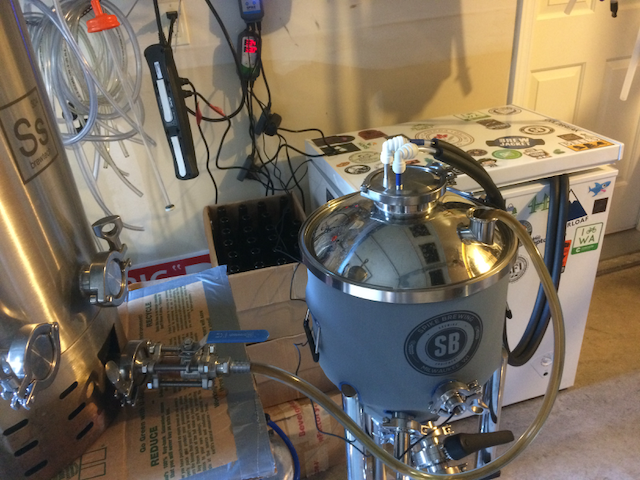
Blichmann AutoSparge

The Blichmann AutoSparge is an ingenious device that gives you “digital like” control precision, but uses no electronics to accomplish it. Its function is to automatically maintain a water level in your mash tun during sparging or recirculation of wort. If your brewing process uses sparge water transfer or recirculating wort, the AutoSparge turns this into a hands-free operation where you set it up once and then can go worry about other things (or RDWHAHB).

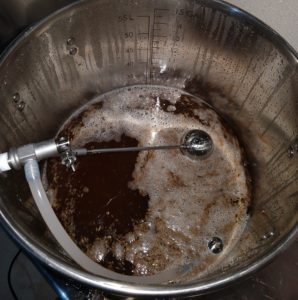
The AutoSparge uses some cool engineering principles to maintain the liquid level in your mash tun. The main function is a slider piston valve that uses hydraulic pressure to let liquid flow into your kettle. This screws into a 1/2″ NPT port on your kettle. With fluid pushing on the valve (either from a pump or from a gravity feed), it pushes the valve back and lets beer in the kettle. There’s a barbed fitting and a length of hose that comes with it to take circulating wort from the top of your kettle down to the grain level. Attached to the other end of the valve is a long rod and stainless-clad hollow ball. This ball floats on the water level in your kettle. As the fluid level rises, the ball floats up and pushes the slider valve closed, shutting off the flow of wort into your kettle.

The rod and floating ball is adjusted simply by a wing nut you loosen and adjust the float to sit at the level you want, then hand tighten it down. With laws of physics and lever arms, the ball can easily contain the high flow rate of a recirculating pump you may have hooked up. Another nice detail is the hose that delivers the wort down to your grain bed has its own little floating ball. In this way, it will sit on the top of your fluid level, and not be buried down in your grain bed blasting its own trench.

Once you have your float level set, you just let your pump(s) run. As you pull wort out from the bottom of your mash tun, the fluid level goes down in the kettle and the float arm opens up the valve and lets more wort come in. If you’re pulling fluid out slowly, the wort level drops slowly and therefore the valve only opens a little bit to replace that wort slowly. If you’re pulling out wort quickly, the level drops more quickly and the valve opens up more.


Compare Models, Prices and Availability, Review Continues Below:


Continue reading