
Hands on Review: Anvil Foundry Brewing System!
July 7,2024
This review is by Homebrew Finds Contributor Brad Probert. Brad is an engineer, expert homebrewer and experienced reviewer. Grab a link to Brad’s website at the end of this review.
Anvil Brewing Equipment Foundry
There are a lot of all-in-one electric brew rigs on the market. The entry to all-grain for most was through a converted cooler 3-vessel system. It was the cheapest way to get into all-grain, and why so many of us came that way. Precision control and/or electric heating convenience came at a premium that you would upgrade to later. Well, those are now relegated to “old timer stories”. At the all-grain entry level price point, you can now get an all-in-one electric unit from Anvil for the price you’d pay for an Igloo cooler kit with a burner and pot. So now those getting into all-grain can start with the precision of digital temperature control, and the weather-proof convenience of an electric heat source.
Compare Models, Prices and Availability, Review Continues Below:
- Anvil Foundry Systems and Accessories at MoreBeer
- Anvil Foundry Systems and Accessories at Adventures in Homebrewing
- Anvil Foundry Systems and Accessories at Austin Homebrew Supply
- Anvil Foundry Systems and Accessories at Great Fermentations
- Anvil Foundry Systems and Accessories at Beer & Wine Hobby
- Search “Anvil Foundry” at Amazon – offerings vary
- ANVIL FOUNDRY 6.5 Gallon Electric Boiler Kettle For All Grain Brewing T500 Ready Includes Recirculation Pump Kit and Wort Chiller
- Foundry 10.5 Gallon All-In-One Brewing System With Pump
- All-in-One Electric Brewing System, Anvil Foundry™, Home Beer Brewer, Delayed Start Timer, 240V or 120 Option, Easy Clean False Bottom, Sous Vide Machine (10.5 Gallon)
- Foundry 10.5 Gallon All-in-One Brewing System – No Pump
- Anvil Foundry 6.5 Gallon All-In-One Brewing System – No Pump
These are affiliate links, note that multiple variations of this product may be available, as such a different version may appear at these links
Comparing Anvil Foundry Versions
The Anvil Foundry comes in two sizes, a 10.5 gallon and a 6.5 gallon. They share most all of the same features, but the 10.5 is targeted at 4-5 gallon batches, and the 6.5 for 2.5 gallon batches. There’s also an accessory you can order for the 10.5 to insert in the mash basket and then go as low as 2 gallon batches. Both of these units come with the option to add on a recirculation kit, which provides a pump and some other hardware bits to allow you to recirculate wort during the mash. Every unit also has a simple switch you can change to run on 120V or 240V. However, the unit comes with a 3-prong 120V plug, so if you do opt for the 240V setting, you have to cut the plug off and attach the appropriate 240V plug type.
This article contains affiliate links. We may make a small percentage if you use our links to make a purchase. You won’t pay more and you’ll be supporting Homebrew Finds and more content like this. Thank you for your support!
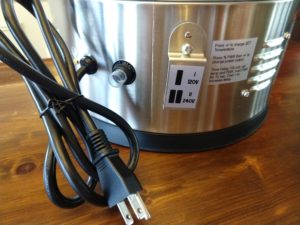 120V-240V Power Switch and 3-Prong 120V Plug
Anvil Foundry Control Panel
The control panel on the unit sits in an uncommon location. Other all-in-one units on the market mount the controller down low. But in the case of the Foundry, it’s mounted up high. Since the unit is designed to sit on the floor, there is a huge convenience factor of being able to use the controller without getting down on your hands and knees. And the double-wall construction of the Anvil Foundry keeps all the wiring tucked away unseen inside.
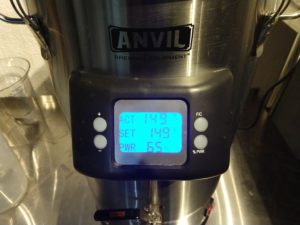 Controlling at Set Point with Reduced Power
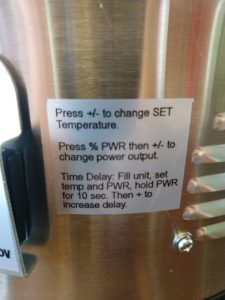 All the Directions You Need for Controller
The controller is simple to use. You set your target temperature (in whole degrees), and the maximum power output percentage (0 – 100%, in 1% increments). This fine level of output power adjustment lets you dial back the sensitivity once you reach target temperature (to minimize control oscillation), yet still have full power when stepping up in temperatures. It also lets you fine tune the vigor of your boil. While other all-in-one units have two heating element rings in the base, the Anvil breaks its power output into 3 rings. With heating power split across an additional ring, each ring will not get as hot, which minimizes your risk of wort scorching. When the unit is running in 240V mode, the heating elements output 2800W of power, and in 120V mode output 1600W. This is the same whether you have the 6.5 or 10.5 unit. The other two controller functions are a button to change temperature units between Celsius and Fahrenheit, and a delayed start timer (set in 1 hr increments).
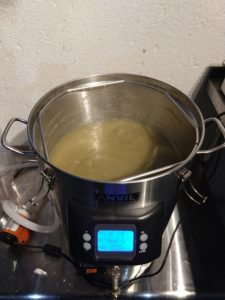 Boil Mode
Included Wort Chiller and Optional Recirculation Kit
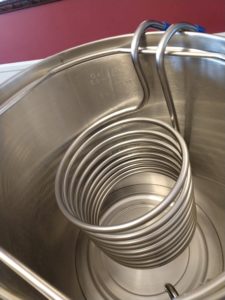 Wort Chiller Hanging over Edge
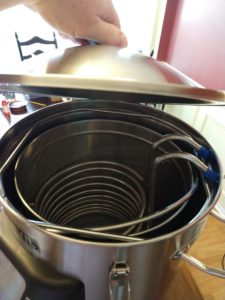 Wort Chiller Fully Fits Inside for Storage
The Anvil Foundry includes a stainless steel immersion chiller. This makes it even more of a complete set-up for new brewers. They are sized to the unit (10.5 has a longer one than the 6.5), and are made to hook over the rim of your unit.
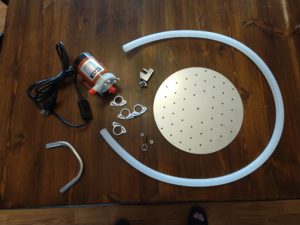 Recirculation Kit
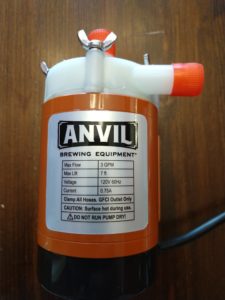 Anvil Pump
The optional recirculation kit comes with a pump, hose & clamps, a short section of stainless tubing to connect the hose to the lid, a hose flow restrictor, and a perforated plate that sits on top of the mash basket. Since this is add-on gear outside the body of the unit, you can always add it on later if you want to save some bucks on your initial purchase. The recirc kit helps ensure more even temperatures throughout your mash, and improve mash conversion efficiency (see Hands On section below). The perforated plate that sits on top of the mash basket allows the recirculating wort to trickle down through several holes to avoid compacting your grains in one area. The pump in the kit is the small Anvil pump with a plastic head. While it is physically small, it is more than up to the job of recirculation, and comes in a nice splash-resistant body to avoid damage from accidental wort spills. With the pump separate from the unit it is easy to clean, or replace if needed down the road.
Hands on Review
The build quality of the Anvil unit is top notch, same as every Anvil or Blichmann product I’ve used. The value ratio is high, in that you’re getting quality and design near the top end, but pricing near the bottom. It’s no surprise the Anvil Foundry quickly sells out every batch shortly after orders open. Anvil seems to selectively place their money on some features, while keeping others simple. For example, you don’t see programmable mash steps on the controller or Bluetooth connectivity, but you do find a delayed start timer and a fully adjustable output power control. Which are excellent features.
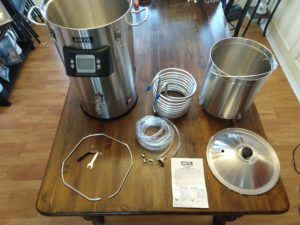 Unboxing the Anvil Foundry – Complete Content of Box
The delay timer was great. This is such a phenomenal time saver on brew day, for me, it made the difference between having time for a brew day or not. I set the timer for the unit to kick on at 5:00 AM and start heating. Then, whenever I rolled out of bed, I’d mash in, and then head back upstairs to eat breakfast. Getting the water measured and adjusted the night before, along with crushing the grains, allowed such an easy start on brew day that I could start unreasonably early. As a result, brew days would finish by lunch. Having the whole afternoon free definitely enabled brew days that wouldn’t have happened otherwise.
Inkbird ITC-308 Digital Temperature Controller| Review
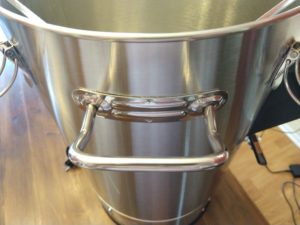 Sturdy Welded-on Handles
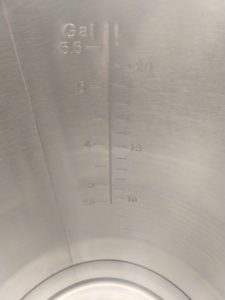 Stamped Volume Markings
The specific unit I evaluated was the Anvil 6.5, and found the 1600W power good for this smaller volume. I’ve used other larger volume all-in-one units with 1600W, and that’s pretty much the minimum you want for making 5 gallon batches. I had the recirculation kit, and I did some quick assessments of temperature accuracy of the mash with and without recirculation. Since the temperature sensor is at the bottom of the brew unit, along with the heating coils, it is susceptible to temperature stratification (this is common with all of the competitor units I’ve evaluated as well). I found while heating strike water, that a hand-held thermometer at the top of the mash was reading 149F, while the unit was measuring 154F. However, this could be resolved by stirring things up with a spoon, and the double-wall construction helped minimize this effect while sitting at a steady set temperature. I found with a decent recirculation flow going, this temperature difference went away- which is a key reason in my mind to go for the optional recirc kit. The temperature holding accuracy was be pretty good at roughly +/- 2 degrees, and any deviations were very short. If I adjusted the Power level to 65% once I reached my set temperature, the variation was down to +/- 1 degree and excursions were even shorter.
From mash in to yeast pitch in the fermentor for a 2.5 gallon batch took 3hr and 45min (1 hour mash, 10 min mash out, and 60 min boil). This was with taking advantage of the start delay timer to heat strike water to temperature early in the morning before I got up, so that time isn’t included. Immersion chillers require movement of the wort in order for them to not take forever, so I used the recirculation set-up to circulate wort flow while chilling. Recirculation during wort chilling is something you can do with an external pump, but with an internally mounted pump, you wouldn’t dare. Clogging an internal pump requires a significant effort to disassemble the unit and remove the pump to clean it. When I was finished brewing, clean-up of wort chiller, recirculation kit, and brewing unit took 20 minutes.
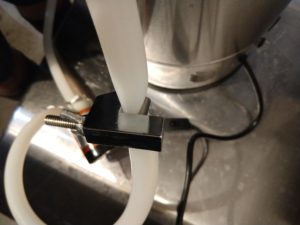 Output Flow Restrictor on Hose
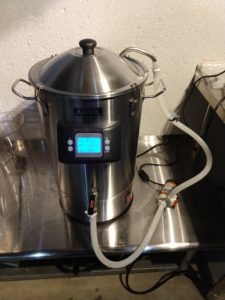 Unit Running with Recirculation Kit
I was a big fan of the recirculation kit. In addition to the aforementioned improvement in temperature performance, and aid in cooling the wort, the Anvil recirc kit had a couple of nice features. The super-simplistic flow restriction that went on the outside of the cooling hose was brilliant. It was simple, which obviously helped save cost, but since it was outside of the wort flow, there were no hidden pockets/chambers to try to figure out how to clean or dry. And the plate that goes on top of the mash basket was better than others I’ve seen. With large holes, there was no risk of blockage from stray recirculated grain bits. The holes were also spread out quite a bit, so the wort found its way to trickle down over a very wide area of the mash. The instructions recommend disassembling and washing the pump- which I wholeheartedly agree. There was a metal shaving on the impeller head that would probably have been a problem had I not disassembled and washed the pump first.
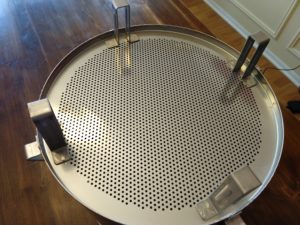 Mash Basket- Bottom
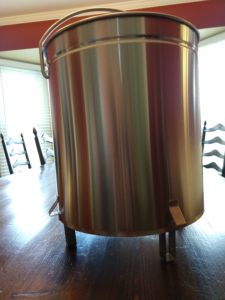 Mash Basket
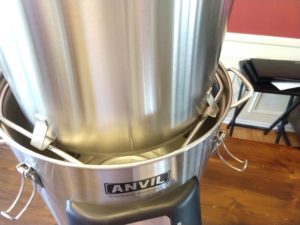 Mash Basket Feet Resting in Drain Position
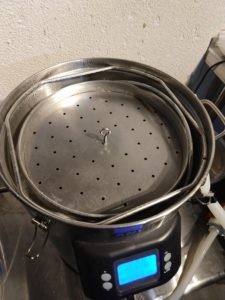 Mash Basket Cover Plate from Recirc Kit
I’d heard anecdotes of improved mash conversion efficiency with recirculated wort, but I’d never seen numbers, so I did my own experiment. I used a simple mash of 5 lbs of Viking Xtra Pale Malt and 0.3 lbs of Briess 2-row Brewers Malt, along with brewing salts + acid to hit a mash pH of 5.57. The grains were from the same 55 lb sack of each malt. I mashed for 1 hour at 149F, followed by a ramp up to 168F for a 10 min mash out. I mashed 3 different batches: 1) Full volume mash, no recirc, 2) Full volume mash with recirc, 3) Loose mash with 2.4 qt/lb with recirc followed by 1.5 gal sparge poured through the mash basket while up on its posts. The mash efficiency difference was striking. The full volume mash without recirc achieved 72%, with recirc it increased to 74%, and the recirc + sparge reached 87%. From this data, it would appear that the sparge made a significant effect. Unfortunately, I didn’t have enough of the same batch of grain to do a 4th combination of no recirc + sparge.
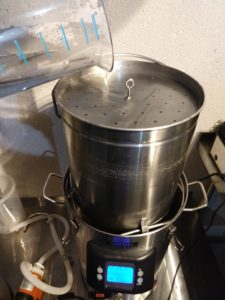 Sparging with Mash Basket in Drain Position
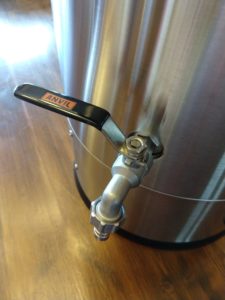 Output Ball Valve- Rotatable
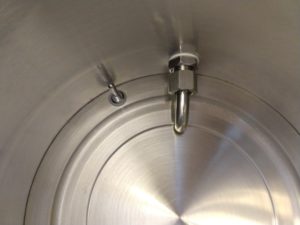 Rotatable Pickup Tube and View of Temp Sensor
While overall the Anvil performed great for me, there were a few annoyances I came across. First was the silicone sealing ring in the lid didn’t want to stay put at times. It wanted to curl up, and I had to pay attention to make sure it didn’t come out of the groove when putting the lid on. The wing nuts on the Anvil pump had sharp corners to them, and putting the inlet tubing clamp on or taking it off involved some uncomfortable moments of their pointy edges poking at my fingers.
Conclusions
In summary, the Anvil Foundry definitely gives you a lot of bang for your buck. It checks all the boxes of convenience of other all-in-one electric brew rigs, but also had some features that are unique in this space and definitely are well thought-out improvements. The build quality and materials were excellent, so it appeared that it will live up to use for a long time. This is a good unit for new all-grain brewers, or those that maybe want a smaller/simpler system to try out recipes on before making big batches. In a lot of cases, it’s definitely worth a look.
Compare Models, Prices and Availability, More Photos Below:
- Anvil Foundry Systems and Accessories at MoreBeer
- Anvil Foundry Systems and Accessories at Adventures in Homebrewing
- Anvil Foundry Systems and Accessories at Austin Homebrew Supply
- Anvil Foundry Systems and Accessories at Great Fermentations
- Anvil Foundry Systems and Accessories at Beer & Wine Hobby
- Search “Anvil Foundry” at Amazon – offerings vary
- ANVIL FOUNDRY 6.5 Gallon Electric Boiler Kettle For All Grain Brewing T500 Ready Includes Recirculation Pump Kit and Wort Chiller
- Foundry 10.5 Gallon All-In-One Brewing System With Pump
- All-in-One Electric Brewing System, Anvil Foundry™, Home Beer Brewer, Delayed Start Timer, 240V or 120 Option, Easy Clean False Bottom, Sous Vide Machine (10.5 Gallon)
- Foundry 10.5 Gallon All-in-One Brewing System – No Pump
- Anvil Foundry 6.5 Gallon All-In-One Brewing System – No Pump
These are affiliate links, note that multiple variations of this product may be available, as such a different version may appear at these links
More Photos
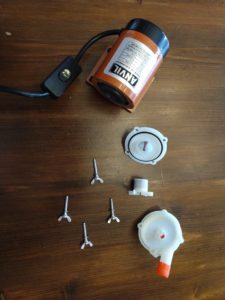 Disassembled Pump
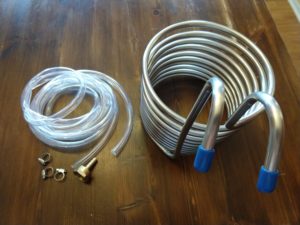 Immersion Wort Chiller
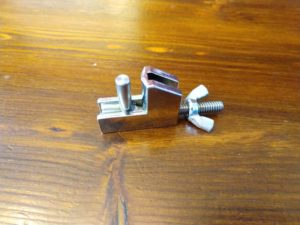 Innovative Output Flow Control Clamp
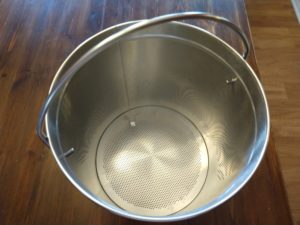 Mash Basket – Inside
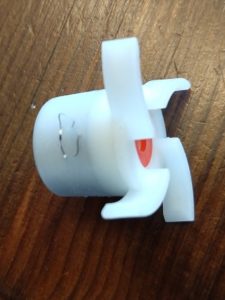 Metal Shaving Found on Initial Cleaning
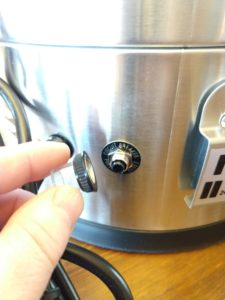 Reset Switch if Thermal Overload
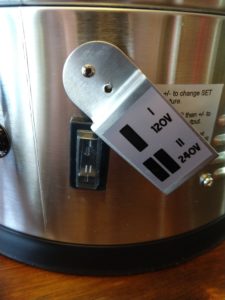 Voltage Switch Panel Rotated for Access
![]() Silicone Seal in Lid Flipping Up
Silicone Seal in Lid Flipping Up
More Anvil Brewing Equipment Reviews+Related:
Special Thanks to Anvil Brewing Equipment for providing the unit used for evaluation in this review.
By Brad Probert. Check out Brad’s website – beersnobby.com
pinnedThis post may contain affiliate links. We may make a commission when you use our links. This will never cost you extra. Thank you for supporting Homebrew Finds!
greatdealsMore Homebrew Finds!
- Last 50 Finds!
- Top Deals – a curated list of the best deals
- Homebrew Reviews – one of the largest libraries of homebrew reviews in existence!
- Our Top Posts – tips, how-tos, resources posts and more
- Let’s be Friends!
Recent Deals!
10 Most Recent Homebrew Resource Posts & How-To’s!
We are Homebrew Review HQ! Our 10 Most Recent Reviews
Price, promotions and availability can change quickly. Check the product page for current price, description and availability. tag:lnksfxd review:anvfoundry rs:8 tag:tpr


You no longer have to cut off the cord it switch from 110 to 220. The 10.5 has a 220 plug with a 110 adapter, so you can use it either way by just changing the switch. Pretty happy with it.
I’ve been using the 6.5 for a while now and like it very much. I have found it works well to kettle sour or Kveik fermentation. I set the temp at 100f and wrap the unit in a towel. The hole in the lid I fit with a blow-off.
What about a 5 gallon batch in the 6.5 Gal version?
I’ve had my Anvil Foundry 6.5 gallon system for a year and I could not be happier. I’ve brewed 19, 2.5-2.75 gallon batches on it in the past year. The reviews from family and friends is that the beers brewed have been very good. For the price, the ease of use, and the overall quality, you’re you’re not going to beat this product or the quality of the Anvil line of products. I read numerous reviews, watched countless videos on the electric all-in-on brewing systems prior to getting this system and I am convinced that I made the right choice. You can spend more money for a couple more bells and whistles and WiFi connectivity that the other all-in-one big name systems have, but why? At the end of the day I brew good beer, plain and simple. What more do you need?
How does the Anvil Foundry compare to the Brewer’s Edge Mash and Boil?
Great thorough review! Would it be possible to do 1 gallon batches in the 6.5 version, or would that be too little? I noted in your picture that the stamped measurements only go down to 2.5 gallons. Thanks!
I asked the company this question and they said no. Just to small of a batch. The 10 gallon version has a ring you can purchase and place in the basket that allows you to go down to 2 gallons batches. The larger system gives me the option if I ever need to do a larger batch and do 2 gallon batches on the same system. I’ll split the the batch into 2 different fermenters to try different yeast on the same batch etc… or I use a 3 gallon carbo to ferment in.
The Brewer’s Edge Mash & Boil has been out for some time now but nonetheless, I’m interested in it. Do you think it holds up well against this Anvil Unit or is time to move on?