
Hands on Review: BouncerMD Inline Beer Filter!
6/19/2024
This review is by Homebrew Finds Contributor Brad Probert. Brad is an engineer, expert homebrewer and experienced reviewer. Grab a link to Brad’s website at the end of this review.
BouncerMD “Mac Daddy” Inline Filter
As popular as unfiltered beer is right now, there are still a lot of times in the brewing process when you want to filter your in-process beer to some degree. For me, it’s hop trub when transferring from the kettle to the fermentor. Dry hopping can also get you unwanted debris when transferring into your keg. You’ve got process options like whirlpooling or gear additions like bazooka screens for inside your kettle. The Bouncer filter is another option you can add to your toolbox.
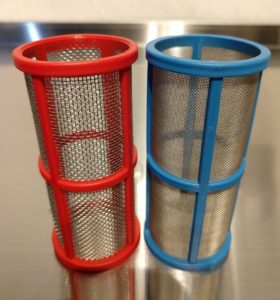 Course filter on the left, Fine filter on the right
The Bouncer filter is like a miniature version of a home water filter. There’s a plastic housing that has inlet and outlet ports, and a clear plastic body that holds the stainless mesh filter screen and screws onto the main housing. The filter screen is made of stainless steel and nylon, and comes in two different mesh sizes. The coarse filter is 20 squares per inch (915 microns), and the fine filter is 50 squares per inch (305 microns).
The Bouncer itself also comes in two sizes- Normal and Mac Daddy. The Normal size comes with barbed fittings to hook up your 3/8” ID transfer hose. The Mac Daddy comes with two sets of fittings- one for 3/8” ID hose and the other 1/2″ ID hose so you can select whatever size matches your siphon or brew kettle valve. The larger Mac Daddy filter also gives you 224% more filter surface area than the base model.
The filter unit is rated for temperatures up to 150F. That means it’s good post-chilling, but not suitable for the hot inlet side into a plate chiller for example. Another creative use of the filter is as a Randall to infuse hops or other ingredient flavors into your beer when serving. More on that in my hands on trial below.
Check Pricing and Availability:
- BouncerMD inline beer filter (Mac Daddy) < the size featured in this review
- Bouncer Inline Beer Filter – Hands on Review
Bouncer Replacement Parts
- Nylon Replacement Bowl for Bouncer Mac Daddy
- Replacement Nylon Bowl for Bouncer Classic
- Replacement Gaskets for Bouncer MD – 5 Pack
- Replacement Gaskets for Classic Bouncer – 5 Pack
- Screen Assortment for Mac Daddy Bouncer
- Screen Assortment for Classic Bouncer
This article contains affiliate links. We may make a small percentage if you use our links to make a purchase. You won’t pay more and you’ll be supporting Homebrew Finds and more content like this. Thank you for your support!
Hands on Review
The filter parts screwed together easily, and importantly for equipment like this, there were no leaks. I used it on batches using 3/8” hose and 1/2″ hose and had no issues swapping out the barbed fittings and getting them tightened up with Teflon tape for no leaks. Everything cleaned up great, rinsing out very easily with a sprayer hose.
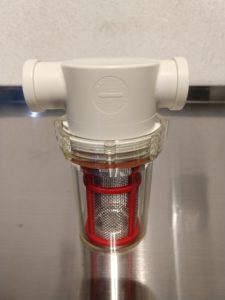 The BouncerMD with Coarse Mesh Filter Installed
For me, I already have a giant mesh strainer I use when transferring beer from kettle into my fermentor. This has worked great for me, and serves dual purpose of breaking up the beer and letting it splash down into the fermentor, which I count as my “oxygenation of wort”. My strainer does a great job at filtering out hop residue and trub from the fermentor, so I didn’t experiment with that in my trial. Since the mesh size is the same, I’m confident the Bouncer would do an equally great job at filtering. Total surface area might require a pause in wort transfer to clean the filter for a 5 gallon batch.
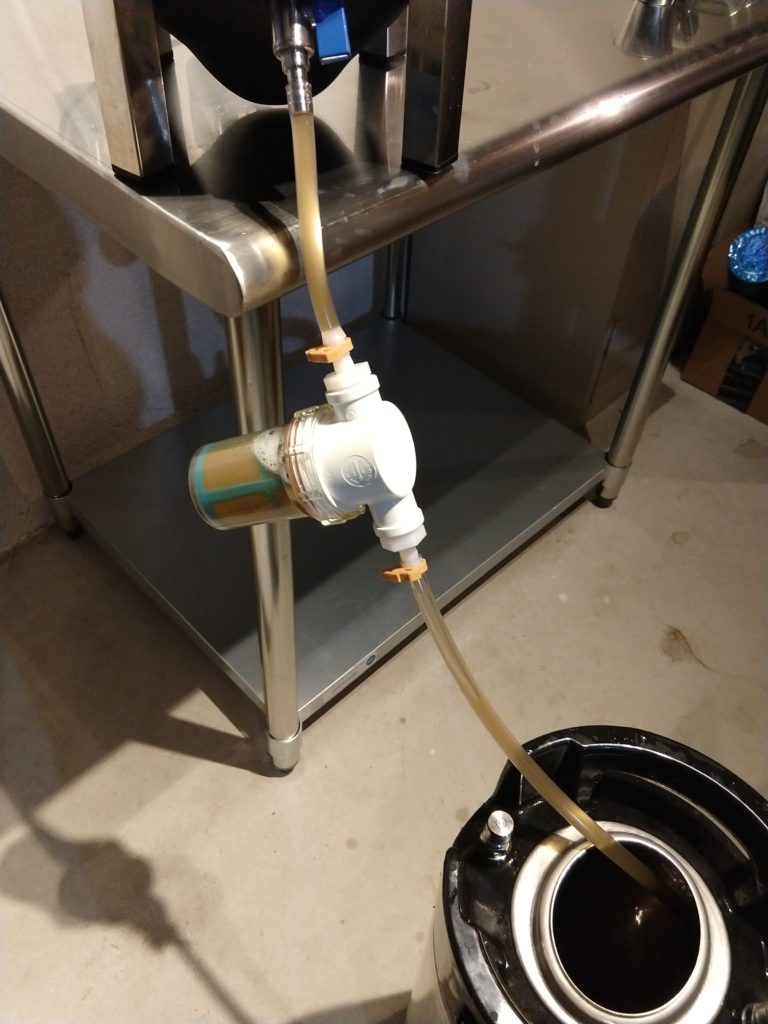
 Using the BouncerMD while transferring from fermentor to keg
I did use the filter when transferring from fermentor to keg. The mesh size isn’t fine enough to filter out anything like yeast particles, and since the bulky hops reside was already taken care of by my strainer when transferring into the fermentor, there wasn’t a lot of residue in the Bouncer. I also cold crash in the fermentor before transferring to keg, and I found that even an IPA that had 2 oz. pellet hops dry hop in fermentor was mainly taken care of with cold crashing. There was some hop residue in the filter, but not massive amounts. It might’ve caught more stuff had I been dry hopping with whole leaf hops, or had I not cold crashed in the fermentor before transferring to the keg.
The BouncerMD as a Hop Randall
There was another use for the Bouncer that sounded unique that I wanted to try out. They advertise using it as a Randallizer. I had an IPA that was sadly lacking in hops “zing”, so I threw some pellets inside the inner screen. I then hooked this up to the tap spout with a hose. When I opened the tap, beer would flow through the hose, into the filter housing past the hops, and then out the other end, to which I could direct into my cup. It did impart hop zing, but I had a lot of problems. I’ll pass some of what I learned on to you so you can learn from my mistakes.
First off, due to the expansion of hop pellets in fluid/carbonation, they recommend only filling the inner filter about 10% of the way. I found that out too late and filled it 50% of the way and the hops expanded and ended up blocking my flow after a while. I also got some hop residue in my beer (enough to give it a notable green tinge). I think next time I’d use whole leaf hops to avoid the fine pellet dust giving me too much hop flavor. I used this on my kegerator with standard rear-sealing faucets. The backpressure with the Bouncer connected caused the system to purge/leak beer out of the drain hole on the faucet, leading to a mess on top of the kegerator. Next time, I’d use my forward sealing faucets that don’t have this leak path.
Talking with the Bouncer team, they’ve had good results using it with vanilla beans and citrus peels. They also noted that the whole process can make the beer foamy, so they recommended turning down the dispense pressure on the beer as well. The Bouncer as a Randallizer definitely showed potential and I think with my lessons learned from my first trial, I’d try this again.
Conclusions
In summary, the filter is a good option to filter debris when transferring from kettle to fermentor. It didn’t prove too useful in filtering from fermentor post-cold-crash to keg. And the Randallizer function looks to have some interesting potential, it just takes some care to set things up properly for it to work.
Check Pricing and Availability:
- BouncerMD inline beer filter (Mac Daddy) < the size featured in this review
- Bouncer Inline Beer Filter – Hands on Review
Bouncer Replacement Parts
- Nylon Replacement Bowl for Bouncer Mac Daddy
- Replacement Nylon Bowl for Bouncer Classic
- Replacement Gaskets for Bouncer MD – 5 Pack
- Replacement Gaskets for Classic Bouncer – 5 Pack
- Screen Assortment for Mac Daddy Bouncer
- Screen Assortment for Classic Bouncer
More Photos
 Gravity Transfer from a BrewBucket Fermentor
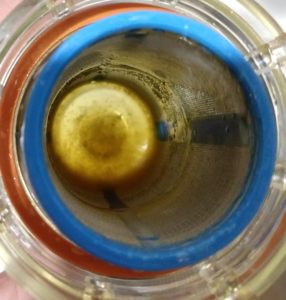 Hop Residue from a Dry Hopped IPA from a Fermentor to Keg Transfer
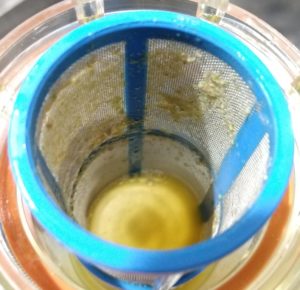 Reside from Dunkelweiss Fermentor to Keg
More Homebrew Finds!
- Last 50 Finds!
- Top Deals – a curated list of the best deals
- Homebrew Reviews – one of the largest libraries of homebrew reviews in existence!
- Our Top Posts – tips, how-tos, resources posts and more
- Let’s be Friends!
Recent Deals!
10 Most Recent Homebrew Resource Posts & How-To’s!
We are Homebrew Review HQ! Our 10 Most Recent Reviews
pinnedThis post may contain affiliate links. We may make a commission when you use our links. This will never cost you extra. Thank you for supporting Homebrew Finds!
greatdealsSpecial Thanks to Bouncer for providing the unit used for evaluation in this review.
By Brad Probert. Check out Brad’s website – beersnobby.com
Make sure the components you use are compatible and rated for your intended application. Contact manufacturer with questions about suitability or a specific application. Always read and follow manufacturer directions. tag:lnksfxd review:bouncerreview tag:tpr




Do you know the size of the hose barb thread? I would like to replace those hose barbs with john Guest fittings so I can use this in my closed transfer system from fermentor to keg, which I already have set up to use John Guest fittings all the way.
Thanks!
Brad, thanks for the detailed review and especially for sharing your “lessons learned”…
I’d been debating whether this would deliver any value for me. My system includes a filter with a similar looking mesh in it, so I doubt this would do more. It would probably be just one more thing to clean and sanitize, and one more potential source for leaks.
I bottle my brews to facilitate longer-term storage and sharing, so its value as a Randalizer is lost on me. I can see where others would get value from it, having seen the Dogfish Head Randal at work.
Although it looks like a nice enough gadget, I think I’ll pass on this one.