Hands on Review: Jaybird Ball Lock Canning Jar Hop Randall from NorCal – convert a Mason Jar into a Hop Randall
This review is by Homebrew Finds Contributor Brad Probert. Brad is an engineer, expert homebrewer and experienced reviewer. Grab a link to Brad’s website at the end of this review.
NorCal Canning Jar Randall
The original intent of the Randall was to infuse beers with additional hop flavors and aromas, but it can be used to infuse your beer with a variety of flavors. In addition to hops, fruits are often used, but also things like vanilla beans and cocoa nibs. The beauty of the Randall is that you can experiment with these different additions without dedicating the whole keg of beer to it. If it isn’t just right, you can change it up, and you haven’t ruined a whole keg of beer with what “seemed like a good idea at the time”.
With all of your additions, the flavor impact is fairly minor. Think of it more like adding complimentary flavors, not making a flavor showcase. For hops, the flavor and aroma addition are different than other hop additions due to the temperature you add them. There’s no boiling isomerization so you’re not getting bitterness. And it’s not like dry hopping where you’re soaking them in ~70 degree beer for a couple of days. With the Randall, the hops have a couple seconds of contact time at 35 degrees (or whatever you like to keep your keezer serving pressure set to).
This article contains affiliate links. We may make a small percentage if you use our links to make a purchase. You won’t pay more and you’ll be supporting Homebrew Finds and more content like this. Thank you for your support!
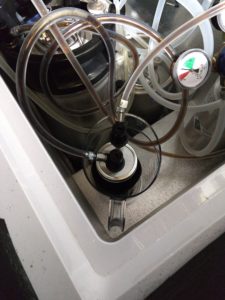 Jaybird Hop Randall sitting in Brad’s Keezer
NorCal Brewing Solutions’ Randall has a design that uses a 64 oz. canning jar (not included). With a canning jar’s thick-walled tempered glass design, it’s able to handle carbonated beer pressure and be somewhat durable (of course don’t drop it). It has liquid in and liquid out ball lock posts coming out the top of the lid, so it’s actually well designed for a keezer. Its size and weight make it stable to sit sturdily, and the posts coming up from the top provides easy access for beer line connections. There are two connections- one is long and reaches to the bottom of the jar, and the other one is short and sits above a welded-in strainer plate that’s part of the lid. This strainer plate helps keep your hops/fruit from floating up and clogging the tube when dispensing. There are a couple of silicone gaskets on the lid assembly to keep things sealed, and then a regular canning jar ring to screw things down and clamp the seal.
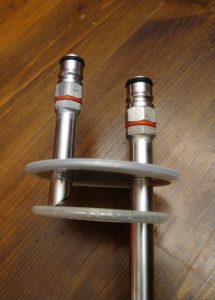 Randall Lid and Tube Layout
Hands on Review
For my first trial, I had a Black Lager on tap. I was really enjoying it, and thought a cherry flavor would go well with it. Since November isn’t fresh cherry season, I had to settle for dried cherries. My first test run showed I had under-done it, using about a 1/2 Cup. I then upped it to about 1.5 Cups of cherries. With the size of the NorCal Randall, it could easily accommodate this amount of fruit. Even if it were fresh fruit instead of dried, the 64 oz. jar seemed to be a good size. The finished beer tasted great. It still tasted like a beer (not a dessert), and the subtle cherries on the back end made the perfect complement.
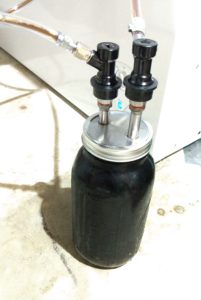 Using the Hop Randall to add “dry hop” with cherries
I had some issues with beer leaking out between the jar and the lid when it filled up with pressurized beer. The keg was initially running at 12 psi, but to keep the Randall from leaking, I had to dial back the pressure to just 5 psi. This worked, but made for a very slow pour. I have future plans to set up a short length of line from the Randall to the tap. That way I won’t have needless length of line slowing down flow.
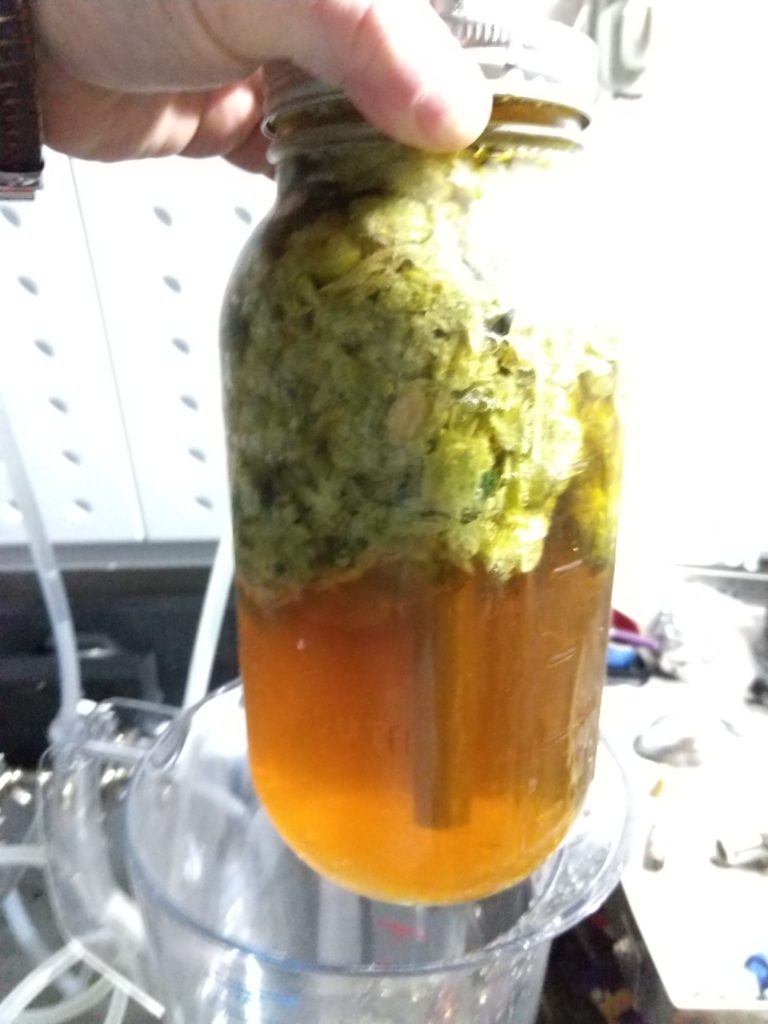
My next trial was with adding hops. I had an Amber Ale that was by all accounts boring in flavor. With the mesh size in the Randall, you need to use whole leaf hops, not pellets. Pellets will breakdown and just pass through into your beer. I poured in a 1 oz. bag of Centennial leaf hops. Once wet, they swelled up a fair amount. It looked like I maybe could’ve gotten 2 bags in there, but 1 filled up a good portion of the volume. The aroma was nice (lightly fragrant), and the flavor was very different (somewhat grassy). In this case, I don’t think my base beer was flavorful enough to mask some of the grassy flavor from the Randall hops.
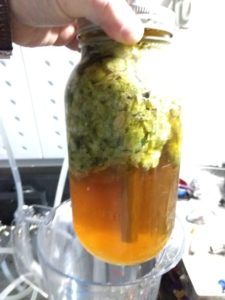 1 oz bag of leaf hops in the NorCal Randall
After my leakage issues on my Black Lager batch, I put my full effort into screwing the lid on as tight as I could. The extra muscle seemed to pay off, as with the same line length set-up, I was able to have the keg at 10 psi and not have any leaks at the Randall. I did battle copious amounts of foam initially, though. The standard set-up for the Randall is beer going in through the long tube that reaches to the bottom of the jar, and beer going out through the short tube that sits up top above the screen. Jay at NorCal suggested I try swapping the in & out, so I’d be drawing beer up from the bottom of the jar. Like magic, the foam was gone. With all of the hops floating in the beer, they were up around the short post and this caused a lot of foam in the output. By drawing up off the bottom of the jar, I didn’t get any hop debris (since they were floating), and it solved my foam problem.
Also Consider: Bouncer Inline Filter – Can Pull Double Duty as a Hop Randall
 Pictured: BouncerMD inline beer filter (Mac Daddy) – Hands on Review
The Hop Randall or Randalizer, originally referred to as Randall the Enamel Animal is the brainchild of Dogfish Head Brewery Founded Sam Calagione. It’s designed to infuse beer with hops (or other spices) at serving time as the beer is being drawn from the tap. Typically you would use whole leaf hops, but ingredients like spices can also be infused using a Randall.
If you’re looking for a Randall infuser for your homebrewing setup, here are some options:
Bouncer Inline Filter [Bouncer Inline Beer Filter – BouncerMD inline beer filter (Mac Daddy) – both via Amazon] both can be used to both filter beer going into your fermenter and as Hop Randalls. If you’re going to use the Bouncer for this, I’d recommend the larger MD version. Hands on Review
Clean up was super easy. I threw in one of the steel scrubbies that NorCal offers as an add-on to their Randall to help with filtering. I’m not sure if it was truly needed with the hops or not, it may be more intended if you have smaller particle size flavor additions. The glass and stainless steel cleaned up with just hot water from my sink sprayer. Surprisingly, even the steel scrubby cleaned out with just a few blasts of water.
Conclusions
Overall, a Randall adds another tool to your beer creativity toolkit. Not every beer needs or would benefit from flavor infusion additions. But having this available to you allows you to create something you might not otherwise be able to make. And for hop lovers, the idea of another hop flavor addition method is justification in itself.
Related Resource Post, More Photos Below:
Mason Jars For Homebrew Ingredient Storage, Yeast Starters and More
More Photos
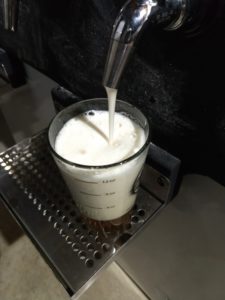 Foamy Pint before swapping inlet and outlet
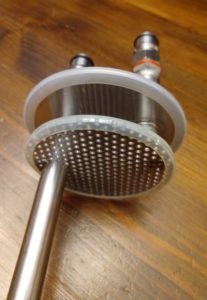 A closer look a the screen size
Recent Hop Deals
Also: Kegerator Tips & Gear | Keg Repair Part #s | Recent Keg Finds
Our Top Draft Resources!
Check our our Top Draft Related Resources- Commentary: Pin Lock Keg Pricing and Availability
- Check Your CO2 Regulator for Leaks!
- How to get a keg ready for first use? New Keg Cleaning and Prep
- Portable Draft Beer Serving Options!
- Pin Lock Keg Pricing and Availability
- The Most Difficult Spot to Check for CO2 Leaks
- Keg O-Ring Materials Selection! – EPDM, Silicone and Buna-N?
- Why Do I Have Bubbles in My Beer Line? Diagnosing and Fixing Kegerator Foam Problems
- Five Benefits of Using Corny Kegs As Fermenters
- Rebuilding & Reconditioning Homebrew Kegs!
- Food Safe Replacement Keg O-Rings in Bulk
- Hands on Review: Kegland DuoTight Fittings & EVABarrier Tubing!
- Why Won’t My Beer Carbonate? Fixing Draft Beer Carbonation Problems
- What Does a Flow Control Faucet Do?
- Upgrade Your Kegerator – 6 Improvements!
- Serve Homebrew on Any Kegerator & Convert Commercial Kegerator to Homebrew
- Tips and Gear for Growler Filling
- What’s the Difference Between Ball Lock Kegs and Pin Lock Kegs?
- Checking for Draft System CO2 Leaks – Using The Pressure Gauge Method
- Tip: Consider Oetiker Stepless Clamps for Kegerator Gas and Beer Lines
- Hands On Review: Inkbird ITC-308 Dual Stage Temperature Controller +WiFi Version
- Universal Poppets Tips and Tricks!
- Convert Your Mark II Keg & Carboy Washer to a Recirculating Draft Line Cleaning Pump!
- Step by Step: Finding and Fixing Keg CO2 Leaks
- Kegerator Temperature Probe Placement – To Immerse or Not To Immerse? – three tests to determine optimal pla…
- Kegerator Beer Line Temperatures & Reducing Foam with a Recirculating Fan
- Kegging CO2 Use Estimations and Calculations
- Balancing Your Kegerator Draft System
- Building a Simple Ball Lock Draft Line Flushing Setup
- Build a Recirculating Draft Line Cleaning Pump
- Home Brew Keg Roundup – New & Used, 5 and 2.5 Gallon & More!
- Damp Kegerator? Fix Kegerator Condensation
- Homebrew Temp Controller Roundup! – Kegerator and Fermentation – concepts, applications and models
- Bulk Keg Orings and Keg Parts Reference
More Homebrew Finds!
- Last 50 Finds!
- Top Deals – a curated list of the best deals
- Homebrew Reviews – one of the largest libraries of homebrew reviews in existence!
- Our Top Posts – tips, how-tos, resources posts and more
- Let’s be Friends!
Recent Deals!
10 Most Recent Homebrew Resource Posts & How-To’s!
We are Homebrew Review HQ! Our 10 Most Recent Reviews
Special Thanks to Norcal Brewing Solutions for providing the equipment used for evaluation in this review.
By Brad Probert. Check out Brad’s website – beersnobby.com
pinnedThis post may contain affiliate links. We may make a commission when you use our links. This will never cost you extra. Thank you for supporting Homebrew Finds!
greatdealsCanning Jar Equipment at NorCal Brewing Solutions
Make sure the components you use are compatible and rated for your intended application. Contact manufacturer with questions about suitability or a specific application. Always read and follow manufacturer directions. tag:lnksfxd review:nchoprandall tag:tpr


