Hands on Review: KOMOS Stainless Steel Kegerators! – Designed for Homebrewers
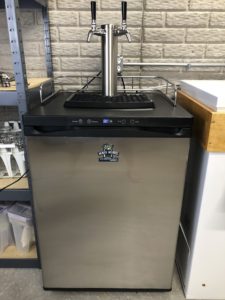 KOMOS Kegerators, are designed for Homebrewers from the ground up. They have loads of features including the ability to operate at either draft serving temperatures or fermentation temps.
A Note On Branding of This Kegerator
Since this review was published, this Kegerator has gone through at least three branding changes. Initially it was the Keg King, then it became the “Kegerator with Stainless Steel Intertap Faucets” and then it became the Kegland Kegerator. Now, it’s the KOMOS kegerator.
Differences Between the Reviewed Unit and the Current KOMOS Kegerator
Beyond, branding, the KOMOS Kegerator sports two notable upgrades. First it uses EVABarrier double walled tubing. Second… it’s equipped with DuoTight connections. I’ve been very impressed with both of these, so these are nice improvements. There may be some other small differences.
Related: DuoTight Review
See Prices, Current Models and Specs, Review Continues Below:
This article contains affiliate links. We may make a small percentage if you use our links to make a purchase. You won’t pay more and you’ll be supporting Homebrew Finds and more content like this. Thank you for your support!
Features of KOMOS Kegerators
- Your choice of 1, 2, or 3 Faucet Stainless Steel Intertap Forward-Sealing Faucets
- Stainless Steel Air Cooled Tower
- Stainless Steel Intertap Forward-Sealing Faucets (choose number of taps above)
- Duotight Fittings make connecting draft lines a breeze
- Digital Thermostat with wide 26 – 82° F temp range
- Robust KOMOS Dual Gauge Regulator included
- CO2 Tank holder mounts on back of kegerator (tank not included)
- Efficient and powerful compressor
- Stainless Steel Door
- Countertop Style Drip Tray
- Removable Glass Rack
- Stainless Steel Floor for additional keg support
- Includes EVABarrier beer and gas tubing
- Beverage line measures 4mm ID x 8mm OD
- 1 x 1.7m length of line per tap
- Gas line measures 5mm ID x 8mm OD
- 1 x line of varying length depending on number of taps (2, 2.5, or 3m)
- Removable shelf if you want to use it as a refrigerator
- Available Kegerator covers and “off road” casters for moving over uneven terrain
Hands on Review KOMOS Stainless Steel Kegerators
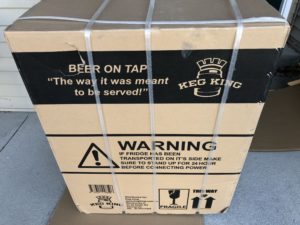 The box. This is a large unit and as a result… it comes in a large box.
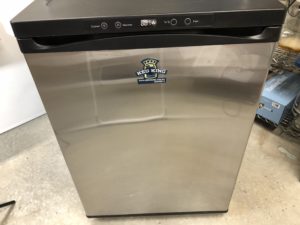 Front of the kegerator
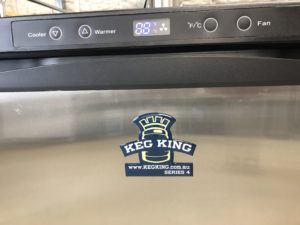 Zoom in on the control panel. A beautiful stainless steel kegerator and digital control panel. See Note above on branding changes.
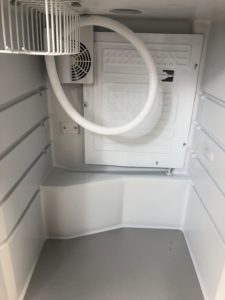 Inside of the kegerator. There is a glass holding rack in the top left hand corner. The rack can be removed. Also notice the coiled up tube. That is a tower cooler and attaches to a cooling fan. This helps to keep the tower cold and helps to eliminate excess foam. That’s a great feature. Note that the integrated tower cooler can be turned off via a button on the control panel. That’s handy and should help to save energy when the fan isn’t needed. Related: Fight the First Foamy Pint!
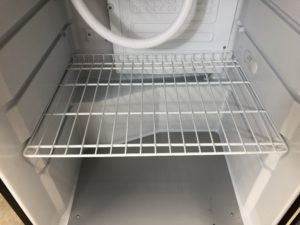 KOMOS Kegerators are versatile. Along those lines they include a shelf, even though you wouldn’t use one for normal kegerator operation. The shelf allows you to easily use this as a refrigerator if you’re so inclined. KOMOS Kegerators work at draft AND fermentation temps. That means this unit can be used… as a refrigerator, a temp controlled fermentation chamber and for draft beer, wine, kombucha, mixed drink and coffee.
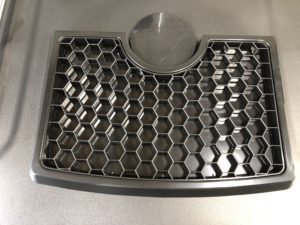 Nice, large drip tray that fits perfectly around the tower opening.
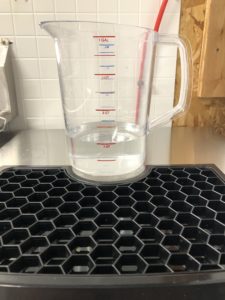 This is the drip tray with my trusty 1 gallon pitcher – Hands on Review. Notice that the pitcher contains about one quart of water.
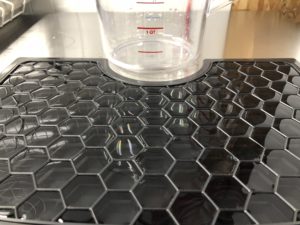 When I measured out the quart of water I actually expected to have some left over. But that ended up being right at what this drip tray can hold. This drip tray can hold about 32 ounces. That equates to a couple of beers and, in my book, is a huge capacity. Details like this are a testament to the fact that KOMOS Kegerators are designed, from the ground up with homebrewers in mind. I don’t plan on spilling two beers in this, but it’s nice to have the capacity should the need arise.
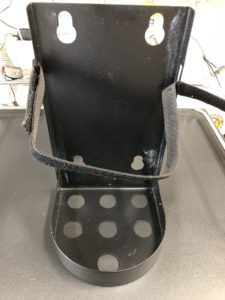 This bracket mounts on the back of the kegerator and holds a 5 lb CO2 tank. Of course you could use a larger tank and skip the mount.
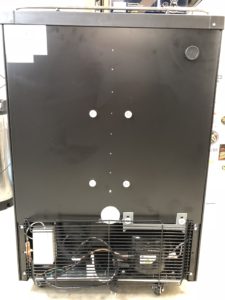 Back of the kegerator. If you look at the bottom of this photo, you can see the included wheels. I also have the rugged wheel option that I plan to install.
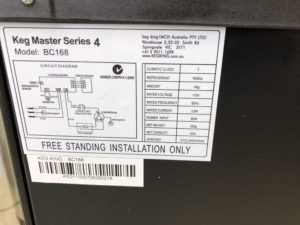 Close up of the sticker on the back of the kegerator
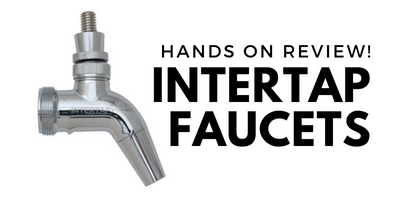
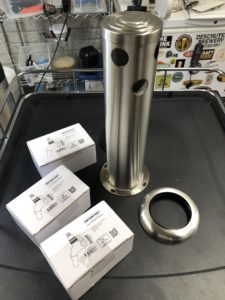 Here’s a three faucet tower and three Intertap Stainless Steel, Forward Sealing, Flow Control Faucets. Multiple tap style and count options are available, ranging from 1 to 3 faucets. I ended up switching this up for the final build and went with the two tap version. This inclusion of Intertap Faucets with KOMOS Kegerators is a huge plus. These are awesome faucets. Check out my extensive hands on review… Hands on Review: Intertap Forward Sealing Faucets and Accessories
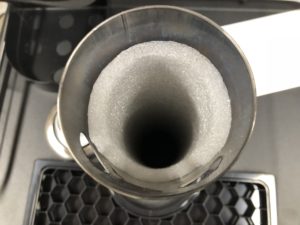 A look down the tower. Notice the foam insulation. That combined with the integrated tower cooler help to reduce (eliminate in my case) excess foam on the first pour. I can walk right up to my kegerator and pour a great pint on the first pour. No fighting foam, no wasting beer.
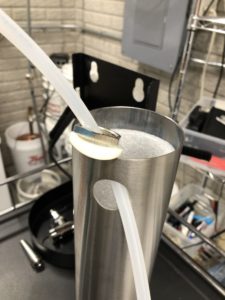 Tubing, shank and faucet installation in progress
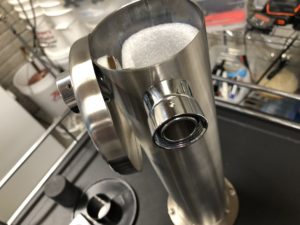 This is included here to prove a point and to help you out when you’re putting your KOMOS together. The point is… read the directions. This is the tower base cover, which looks awesome once installed and provides a clean look. The problem here is that it doesn’t fit with the shanks installed. I’m not a real “direction reader”. I usually just start throwing stuff together with the idea that I pretty much know how it works and figuring it out on my own will be fun. I had to, on multiple occasions, remove and repeat installation steps, because I didn’t read the directions. This stuff needs to go on in a particular order. For at least the tower/line/shank install I suggest reading the directions. It’s all simple, but it needs to be done in the right order.
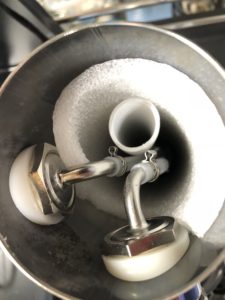 Line and shanks installed. You can also see the tower cooler tubing.
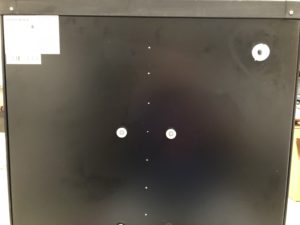 Notice the small white circle in the top right hand corner. This is where the gas lines go into the unit.
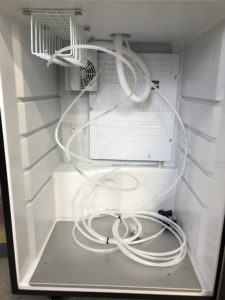 Gas and liquid lines installed with ball lock fittings. Of course you could just as easily use pin lock or commercial Sanke fittings. I really, really like the lines on this kegerator. They are thermo-coiled for easy storage and they seem to provide good resistance for a great pour. It’s difficult to see in this photo, but the temperature probe is actually located on the right wall about half way down – here is a close up.
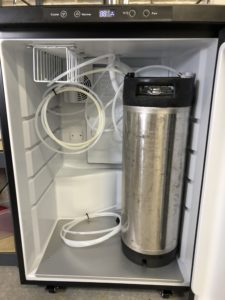 A keg chilled, carbonated and serving.
 The KOMOS Kegerator setup and working
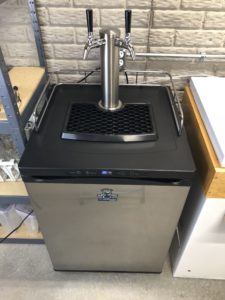 A top-down-ish look
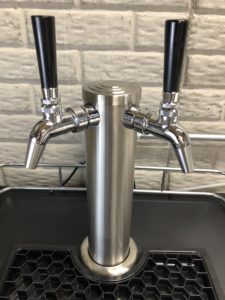 Tower with installed faucets. KOMOS Kegerators use Intertap’s line of awesome faucets. I had already converted my previous kegerator to these and I just can’t say enough good things about them. They look and function great and are generally a great value. I also like the line accessories that are designed to work with Intertaps – growler fillers, ball lock connector and more. See: Hands on Review: Intertap Forward Sealing Faucets and Accessories
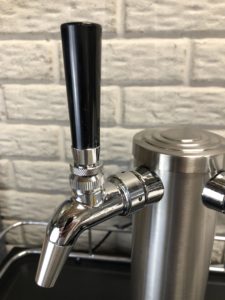 Faucet close up
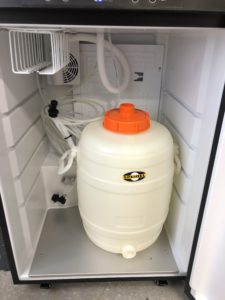 The KOMOS Kegerator is designed for homebrew use. As such built it to operate both at serving temperatures AND at fermentation temperatures. Here is a 7.9 gallon Speidel Fermenter – Hands on Review – sitting in the kegerator. I will say that temperature-wise, this does dance around a few degrees. Guessing the offset is set to 3 or so. I usually set my offset to 1 degree when fermenting in my fermentation chest freezer. Not a huge deal, but something to be aware of. The kegerator CAN be calibrated.
 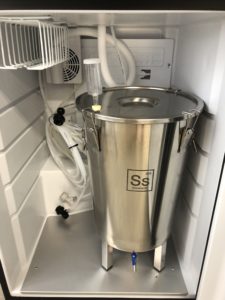 Here is a 7 Gallon Ss Brewtech Brew Bucket – Hands on Review – in the Kegerator. Plenty of room. Check out the “What Fits?” section below for more information on… what fits.
Buy or Build, Which is Cheaper DIY Kegerator or KOMOS purpose built kegerator?
How does this unit compare cost-wise with a do it yourself build? These are estimates for a two tap keezer. So it’s as close as possible to the KOMOS, I’m not including a CO2 tank or disconnects in my estimation. These estimates are for new parts as the KOMOS will be new when you receive it. These are estimates, fill in your own numbers for a more accurate estimation for your intended build.
- 5 cu ft Chest Freezer – $200
- CO2 Regulator – $50
- Temp Controller – $35
- Tubing – $20
- 2 x Shanks – $40
- 2 x Intertap Faucets – $70
- Drip Tray – $50
- Wood for Collar – $50
- Eva Dry for Kegerator Condensation – $25 (estimate, check product page for current price) – freezers are not designed to operate at refrigerator temperatures and EVA Day helps handle condensation.
- Recirculating Fan – $20 (estimate, check product page for current price)
- Miscellaneous – $25
- Several Hours of Your Time – I’m guessing I spent 8 to 10 hours building mine
Grand Total (excluding your time) – $585.
Compare that to current pricing for a two tap version KOMOS Kegerator.
That’s a chest freezer with a wooden collar, compared to a professionally designed and manufactured, purpose built stainless steel kegerator. Depending on how you value your time, the KOMOS is could arguably less expensive than a DIY solution.
Ease of Use
Coming from a freezer/based kegerator/keezer, this unit is quite different work-wise. The fact that I can load and unload kegs and fermenters without lifting heavy objects 4-ish feet is a pretty big deal. I’m not to that point yet physically, but if you have been struggling to continue homebrewing because of the lifting, this unit makes life a whole lot easier and may very well extend you homebrewing career. Beyond lifting things in and out, it’s also much more accessible for cleaning and such.
Dimensions and Specifications
Specifications:
- 24″ wide
- 23.5″ deep
- 30″ with co2 mount
- 33.5″ Tall (fridge only)
- 36″ with Caster wheels
- 49.75″ with tower
- 52″ with Casters and Tower
- 110 v – 60 hz
- 0.8 Amp draw
Internal Dimensions:
- 20″ wide
- 16.25″ deep
- 13.25″ on compressor side
- 28″ tall
- 24″ clearance under glass rack
What Fits?
- 2.6 Gal. BrewKeg – 2
- 5 Gal. Torpedo Keg – 3
- 5 Gal. Slimline Torpedo Keg – 3
- 5 Gal. Pin Lock Cornelius Keg (Corny Keg) – 3
- 5 Gal. Ball Lock Cornelius Keg (Corny Keg) – 3
- 5.16 Gal. Sixth Barrel Keg (Sixtel, Log) – 2
- 7.75 Gal. Quarter Barrel Keg (Pony Keg, Stubby Quarter) – 1
- 7.75 Gal. Slim Quarter Keg (Tall Quarter, The Slim) – 1
- 15.5 Gal. Half Barrel Keg (Full Size Keg) – 1
Conclusions
The purpose built KOMOS Kegerator is awesome. It’s easy to put together, well built, and looks amazing. It has lots of touches that speak to the fact that this is made for homebrewing from the ground up. It’s feature rich, include high quality and featured filled Intertap faucets, it’s easy to use and easy on the back.
See Prices, Current Models and Specs, Review Continues Below:
A Note on Shipping: Prices also include shipping to most US addresses. This is a huge box that comes by common carrier. Check MoreBeer for current price, description, specifications and availability.
Related Reviews, Products and Resource Posts:
- Hands on Review: Intertap Forward Sealing Faucets and Accessories
- Hands On Review: Insulating Neoprene Kegerator Tower Wrap – Fight the First Foamy Pint
- Build a DuoTight CO2 Gas Manifold! – for Kegland EVABarrier Tubing
- DuoTight Push In Fittings & EVABarrier Double Wall Draft Tubing at MoreBeer
Keg Deals!
kegdealsIntertap Faucet Review!
tsrduotightMore MoreBeer Reviews+Related:
More Homebrew Finds!
- Last 50 Finds!
- Top Deals – a curated list of the best deals
- Homebrew Reviews – one of the largest libraries of homebrew reviews in existence!
- Our Top Posts – tips, how-tos, resources posts and more
Also: Kegerator Tips & Gear | Keg Repair Part #s | Recent Keg Finds
Our Top Draft Resources!
Check our our Top Draft Related Resources- Commentary: Pin Lock Keg Pricing and Availability
- Check Your CO2 Regulator for Leaks!
- How to get a keg ready for first use? New Keg Cleaning and Prep
- Portable Draft Beer Serving Options!
- Pin Lock Keg Pricing and Availability
- The Most Difficult Spot to Check for CO2 Leaks
- Keg O-Ring Materials Selection! – EPDM, Silicone and Buna-N?
- Why Do I Have Bubbles in My Beer Line? Diagnosing and Fixing Kegerator Foam Problems
- Five Benefits of Using Corny Kegs As Fermenters
- Rebuilding & Reconditioning Homebrew Kegs!
- Food Safe Replacement Keg O-Rings in Bulk
- Hands on Review: Kegland DuoTight Fittings & EVABarrier Tubing!
- Why Won’t My Beer Carbonate? Fixing Draft Beer Carbonation Problems
- What Does a Flow Control Faucet Do?
- Upgrade Your Kegerator – 6 Improvements!
- Serve Homebrew on Any Kegerator & Convert Commercial Kegerator to Homebrew
- Tips and Gear for Growler Filling
- What’s the Difference Between Ball Lock Kegs and Pin Lock Kegs?
- Checking for Draft System CO2 Leaks – Using The Pressure Gauge Method
- Tip: Consider Oetiker Stepless Clamps for Kegerator Gas and Beer Lines
- Hands On Review: Inkbird ITC-308 Dual Stage Temperature Controller +WiFi Version
- Universal Poppets Tips and Tricks!
- Convert Your Mark II Keg & Carboy Washer to a Recirculating Draft Line Cleaning Pump!
- Step by Step: Finding and Fixing Keg CO2 Leaks
- Kegerator Temperature Probe Placement – To Immerse or Not To Immerse? – three tests to determine optimal pla…
- Kegerator Beer Line Temperatures & Reducing Foam with a Recirculating Fan
- Kegging CO2 Use Estimations and Calculations
- Balancing Your Kegerator Draft System
- Building a Simple Ball Lock Draft Line Flushing Setup
- Build a Recirculating Draft Line Cleaning Pump
- Home Brew Keg Roundup – New & Used, 5 and 2.5 Gallon & More!
- Damp Kegerator? Fix Kegerator Condensation
- Homebrew Temp Controller Roundup! – Kegerator and Fermentation – concepts, applications and models
- Bulk Keg Orings and Keg Parts Reference
This post may contain affiliate links. We may make a commission when you use our links. This will never cost you extra. Thank you for supporting Homebrew Finds!
greatdealsNote that specifications and features may have changed since this review was published. Check product page for current descriptions, specifications and pricing. Make sure the components you use are compatible and rated for your intended application. Contact manufacturer with questions about suitability or a specific application. Always read and follow manufacturer directions. tag:lnksfxd review:komoskegereatorreview rs:7 tag:tpr
