Hands on Review: KOMOS Rubicon Draft Jockey Box!
This review is by Homebrew Finds Contributor Brad Probert. Brad is an engineer, expert homebrewer and experienced reviewer. Grab a link to Brad’s website at the end of this review.
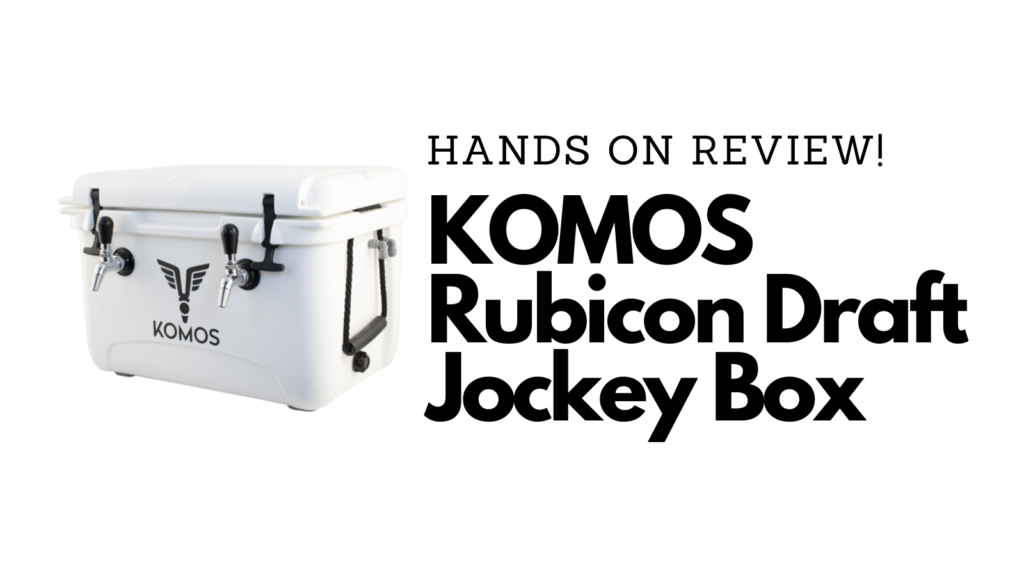
Komos Rubicon Draft Box
There is a lot of equipment out there for making draft homebrew mobile. Like different tools in a toolbox, each one is designed for a given situation. A draft box or jockey box is ideal for a group/party situation where you’ll be serving your beer away from your home. Or maybe it’s still at your home, but you’re serving your beer at a party in your backyard and don’t want to have a constant flow of people in & out of your house to refill their cups. A jockey box is made from a regular picnic cooler and has standard shanks/taps mounted through the wall, and a length of beer line inside sitting on ice to keep beer cold as it heads to the faucets.
Limited Time Deal on Cooler
The cooler part of this build is on sale for $169.99 as a MoreBeer Deal of the Day. This is valid 3/15/25 only while supplies last.
Limited Availability Deal of the Day: As of this posting, this on sale as as a MoreBeer Deal of the Day. Shipping is also free to addresses in the contiguous US with most $59 Orders. Availability: This is available today only, while supplies last. Quantities are limited. Check the MoreBeer’s Deal of the Day to check today’s offering.
Product Description – Here – Use coupon code BEERDEAL to get this discount.
The first building block of a jockey box is the cooler you install the hardware in. The Komos Rubicon Draft Box uses a heavy-duty roto molded cooler as its base. It has a tough 2.5 mm thick skin, and in-between is filled with high density foam to provide insulation. With most coolers, you get all your heat transfer through a plastic-to-plastic fit with the lid. But the Komos has a thick, engineered seal, and uses two stretchy rubber latches to keep it compressed down tight. Rounding out its features, it has rope handles with molded grips, and 4 broad durable rubber feet on the bottom to prevent it from sliding around or scratching the surface it sits on.
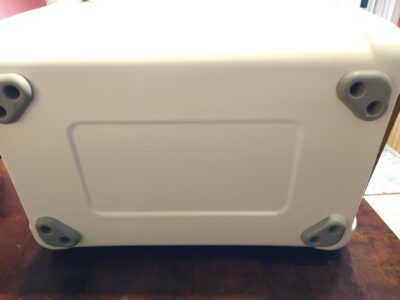 Anti-Skid Feet on Bottom of Cooler
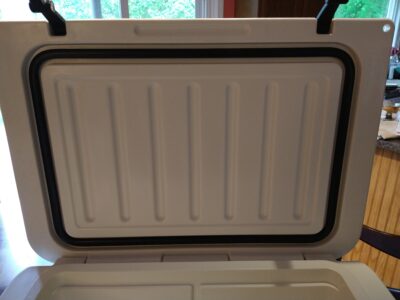 Lid Seal
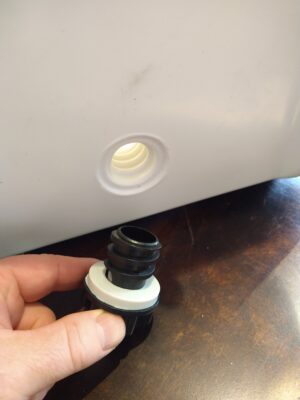 Threaded Drain Plug with Seal
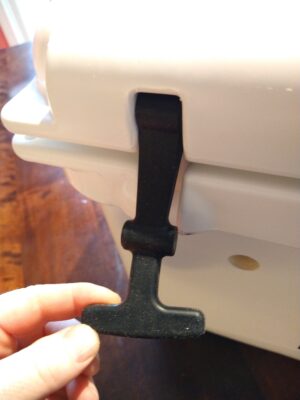 Stretchy Rubber Latches to Hold Cover Closed
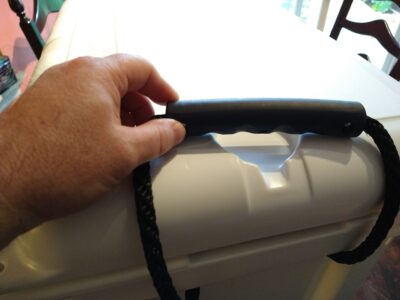 Rope Handles and Grips
Check Prices, Models & Availability
- KOMOS® Rubicon Draft Box (2 Tap) D1915 << The unit reviewed in this post
- KOMOS® Rubicon Cooler D1916
- KOMOS® Draft Multi Tool with Duotight Remover (7 in 1) D1269
- KOMOS® XL Slimline Cold Plate – 2 Lines D1917
- CoolBrew Bags – Hands on Review
- DuoTight Fittings & Accessories – Hands on Review
- EVABarrier Tubing – Hands on Review
- Intertap Faucets – Hands on Review
This article contains affiliate links. We may make a small percentage if you use our links to make a purchase. You won’t pay more and you’ll be supporting Homebrew Finds and more content like this. Thank you for your support!
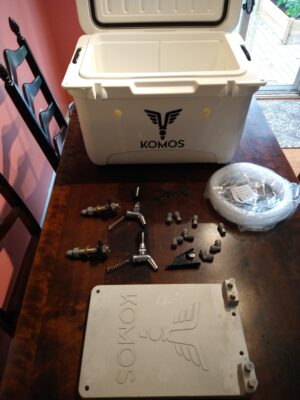
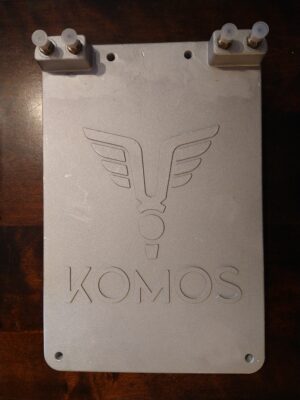
The next part of a draft box is the cooling coils inside. The purpose of these coils is to make sure your beer is cold as it comes out of the tap, and also to avoid the typical picnic tap problem of beer foaming as your cold beer hits outdoor temperature vinyl beer lines. The typical jockey box setup uses big coils of stainless steel tubing to sit inside, buried in your ice. In the case of the Komos Rubicon, they went a unique direction and used a thick rectangular cast aluminum plate, with 18 feet of stainless steel tubing running through it. The aluminum is a big heat sink to pull heat from the beer in the lines and transfer out to the ice/water while it sits in the cooler. The cast plate is 15” long x 10” wide x 1” thick (2.75” tall at inlet/outlet threaded fittings).
The rest of the hardware in the cooler is all Kegland. Kegland shanks, self-closing springs for the faucets, and Intertap faucets – Hands on Review – make up the hardware to pass through the wall of the cooler up front. On the side are two small drilled holes to pass through Duotight EVABarrier 8 mm OD line. The backs of the shanks, the inlet/outlet threaded ports on the cooling plate, and the 90 degree elbows to pass the cooling lines out the side of the cooler are all Duotight fittings. To connect all these fittings, the draft box also comes with 39 feet of 8 mm x 5 mm EVABarrier tubing (and a tubing cutting tool) for press-fit convenience into the Duotight fittings – Hands on Review. That is of course enough length to reach to wherever your kegs are, but you have to supply your own Duotight ball lock fittings for your connections at the kegs.
The cooling plate design is intentionally designed to allow you to have room in your cooler for both beer cooling lines as well as some space for other icebox things. A typical draft box with coils of stainless cooling coils takes up most/all of the interior space in the cooler, and you’re not fitting anything else in there except the ice to keep it cool.
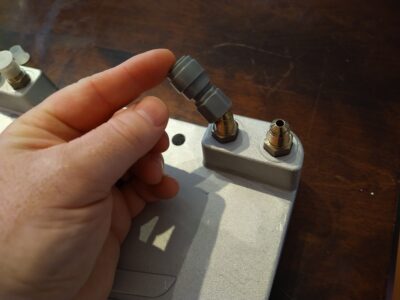 Duotight Fitting Threads onto MFL Thread
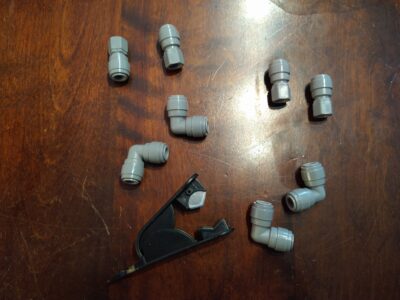 All the Duotight Fittings and Tubing Cutting Tool
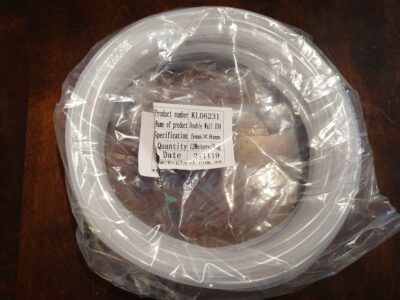 Roll of EVABarrier Tubing
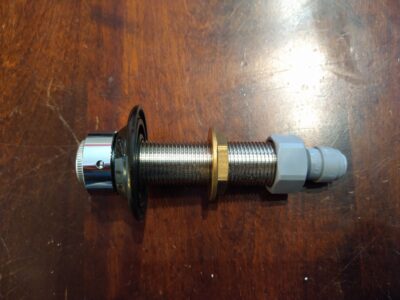 Shank with Duotight Fitting Attached
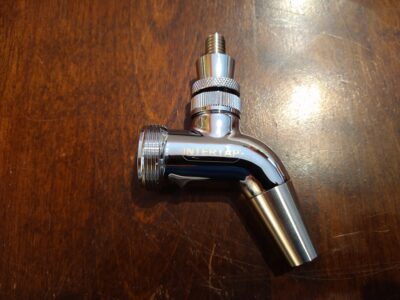 One of the Two Intertap Faucets
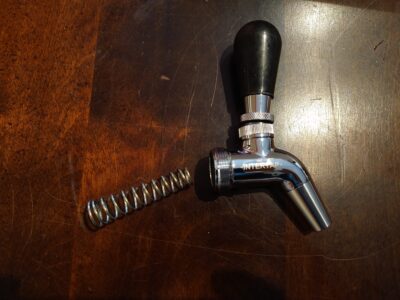 Intertap Faucet with Return Spring and Black Plastic Handle
Hands on Review
The build quality of the Komos cooler was great. The smooth, hard plastic outer shell had no imperfections, as well as the inside. The lid seal was likewise good quality without any flaws- which was critical for cold performance of the cooler. The aluminum casting wasn’t anything flashy, and had some small marks in the surface in a couple of places. But since the function of the casting is just to heat sink the stainless cooling tubes inside, those had no impact on its function. The heft of the plate was substantial, weighing in at 15 lbs and 11 oz.
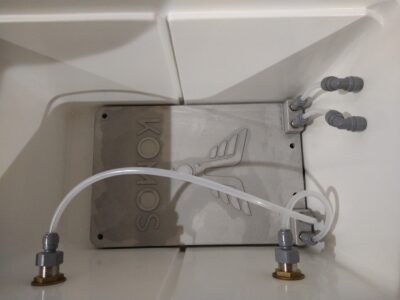 Internal Duotight Fittings and EVABarrier Line Installed
The Duotight fittings made assembly a breeze. Otherwise, assembly probably would have been quite tedious with several small joints. The provided directions gave dimensions for lengths of tubing to make all the connections. These worked great, other than the length of tubing to pass through the side of the cooler. Cut at 3” length they were just right at the length to pass through the wall of the cooler and press into the 90-degree elbows. However, I found it just a tad short on one fitting, and it needed about 1/8” additional length to ensure it made a solid connection and bottomed out. Luckily, with 39 feet of tubing, it was easy to just make a slightly longer piece to ensure the right fit. Another tip here is to put some tape over the 3” length as you assemble it through the cooler wall. Otherwise it will collect pieces of foam core debris, which then could get stuck in your beer line somewhere. In all, I had zero leaks, and it required no Teflon tape on any of the interface to threaded joints, either.
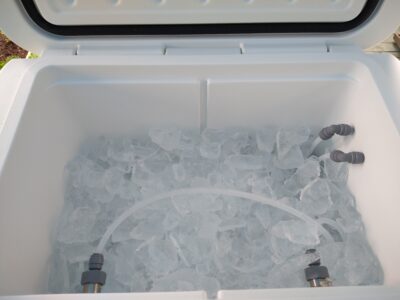 Cooler Loaded with 22-lb Bag of Ice
Although the concept of the flat cooling plate was so you could stash extra things in the cooler, the 2 centrally located shanks protruding inward, and the lines coming off them did block access somewhat. There was definitely more space than a typical draft box, but I wouldn’t have been able to stash a 12-pack of beer in there or anything. And of course if people are opening & closing the lid constantly, your ice inside is going to melt faster. I put a 22-lb bag of ice in there and it filled it to maybe 85% of space. I didn’t put anything else in there, as I wanted to focus on serving beer through it. The capability of the cooler to keep that ice was impressive, as after serving about 2.5 gallons of draft beer over a couple of hours in 80-degree heat, and sitting for about 20 hours between 70-80F, it was still pretty much all ice when I opened the lid to peek inside.
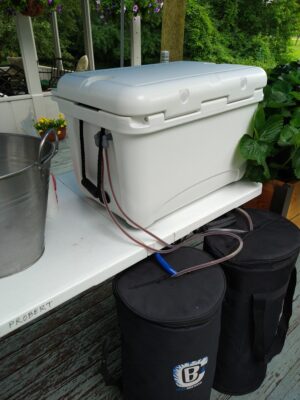 Connections to Kegs in Cool Brewing Bags – Hands on Review
The draft box was the perfect accessory for the party where I used it. I typically have a couple kegs in Cool Brewing keg cooler bags with their thin ice packs, and use a couple of picnic taps. Night and day difference using the draft box. For one, cold beer in the keg stayed cold all the way to the cup. The temperature effect on a hot day was nice, and it also resulted in less foam in the cups. Secondly, the delivery method was a far better experience. Instead of someone fiddling with the picnic tap to figure it out, and then trying to figure out how to leave it when done, the Intertap faucets were clean and intuitive. The auto-close springs were perfect at avoiding any drippy or stuck picnic taps that end up making a mess or losing precious beer. Lastly, the overall presentation was very professional looking, and it felt like bringing my homebrew game to a new level. With the length and size of the lines, Komos recommends setting your CO2 to 20-30 psi, which I would concur. I served at 15 psi, and had no issues with foaming, but had fairly slow pours (20 seconds to fill a pint cup).
 Backyard Trial Setup
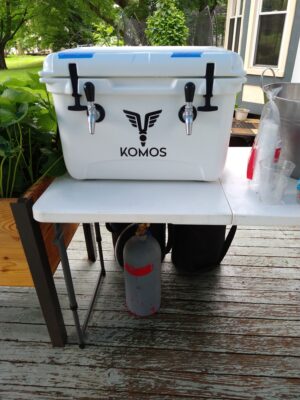 Ready to Serve- with CO2 and Kegs Under Table
In addition to putting it to the test at a backyard party, I decided to collect some data to quantify its cooling performance. They suggested that this cooling plate setup only be used for low volume applications. My first trial proved a point I could have easily figured out even without testing. A keg full of cold beer, kept in an insulated keg bag with an ice pack, and then pushed through a cold plate sitting in an ice bath- comes out ice cold. This of course would be the case no matter how many beers you flowed through it, or how quickly. And I would say this would be the normal case. I used a keg full of cold water at 38F, and poured 16 oz cups of water at 34-35F, whether I was pouring cups continuously, or pausing for a few minutes in between.
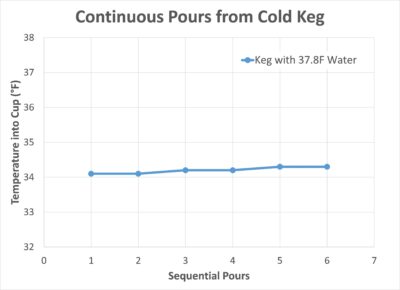 Continuous Pours from Cold Keg
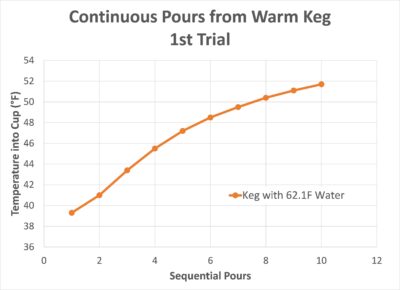 Continuous Pours from Warm Keg 1st Trial
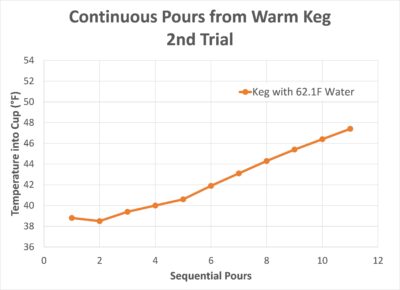 Continuous Pours from Warm Keg 2nd Trial
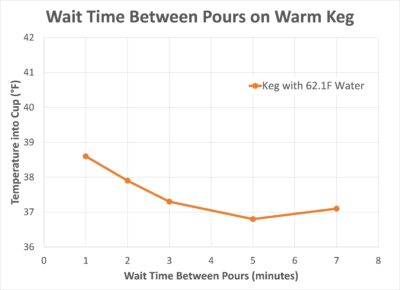 Wait Time Between Pours from Warm Keg
Next I filled the keg with 62F water and collected more data. Again pouring 16 oz cups, pausing from 1 – 3 minutes in between pours, cups of water came out at 37-38F. This seemed like pretty good performance for a setup with a keg of warm-ish beer. I let the system rest and then started pouring continuous 16 oz cups of water starting at 39F. Pouring one after another, each cup was 1-2F degrees warmer than the cup before it. This trend continued up through the 10th pour, when I stopped collecting data. So I guess in a situation of not-so-cold beer in the keg, and continuous pours, the heat sink chiller can’t quite keep up. But the system does work if you keep your keg cold, or if you space out your pours with a couple minutes in between.
Conclusions
Overall, the Komos Rubicon Draft Box with its cold plate system and roto-molded cooler performed strongly and looked great serving beer at the backyard party. The cooling system might not be designed to host a craft beer festival, but it can keep up with a typical house party (or at least mine). Once you’ve served your beer from a draft box with actual beer faucets, versus picnic taps, you won’t want to go back.
Check Prices, Models & Availability
- KOMOS® Rubicon Draft Box (2 Tap) D1915 << The unit reviewed in this post
- KOMOS® Rubicon Cooler D1916
- KOMOS® Draft Multi Tool with Duotight Remover (7 in 1) D1269
- KOMOS® XL Slimline Cold Plate – 2 Lines D1917
- CoolBrew Bags – Hands on Review
- DuoTight Fittings & Accessories – Hands on Review
- EVABarrier Tubing – Hands on Review
- Intertap Faucets – Hands on Review
Related Reviews
- CoolBrew Bags
- DuoTight Fittings & Accessories
- EVABarrier Tubing
- Intertap Faucets
- NukaTap Faucets
- Our Collection of MoreBeer Reviews
- Kegland Reviews
More Photos & Graphs
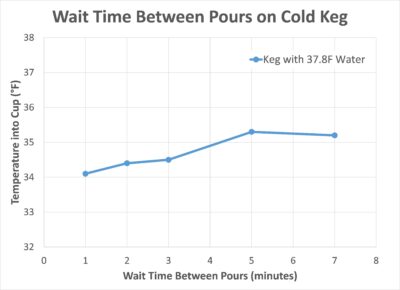 Wait Time Between Pours from Cold Keg
 Closeup of Hole for Tap Shank
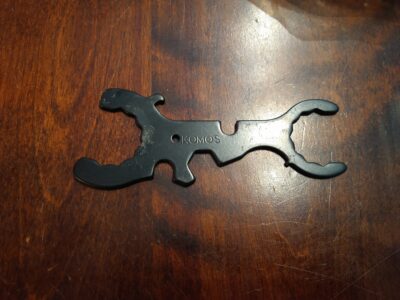 Faucet Wrench
Rebuild Your Used Kegs
Keg Deals!
kegdealsEverything For Your Kegerator!
Food Grade Keg O-rings in Bulk!
More Homebrew Finds!
- Last 50 Finds!
- Top Deals – a curated list of the best deals
- Homebrew Reviews – one of the largest libraries of homebrew reviews in existence!
- Our Top Posts – tips, how-tos, resources posts and more
- Let’s be Friends!
This post may contain affiliate links. We may make a commission when you use our links. This will never cost you extra. Thank you for supporting Homebrew Finds!
greatdealsAlso: Kegerator Tips & Gear | Keg Repair Part #s | Recent Keg Finds
Our Top Draft Resources!
Check our our Top Draft Related Resources
- Commentary: Pin Lock Keg Pricing and Availability
- Check Your CO2 Regulator for Leaks!
- How to get a keg ready for first use? New Keg Cleaning and Prep
- Portable Draft Beer Serving Options!
- Pin Lock Keg Pricing and Availability
- The Most Difficult Spot to Check for CO2 Leaks
- Keg O-Ring Materials Selection! – EPDM, Silicone and Buna-N?
- Why Do I Have Bubbles in My Beer Line? Diagnosing and Fixing Kegerator Foam Problems
- Five Benefits of Using Corny Kegs As Fermenters
- Rebuilding & Reconditioning Homebrew Kegs!
- Food Safe Replacement Keg O-Rings in Bulk
- Hands on Review: Kegland DuoTight Fittings & EVABarrier Tubing!
- Why Won’t My Beer Carbonate? Fixing Draft Beer Carbonation Problems
- What Does a Flow Control Faucet Do?
- Upgrade Your Kegerator – 6 Improvements!
- Serve Homebrew on Any Kegerator & Convert Commercial Kegerator to Homebrew
- Tips and Gear for Growler Filling
- What’s the Difference Between Ball Lock Kegs and Pin Lock Kegs?
- Checking for Draft System CO2 Leaks – Using The Pressure Gauge Method
- Tip: Consider Oetiker Stepless Clamps for Kegerator Gas and Beer Lines
- Hands On Review: Inkbird ITC-308 Dual Stage Temperature Controller +WiFi Version
- Universal Poppets Tips and Tricks!
- Convert Your Mark II Keg & Carboy Washer to a Recirculating Draft Line Cleaning Pump!
- Step by Step: Finding and Fixing Keg CO2 Leaks
- Kegerator Temperature Probe Placement – To Immerse or Not To Immerse? – three tests to determine optimal pla…
- Kegerator Beer Line Temperatures & Reducing Foam with a Recirculating Fan
- Kegging CO2 Use Estimations and Calculations
- Balancing Your Kegerator Draft System
- Building a Simple Ball Lock Draft Line Flushing Setup
- Build a Recirculating Draft Line Cleaning Pump
- Home Brew Keg Roundup – New & Used, 5 and 2.5 Gallon & More!
- Damp Kegerator? Fix Kegerator Condensation
- Homebrew Temp Controller Roundup! – Kegerator and Fermentation – concepts, applications and models
- Bulk Keg Orings and Keg Parts Reference
By Brad Probert. Check out Brad’s website – beersnobby.com
Special Thanks to MoreBeer for providing the unit used for evaluation in this review.
Price, promotions and availability can change quickly. Check the product page for current price, description and availability.
Make sure the components you use are compatible and rated for your intended application. Contact manufacturer with questions about suitability or a specific application. Always read and follow manufacturer directions. tag:lnksfxd review:b3komosjockey tag:tpr
