Hands on Review: Nukatap Counter Pressure Bottle Filler!
Updated: March 16, 2025
Thank you to HBF Contributor Aaron Nord for this hands on review! Aaron is an advanced award winning brewer, a long time reader and a serial tipster!
Nukatap Bottle Filler
As with many homebrewers, my experience with the hobby began with making a boxed kit on my stovetop with about 50 bottles of drinkable beer when all was said and done. It was enough to keep me coming back, advancing in skill and acquiring equipment as time went on. I realized quickly that bottling was my least favorite part and was looking forward to ditching the bottles and getting into kegging. This change was one that made a big impact as far as increasing enjoyment of the hobby for me – that and getting out of stovetop brewing and into an electric brewing setup.
Inevitably, I found myself in the situation where I still needed to fill a few bottles from time to time, mainly for competitions. Now that I was kegging all my beer, I wanted an option that wouldn’t interrupt that practice too much. At the time, the most prevalent options for homebrewers were complicated counterpressure systems or the Blichmann Beer Gun. I opted for the latter and used that for several years to successfully bottle my competition beers. It has its pros and cons (discussed more later), and I always kept my ear to the ground on other options.
Limited Time Deal! (Ends 3-17)
- MoreBeer is discounting most things by 17% when you use coupon code GETLUCKY at checkout
- *Code will not work with other coupon codes. Offer not valid on gift cards, items over $1000 or products already on sale & MAP products which have an indication on their product page. Single use per customer.
- Get Free Shipping: This ships for free with a qualify order as part of MoreBeer’s Free Shipping Program. Under that promo most orders over $59 ship for free.
17% Off at MoreBeer! use coupon code GETLUCKY
That makes this just $69.59 and shipping is also free to many US addresses.
Check Current Pricing & Availability:
- Nukatap Counter Pressure Bottle Filler KEG915 via MoreBeer
- Nukatap Counter Pressure Bottle Filler via William’s Brewing
- Nukatap Counter Pressure Bottle Filler via cornykeg.com
This article contains affiliate links. We may make a small percentage if you use our links to make a purchase. You won’t pay more and you’ll be supporting Homebrew Finds and more content like this. Thank you for your support!
When a couple homebrewing friends of mine told me about their new devices that performed the same function as the more complicated counterpressure rigs but in a simpler fashion, I was intrigued. Then, not too much later, I was presented with the opportunity to test out Kegland’s creation in this arena. I’m admittedly a bit of a Kegland fanboy as I appreciate their endeavor to produce high quality, generally affordable, and well-engineered products for homebrewers. I suspected that their Nukatap Bottle Filler wouldn’t disappoint.
Breakdown of Components
When purchased from MoreBeer, the bottle filler comes with the following:
- All stainless steel counter pressure filler
- Push-in spout compatible with forward-sealing faucets
- (2) 8 mm Duotight adapters for filler and NukaTap spout
- (2) Ball Lock Post Adapters (Red / Yellow)
- 19.5″ length of 8 mm OD x 5 mm ID EVABarrier tubing
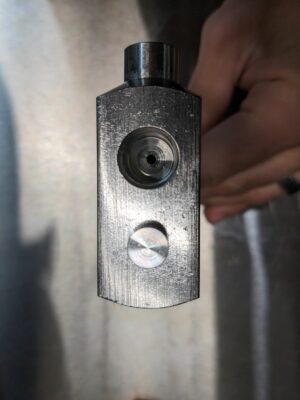
The counter pressure filler itself was notable right away because of its heft. The main body is milled stainless steel with precisely tapped screw-in ports. Port (1) is for the pressure relief valve, port (2) is for the liquid in supply, and port (3) is for the gas in supply. Next to the liquid in supply there is a purge valve (4) and on the bottom of the pressure filler body is a telescopic liquid out line (5) fitted with a silicone bung.
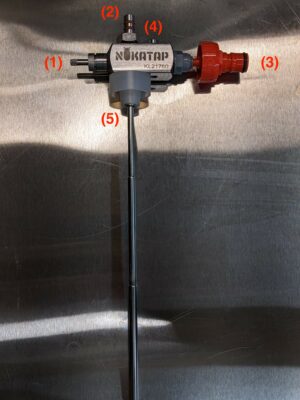 Assembled and Extended Numbered Diagram
The pressure relief valve consists of an inner and an outer body with the inner body screwing in and out of the main bottle filler’s body which is used to adjust the filler pressure. The outer body is a knurled pin that acts as a manual pressure relief valve, to be pulled when the pressure in the bottle needs to be purged to stabilize it with the ambient pressure. There is a spring and gasket that sit between the inner and outer body to allow for the inner body to sit tightly within the outer body.
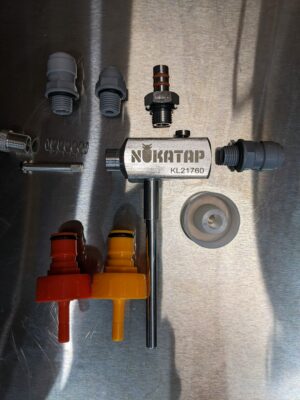
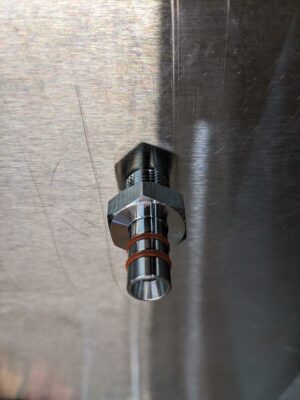
The liquid supply in is threaded to accept ¼” BSP fittings allowing for several opportunities for connections. The kit from MoreBeer included two Duotight connectors, one with an 8 mm Duotight hook-up and one with a 6.35 mm Duotight hook-up. These fittings allow for connecting the popular EVABarrier tubing in both sizes. The 6.35 mm hook-up also accepts the barb on the bottom of the Ball Lock Post Adapter (aka Carbonation Cap). The other included connector is a 10mm post with two gaskets which fits directly into the following faucets: Kegland Nukatap, 600-series Perlick, Intertap, Ventmatic.
Related: Our Collection of DuoTight Resources & Reviews
tsrduotight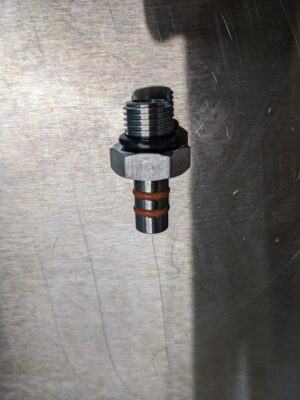 Faucet Adapter
The purge valve is small and compact with a short action, requiring a decent amount of force to operate, with a firm return action.
Related: DuoTight Review
duotightreviewLastly, the telescopic filler wand is composed of three interlocking pieces, allowing for lengths between 3.75 inches and 10.25 inches for the filling of up to 500 ml bottles. It is made of stainless steel and is easy to operate, with a satisfying opening and closing action. At the top of the filling wand, directly under the main body of the bottle filler, is a silicone bung. The included bung is well-suited for the “Grolsch” style, but there are other options available. The William’s Brewing page for the Nukatap Bottle Filler has an add-on option for a #3 Silicone Stopper to fit 12-ounce bottles and they note specifically that the silicone stopper that comes with it fits all 16-ounce and 32-ounce “Grolsch” style bottles.
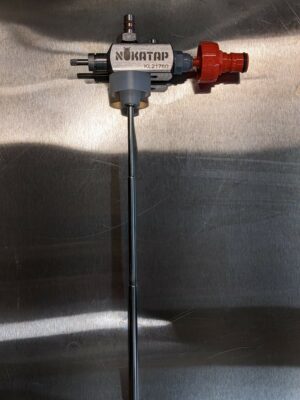 Assembled and Extended
![]() Silicone Bung
Silicone Bung
Hands on Review
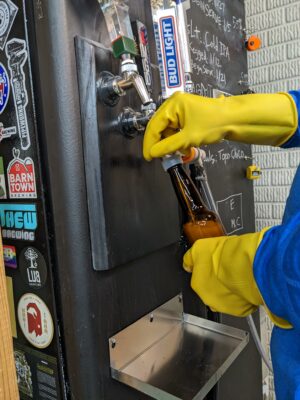
With a homebrew competition coming up, I set out to fill bottles for three entries, plus a few more to get some more experience with the filler. Having cleaned and reassembled the bottle filler, I let the parts soak in StarSan along with my bottles just prior to filling. I connected a ball lock disconnect coming from my CO2 tank to the carbonation cap on the gas in side of the bottle filler. For the first bottle fills I used the 10 mm post for the liquid supply side and inserted it into my 630 series Perlick faucet. It fit snugly. I pulled a bottle from the StarSan bucket, emptied its contents, then inserted the fully extended telescopic wand into the bottle. I then proceeded to use the purge action on top of the filler body to fill the bottle with CO2, holding it for about 8-10 seconds to ensure the remnant gas in the bottle was mostly CO2. I then proceeded to push the bottle up against the silicone bung as tightly as possible, which collapsed the wand to just the length of the bottle. Pressing the bottle up required a good amount of upward force to create a seal. After that seal was made, I opened the faucet, causing mostly foam to fill my bottle.
For these first fills, I struggled to get enough liquid in the beers and expel the foam. Ideally there would be 90% liquid with a little foam cap on top of the liquid to be able to cap onto to reduce the chances of oxygen staying in the bottles, but most of mine were 50/50 liquid to foam, requiring me to wait for the foam to subside in order to top off the liquid.
I followed this same process for my next bottles which were on an Intertap faucet with flow control built in. This extra flow control option aided in reducing the foam a bit, as I could slow the flow down to a trickle. This is what the pressure valve on the side of the filler is supposed to do when the apparatus is used properly. Since I did not have the bottles pressurized, that option seemed to do nothing.
 Filling From Tap Side View Halfway Filled
Lastly, I decided to test the functionality of the filler’s tap-free method of bottle filling. I hooked my EVABarrier tubing from the keg directly to the bottle filler and filled several bottles with this method. It was difficult to manage it all – the flow of the beer, the now downward pressure I had to apply from the filler down onto the bottle, and the pressure relief valve. When the bottles were nearing full, I also had to manage the keg pressure, turning off the CO2 and purging the keg to stop the flow of beer through the EVABarrier tubing. Had I been thinking, I would have placed a DuoTight flow control valve inline to be able to turn off the flow. It also would have helped if I had properly pressurized the bottle beforehand as the pressure relief valve on the side of the filler would have been more effective.
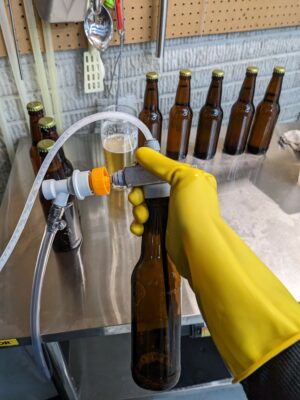 Filling with EVABarrier Connection
After I consulted with a couple of friends who both own the Tapcooler bottle filler, they instructed me that after I place the purged bottle onto the silicone seal tightly, I need to use the purge button once more, this time to increase the pressure inside the bottle. This nearly equalizes the pressure within the bottle with the pressure in the keg, allowing for a counter-pressure fill of the bottle. With this environment, a bottle fill should be low on foam and the gas inside the bottle should be very close to 100% CO2.
Using this method, I was much more successful in filling bottles that were almost all liquid with just a little foam. I was still not able to get the amount of foam I am used to for capping onto but, being confident that the bottle was filled with CO2 prior to being filled with beer, I was satisfied that there was little oxygen in the headspace after capping. This new process also resulted in much less cursing as an extra bonus.
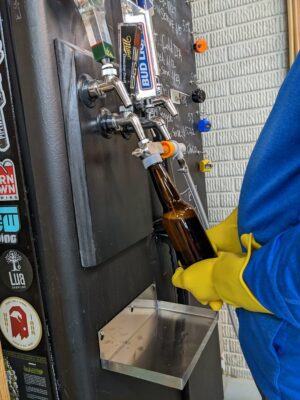
Filling From Tap Side View Almost Filled
One other change I made for this second go around was making sure the tap was sufficiently cooled before bottling. As with any pour on my system, the first one usually is foamier than the others, so prepping it by pouring a pint first ensured that the first bottle filled using the Nukatap Bottle Filler was lower on foam, too.
I did my best to ensure that the seal between the bottle and the silicone grommet was as tight as possible. In the future I will invest in a #3 Silicone Stopper before attempting to fill any other 12-ounce bottles.
Nukatap vs Blichmann Beer Gun
Being used to the Blichmann Beer Gun, using the Nukatap Bottle Filler was certainly a different experience. The whole concept of counter-pressure filling was new to me and not something I needed to account for when using the Beer Gun. Comparing the two further, I do like the simpler method of filling bottles that the Beer Gun offers. It has the same option to purge bottles with CO2 prior to filling but doesn’t require pressuring the bottles. When filling bottles with the Beer Gun I have been able to cap on foam almost all the time because when I pull the bottling wand from the bottle it usually rouses the liquid enough to create a nice foam cap. This gives me some degree of confidence that I’ve limited the oxygen in the headspace.
Where the Nukatap has an edge on the Beer Gun is not in the filling process, but pretty much everything else. The Nukatap is much easier to assemble and clean owing to its fewer parts. It is more compact and takes up less space when not in use. Filling straight off the tap is simpler for my setup compared to opening my serving refrigerator and hooking up a ball lock disconnect. Without performing a Dissolved Oxygen (DO) test on bottles filled with both methods I cannot say definitively, but I would imagine that bottles filled with the counter-pressure method would have less DO than those filled with a Beer Gun.
After speaking more to my friends with the Tapcooler and comparing with the Nukatap bottle filler, one option the Nukatap offers that isn’t included with the Tapcooler is the ability to hook a ball lock disconnect for the gas supply. The Tapcooler has a barb for gas hookup making it a bit more fixed and less flexible than the Nukatap. I did find that there is an optional adaptor for the Tapcooler enabling this feature, but it doesn’t appear to be standard like on the Nukatap. Also, the pressure relief valve on the Tapcooler is simpler and does not include the inner piece. It only has the screw type adjuster without the quick release valve, another point for the Nukatap.
Summary
After my initial frustration owing my inexperience with a counter-pressure bottle filler, I can say that I appreciate the Nukatap Bottle Filler for what it offers. As with most of the equipment I’ve seen from Kegland, it is a high-quality addition to my brewing gear that will last a long time if properly cared for. I can see myself using the bottle filler when I want to fill a few bottles quickly. It will allow me to perform the function in a faction of the time compared to the Beer Gun because of its simple setup/teardown and cleaning process. However, for instances where I need to fill many bottles, say for a competition, I think I’ll rely on my Beer Gun to do the job and accept the trade-off of having to take more time setting up and cleaning for less complication in the bottle filling process.
Check Current Pricing & Availability:
- Nukatap Counter Pressure Bottle Filler KEG915 via MoreBeer
- Nukatap Counter Pressure Bottle Filler via William’s Brewing
- Nukatap Counter Pressure Bottle Filler via cornykeg.com
Related Reviews & Top Posts
- Hands on Review: Tapcooler Counter Pressure Bottle Filler for Forward Sealing Faucets
- Hands on Review: Blichmann Engineering Beer Gun
- Nukatap Faucet Hands on Review
- Intertap Hands on Review
- Hands on Review: NukaTap FLOW CONTROL Faucets
- Tips and Gear for Growler Filling
- Tip: Filling a quick bottle or growler from your kegerator faucet
More Photos
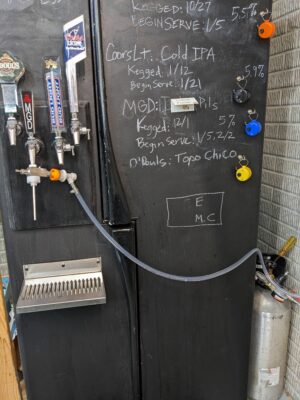 CO2 Hooked Up Wide View.jpg
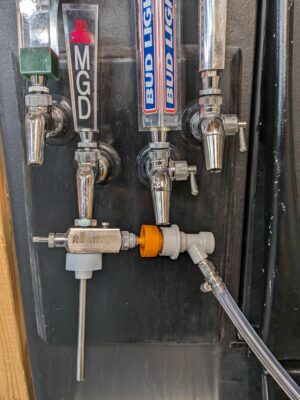 CO2 Hooked Up Close View
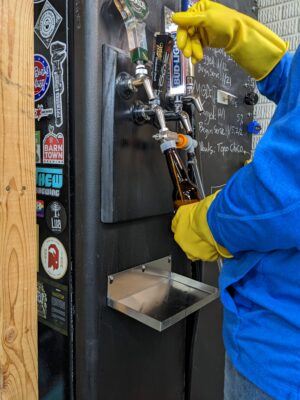 Filling From Tap Side View Wider Angle
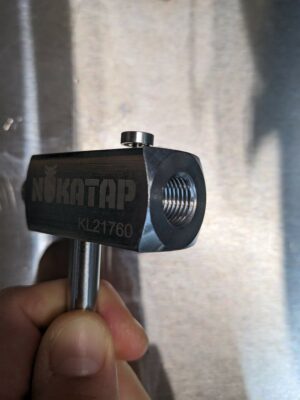 Main Body Side View of Gas Out
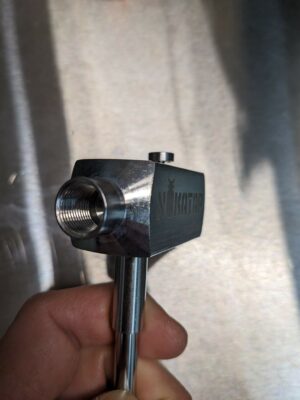 Main Body Side View of Gas In
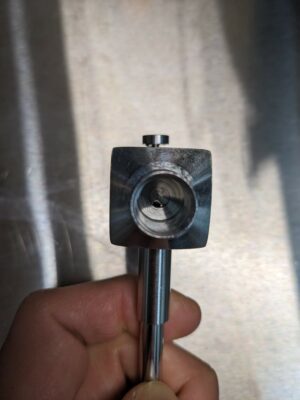 Main Body Side View Gas In Straight
 Main Body Top View
 Faucet Adapter Angled Side View
![]() Silicone Bung Top View
Silicone Bung Top View
Nukatap Faucet Review
Intertap Review
Blichmann Beer Gun Review
Buy DuoTight
- DuoTight Push In Fittings & EVABarrier Double Wall Draft Tubing at MoreBeer
- Search MoreBeer for “DuoTight” – to find components and accessories that may not show up on category pages.
- Kegland DuoTight Fittings and Accessories at William’s Brewing
- Search William’s Brewing for “DuoTight” – to find components and accessories that may not show up on category pages.
- DuoTight and EVABarrier at Keg Connection – coupon code HBF5OFF saves you 5%
- Search Amazon for “DuoTight” – offerings vary
- Search Amazon for “EVABarrier Tubing” – offerings vary
- DuoTight Compatible Locking Clips via Valuebrew
Related DuoTight Reviews on How-To’s!
DuoTight Reviews, Resource Posts & How-To’s!
DuoTights are so amazing – at least in my book 🙂 – that I have several reviews and related top posts
- Hands on Review: Kegland DuoTight Rigid Joiners
- Hands on Review: Kegland Digital Gauges!
- Hands on Review: Kegland BlowTie Spunding Valve!
- Five Benefits of Using Corny Kegs As Fermenters
- Hands on Review: Kegland DuoTight Ball Lock QDs!
- Using a Keg as a CO2 Source for Portable Serving!
- Building a Simple Ball Lock Draft Line Flushing Setup
- Build a DuoTight CO2 Gas Manifold! – for Kegland EVABarrier Tubing
- Hands on Review: Kegland Inline Secondary Regulator!
- Hands on Review: Kegland Ball Lock Cleaning Kit and Party Pump
- Hands on Review: Kegland DuoTight Fittings & EVABarrier Tubing!
- Troubleshooting and Fixing DuoTight Leaks
My DuoTight Review!
duotightreviewI Recommend These for DuoTight Users!
duotightclipsMore Kegland Gear Reviews!
More Homebrew Finds!
- Last 50 Finds!
- Top Deals – a curated list of the best deals
- Homebrew Reviews – one of the largest libraries of homebrew reviews in existence!
- Our Top Posts – tips, how-tos, resources posts and more
Also: Kegerator Tips & Gear | Keg Repair Part #s | Recent Keg Finds
Our Top Draft Resources!
Check our our Top Draft Related Resources- Commentary: Pin Lock Keg Pricing and Availability
- Check Your CO2 Regulator for Leaks!
- How to get a keg ready for first use? New Keg Cleaning and Prep
- Portable Draft Beer Serving Options!
- Pin Lock Keg Pricing and Availability
- The Most Difficult Spot to Check for CO2 Leaks
- Keg O-Ring Materials Selection! – EPDM, Silicone and Buna-N?
- Why Do I Have Bubbles in My Beer Line? Diagnosing and Fixing Kegerator Foam Problems
- Five Benefits of Using Corny Kegs As Fermenters
- Rebuilding & Reconditioning Homebrew Kegs!
- Food Safe Replacement Keg O-Rings in Bulk
- Hands on Review: Kegland DuoTight Fittings & EVABarrier Tubing!
- Why Won’t My Beer Carbonate? Fixing Draft Beer Carbonation Problems
- What Does a Flow Control Faucet Do?
- Upgrade Your Kegerator – 6 Improvements!
- Serve Homebrew on Any Kegerator & Convert Commercial Kegerator to Homebrew
- Tips and Gear for Growler Filling
- What’s the Difference Between Ball Lock Kegs and Pin Lock Kegs?
- Checking for Draft System CO2 Leaks – Using The Pressure Gauge Method
- Tip: Consider Oetiker Stepless Clamps for Kegerator Gas and Beer Lines
- Hands On Review: Inkbird ITC-308 Dual Stage Temperature Controller +WiFi Version
- Universal Poppets Tips and Tricks!
- Convert Your Mark II Keg & Carboy Washer to a Recirculating Draft Line Cleaning Pump!
- Step by Step: Finding and Fixing Keg CO2 Leaks
- Kegerator Temperature Probe Placement – To Immerse or Not To Immerse? – three tests to determine optimal pla…
- Kegerator Beer Line Temperatures & Reducing Foam with a Recirculating Fan
- Kegging CO2 Use Estimations and Calculations
- Balancing Your Kegerator Draft System
- Building a Simple Ball Lock Draft Line Flushing Setup
- Build a Recirculating Draft Line Cleaning Pump
- Home Brew Keg Roundup – New & Used, 5 and 2.5 Gallon & More!
- Damp Kegerator? Fix Kegerator Condensation
- Homebrew Temp Controller Roundup! – Kegerator and Fermentation – concepts, applications and models
- Bulk Keg Orings and Keg Parts Reference
This post may contain affiliate links. We may make a commission when you use our links. This will never cost you extra. Thank you for supporting Homebrew Finds!
greatdealsPrice, promotions and availability can change quickly. Check the product page for current price, description and availability.
Make sure the components you use are compatible and rated for your intended application. Contact manufacturer with questions about suitability or a specific application. Always read and follow manufacturer directions
Thank you to MoreBeer for providing the units used for evaluation in this review.
Price, promotions and availability can change quickly. Check the product page for current price, description and availability. tag:lnksfxd review:dtcpbf #tag:tpr

