
Hands on Review: Spike Conical Fermenters
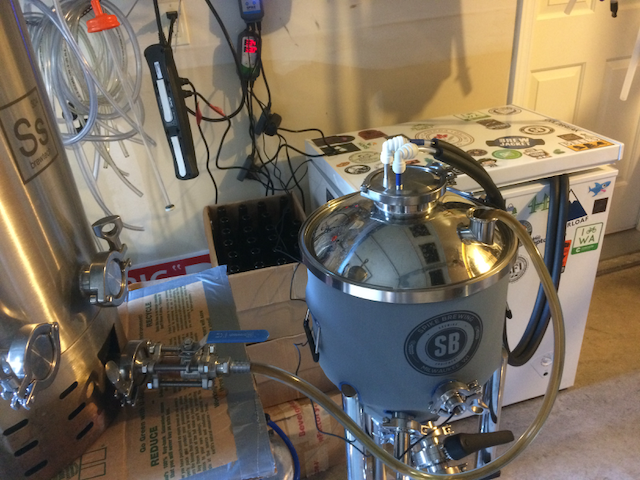
This review is by Homebrew Finds Reader Benji S. Benji has been brewing for 10 years. His favorite style is Festbier. He’s an all grain brewer and member of WIZA (Whidbey Island Zymurgy Association). Check him out on Instagram at neon_hop
After well over a year of evaluating, I splurged recently and got a Spike Conical (the CF5). I’ve seen quite a few others going through this debate period, so I wanted to provide a hot take to help others in their own decision making process. So far I’ve assembled and prepped it for my first brews, but haven’t actually used it yet. Most of the points here will be about equipment quality/features rather than practice.
For context; I added on the temp control bundle with heater, leg extensions, casters, extended bracing shelf, and a few other nice to haves. So some of these will cover things that aren’t part of the “core” conical package.
Compare Prices, Review Continues Below
Related, Save on Refurbished Conicals at MoreBeer
- MoreBeer periodically makes a limited number of refurbished conicals available.
- This is a great chance to get a deal.
- Shipping is also free (for most sizes) to addresses in the contiguous US.
- Limited quantities are available, check link below if you can still get in on this deal.
Refurbished Conicals at MoreBeer
This article contains affiliate links. We may make a small percentage if you use our links to make a purchase. You won’t pay more and you’ll be supporting Homebrew Finds and more content like this. Thank you for your support!
Initial Observations – The Good, The Bad & The Ugly
The Good
Body Quality
The main body feels solid, but not overly heavy. The welding around ports look well done and the internal tunnel entrances for the ports are nice and rounded out.
TC Connection Locations
The TC port connections are well spaced. I have a common problem with the TC connections on my kettle where the ports are so close there isn’t much room for your fingers to get in and tighten the clamp nut without having it at a weird angle. The offset positions on the CF5 avoid this entirely.
Stubby Leg Extensions
Spike recently started providing 9″ leg extensions (instead of the normal 18″ ones they have had), which they call the “Stubby” extensions. These put the top of the conical at a perfect height. You don’t have to bend over to work on the top connections and can still easily see the entire top. Meanwhile, the bottom port is also at a really nice high for a bucket/jar/whatever.
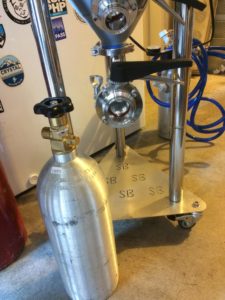 5lb tank for height scale
Casters
If you’ve ever bought an office chair from Office Depot, you know the garbage all-plastic wheels that come with them. The Spike casters are not these. They’re very high quality and smooth running rubberized non-marking. The locks have a good snap/unsnap action so they don’t get stuck in a mid-way state.
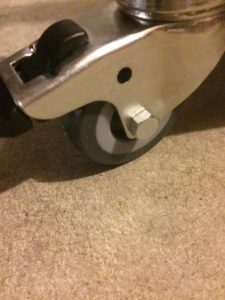 Caster glamour shot!
Extended Bracing Shelf
The extended bracing shelf is basically a slightly larger regular bracing shelf with additional holes drilled on the outside (fixed with a welded nut on top). This allows the legs to attach to the inner holes and the caster or regular pads to attach to the outer holes, providing more stability. I mention this because it’s not at all clear from the description or pictures on their website how this is setup. In practice, it works extremely well and provides good stability for wheeling around.
Insulation Jacket
The insulated jacket that comes with the TC bundle fits snugly, is fairly thick, and has good reinforced stitches around the holes where connections or handles can be accessible. It does take a bit of careful stretching and inching to get it on, but I didn’t feel like I was going to rip it at any point. Once on, it goes right up to the base of every TC port and allows the handles to be easily accessible.
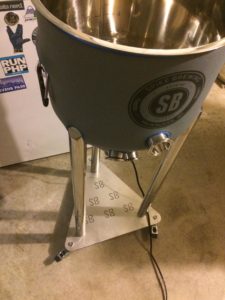 Snug jacket and extensions; cord is from the heater
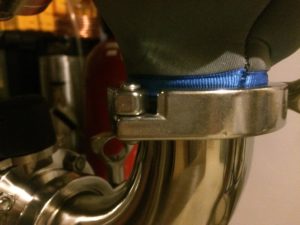 Jacket going right up to the bottom TC bracket point
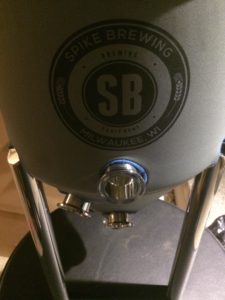 Showing where the jacket rests around the ports
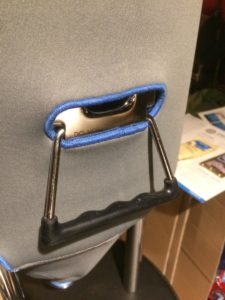 Silicone covered handles and stitching close up
Wrapped Cooling Lines
These are fairly basic silicone lines wrapped in a high quality insulation material. The material individually wraps each line, but then is joined in the center by a solid piece. This makes both lines act as one, in effect avoiding tangles.
Handles
The main body handles are wrapped in silicone and make it really easy to move around if you aren’t using casters.
Chilling Coil Seating
When in place, the chilling coil sits at a nice spot above the cone. The Spike Conicals are all designed to support half batches, so having this sit so far down makes temp control of those batches easy.
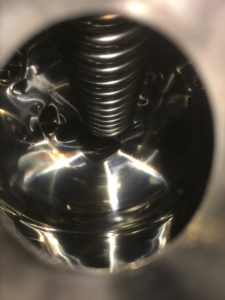 Showing the inside of the conical with the chilling tube seated in the top 4″ fitting
The Bad
Racking Arm
By default, no racking arm is included. This is a bit of a head scratcher and moderately annoying given that this is standard equipment on just about every other unitank I’ve seen (as well as Spike’s own SS brew buckets, the Flex series)
Gas Manifold
I’ve had nothing but trouble getting the gas manifold NPT connections to seal properly and hold pressure. So far I’ve had to re-wrap each post several times, re-pressurize, and spray the connection with sanitizer to find the next leak through bubbles. This might be a personal issue, but it’s a fairly annoying one…
TC Tube Quick Disconnects
The quick disconnect posts that attach the cooling lines to the chiller posts are fairly flimsy plastic. The locks and unlocking feature on them doesn’t feel solid. If I broke these somehow, I’d look elsewhere for a replacement rather than pay the $15 (plus shipping) to get another pair from Spike.
Insulating Jacket & Heater
The inside of the insulating jacket has three velcro spots that the optional heater attaches to. This keeps the heater “locked” to the bottom of the conical cone and likely helps prevent it slipping as you’re trying to get the jacket on. Unfortunately it seems extremely difficult to get the velcro spacing exactly lined up, leaving spots of loose material in the jacket where everywhere else feels snug.
Installing Extended Bracing Shelf
While attaching the conical legs to the extended bracing shelf I discovered that the holes didn’t line up perfectly, leaving about a 1/4″ misalignment. This meant I had to push the leg slightly outward to bend it towards the hole so I could screw it in. This was unexpected given that the shelf is supposed to be custom drilled specifically for the CF5 leg placements.
Butterfly Valves
The two butterfly valves are constructed very solidly, but unfortunately where they sit on the body means that when closed they push right up against the conical legs. This makes it hard to tell if they are in a completely closed position and often feels like they can’t quite get there. Due to their design this position isn’t affecting a seal, but is annoying. I suspect this might be an issue that is unique to the CF5 as the butterfly valves are the same size on all models but the smaller body means less room for angles.
Gaskets
One nice thing about TC connections is that they are fairly easy to attach and detach compared to NPT. One not so nice thing about TC connections are the silicone gaskets needed on every one. These always feel flimsy and get discolored after only a couple of uses. The Spike series of conicals uses two non-standard (if we assume 1.5″ is standard) TC fittings, the 2″ bottom butterfly and the 4″ top port. You receive one of each of these with your core conical and no extra ones by default with the TC or any other add on that uses those ports. It would be nice to see extra gaskets come standard, given that they are sold in the accessories for $1. This isn’t a deal breaker, but does feel like a brand experience improvement (especially in the light that free shipping only triggers at $100, so if you want to order a couple of gaskets after your main order, prepare to pony up just as much for them as to have them shipped…)
Also Consider:
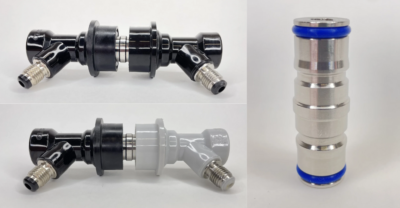 Stainless Steel Ball Lock Jumper with Food Grade Silicone O-Rings: Allows you to connect multiple ball lock runs to clean multiple lines and taps at the same time. Works with both liquid and gas QDs. Stainless Steel Ball Lock Jumper – via Valuebrew – An easy add-on… food grade o-rings, featured in our Keg Rebuild Post
The Ugly
Chilling Coil Starting State
The CF5 comes with a handy getting started sheet about cleaning and passivation, mentioning that all should be needed is a basic hot water & soap wash to get remaining factory oil residue off. Unfortunately the chilling coil comes with printing on the steel tubing, which turns into black ink flakes in a PBW bath. Since the factory cleaning process the conical goes through before if gets to you is fairly opaque, I could easily see someone blindly following the initial instructions and ending up with that ink in their beer instead. It took some dedicated scrubbing with a large brush to get all of it off, as it’s embedded on the piping in the interior of the coil and a bit hard to get to. The actual quality of the coil itself seems to be great except for the connection points that the quick disconnects attach to having fairly rough/sharp edges on them.
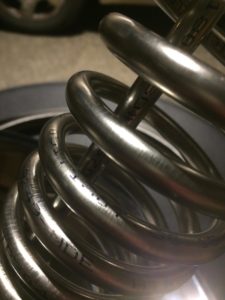
The chilling coil out of the box; notice text running around both the inside and outside of the curves and on the center tube.
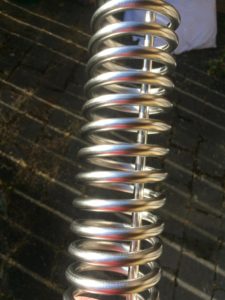 After PBW batch and scrub down
Top Sealing Bracket
The bracket which seals the top of the conical to the body is what I would consider one of the most important parts. It ensures your barrier against infection, oxidation, and maintaining pressure. Unfortunately this piece is by far the flimsiest feeling component on the entire system. It essentially consists of a thin wobbly steel band with three inner sections spot welded to it. This wraps around the top lip and then you have to use a extremely bespoke connecting bracket to close the loop and then screw it tight. Every time I handle this entire bracket it feels like I’m going to bend it or break it. It definitely feels like the weakest link of the entire system. Additionally, the tightening screw takes forever to both loosen and tighten, making it the most laborious assembly item.
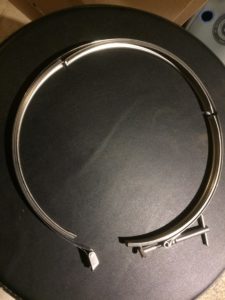 The sealing bracket
Sampling Port
One consistent thing I’ve heard about sampling ports is that they often result in a trickle coming out, followed immediately by a geyser as you loosen. I can now see how that would happen. The valve on the included port is extremely tight and hard to turn. Making this worse is the grooves on the handle. They are just a bit too deep, causing them to really dig into your fingers and make the valve physically painful to use barehanded.
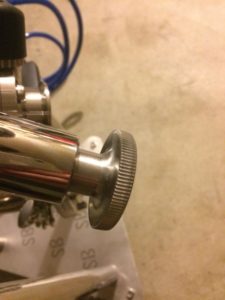 Grooves Hand Forged in Mordor 🙂
Initial Conclusions
Overall I’m happy with my purchase, but some of the minor design issues and getting started woes have made me wonder if I would buy another one were I ever in the position to do so. When cost comparing, the price for an “all in” spike is actually a bit higher than for similarly spec’ed models of other brands. This may have led me to have higher expectations for some of the Bad & Ugly issues. So I do wonder how it would compare side-by-side with another similar system like the SS Brewtech Unitank
Hands on Review: Brew Day
Now having racked into the CF5 for fermenting my first batch of Festbier, here are a couple of round up details I’ve collected.
After my experience with the ink on the chilling coil, I decided to call a last minute audible and do a brew-day PBW wash of the conical before putting it to first use. This ended up being a good decision based on the amount of metallic grey water with floating black specs I got out of it. So ignoring the in-box guidance on this one definitely seems called for (and should really be a de facto rule for any new SS gear).
Once this was completed and I’d finished brewing, racking into it without a pump proved a bit of a challenge. With the stubby extension legs and casters, the top ports sit just over 3 feet off the ground. To make a gravity fill work, I ended up having to use a high cocktail table we had in the garage to get the kettle mostly above the conical top (save your back and do a team lift). This then allowed a gravity fill through the TC manifold port. This route actually ended up working better than expected, as the last dregs which couldn’t gravity feed in were mostly protein and pellet hop sludge. This left nice fairly clean sweet wort going in.
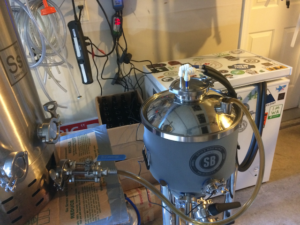
As I was using L17 Harvest for this batch, I wanted to get the temperature dropped down to 50F before pitching. I’d placed a bin of water into my chest freezer (set at 32F) several days before to test the chilling coil pump hook up. So this made it easy to plug in the temp controller and begin trying to drop the temperature. Then all I had to do was wait…and wait…and wait. After over an hour and a half checking in on it sporadically, while working on batch #2 for the day, the temperature had barely dropped a few degrees from the 70F I’d started with. The next 4-6 hours became a back and forth battle with configurations, freezer settings, moving the water reservoir, and eventually getting a setup that works. An important detail to plan out (which in retrospect, I should have done better) is how you’re going to transfer the cold from your freezer/fridge to the water in your reservoir. My setup had a number of things working against me; the reservoir was plastic (reducing my temperature transfer), the insulated hoses are rather thick (causing a 1/2” gap on the freezer lid and preventing a seal), and my temperature probe was measuring the freezer temp (but not the temperature of the water in the reservoir). Discovering that your reservoir water is at 60F when your freezer is reading 34F is a head smacking moment. These seem like obvious things now, but trying to tease these out one by one can be exasperating when you feel like you’re working against a clock.
To shorten your own journey; use glass or metal for your reservoir tank if you can, put your freezer temp probe directly in the water of the reservoir (be warned; I currently experience a 20F differential between the two based on a secondary freezer thermometer), and think about adding some insulating layers on top of your reservoir (IKEA bags work great, by the way). Also in terms of user experience; keep in mind that the length of hose extending from out of the insulation material isn’t very long. This is great for keeping in trapped cold, but terrible for trying to connect to your pump through a cutout hole in a reservoir lid.
Once I’d finally sorted the temperature management pieces, I was happy to see it easily holding at a constant 51F with minimal engagement from the pump. For the control(ler) freaks out there, it’s worth noting that the temperature controller has the same form factor as the popular Inkbird programmable controllers, but not the same feature set. The only settings you can control is the hold temperature and display format (C or F), so don’t expect to be able to change the +/- degrees for triggering heating or cooling (it defaults to 1 degree F), have alarm settings, or the normal compressor engagement delay controls. Given that the purpose of this controller is different, not having these features isn’t really a big deal, but is worth nothing in case you were hoping to be able to interchange and use it on your fridge or keezer.
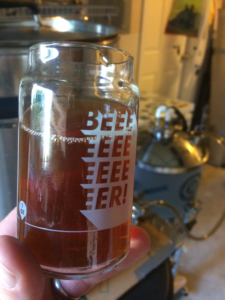
Finally, after several days, I went to pull my first sample for a gravity reading and taste test. Knowing some of the gushing issues others had encountered with sample ports, I was slow to engage it. After what felt like many turns later, I was just starting to get a trickle when the yeast dam broke and a quick stream of beer started pouring out. As the valve is extremely tight, closing it is very slow. This resulted in several ounces of beer all over my garage floor before I was able to shut it off. Word to the wise; connecting a hose going to a larger than necessary jar is a very good idea.
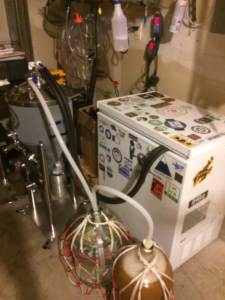
There are definitely some additional takeaways I’ve discovered planning for racking and cleaning, which I’ve iterated below. Hopefully this helps anyone else in their own journey considering a major upgrade to their equipment:
- I primarily went the conical route to expand my temperature control without needing to sacrifice keezer space. This hasn’t worked out so far, but given some tweaks and additions I think I will get there. One thing I continue to want to explore is using a non-submersible pump and a mini-keg as the water reservoir. This would reduce my reservoir footprint, provide better cooling exchange, and is easier to troubleshoot and disassemble.
- In order to pressure transfer, you will need both the gas manifold AND the parts from their pressure transfer kit. I didn’t think those parts alone justified a cost of $55, so I ended up picking up a third party TC ball lock port and TC clamp for much cheaper.
- Rather than buy a whole new set of parts for the bottom 2” TC port, look into 2” TC to 1.5” TC reducers. These are fairly cheap and allow you to still get a wider bottom opening, but avoid needing a whole new set of TC fittings and clamps.
- Plan to remove the conical jacket for cleaning; I’ve managed to spill PBW liquid and beer on it thus far and know it could probably use a laundering…
Conclusions
Despite some issues, the CF5 has given me much finer grained control over temperature, light exposure, oxygen exposure, and sample pulling (does anyone actually enjoy using a wine thief??). These feel like major improvements to my process, though that will likely be proven out through time and quality of my beer going forward. If a conical is right for you, definitely check out the CF5. If it’s not; Relax, Don’t Worry. Have a Home Brew.
Compare Prices
Related, Save on Refurbished Conicals at MoreBeer
- MoreBeer periodically makes a limited number of refurbished conicals available.
- This is a great chance to get a deal.
- Shipping is also free (for most sizes) to addresses in the contiguous US.
- Limited quantities are available, check link below if you can still get in on this deal.
Refurbished Conicals at MoreBeer
More Photos
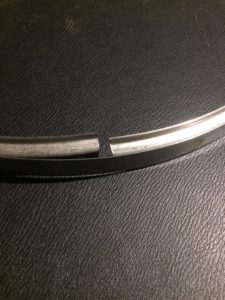 Join between the metal pieces on the sealing bracket. This is in a resting state, so there is nothing making it separate like that
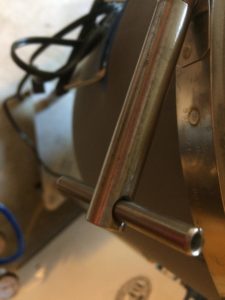 The post that turns to screw the lid seal tight
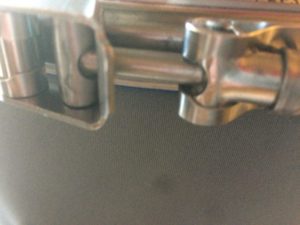 The clamp has to be hooked over this hammer and then tightened
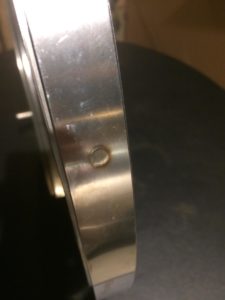 Spot welded inner pieces
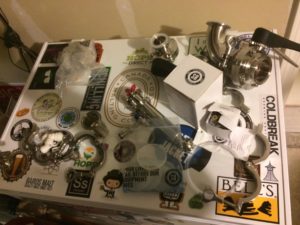 Holy Parts Batman!
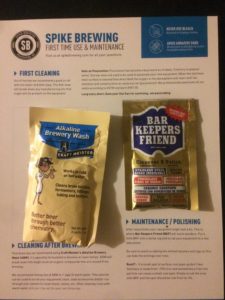 Getting started guide
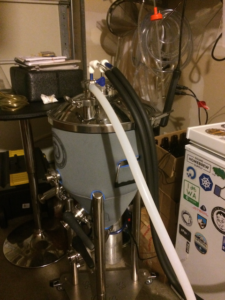
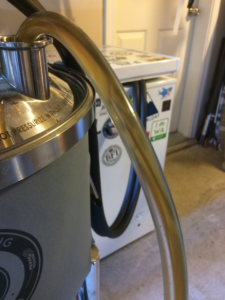
More Spike Brewing Equipment Reviews
More Homebrew Finds!
- Last 50 Finds!
- Top Deals – a curated list of the best deals
- Homebrew Reviews – one of the largest libraries of homebrew reviews in existence!
- Our Top Posts – tips, how-tos, resources posts and more
- Let’s be Friends!
Recent Deals!
10 Most Recent Homebrew Resource Posts & How-To’s!
We are Homebrew Review HQ! Our 10 Most Recent Reviews
More Fermentation Related!
pinned
This post may contain affiliate links. We may make a commission when you use our links. This will never cost you extra. Thank you for supporting Homebrew Finds!
greatdealsPrice, promotions and availability can change quickly. Check the product page for current price, description and availability.
Make sure the components you use are compatible and rated for your intended application. Contact manufacturer with questions about suitability or a specific application. Always read and follow manufacturer directions. 7.30.2019 spikebrewing tag:lnksfxd review:spikeconicalreview rs:7 tag:tpr




I have owned and used a Spike CF5 for 2 1/2 years. To state that the band clamp is the weakest link is an understatement at best.
I have probably brewed 30 to 40 five gallon batches in my unitank since receiving in January 2019. Around five or six of those have been pressure fermentations (the CF5 is “rated” up to 15 psi). A few weeks back, it was my intent to place a SMASH in the fermenter with 34/70 yeast andto ferment at 10 psi. I use a tri-clamp Blichmann spunding valve to control psi.
I sanitized the CF5 placed all connections and lid on the fermenter, and started to pressurize with the spunding valve by keeping it full open at first, and closing the valve until it released CO2 at 10 psi.
Never got there. At 9 PSI the band clamp closure failed, the lid exploded off and cracked my knuckle severing two tendons. These severed tendons required orthopedic surgery 10 days later to reattach.
I just thank God the lid did not hit me in the face or head.
In a nutshell – DO NOT PRESSURE FERMENT IN A SPIKE UNITANK. Compare the Spike Unitank’s design with that of SS Brewtech. The SS Brewtech has tri-clamp closure on the lid – for very good reason – the tri-clamp is a tried and true safe closure method. Spike’s band clamp is a dangerous ineffective closure method.
Until and unless Spike replaces the band clamp with a tri clamp do not pressure ferment with the Spike unless you enjoy severe physical injury and pain.
I have the CF10 and love it. It’s my first conical to use and takes a little getting used to the TCs but they work out well.
The band clamp for the lid is awesome and should never ever fail you. This is the exact kind of band clamps used to hold generators, and other important pieces, onto jet aircraft engines. I have worked with them for years and I have never seen one fail. If they are good for flight at 41,000’ then it’s good for my beer at a few psi.
Cheers!
I’ve had the CF5 for coming up on 2 years now, stock w/o add-ons until recently. I got the casters, racking arm, clear lid, and pressure transfer bundle within the last few months.
I agree with other folks in the comments.
Butterfly valves: While tight, the swing action on the butterfly valves is not interfered with by the legs.
Lid bracket: I very much disagree with your complaints on the lid bracket as I don’t feel that it’s flimsy nor takes forever to open/close. Much like TC fittings, it does not require tightening to the point of pain in your hand.
Gas manifold: Make sure you’re using gas rated teflon tape (yellow). As above, I’ve had no issues with mine.
Sampling port: It loosens up over time and is just like others I’ve used on pro equipment. Screw it in until you feel a bit of resistance, then go 1/4 turn more.
I’ve worked with multiple uni-tanks in professional breweries, and the Spike conical is on par with them as far as fittings and ergonomics.
Very good information. I have the CF15. Not sure where the optional racking arm is installed. Is it at the sampling connection or at the 1.5 ” ball valve. Really like this unit. Not sure how to dry hope with a small bag as no place to tie it off so it doesn’t drop down and plug off the connection ports ?
I own 2 CF5’s at home and have 2 CF10’s at work. I feel like most of your negatives are likely from not being used to using a triclamp unitank. There is a learning curve with the valves and what setup works best.
I love the units and if you are looking at unitanks I prefer spikes design overall.
My biggest complaints with the units are the 2″ dump port. While I understand the idea behind it, it just isnt necessary. Having the 2″ port means more nonstandard triclamps and gaskets to keep track of.
The lid gasket can be a pain to keep seated. That being said, being able to take the whole top of makes cleaning a breeze and I wouldn’t want to be washing through a 6″ port like the one on a competitors tank.
Bracing shelf. Its too expensive as an add on and should likely be included. especially with the CF10 and up.
I’ve had a CF10 for over a year and I feel that a lot of your bad comments were due to lack of experience. I don’t have the coil or cooling system. Just the basic tank with casters. No racking arm either. I thought I would need one but after a dozen or more brews, I don’t miss it.
I completely agree with the print on the stainless, eesh. Seems like a quality control issue IMO.
CLEANING: Cleaning the CF10 is a dream (no leg extensions, just casters). I lift the entire thing into my utility sink and start taking it apart. My sink has a spray hose so I just turn the hot water on and start rinsing and taking it apart. Once completely apart I take a sponge and dish soap to clean.
SAMPLING PORT: On the sampling port I suggest not closing it so tight. It is a very solid part and you can really crank down on the gasket. If you damaged you will get a leak and will tighten it more.
DUMPING PORT: The 2″ dumping port makes extracting yeast a lot simpler and finding parts is not hard. BrewHardware had what I needed to attach a hose for easy yeast dumps. I would not go any smaller.
SEALING BRACKET and GASKET: I agree that these two elements of the colonials are the worst part. I never get it on the first try. Flipping the lid with the gasket sanitized causes it to slip out all the time. Getting the bracket on isn’t hard but the edges are sharp and with wet hands makes it easy to give you a cut. I agree that it is the weakest component but when it is on, I feel confident in the seal.
GAS MANIFOLD: I have a gas manifold and have had no issues. I have yet to use it to carbonate my beer but using it to pressurize my conical for racking to a keg has been hassle free.
A note about my brewing: I have an electric brewery in my basement so I do all my brewing there. Living in Wisconsin my basement doesn’t get higher than 65 deg, so I can brew most ales with out any issues. I have a heat wrap with an ink bird controller for warmer ferments. I just use a bungee cord to hold it on. Additionally, I have a chest freezer for temperature controlled fermenting and use half barrels in there with a fermostat to manage the temperatures. (out of business but works great for me)
I have the CF10s and can confirm that top sealing bracket is the worst part of the whole system. Everything else pretty great, but getting that bracket in place and properly tightened is a huge pain.