Homebrew Hack: Mimicking Dual Stage Temp Control with a Single Stage Controller
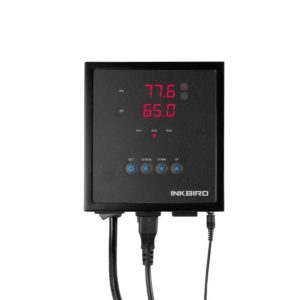
Pictured: Inkbird IPB-16 15A Digital Pre-Wired PID Temperature Controller
Overriding temperature controllers give you more control over heating and cooling devices. They work by power cycling the device based on temperatures read. This is extremely valuable for homebrewers for both homebrew kegerators and for controlling fermentation temperatures. This technology allows you to operate a chest freezer at refrigerator-type temperatures. This is even helpful if you’re using a refrigerator, because stock refrigerator thermostats generally do not have the precise controls we’re looking for as homebrewers.
A single stage controller, controls… a single stage. Groundbreaking I know. A stage in this cause would be either a heating device OR a cooling device. Most single stage units (at least that I’ve seen used for homebrewing) support cooling and some support cooling OR heating. A single stage controller cannot control both cooling AND heating at the same time, because… that’s two stages.
Related: Inkbird Controller Deals and Coupons
A dual stage controller, does have the ability to control two stages at the same time, in this case both heating AND cooling functions. This is primarily be helpful for dialing in fermentation temps. Each stage kicks in as needed. Fermentation active and creating excess heat? Dandy, let’s activate the cooling stage. Fermentation slow or the ambient temp low? OK, let’s activate the heating stage. All done automatically based on the temp controllers settings and algorithms. In this way, you gain very fine control over fermentation temp profile, which, as we know, is a big part of the finished beer.
A dual stage controller is generally less useful for kegerator applications. Usually we’re just wanting to cool kegerators as the exothermic phase of fermentation has completed. An exception may be if your kegerator is in a garage or some other place that gets too cold in the winter. In that case you may need a dual stage setup for your kegerator to keep beer from freezing. Unless you’re going for something like and Eisbock. 🙂
What I did when I had a single stage temp controller to mimic dual stage control was… add an application suitable low power heating source to my fermentation deep freezer. In my case, this was an always on, moisture proof, heating mat. Mine was 9 watts. The small amount of constant heat produced by this heat source was enough to offset most temp drops due to ambient temperature swings or a drop in fermentation activity. The idea was to try and make sure cooling was the only thing that would be needed and let the cooling device do the work. This also worked well enough to allow me to drive fermentation temp up by a couple degrees (to encourage the yeast to finish) toward the end of fermentation. I did that by adjusting the set point on my temp controller a couple degrees higher.
Some possible downsides:
First, this is a less efficient configuration compared to a true dual stage setup. This causes the cooling device to kick on more often. I was paying for heating that I needed to pay for cooling to get rid of. The deep freeze is going to kick on more often. A low output device was, for me, essential and helped to minimize this inefficiency. As I’ve said, my heating pad was 9 watts. That’s less than 1/10th the power of a 100 watt bulb. The lower, the wattage the less “fighting” between the two devices and the less inefficiency. Although, I don’t have hard numbers, for my setup, I believe this was a minimal expense.
Second, this is probably a less responsive setup. Using a low power heat source doesn’t give you a lot of heating potential. If there is a dramatic swing in temperatures, a lower power heating source will have a hard time keeping up or at least keeping up quickly. This was not a problem in my basement.
At one time, dual stage temp controllers were either expensive, or you had to wire them yourself. Not really the case anymore. If you’re in the market for a new setup my advice to you is… get a dual stage controller. Take a look at the ITC-308 [Review] as a possible option. I have now used my ITC-308 for years with great results. It’s generally a bargain.
What techniques do you use to help maintain temperatures? Submit a tip and let us know!
Heat and electricity are dangerous. This post outlines what I have personally done. I am not recommending any specific equipment for this use or purpose. No matter what techniques you use for temperature control, make sure that the devices you use are appropriate for your application and all devices operate within their stated specifications. Always read and follow manufacturers directions.
This is a Top Post! See: All Top Posts
Resource Pages: Yeast Starters & Fermentation | Kegerator Tips & Gear | Inkbird Dual Stage Temp Controller
pinnedThis post may contain affiliate links. We may make a commission when you use our links. This will never cost you extra. Thank you for supporting Homebrew Finds!
greatdealstoppost:mimicdualstage

here is another way to do this.
Most PID controllers like the TA series we use in our controllers support an alarm function and the alarm direction is set separate from the main PID function.
To make this work, you manage cooling with the PID function then you control a heater with the alarm function. When set up right, the alarm will turn on the heater when you drop below a set temperature and the freezer compressor will turn on when the keregator gets too warm.