Make Your Own Hop Water!
By Vito Delucchi
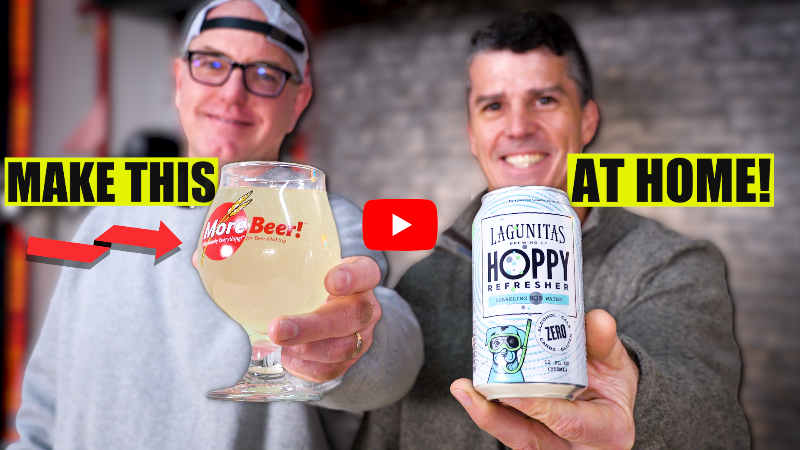
Are you looking for a hoppy non alcoholic beverage to have on tap? Hop Water is the perfect drink to hold down a tap handle and give you an N/A alternative to beer. In the past, I’ve always enjoyed having some “carbonated water” to fill this void. But after trying Hoppy Refresher from Lagunitas Brewing, I was hooked and wanted to make one myself. Luckily I live close to the brewery and actually knew someone there. After a few text messages back and forth I was armed with everything I needed to brew my own hoppy refresher hop water at home! But being the awesome peeps they are, we took it a step further and they invited me to their innovation lab to brew our own experimental batch of hop water and sat down with me to answer any questions. Check out that full video below and keep reading for a summary of everything I learned, including a step-by-step hop water recipe
The Secret To Making Lagunitas Hoppy Refresher
The Water

It goes without saying good tasting water is a huge component in making hop water. Hopefully your water source is relatively low in TDS’s (Total Dissolved Solids) and does not need much treatment past a good carbon filter to remove any chlorine. If you have access to RO water and or are familiar with your water profile we’re essentially trying to have about a 2:1 or even 3:1 Chloride to Sulfate ratio. This is something you can play with, but the team at Lagunitas said they were shooting for this to help soften the bitterness and not accentuate it by having a higher sulfite level. If you brew IPA’s this is a pretty common concept when it comes to brewing water. We will be boiling the water for several reasons. First being we want sterile & de-aerated water to help prolong its shelf life. The other thing we’re going to want to do is extract some (8-12 IBU’s) to give it a slight hop bitterness and help promote its antibacterial properties as well. Speaking of, we will also be acidifying the water into the 3.2-3.6 pH range. This will help with the taste and ensure it’s completely safe against any bacteria for weeks or even months. You can use different food-grade acids to achieve this pH, the most common being lactic acid. I’ve also used citric acid from freshly squeezed limes and really enjoyed the flavor it brought to my hop waters.
The Hops & Biotransformation
I’ve made several batches of hop water now and my initial batches did not include any fermentation steps. I simply added all my hops in the kettle i.e. whirlpool to hit my IBU’s and chilled then kegged, carbonated and served. As I previously mentioned I also did things like lime juice / zest and thought these batches turned out delicious. So you don’t need to rack into a fermenter, pitch yeast etc. BUT having now done side-by-side tasting of both methods it’s clear the biotransformation that happens with brewers yeast takes the dank & vegital hop flavors and not only softens them, it moves them more towards fruity notes. Having shared both of these types with many individuals it seems like the biotransformed version is more universally approachable and liked. Whereas the non fermented version was liked more by hop heads and IPA drinkers, being described as putting your head into a bag of fresh hops. Below the steps and recipe reflect the biotransformation method as that is what Lagunitas does and it’s delicious. I just wanted to share other methods I’ve done and enjoyed to let you learn and decide for yourself what you like better. Speaking of which hops you like better, in the recipe we brewed together “Wizard Mullet ”,’ we used Nectaron Hops. In talking with the team at Lagunitas they said they tried a bunch of different hops before they found what they settled on for Hoppy Refresher. Unfortunately I was unable to acquire the exact recipe, but the process and steps outlined below are pretty close, except for the actual hops. I’ve been playing with Citra & Eldorado and really enjoyed that combo. The last thing to note on the hops & process is the hop dip step. They said this helps drive off the merecene reducing the vegetal taste/aroma. It’s essentially steeping your dry hops and there are articles out there outlining how & why you want to do it. Again, on some of my previous batches I never performed this step as I never performed any biotransformation/dry hop steps on them at all. The flavors are quite different and something fun to experiment with.
Carbonating & Serving

Related: Hands on Review: Kegland Inline Secondary Regulator | Torpedo Keg Review
Regardless if you choose to ferment/biotransform your hop water you’re going to need to carbonate it, cause…it needs that fiz! I’m sure you could bottle condition it, but I am just going to go over kegging and force carbonating hop water for now. Since there is no residual sugar or alcohol you are really going to want to highley carbonate it. I’ve tried carbonating them to the typical 2.2-2.5 ale range and it’s just not that enjoyable. Hop Water really should be in the 3 to 4 volumes of CO2 range to taste like what you’re getting in commercial canned examples. So depending on the temperature of your Hop Water you will need to pump that regulator up to 30+ psi. The tendency of most would be to reduce the pressure and serve it around 12psi or so. What will happen though is over time that highly carbonated water will start to taste flat as the CO2 in solution equalizes with it’s new head pressure. So be sure to keep it on a separate higher (30+ psi) line to keep tasting delicious and refreshing!
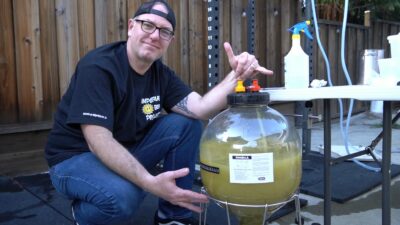 Related: Hands on Review: FermZilla All Rounder Fermenter
Hop Water Recipe
Batch Size: 5.5 Gal
Note on using different hops: In the video we sampled several different batches. The experiment batch was Simcoe & Mosaic and at Lagunitas we used Nectaron, but you can try different combinations of your favorite hops. The key is to keep you calculated IBU’s in that 8-12 range as to not make the final hop water too bitter and out of balance.
Equipment needed:
- Brewing Kettle Large enough for batch size
- Small Stainless Kettle for Hop Dipping
- pH Meter
- Wort Chiller
- Fermentation Vessel
- Keg & CO2 Tank/Regulator
Ingredients Needed:
- 4-6 oz of your favorite hops!
- 2-4 g Calcium Chloride (Optional)
- 5-10 ml Lactic Acid 80%
- Brewers Yeast (1 packet of dried or liquid yeast)
Step 1: Collect water & acidify to 3.2-3.6pH range (Optional: Adjust water profile Cl level to be 2:1 higher chloride to sulfate)
Step 2: Start heating water, once temperature reaches 170 pull 16oz into small kettle and add 2 oz of hops. Cover with tin foil and set aside. This is the hop dip step we will add back later.
Step 3: Bring water to a boil and continue to boil for 10 minutes
Step 4: Turn off heat source and add 2oz of hops (We targeting 8-12 ibu depending on your hops AA)
Step 5: Whirlpool hops for 10 minutes and then chill hop water to pitching temperature
Step 6: Move hop water into a fermenter and pitch yeast and your hop dip slurry.
Step 7: Ferment for several days allowing yeast to biotransform hops
Step 8: Crash out any solids and rack into a clean & sanitized keg.
Step 9: Force carbonate to 4 volumes of CO2
Step 10: Serve & enjoy!
Fermenter Reviews:
Recent Hop Deals:
Video: The Homebrewer’s Guide to Making Hop Water
Also: Kegerator Tips & Gear | Keg Repair Part #s | Recent Keg Finds
Our Top Draft Resources!
Check our our Top Draft Related Resources- Commentary: Pin Lock Keg Pricing and Availability
- Check Your CO2 Regulator for Leaks!
- How to get a keg ready for first use? New Keg Cleaning and Prep
- Portable Draft Beer Serving Options!
- Pin Lock Keg Pricing and Availability
- The Most Difficult Spot to Check for CO2 Leaks
- Keg O-Ring Materials Selection! – EPDM, Silicone and Buna-N?
- Why Do I Have Bubbles in My Beer Line? Diagnosing and Fixing Kegerator Foam Problems
- Five Benefits of Using Corny Kegs As Fermenters
- Rebuilding & Reconditioning Homebrew Kegs!
- Food Safe Replacement Keg O-Rings in Bulk
- Hands on Review: Kegland DuoTight Fittings & EVABarrier Tubing!
- Why Won’t My Beer Carbonate? Fixing Draft Beer Carbonation Problems
- What Does a Flow Control Faucet Do?
- Upgrade Your Kegerator – 6 Improvements!
- Serve Homebrew on Any Kegerator & Convert Commercial Kegerator to Homebrew
- Tips and Gear for Growler Filling
- What’s the Difference Between Ball Lock Kegs and Pin Lock Kegs?
- Checking for Draft System CO2 Leaks – Using The Pressure Gauge Method
- Tip: Consider Oetiker Stepless Clamps for Kegerator Gas and Beer Lines
- Hands On Review: Inkbird ITC-308 Dual Stage Temperature Controller +WiFi Version
- Universal Poppets Tips and Tricks!
- Convert Your Mark II Keg & Carboy Washer to a Recirculating Draft Line Cleaning Pump!
- Step by Step: Finding and Fixing Keg CO2 Leaks
- Kegerator Temperature Probe Placement – To Immerse or Not To Immerse? – three tests to determine optimal pla…
- Kegerator Beer Line Temperatures & Reducing Foam with a Recirculating Fan
- Kegging CO2 Use Estimations and Calculations
- Balancing Your Kegerator Draft System
- Building a Simple Ball Lock Draft Line Flushing Setup
- Build a Recirculating Draft Line Cleaning Pump
- Home Brew Keg Roundup – New & Used, 5 and 2.5 Gallon & More!
- Damp Kegerator? Fix Kegerator Condensation
- Homebrew Temp Controller Roundup! – Kegerator and Fermentation – concepts, applications and models
- Bulk Keg Orings and Keg Parts Reference
More Homebrew Finds!
- Last 50 Finds!
- Top Deals – a curated list of the best deals
- Homebrew Reviews – one of the largest libraries of homebrew reviews in existence!
- Our Top Posts – tips, how-tos, resources posts and more
- Let’s be Friends!
Recent Deals!
10 Most Recent Homebrew Resource Posts & How-To’s!
We are Homebrew Review HQ! Our 10 Most Recent Reviews
pinnedThis post contains affiliate links. We may make a commission when you use our links. This will never cost you extra. Thank you for supporting Homebrew Finds!
morebeerThanks to Vito and MoreBeer for this how-to
Price, promotions and availability can change quickly. Check the product page for current price, description and availability. tag:lnksfxd top:hopwater tag:tpr
