
How to Build a Mash Tun – Start All Grain Brewing!
Updated: January 7, 2025
What’s a Mash Tun?
A mash tun is a container that holds grain and warm water. The warm water activates enzymes in the malt and converts complex carbohydrates to yeast-friendly simple sugars.
A mash tun can be as simple as a bucket. Many homebrewers convert coolers to mash tuns. Those have the advantage of insulation. That insulation helps maintain a steady temp throughout the mash process. Kettles are also regularly used as mash tuns and there are also some purpose built stainless mash tuns. An example of that is Ss Brewtech’s InfuSsion Mash Tun.
Components of a Mash Tun
- A container – Examples: bucket, cooler, kettle, keggle or a purpose built vessel
- Filter device/mechanism – Examples: false bottom, bazooka screen
- Ball valve and tubing
- Optional – sparge arm, thermometers
This article contains affiliate links. We may make a small percentage if you use our links to make a purchase. You won’t pay more and you’ll be supporting Homebrew Finds and more content like this. Thank you for your support!
Coolers to Consider
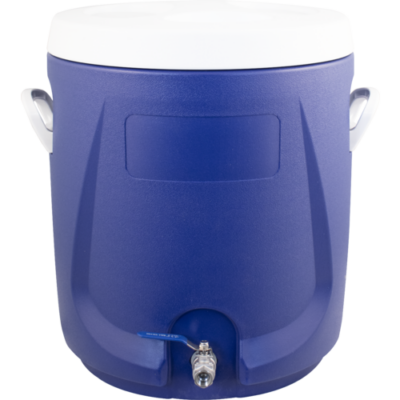
- 10 Gallon Igloo Cooler – affiliate link, note that multiple variations of this product may be available, as such a different version may appear at this link
- Igloo 10-Gallon Seat Top – via Wal-Mart
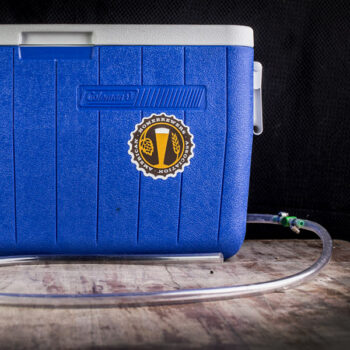
- Coleman 48 Quart Cooler – affiliate link, note that multiple variations of this product may be available, as such a different version may appear at this link
A key feature to look for when considering a cooler to convert to a mash tun is a built in drain. It’s possible to drill a hole in some coolers, but it’s generally, much easier if the cooler has a drain.
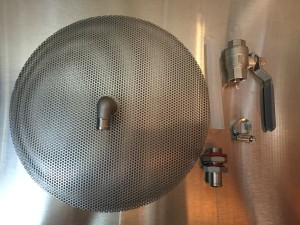
Mash Tun Conversion Kits
- Learn to Brew Complete 12″ Stainless Steel False Bottom With Weldless Valve – affiliate link, note that multiple variations of this product may be available, as such a different version may appear at this link
- TAPCRAFT Cooler Mash Tun Conversion Kit with Stainless Steel False Bottom Full Port 1/2″ Ball Valve Silicone Gaskets (10 Gallon Conversion) – affiliate link, note that multiple variations of this product may be available, as such a different version may appear at this link
- HomeBrewStuff Stainless Steel Sanke Keg – Keggle Conversion Kit with Flat False Bottom, Valve & Weldless Bulkhead – affiliate link, note that multiple variations of this product may be available, as such a different version may appear at this link
- Options change frequently… Search Amazon for “mash tun conversion kit” to shop around
False Bottoms
- Chill Passion Stainless Steel Domed False Bottom, Select a Size (12″, 10″ or 9″), 12″ L x 12″ W – affiliate link, note that multiple variations of this product may be available, as such a different version may appear at this link
- Krome AG405 Stainless Steel False Bottom for Homebrew Pot: 12″ – affiliate link, note that multiple variations of this product may be available, as such a different version may appear at this link
- Kegco False Bottom, 10 Gallons, Stainless Steel – affiliate link, note that multiple variations of this product may be available, as such a different version may appear at this link
- Learn to Brew Complete 12″ Stainless Steel False Bottom With Weldless Valve – affiliate link, note that multiple variations of this product may be available, as such a different version may appear at this link
- Search Amazon for “Stainless Steel False Bottom”
- False Bottoms at MoreBeer
Ready Made All Grain Brewing Setups
- Insulated Cooler Mash Tun | Hot Liquor Tank | 14 gal. AG336
- Mash Tuns, HLTs & More at MoreBeer
- Learn To Brew Mash Tun Igloo Ton with Stainless Steel False Bottom & Valve, 10 gallon – affiliate link, note that multiple variations of this product may be available, as such a different version may appear at this link
- Northern Brewer – Insulated Cooler All Grain Beer Brewing Kits (Starter Kit w/ 12 Gallon Mash Tun) – affiliate link, note that multiple variations of this product may be available, as such a different version may appear at this link
- Learn to Brew Igloo Mash Tun with Stainless Steel False Bottom and 1/2″ Valve, 10 Gallon – affiliate link, note that multiple variations of this product may be available, as such a different version may appear at this link
Popular (and Simple Design) via Denny Conn and the AHA:
This setup is based on Denny Conn’s great design. Denny is a legendary homebrewer. Among other things, he is the co-author of Experimental Homebrewing and the keeper of Wyeast 1450 Denny’s Favorite 50. Check out Denny’s Author Page on Amazon see more of his books.
See the AHA’s Article on this: How to Build a Mash Tun – via the American Homebrewer’s Association
Related:
- Coleman 48 Quart Cooler – affiliate link, note that multiple variations of this product may be available, as such a different version may appear at this link
- Rubber Mini Keg Bung – affiliate link, note that multiple variations of this product may be available, as such a different version may appear at this link
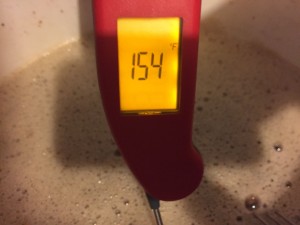 Taking mash temp with my Thermapen. Notice the backlit, rotated display.
Or… Brew BIAB Style
BIAB uses a low cost cloth bag as a filter. This allows you to brew all grain beer using a single kettle. It’s easy and cheaper to get started vs a dedicated all grain setup.
- BIAB Brew Day Spreadsheet – easy water and temp calculations
- The Brew Bag – Purpose Made BIAB
- Get a Bag! Search Amazon for “BIAB Bag”
- Brew In a Bag: Brew fantastic craft beers at home using the All Grain brew in a bag method
- Small Batch, All Grain Stove Top Brewing Using BIAB
- BIAB: Brew in a Bag – Easy All Grain Homebrew! – Gear, Resources & Reviews
Do You Need a HLT?
A hot liquor tank is a container that holds hot or warm sparge water.
Many of the cooler all grain system systems on the market include two coolers. One functions as a Hot Liquor Tank (HLT) the other as a Mash Tun (MLT). If you’re a batch sparger, you may be able to get by with one cooler if by using a spare kettle for your hot liquor tank (HLT). When I first went to all grain, I used my 5 gallon extract kettle to piggy back the first runnings. Doing this allowed me to temporarily use my boil kettle as a HLT.
It worked something like this…
- Heat strike water in boil kettle
- Drain strike water into cooler mash tun and mash
- Heat sparge water in boil kettle
- Recirculate and drain first runnings into 5 gallon extract kettle
- Empty sparge water into cooler mash tun
- Dump first runnings from 5 gallon kettle into boil kettle
- Recirculate and drain second runnings into boil kettle
- Boil!
Obviously, this is batch sparge method. This method would not work with fly/continuous sparging. If you are fly sparging… you need a dedicated HLT.
Having a dedicated HLT is preferable, but this piggy back method got me started in all grain at a reasonable cost until I could pick up another kettle.
Get a Deal on Bulk Grain
Grain Storage!
Check Out These Related Reviews
- Hands on Review: Barley Crusher MaltMill!
- Hands on Review: Viking Malt Xtra Pale Base Malt
- Hands on Review: Vittles Vault Stackable Storage Bins for Homebrew Grain Storage…
- Hands on Review: Monster Mill MM-3 Grain Mill!
- Hands on Review: Blichmann Engineering AutoSparge
- Hands on Review: Ss Brewtech InfuSsion Mash Tun
- Hands On Review: Cereal Killer Two Roller Adjustable Homebrew Grain Mill
- Hands On Review: 24″ Stainless Steel Whisk
- All of our All Grain Related Reviews!
Everything All Grain!
Our resource post on all grain is the source for everything all grain!
More Homebrew Finds!
- Last 50 Finds!
- Top Deals – a curated list of the best deals
- Homebrew Reviews – one of the largest libraries of homebrew reviews in existence!
- Our Top Posts – tips, how-tos, resources posts and more
- Let’s be Friends!
Recent Deals!
10 Most Recent Homebrew Resource Posts & How-To’s!
We are Homebrew Review HQ! Our 10 Most Recent Reviews
pinnedThis post may contain affiliate links. We may make a commission when you use our links. This will never cost you extra. Thank you for supporting Homebrew Finds!
greatdealsMake sure the components you use are compatible and rated for your intended application. Contact manufacturer with questions about suitability or a specific application. Always read and follow manufacturer directions. tag:lnksfxd toppost:makingamashtun tag:tpr







How is the street elbow attached to the false bottom? I tried to upgrade mine last night with a street elbow and had to rig it together. Is there some sort of hollow male threaded bolt that screws into the elbow clamping it down to the false bottom?
I have the same exact cooler and conversion kit, and my dead space is around a pint (not a quart), as long as I don’t lose siphon. When you drained it did you attach a tube that emptied below the level of the valve?
Interesting. Thinking about the siphon effect… I did use a tube when doing this test. It had a drop of 2 or 3 feet (from my table to a keg sitting on the floor). In the interest of getting a reasonable and realistic result, I did not tip the cooler in any way. That would probably help to get more liquid out. That’s something I would probably do on most brew days. Beyond that.. I’m trying to think of what the difference would be.
Did it seem to flow better or differently?
It flowed well, but I can’t tell you that it flowed better or differently.
What would you say your tun deadspace would be in beersmith with this setup?
Great question David. I’ve added that to the review. I’d say 1/4″ gallon would be a great figure.