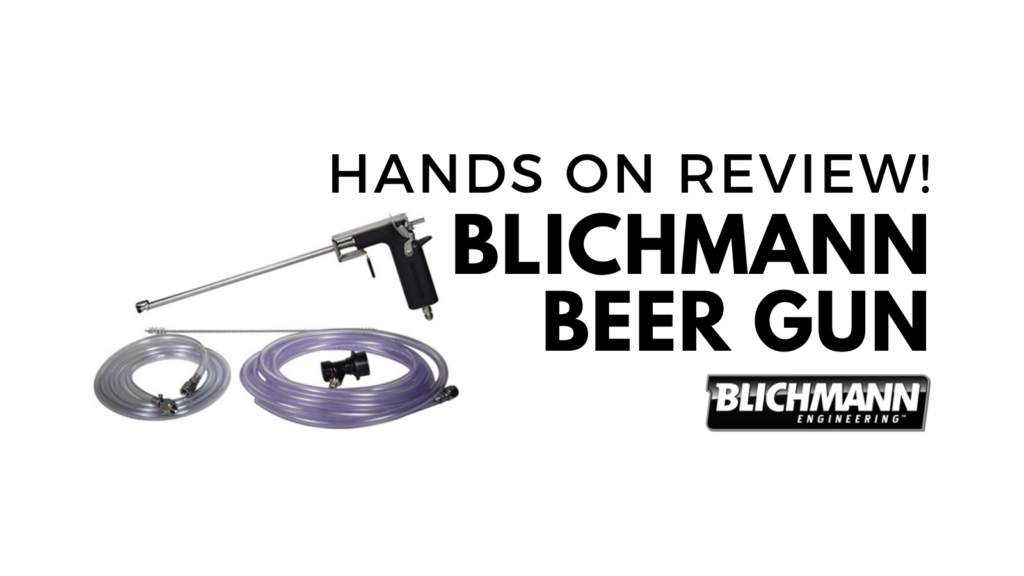
Hands on Review: Blichmann Engineering Beer Gun
Updated: January 14, 2025
Thank you to HBF Contributor Aaron Nord for this hands on review! Aaron is an advanced award winning brewer, a long time reader and a serial tipster!
Blichmann BeerGun v2
After I quickly realized the benefits of kegging, I was happy to forgo the bottling routine and looked forward to never cleaning, sanitizing, and filling 53 twelve-ounce bottles with caps again. Then I decided I would throw my hat into the ring of homebrew competitions. Back to the bottling world.
Blichmann gear is rarely discounted. Why? This is a MAP item. MAP = Minimum Advertised Price. It’s an agreement between sellers and manufacturer’s not to sell an item below a certain price. This gear generally sells for about the same price no matter where you purchase it from and is rarely discounted.
Compare Models, Prices and Availability, Review Continues Below:
- Blichmann Engineering Beer Gun – Complete Lineup and Accessories – at MoreBeer
- Blichmann Engineering Beer Gun – Complete Lineup and Accessories – at Great Fermentations
- Blichmann Engineering Beer Gun – Complete LIneup and Accessories – at Beer & Wine Hobby
- Search Amazon for “Blichmann Beer Gun” – offerings vary
This article contains affiliate links. We may make a small percentage if you use our links to make a purchase. You won’t pay more and you’ll be supporting Homebrew Finds and more content like this. Thank you for your support!
I wasn’t thrilled about trying to split my batch and use priming sugar on the bottled portion and keg the rest, so I decided to investigate the alternatives and found several. For my purposes, I only needed to fill half a dozen to maybe a dozen bottles at a time, depending on how ambitious I was going to be for my number of entries for a given competition. This led me down the path of finding a bottle filler that would integrate nicely with my current kegging system, one that wouldn’t alter my current regimen of transferring all the finished beer to kegs. The solution I decided upon was the Blichmann BeerGun Version 2 (more on versions later). I knew Blichmann Engineering had a reputation for making quality components. Plus, they have been sponsoring several of the podcasts I listened to from the Brewing Network for years. For the hundreds of hours of free content I had consumed thanks to them, why not pay it back a bit and also get a quality piece of gear in the transaction?
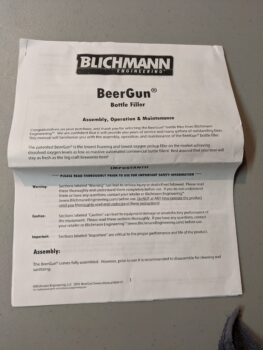
According to the manual I received with the BeerGun, it is “the lowest foaming and lowest oxygen pickup filler on the market achieving dissolved oxygen levels as low as massive automated commercial bottle fillers”. I strive to limit oxygen pick-up in my finished beer and was hopeful that the BeerGun would deliver on this promise, especially now that I added another step in my packaging process. The other touted features are that it can be operated using one hand and is said to be less complex than other counter-pressure bottle fillers. It is versatile enough for other beverage filling needs like wine and mead, it can be used with both kegs and bottling buckets, and all components that come into contact with the filling beverage are stainless steel. Blichmann also asserts that it is simple to clean and set up and it is “so easy you’ll actually enjoy bottling”. More on the last claim later.
Also Consider, for Forward Sealing Faucets
- Nukatap Counter Pressure Bottle Filler KEG915 – Hands on Review
- Tapcooler Counter Pressure Bottle Filler KEG880 – Hands on Review
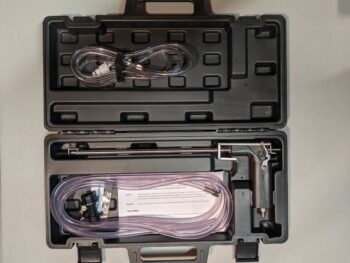
The BeerGun Version 2 comes with the following pieces:
- BeerGun (composed of a handle, spring, trigger, beer tube, CO2 tube, and valve seat and clip)
- CO2 line (5 feet) and fittings
- Anti-microbial beer line (3/16” ID, 10 feet long) and ball lock quick disconnect
- Cleaning brush
- Case
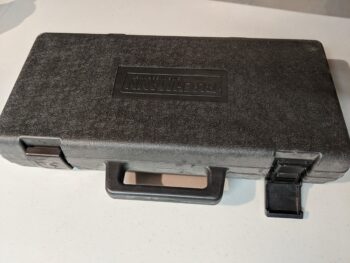
As I expected from Blichmann, the quality of the materials was all top-notch. The grade of plastic used on the handle is high – it is hard and durable. The stainless pieces were all well-crafted and without flaws. Everything fit together precisely and actuated with ease, specifically the trigger action was satisfying in the way it moved back and forth. When all assembled, the handle felt sturdy in my hand and fit well in my average-sized hand. The handle had a butterfly trigger that is used to expel CO2 and that also actuated nicely. The cleaning brush had different sizes at either end for cleaning both the beer and CO2 tube. Finally, the case was handy and had a place for all components to snug into tightly.
Version 2 (V2) of the BeerGun is an improvement upon Version 1 (V1) in that the handle was non-existent in V1. With V1, one would hold onto the 90-degree elbow fitting where the CO2 line attached. Additionally, V2 came with the accessory kit which included the case and ball lock quick disconnect.
Hands on Review
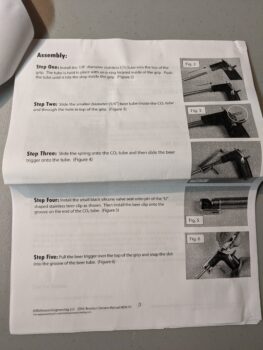
The manual that came with the BeerGun is detailed to the degree that it made assembly, disassembly, cleaning, and operation simple enough. The accompanying photos to the instructions helped a great deal, too. The first instruction is to disassemble the components in order to clean and sanitize them. I completed this task using PBW and StarSan and had no real issues thanks to the detailed instructions. The only tricky parts were getting the valve seat and clip as well as the trigger off the handle. Both sets of stainless-steel components are fitted exactly to the outer CO2 tube. With the help of a flat-tipped screwdriver, being careful not to force anything, the clip and trigger came off with a moderate amount of force.
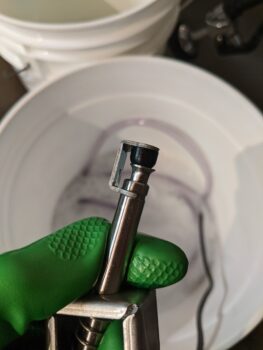 Beer Gun Tip
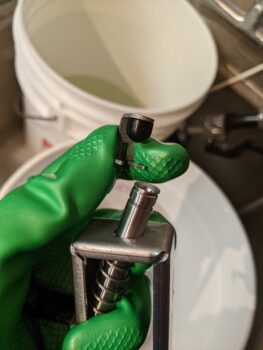 Tip Removed For Cleaning
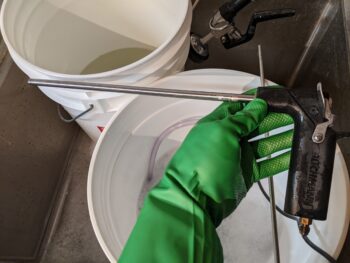
Once cleaned and sanitized, I assembled all pieces to ready it for use. Again, the only tough parts were the valve clip and trigger, which took some force to slide back onto the CO2 tube. Readying for use involves sliding the 3/16” ID beer line onto the beer line which extends out the back top of the handle. It helped to soak the line in hot water so it was pliable enough to slide onto the tube. The other end of the beer line was a female flare fitting which mated to the quick disconnect. The CO2 line also had a female flare that connected and tightened easily to the base of the handle. The other end of the CO2 line had a swivel and nut combination that I replaced with a male gas quick disconnect to hook up to my existing female gas quick disconnect I had installed on my CO2 outlet. With it all assembled it was ready for dispensing.
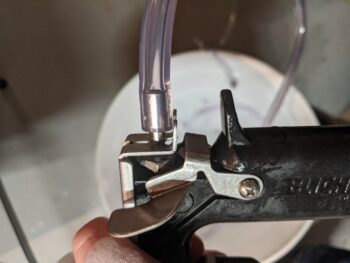 Beer Line Connection
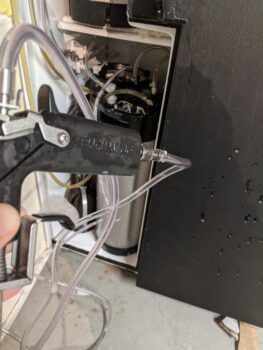 Beer Line Connected to Ball Lock Keg
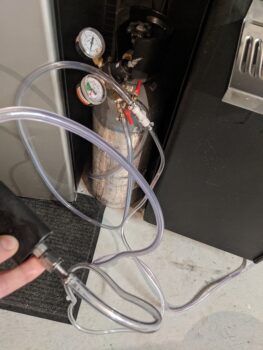 Gas Line Connected to CO2
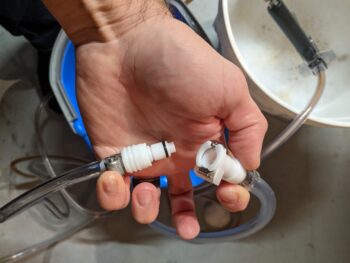 CO2 Gas QD
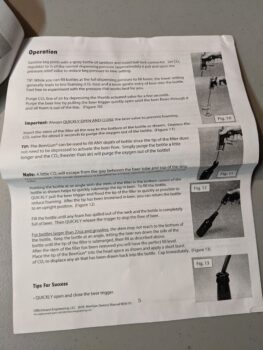
The instructions gave some helpful hints and notes about operating the gun aimed at ensuring a smooth process from the get-go. One of the tips is to reduce the pressure on the CO2 regulator to about half the dispensing pressure and subsequently open the pressure-relief valve (PRV) in the serving keg to lower the pressure there. This tip helps to ensure that the beer doesn’t come out too fast and result in an overly foamy bottle fill. At this point it was helpful to test the flow of the beer out of the gun to ensure it came out at a reasonable rate. It is easy enough to adjust it later by either increasing the pressure on the regulator or decreasing it and pulling the PRV on the keg once again.
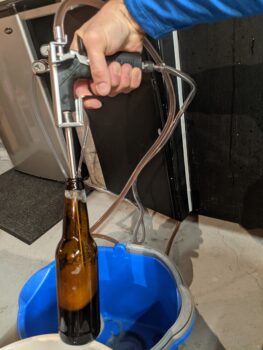
In order to ensure as close to an oxygen-free bottle fill as possible, the BeerGun allows one to purge the vessel with CO2 before filling with beer. The CO2 comes out of the same end of the gun as the beer, so it was easy to insert the filling tube into a sanitized bottle and depress the CO2 butterfly trigger. Pulling the bottles out of a bath of cold StarSan and water, I drained as much of the solution out as possible by inverting it over the StarSan bucket. Once it was only dripping out, I inserted the BeerGun and purged it with CO2 by pressing the CO2 trigger for about five seconds. This action also helped the remaining drops of StarSan solution depart the vessel. At this point the bottle was filled with CO2 and ready for beer.
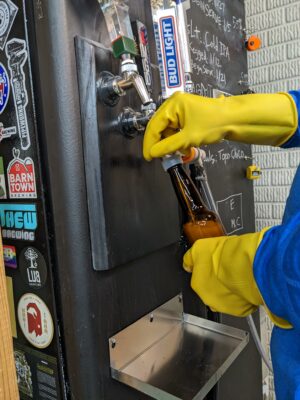
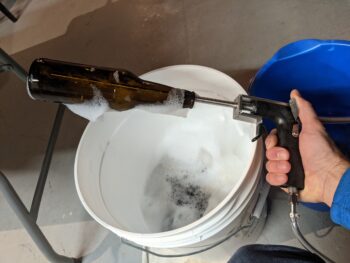 Tipping the bottle back upright but at a slight angle, I placed the tip of the gun in the bottom corner of the bottle and pulled the filling trigger. The flow was slow and steady, usually producing low or no foam. If I found there was too much foam, I would readjust the pressure of the keg. Once the beer level was even with the top of the bottle, I pulled out the gun and capped it. Worth noting is that the volume of the gun nozzle is such that filling to the top and removing the filler leaves the proper headspace in the bottle, like several other bottling wands and fillers. The action of pulling the nozzle from the beer often left a bit of foam which can be helpful, as capping on foam is another way to reduce oxygen in the bottled beer.
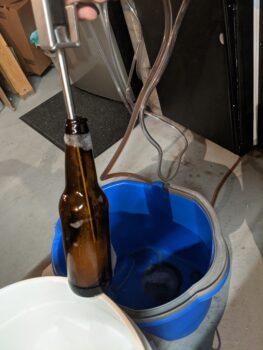 Filling a Bottle with Blichmann Engineering Beer Gun
The process was repeatable and produced consistent results. I continued filling bottles from one keg until I had my desired number of identically filled bottles. I needed to fill bottles from a couple of other kegs and the transition was easy. I disconnected the ball lock quick disconnect from one keg, hooked it to the next keg, pulled the beer trigger until the next beer started flowing into a catch bucket, and was ready to fill the next bottles. I tried to order my beers strategically so that the flavors of the first beer didn’t affect the next. For example, the serving kegs contained a Helles, an amber ale, and a dark lager. I followed that order for the bottling sequence, ensuring that there were no remnants of the previous beer in the serving line and BeerGun before filling the next bottles. This was easy to do with the BeerGun.
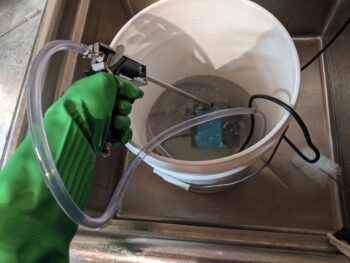
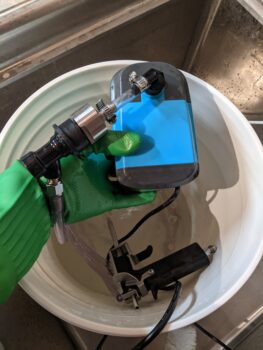
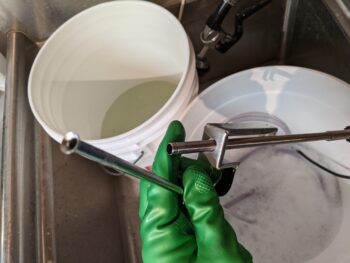
Having filled and capped all my bottles, it was time for cleanup so I disassembled it once again. I soaked all parts in PBW and hot water and scrubbed the parts I could with the bottle brush. This includes the beer and CO2 tubes, the quick disconnect, and the first 8-10 inches of beer line. I tried to get the PBW solution in the beer line and push it out by forcing water from the faucet through the line. The other parts I wiped down with a rag, rinsed off, and set out for drying. I suspended the beer line up so that it could drip and air dry, after performing the same motion I’m sure all other homebrewers do to get water out of lines – the helicopter. I propped up the remaining pieces over a towel to let them drip dry, putting it all back into the case once completely dried. At the end of the cleaning process I was pleased with how easy it was to clean the gun but disappointed with adding another line to clean and struggle with getting fully dry.
Compared to other bottling methods I had tried, the BeerGun was a definite improvement. I was sure that the bottles I filled were properly carbonated because the pints I pulled off of the kegs were carbonated properly. Compared to using priming sugar or carbonation drops, that aspect was a distinct advantage as there was no guesswork and it was easy to sample. I’ve filled bottles and growlers directly off the tap or with a tap extension, which is fine for casual exchanges or shares, but for competitions it is unacceptable due to the level of oxygen pickup and the loss of carbonation that occurs.
There are other products that aim to achieve the same results as the BeerGun, including a good number of counter pressure bottle fillers. Having tried none of them and having only read reviews, I can’t speak of those firsthand. One filler I can reference is the Tapcooler bottle filler (https://www.homebrewfinds.com/hands-on-review-tapcooler-counter-pressure-bottle-filler-for-forward-sealing-faucets/). A friend of mine recently purchased this filler and was quite pleased. I had the opportunity to use it and was rather impressed. It was simple to operate, easy to clean, and was composed of less parts than the BeerGun. For any brewer that doesn’t need the portability that the BeerGun can offer and who already has a tap that fits with the Tapcooler filler, I believe that is a fine choice.
Conclusion
Conclusions
Did I “actually enjoy bottling” with the BeerGun? I did. I really enjoyed the trigger filler and butterfly CO2 trigger operation. It was easy to fill bottles to the top while ensuring proper headspace, being confident that the oxygen level was as low as possible. The stainless components made me feel assured that the pieces were clean and sanitized, not imparting any off flavors to my bottled beer. Overall I’m pleased with my purchase and know that being from Blichmannn, my BeerGun will serve my bottling needs for years to come.
Compare Models, Prices and Availability, Review Continues Below:
- Blichmann Engineering Beer Gun – Complete Lineup and Accessories – at MoreBeer
- Blichmann Engineering Beer Gun – Complete Lineup and Accessories – at Great Fermentations
- Blichmann Engineering Beer Gun – Complete LIneup and Accessories – at Beer & Wine Hobby
- Search Amazon for “Blichmann Beer Gun” – offerings vary
Also Consider, for Forward Sealing Faucets
- Nukatap Counter Pressure Bottle Filler KEG915 – Hands on Review
- Tapcooler Counter Pressure Bottle Filler KEG880 – Hands on Review
Related Reviews:
- Hands on Review: Nukatap Counter Pressure Bottle Filler!
- Hands on Review: Tapcooler Counter Pressure Bottle Filler for Forward Sealing Faucets
More Photos
Tapcooler Review:
More Blichmann Engineering Reviews!
More Homebrew Finds!
- Last 50 Finds!
- Top Deals – a curated list of the best deals
- Homebrew Reviews – one of the largest libraries of homebrew reviews in existence!
- Our Top Posts – tips, how-tos, resources posts and more
- Let’s be Friends!
Recent Deals!
10 Most Recent Homebrew Resource Posts & How-To’s!
We are Homebrew Review HQ! Our 10 Most Recent Reviews
pinnedThis post may contain affiliate links. We may make a commission when you use our links. This will never cost you extra. Thank you for supporting Homebrew Finds!
greatdealsPrice, promotions and availability can change quickly. Check the product page for current price, description and availability.
Make sure the components you use are compatible and rated for your intended application. Contact manufacturer with questions about suitability or a specific application. Always read and follow manufacturer directions. tag:lnksfxd review:blichmannbg #tag:tpr


